background image


5 / 8

10

11

12

(ill. 10)

PUR-Ring 3 und Ringmutter 4 montie-

ren� Die Rillen der Ringmutter müssen 

gegen den PUR-Ring gerichtet sein 

(siehe Detailzeichnung X)�

(ill. 10)

Mount the PUR ring 3 and the ring 

nut 4� Arrange the grooves of the ring 

nut toward the PUR-ring (see detail 

drawing X)�

(ill. 11)

Ringmutter mit Steckschlüssel und 

Drehmomentschlüssel anziehen� An-

zugsdrehmoment: 10 Nm.

(ill. 11)

Tighten the ring nut with socket 

wrench and with torque wrench� 

Tightening torque: 10 Nm.

2. Montage des Schutzdeckels

2. Protective cover assembly


Hinweis:


Beachten Sie auch die Anleitung 

MA036, wwwstaublicom/electrical


Note:


See also the assembly instructions 

MA036, wwwstaublicom/electrical

3. Montage des Mikroschalters

3. Installation of microswitch

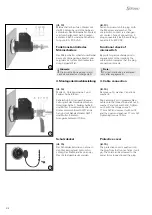
(ill. 12)

Schutzhaut am Durchgangsloch P 

des Steckers mit einem Durchschlag 

durchbrechen� Darauf achten, dass 

sich kein Durchbruchmaterial im Ste-

cker befindet.

Bevor der Mikroschalter aufge-

schraubt wird, muss die Einbaudose 

in die Fronttafel eingebaut werden 

(siehe ill� 6 bis ill� 11)�

(ill. 12)

Break the protection membrane of 

the through-hole P of the plug with a 

punch� Be careful that the plug is free 

from the broken material�

Before fastening the microswitch, the 

panel receptacle has to be assembled 

into the front panel (see ill� 6 to ill� 11)�

Содержание ID/S10BV-C Series

Страница 1: ...Werkzeug 4 1 Steckverbindermontage 4 2 Montage des Schutzdeckels 5 3 Montage des Mikroschalters 5 Funktionskontrolle des Mikroschalters 6 4 Montage der Anschlussleitung 6 Schutzdeckel 6 Kodierung 7 No...

Страница 2: ...ven described as St ubli compatible by certain manufactur ers do not conform to the requirements for safe electrical connection with long term stability and for safety reasons must not be plugged toge...

Страница 3: ...previously be inspect ed for external defects particularly the insulation If there are any doubts as to its safety a specialist must be consulted or the connector must be replaced Die Steckverbinder s...

Страница 4: ...enn vorhanden den Farbring auf kleben ill 7 If desired stick on the coloured ring ill 8 PUR Ring 1 und Ringmutter 2 von Stecker demontieren ill 8 Remove PUR ring 1 and ring nut 2 from plug Achtung Wen...

Страница 5: ...achten Sie auch die Anleitung MA036 www staubli com electrical Note See also the assembly instructions MA036 www staubli com electrical 3 Montage des Mikroschalters 3 Installation of microswitch ill 1...

Страница 6: ...t Note Correct interlocking is achieved only after engagement 4 Montage der Anschlussleitung 4 Cable connection ill 14 Mutter 9 Unterlegscheibe 7 und Federscheibe 8 l sen ill 14 Remove nut 9 washer 7...

Страница 7: ...ker und Buchse axial gegen berstehen Steckverbin dung bis zum Anschlag zusammenstecken dann mit axialem Druck tieferstecken und gleichzeitig den Stecker um 50 nach rechts drehen bis die Verriegelung e...

Страница 8: ...8 4123 Allschwil Switzerland Tel 41 61 306 55 55 Fax 41 61 306 55 56 mail ec ch staubli com www staubli com electrical by St ubli Electrical Connectors AG Switzerland MA046 10 2019 Index b Marketing...

Отзывы: