21
4. COMMISSIONING
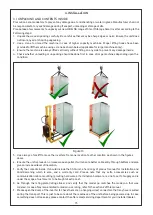
Once the unit has been firmly secured and all the incoming/ outgoing cables properly connected, this machine is
ready for being powered up. But before you start, please perform a couple of pre-checks which are mandatory:
4.1 PRECHECKS BEFORE ENERGIZING
Now the unit is ready to be turned on, but to be double sure, please perform the following couple of checks:
Body machine should be firmly connected to building earth.
Check the battery connections – both positive and negative cables should be tight.
Check the polarity of the connections visually or preferably through a multimeter.
Check the value of battery voltage – it should match the nominal battery voltage mentioned on the rating sticker
of this machine.
In case of discrepancy in any of the above, rectify it or refer to the troubleshooting manual.
4.2 ENERGIZING THE MACHINE FOR THE FIRST TIME
Turn on the battery breaker. With a pause of 1 second, the machine should become live. There should be a sound of
contactor, and the display should light up with, possibly, a buzzer sound.
Ensure that all the other circuit breakers (PV, Load and Grid) are in OFF position only.
Before proceeding further to energize the loads, please ensure that the settings in the machine supplied are
correct to suit the site conditions. Please be noted that these machines are supplied with default settings and
hence, may or may not suit your requirements. The default settings are a part of this manual and discussed in the
following sections.
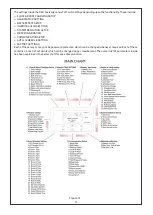
To change any kind of settings of this machine, the user needs to interact with the Display Keypad Unit (DKU)
provided on the front side of this machine. In case you are not familiar with the DKU unit, please refer to Section 5
before moving forward. Understanding the DKU unit is an essential part of the Installation and Commissioning.
4.3 SETTINGS UPLOAD
We hope that you have made yourself familiar with the DKU to feed the settings as per your requirements into the
machine.
HBD-NG range of inverters are supplied with standard factory settings. These settings may or may not suit the
site conditions and hence, need to be updated as per the actual site specifications. Some of the reasons why
settings need to be updated and verified are as follows:
What is the Battery Type and the Battery Ah connected?
What are the Float, Boost and Bulk Voltage settings of the Battery connected?
What is the Mode of Operation required – Off-Grid, Hybrid or Hybrid with Export enabled?
When do you want to connect and disconnect the Grid supply?
If required, how much power do you want to export?
Do you want to set any scheduled events?
To implement the change of settings, we need to follow the below procedure in the same order:
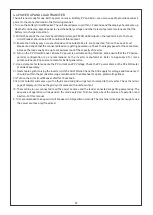
I. Turn on the battery circuit breaker so that the unit is powered up. Ensure all the other circuit breakers – PV,
Grid and load are strictly in OFF condition.
II. The display unit should be live with an active buzzer sound. Use the mute button to deactivate the buzzer sound.
III. First, update the time and date, and then press the Reset button to arrive at the home page (refer to Section 5
about the DKU, and Section 5.3 for the date and time settings procedure).
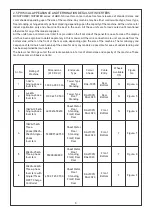
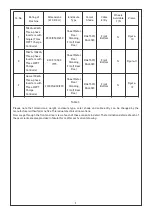
IV. Next step is to update the settings depending upon the battery type connected to this machine. So select the
correct chart given below depending upon your battery type.
V. Next step is to access the DKU unit and change the battery settings inside to suit your system and depending on
the battery type (for general battery settings)
VI. Press back button to Save and Exit the settings once all the changes have been made. Double check that the
change of settings made has been correctly updated by reentering the settings MENU. Warranty shall be void
in case there is a mismatch in the settings parameters from the actual site and the manufacturer shall not be
held responsible for that.
VII.Turn off the battery circuit breaker and wait for 2 minutes for the unit to completely turn off. Restart the unit by
turning the Battery Circuit breaker ON again.
Содержание HBD Series
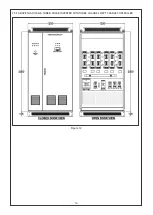
Страница 15: ...14 2 5 9 ABOVE THAN 100kVA THREE PHASE INVERTER WITH THREE CHANNEL MPPT CHARGE CONTROLLER Figure 12...
Страница 46: ...45 APPENDIX 5 SINGLE PHASE SMART STORAGE SOLAR INVERTER DATA SHEET Approx...
Страница 47: ...46 Approx...
Страница 48: ...47 APPENDIX 6 THREE PHASE SMART STORAGE SOLAR INVERTER DATA SHEET Approx...
Страница 49: ...48 Approx...
Страница 50: ...49 Approx...

