background image

Instruction Manual

3

Installation

Windows XP/ Vista/ 7

1.  Connect the included power adapter from an AC electrical outlet to the USB 

Docking Station.  

2.  Insert the provided Driver CD into the computer’s CD/ DVD drive.  
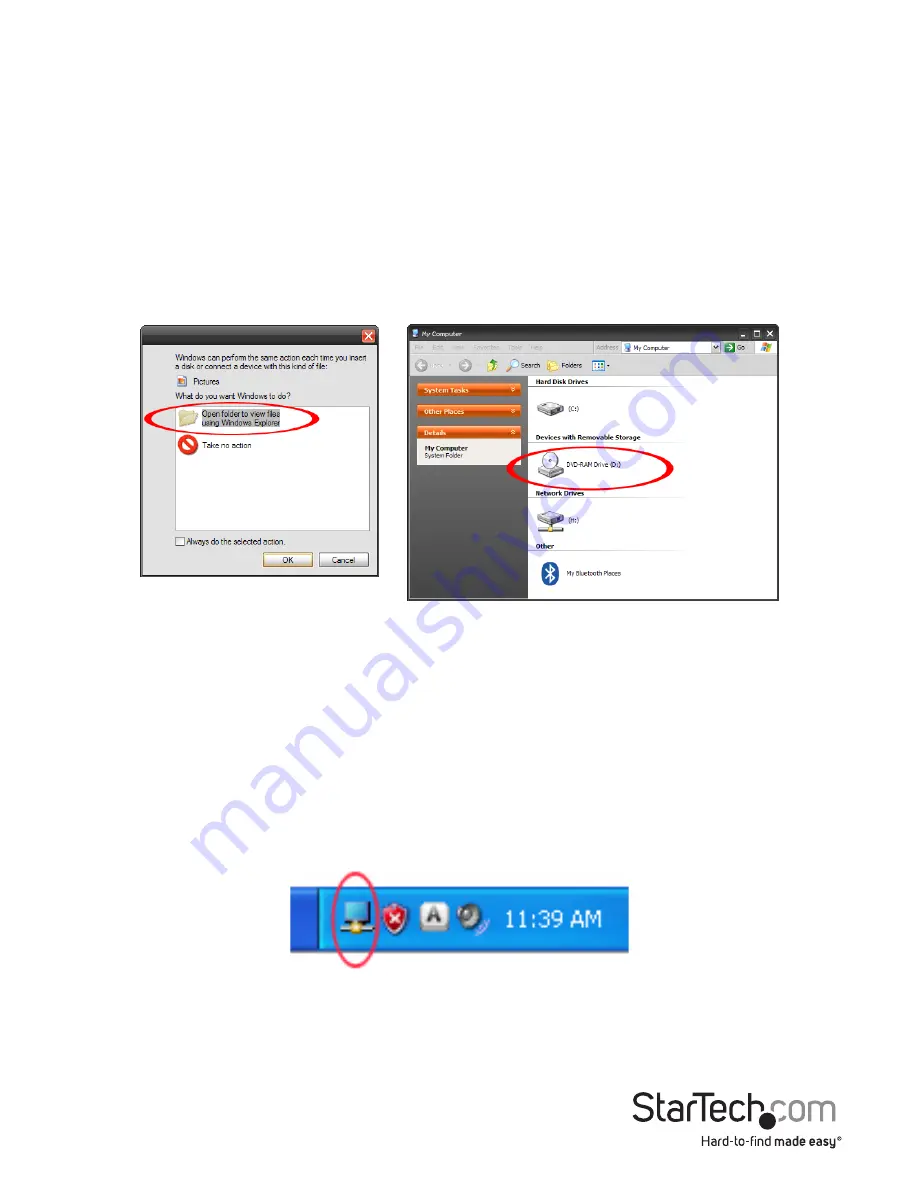
3.  Autorun should give you the option to browse the files on the CD or automatically 

open the CD.

If Autorun does not start, Go into “My Computer” and double-click the CD/DVD 

drive that the CD is in.

*screenshots for reference only

4.  Run the “setup.exe” file on the CD to launch the driver installation program.  Follow 

the on screen instructions to complete the driver installation.

5.  Please wait while the installation program copies the necessary files. 
6.  Connect the Docking Station to the computer using the included USB 3.0 cable.  

Windows will automatically detect and install the drivers.

7.  Connect the monitor(s) to the USB Docking Station using DVI and/or HDMI cables 

and power on the monitors.

8.  Windows will start to automatically load the drivers and software for the USB display 

adapter.  Once complete, you should see this icon in your System Tray:

Содержание USB3SDOCKD

Страница 1: ...rtech com FR Guide de l utilisateur fr startech com ES Gu a del usuario es startech com IT Guida per l uso it startech com NL Gebruiksaanwijzing nl startech com PT Guia do usu rio pt startech com USB3...

Страница 2: ...ceiving antenna Increase the separation between the equipment and receiver Connect the equipment into an outlet on a circuit different from that to which the receiver is connected Consult the dealer o...

Страница 3: ...w to Use 4 Display Modes 5 Extend Display Mode DEFAULT 5 Extend To Options 5 Mirror Display Mode 6 Set as Main Monitor Display Mode 6 Off Display Mode 6 Screen Resolution 6 Screen Rotation 6 Notebook...

Страница 4: ...l in one laptop notebook docking station that is the perfect accessory for those that need to connect and manage many devices on their laptops at home or the office Packaging Contents 1 x USB 3 0 Dock...

Страница 5: ...t View Power LED USB Hub Link LED USB 3 0 Hub 3 5mm Headphone jack 3 5mm Microphone jack USB 2 0 Hub RJ45 Ethernet connector DVI I connector output HDMI connector output USB3SDOCKHD only USB 3 0 type...

Страница 6: ...ence only 4 Run the setup exe file on the CD to launch the driver installation program Follow the on screen instructions to complete the driver installation 5 Please wait while the installation progra...

Страница 7: ...e of two ways 1 Accessing the Windows Display Settings Windows XP right click on a blank area of the desktop select Properties then click on the Settings tab Windows Vista right click on a blank area...

Страница 8: ...ics card This extended working space improves work efficiency You may change the relative position of this extended display through the Windows Display Settings or the Extend To option in the DisplayL...

Страница 9: ...will work as the extended display Please be advised that some display utilities and drivers that shipped with certain AGP and built in display adapters may prevent this option from working on some sy...

Страница 10: ...d Mode if the Windows Desktop screen is not completely visible on the TV Monitor this option can be used to adjust the size of the Windows Desktop NOTE This mode will only work while using Extended mo...

Страница 11: ...80 60 72 75 85 Hz 800 x 600 56 60 72 75 85 Hz 1024 x 768 60 70 75 85 Hz 1280 x 720 60 Hz 1280 x 768 60 75 85 Hz 1280 x 800 60 Hz 1280 x 1024 60 75 Hz 1366 x 768 60 Hz 1400 x 1050 60 75 85 Hz 1600 x 12...

Страница 12: ...e 1 x DC Power 2 x USB 3 0 type A female 4 x USB 2 0 type A female 1 x 29 pin DVI I female 1 x HDMI female 1 x USB 3 0 type B female 1 x DC Power LEDs 1 x Power 1 x USB Hub Link Maximum Data Transfer...

Страница 13: ...10 Operating Temperature 10 C 40 C 50 F 104 F Storage Temperature 10 C 80 C 14 F 176 F Dimensions 195 7mm x 77 0mm x 126 3mm Weight 364g Compatible Operating Systems Windows XP Vista 7 32 64 bit Spec...

Страница 14: ...returned for repair or replacement with equivalent products at our discretion The warranty covers parts and labor costs only StarTech com does not warrant its products from defects or damages arising...

Страница 15: ...ts and we quickly deliver them wherever they need to go Just talk to one of our tech advisors or visit our website You ll be connected to the products you need in no time Visit www startech com for co...

Отзывы: