

Quick start guide
DE:
Bedienungsanleitung - de.startech.com
FR:
Guide de l'utilisateur - fr.startech.com
ES:
Guía del usuario - es.startech.com
IT:
Guida per l'uso - it.startech.com
NL:
Gebruiksaanwijzing - nl.startech.com
PT:
Guia do usuário - pt.startech.com
Manual Revision: 06/17/2016
Packaging contents
• 1 x USB 3.1 dock for SATA drives
• 1 x USB 3.1 A-to-B cable
• 1 x universal adapter
• 4 x power adapter plug (NA/UK/EU/AUS)
• 1 x instruction manual
For the latest information, technical specifications, and support for
this product, please visit www.startech.com/SDOCKU313.
System requirements
• USB-enabled computer system with an available USB port
• 2.5 in. or 3.5 in. SATA HDD or SSD
Note:
To obtain the maximum USB throughput, StarTech.com
recommends that you use a PC with a USB 3.1 Gen 2 port.
Operating systems are subject to change. For the latest
requirements, please visit
SDOCKU313
USB 3.1 (10 Gbps) dock for SATA drives
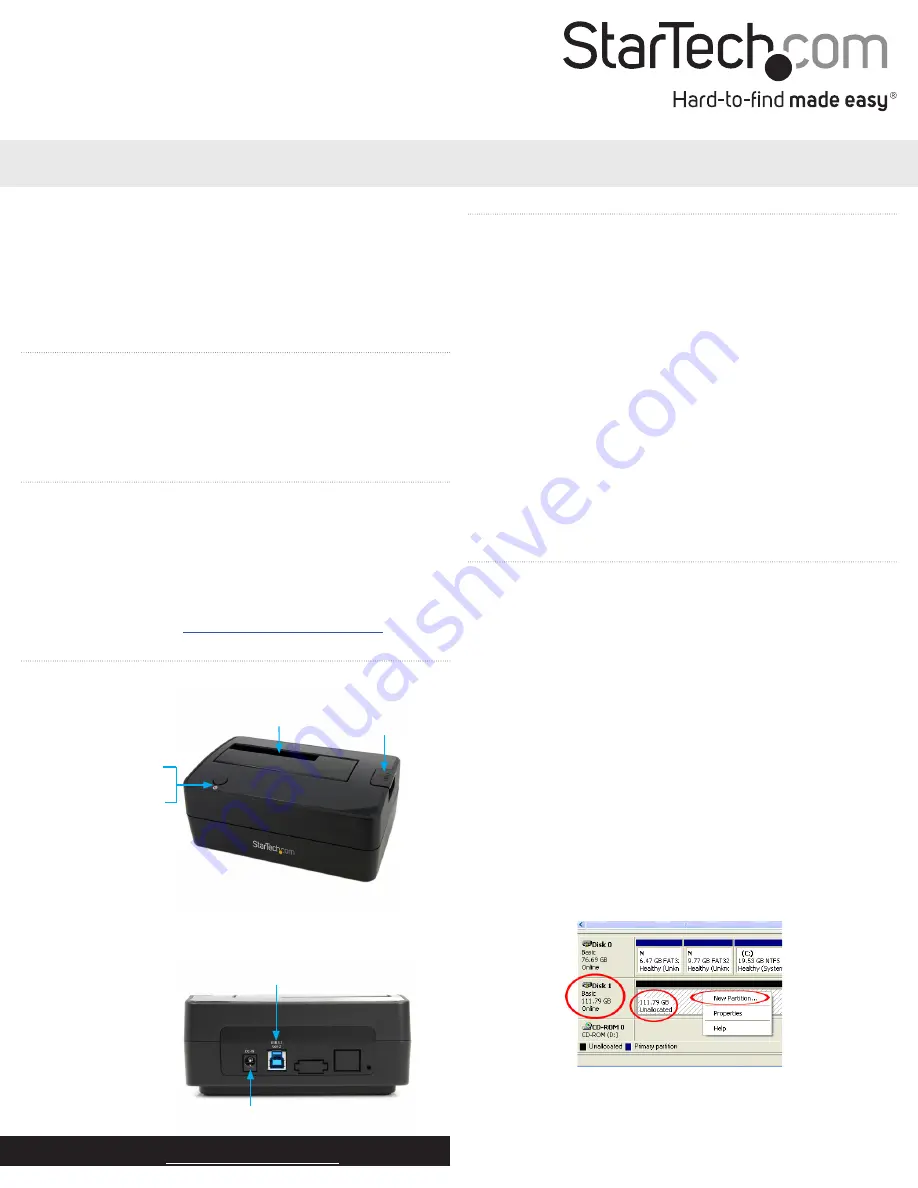
Product overview
Front view
Power button
Power and activity
LED
Drive slot
Drive eject
button
Rear view
USB 3.1 type-B
connector (host)
DC power
connector
*actual product may vary from photos
Install the drive
Warning!
Hard drives and storage enclosures should be handled
carefully, especially when they’re transported. If you’re not careful
with your hard disk, you may lose data as a result. Always handle
storage devices with caution.
1. Connect the external power adapter from the drive dock to a
power outlet.
2. Insert a 2.5 in. or 3.5 in. drive into the drive slot on the top of the
docking station. Make sure that the connectors on the drive are
facing the same corner of the slot that has a cutout in the door.
The label on the drive should face the front of the dock.
3. Connect the included USB 3.1 cable from the drive dock to an
available USB port on your computer system. Your computer can
be turned on or turned off when you connect the USB cable.
4. Press the
Power
button on the top of the drive dock. The LED
under the power button should light up to indicate that the dock
is powered on. The LED blinks when the drive is being accessed.
Prepare the drive
If you install a hard drive or solid-state drive that already has data
on it, after you plug in the drive, it appears under
My Computer
or
Computer
with a drive letter assigned to it.
If you install a brand-new drive that doesn’t contain any data, you
must prepare the drive for use.
If you use a computer that’s running Windows® 2000, Windows® XP,
Windows Vista®, or Windows® 7, do the following:
1. Depending on the OS version that you’re running, do one of the
following:
• On your desktop, right-click
My Computer
.
• On your desktop, right-click
Computer
.
2. Click
Manage
.
3. On the
Computer Management
screen, click
Disk Management
.
4. Locate the disk that is labeled
Unallocated
. To confirm that the
drive is the correct one, check the drive capacity.
5. Right-click the section of the window that says
Unallocated
and
click
New Partition
.
6. To set up the drive, complete the instructions in the
New
Partition
wizard.
When the drive is successfully installed, the disk appears under
My
Computer
or
Computer
with a drive letter assigned to it.


