Rev: November 21, 2007
Support, Warranty Information, and Regulatory Compliance Statement
If you ever need help with your product, visit
www.startech.com/support
and access our
comprehensive selection of online tools, documentation, and downloads. This product is
backed by a one year warranty. In addition, StarTech.com warrants its products against
defects in materials and workmanship for the periods noted, following the initial date of pur-
chase. During this period, the products may be returned for repair, or replacement with equiva-
lent products at our discretion. The warranty covers parts and labor costs only. StarTech.com
does not warrant its products from defects or damages arising from misuse, abuse, alteration,
or normal wear and tear.
Limitation of Liability
In no event shall the liability of StarTech.com Ltd. and StarTech.com USA LLP (or
their officers, directors, employees or agents) for any damages (whether direct or
indirect, special, punitive, incidental, consequential, or otherwise), loss of profits,
loss of business, or any pecuniary loss, arising out of or related to the use of the
product exceed the actual price paid for the product. Some states do not allow the
exclusion or limitation of incidental or consequential damages. If such laws apply,
the limitations or exclusions contained in this statement may not apply to you.
FCC Compliance Statement
This equipment has been tested and found to comply with the limits for a Class B
digital device, pursuant to part 15 of the FCC Rules. These limits are designed to
provide reasonable protection against harmful interference in a residential installa-
tion. This equipment generates, uses and can radiate radio frequency energy and, if
not installed and used in accordance with the instructions, may cause harmful inter-
ference to radio communications. However, there is no guarantee that interference
will not occur in a particular installation. If this equipment does cause harmful inter-
ference to radio or television reception, which can be determined by turning the
equipment off and on, the user is encouraged to try to correct the interference by
one or more of the following measures:
• Reorient or relocate the receiving antenna.
• Increase the separation between the equipment and receiver.
• Connect the equipment into an outlet on a circuit different from that to which the
receiver is connected.
• Consult the dealer or an experienced radio/TV technician for help.
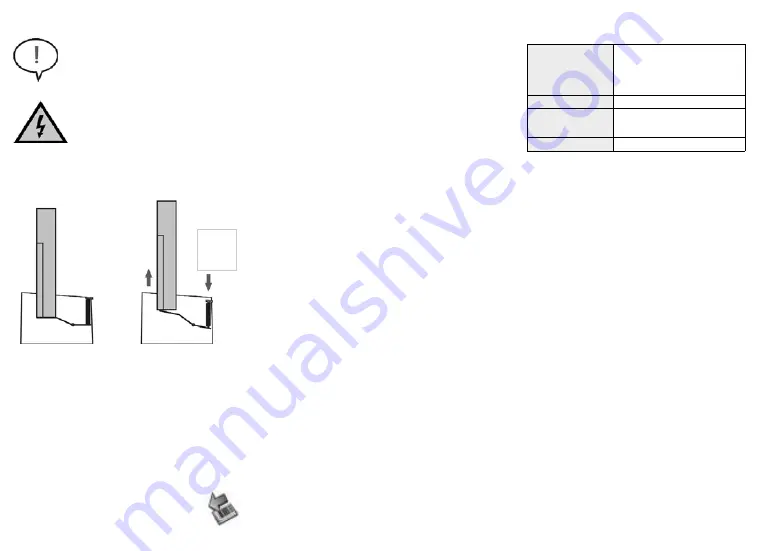
Disk Installation
Side View
Drive
Ejector
Button
Please Note:
Hard drives require careful handling, especially when being transported. If
you are not careful with your hard disk, lost data may result. Always handle your hard drive
and storage device with caution.
WARNING:
Hard drives, like all computer equipment can also be severely damaged by stat-
ic electricity. Be sure that you are properly grounded before touching the hard drive you wish
to install. StarTech.com recommends that you wear an anti-static strap when installing any
computer equipment. If an antistatic strap is unavailable, discharge yourself of any static
electricity build-up by touching a large grounded metal surface (such as the computer case)
for several seconds.
Safe Drive Removal
When removing the installed drive from the Dock, please ensure that you have followed the appropri-
ate steps (dependant on operating system) to disconnect removable storage. In Windows for example,
click on the
Safe Remove
icon located in the taskbar (pictured below). Select the drive from the menu
provided, then click
Stop.
Select the device to disconnect, and click
OK
.
Specifications
Connectors
1 x USB Female (type B)
1 x DC IN (Power)
1 x SATA Power
1 x SATA Data
Certifications
FCC, CE, ROHS
Dimensions
130x90x65mm (L x W x H)
5.1 x 3.5 x 2.5” (L x W x H)
Weight
590g (20.8oz)
1. Connect the Dock to an available power outlet,
using the provided power adapter.
2. Connect the Dock to the (powered) Host
Computer, using the provided USB cable.
3. Insert the 2.5” or 3.5” SATA/SATA II drive you
wish to install, such that the SATA power and
data connectors at the back of the drive are
properly aligned with the corresponding connec-
tors inside the Dock.
4. Press the Power Button on the rear panel of the
Dock
Once the drive has been inserted, the operating sys-
tem will detect that it has been connected and auto-
matically update the drivers for proper operation.


