background image

Instruction Manual

3

M.2 NGFF SSD Installation

WARNING: 

SSD Drives and storage adapters require careful handling. If you are not careful 

with your SSD Drive, lost data may result. Always handle your drive with caution. Be 

sure that you are properly grounded by wearing an anti-static strap when handling 

computer components or discharge yourself of any static electricity build-up by 

touching a large grounded metal surface (such as the computer case) for several 

seconds.
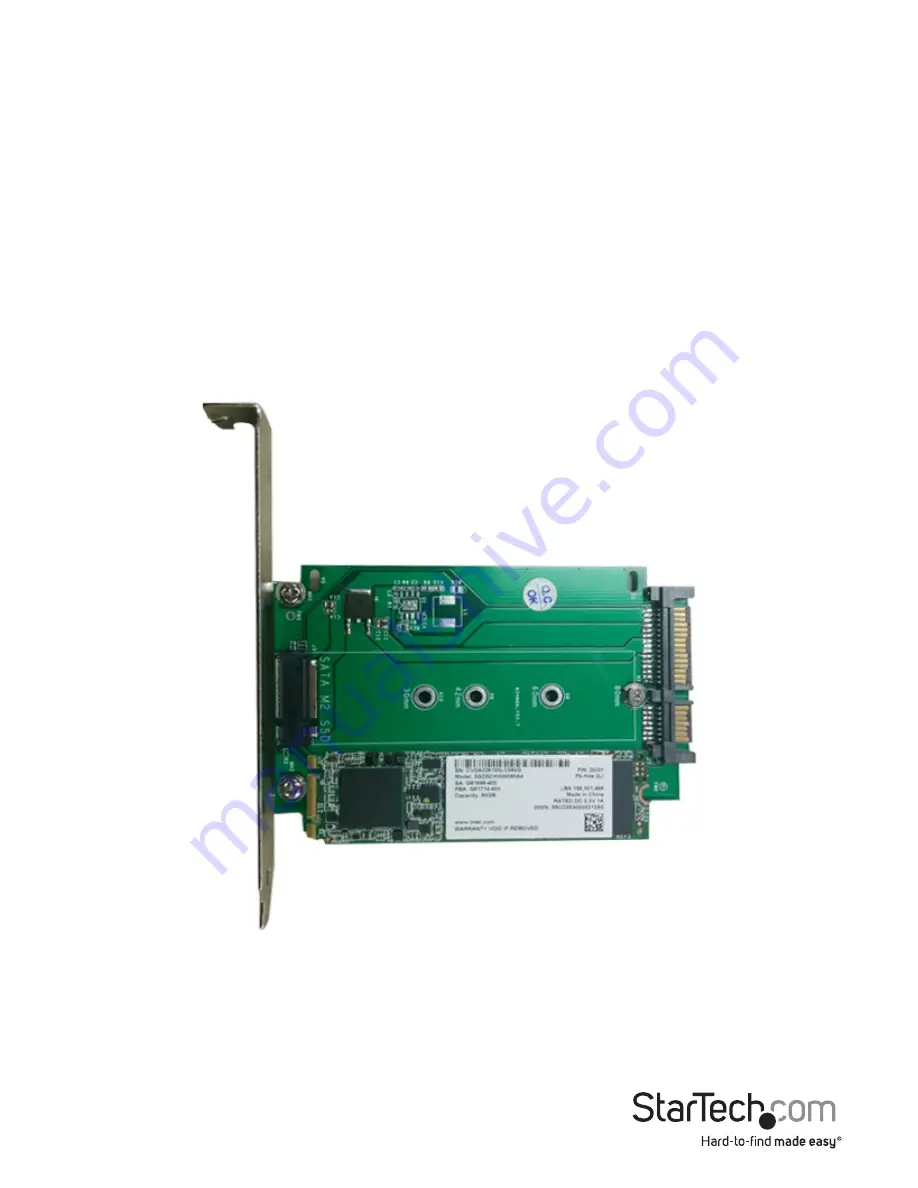
1.  Determine if the SSD installation screw and standoff requires relocating by        

  assessing your drive length. The board is labeled with the respective drive types for  

  length but if your drive type is unknown, place your SSD next to the M.2 (NGFF) SSD  

  connector, note which drive installation hole matches the height of your SSD. If the  

  screw and standoff are already installed in the correct position please proceed to step 4.

Содержание S32M2NGFFPEX

Страница 1: ...tung de startech com FR Guide de l utilisateur fr startech com ES Guía del usuario es startech com IT Guida per l uso it startech com NL Gebruiksaanwijzing nl startech com PT Guia do usuário pt startech com S32M2NGFFPEX SATA to M 2 NGFF SSD Adapter with Expansion Slot Mounting actual product may vary from photos ...

Страница 2: ...FCC Rules Operation is subject to the following two conditions 1 This device may not cause harmful interference and 2 this device must accept any interference received including interference that may cause undesired operation Changes or modifications not expressly approved by StarTech com could void the user s authority to operate the equipment Industry Canada Statement This Class B digital appara...

Страница 3: ...ion 1 System Requirements 1 What s in the Box 1 Product Diagram 2 Front View 2 Rear View 2 M 2 NGFF SSD Installation 3 System Installation Preparation 7 System Installation 10 Hard Drive Initialization 11 Technical Support 12 Warranty Information 12 ...

Страница 4: ...rofile or full profile Expansion slot PCI or PCI Express Available SATA port on the motherboard Available SATA Power connector on the power supply What s in the Box 1 x SATA to M 2 NGFF SSD Adapter 1 x Full profile bracket pre installed 1 x Low profile bracket 2 x SSD Installation screws 2 x PCI slot standoffs ...

Страница 5: ...Manual 2 Product Diagram Front View 1 Mounting Bracket Full profile pictured Rear View 1 M 2 NGFF connector 2 SSD Mounting holes 3 SSD standoff and installation screw 4 SATA Power Port 5 SATA Data Port 4 5 2 1 1 3 ...

Страница 6: ... of any static electricity build up by touching a large grounded metal surface such as the computer case for several seconds 1 Determine if the SSD installation screw and standoff requires relocating by assessing your drive length The board is labeled with the respective drive types for length but if your drive type is unknown place your SSD next to the M 2 NGFF SSD connector note which drive inst...

Страница 7: ...a small 5mm wrench nut driver or needle nosed players not included 3 Only required if the drive installation screw and standoff requires relocating Remove the SSD installation standoff and reseat it into the drive installation hole that matches your SSD Replace the nut on the reverse side and secure it into place using a 5mm wrech nut driver or small set of needle nosed plyers ...

Страница 8: ...screw driver Remove the SSD screw located in the front of the SSD installation standoff 5 Slide the M 2 connector on the SSD into the M 2 receprical connector on the S32M2NGFFPEX Note The connector on your M 2 SSD is keyed so the drive will only fit one way ...

Страница 9: ...down toward the SSD standoff and drive the removed screw through the mounting hole on your SSD drive and into the SSD standoff using the included Philips head screw driver 7 The SSD has now been installed and is ready for system installation ...

Страница 10: ...ket Installation The S32M2NGFFPEX can be installed in an available PCI slot or a PCI Express slot If you intent to install the adapter into a PCI slot the PCI standoffs must be used See PCI Standoff installation Bracket Installation 1 Remove the undesired bracket by unscrewing the bracket screws from the top of the S32M2NGFFPEX board using a Phillips head screw driver not included included screw d...

Страница 11: ...up the mounting holes on the bracket with the bracket holes on the on the bottom of the S32M2NGFFPEX 3 Drive the screws through the bracket holes on the S32M2NGFFPEX into the mounting holes on your desired bracket using a Philips head screw not included included screw driver is too small ...

Страница 12: ...PEX board using a Phillips head screw driver not included included screw driver is too small 2 Using your thumb and for finger or nut driver screw each of the PCI slot standoffs into each of the board mounting holes on the bracket 3 Using a Philips head screw driver not included included screw driver is too small Drive the screws through the bracket holes on the S32M2NGFFPEX and into the PCI slot ...

Страница 13: ...r case screw not included and the appropriate corresponding screw driver not included Drive the screw into the computer case through the case mounting hole on the mounting bracket refer to the computer case user manual for details 3 Connect a SATA cable from your motherboard to the SATA Data port on the S32M2NGFFPEX 4 Connect a SATA Power cable from your power supply to the SATA Power Port on the ...

Страница 14: ...ialog window should automatically appear asking you to initialize the drive Depending on the version of Windows it will give you the option of either creating an MBR or GPT disk GPT GUID partition is not compatible with some older operating systems while MBR is supported by newer and older operating systems 3 Once initialized locate the Disk that says it is Unallocated check the listed hard drive ...

Страница 15: ...e returned for repair or replacement with equivalent products at our discretion The warranty covers parts and labor costs only StarTech com does not warrant its products from defects or damages arising from misuse abuse alteration or normal wear and tear Limitation of Liability In no event shall the liability of StarTech com Ltd and StarTech com USA LLP or their officers directors employees or age...

Страница 16: ...rts and we quickly deliver them wherever they need to go Just talk to one of our tech advisors or visit our website You ll be connected to the products you need in no time Visit www startech com for complete information on all StarTech com products and to access exclusive resources and time saving tools StarTech com is an ISO 9001 Registered manufacturer of connectivity and technology parts StarTe...

Отзывы: