Instruction Manual
7
2. Using the RAID Mode setting jumper pins to your desired Mode.
3. Connect the SSD RAID card to your SATA host device.
Note:
Refer to the manual for your SATA host device for installation instructions. The
top or side mounting holes and included screw kit may, or may not be required to
assist in your installation.
4. Power on the SATA host device.
5. Your RAID array has now been installed.
6.
(Optional)
If you would prefer to lock your RAID array so it cannot be altered by the
RAID mode setting jumper pins, power down your SATA host device, and set the
RAID Lock/Unlock Jumper Pins to the lock position.
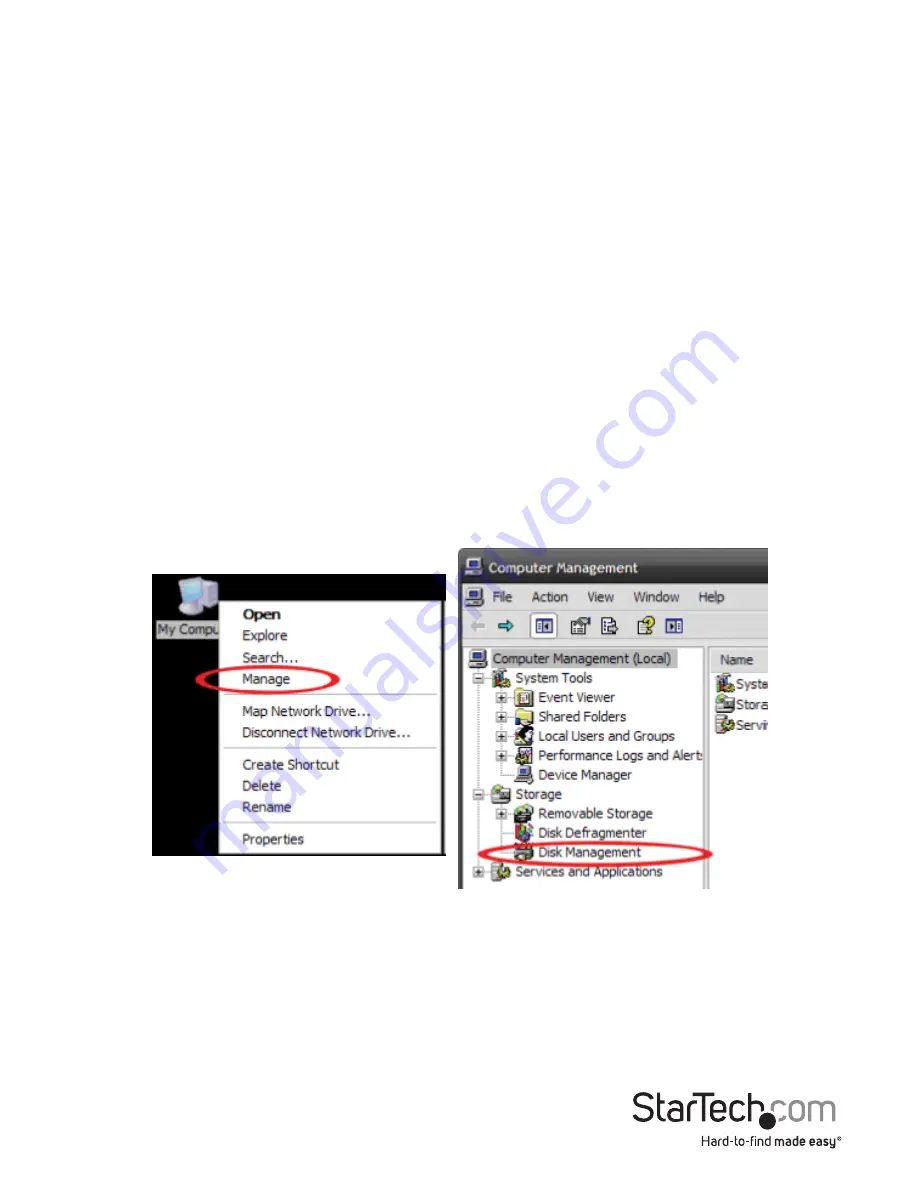
1. From the main Windows desktop, right-click on “My Computer” (“Computer” in Vista/
7 / 8), then select Manage. In the new Computer Management window, select Disk
Management from the left window panel.
2. A dialog window should automatically appear, asking you to initialize the drive.
Depending on the version of Windows, it will give you the option of either creating
an “MBR” or “GPT” disk. GPT (GUID partition) is not compatible with some older
operating systems, while MBR is supported by newer and older operating systems.
3. Once initialized, locate the Disk that says it is “Unallocated” (check the listed hard
drive capacity to confirm it’s the correct hard drive) and then right-click in the
section that says “Unallocated” and select “New Partition”.
Hard Drive Initialization
If the mSATA SSD RAID Array is new or otherwise blank, it may need to be initialized
and formatted before use. Follow the steps below in a Windows interface to initialize
the drive.


