12
E
N
12
•
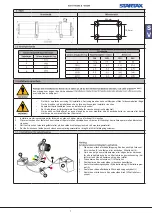
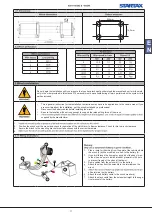
If not attaching the winch to a vehicle, attach the ignition wire to the positive battery terminal. If this is not done, the winch will not operate.
•
The attachement of the motor cables determines the operation of the contorller’s button. After the unit is mounted and powered, check the
direction of the power IN and power OUT on the controller button.
•
If you wish to change the direction on the controller, disconnect the battery cables from the battery, switch the motor cable connections on
the motor assembly, then reconnect the battery cables.
•
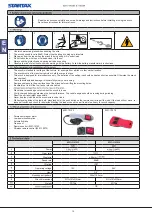
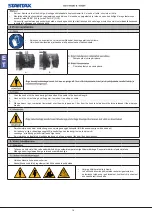
Use always safety strap when the hook is near of the fairlead or the winch drum.
•
Wear always thick leather protective gloves when handling the wire rope!
B
A
•
Turn the knob clockwise.
•
Turn the knob counter-clockwise.
.
1.
Grab the hook with the hand saving strap and pull the cable to the desiired length.
2.
Hook onto the object using a pulling point, tow strap, tree strap, or chain.
4.
Place a heavy rag or carpet(not inclucded) over the wire rope span, 1.8 m from the hook to help absorb the force released if the wire rope
breaks
•
Stand at a safe distance next to the winch line, press (and keep pressed) switch on the remote control to in -position.
•
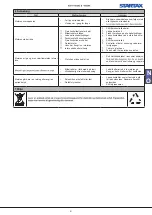
If the load will not move, release pull switch and check for obstacles blocking the load or
•
Check to see if the load is too heavy for winch capacity.
•
When the pulling is complete, secure the load so it cannot move in either direction
•
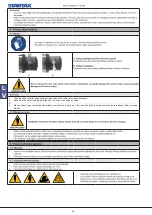
All moving parts within the winch have been lubricated using high temperature lithium grease at the factory. No intermal lubrication is re-
•
Lubricate wire rope periodically using a light penetrating oil.
•
Keep vehicle battery in good condition.
•
Disconnect and clean cable connections peridically
•
Follow all warnings and instructions
•
To prevent serious injury from accidental operation,disconnect
the battery cables before performing any inspection, maintenan-
ce, or cleaning procedures.
Содержание 9201-100203
Страница 23: ...23 L V 23 1 2 3 4 0 0 2 3 2 2 3 2 3 1 2 3 4 jai spailei 3 spailei 254 mm 114 3mm 2 1 3 4 G BK Y R R BK...
Страница 25: ...25 L V 25 Motor does not turn on sies Pievelciet visu vadu savienojumu uzg kontaktus salabotu...
Страница 28: ...28 L T 28 B A 1 2 4 1 2 1 2...
Страница 29: ...29 L T 29 sies Pievelciet visu vadu savienojumu uzg kontaktus salabotu...
Страница 31: ...31 R U 31 1 2 3 4 3 254 mm 114 3mm 1 2 3 4 0 0 2 21 3 2 2 3 2 3 2 1 3 4 G BK Y R R BK...
Страница 32: ...32 R U 32 B A 1 2 4...
Страница 33: ...33 R U 33...
Страница 34: ......
Страница 35: ......


