starsat SR-999USB Скачать руководство пользователя страница 1


-1-

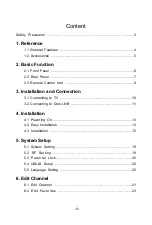
Content


Safety Precaution ....................................................................................3 

1. Reference 


1.1 General Features .............................................................................4 


1.2 Accessories .....................................................................................5 

2. Basic Function 

2.1 Front Panel ......................................................................................6 

    2.2 Rear Panel ......................................................................................7 

    2.3 Remote Control Unit ........................................................................8 

3. Installation and Connection 

3.1 Connecting to TV ...........................................................................10 

3.2 Connecting to Dish LNB .................................................................11 

4. Installation 

4.1 Powering On...............................................................................13


4.2 Easy Installation .........................................................................13 

4.3 Installation ..............................................................................15


5. System Setup 

5.1 System Setting .......................................................................... 19 

5.2 RF Setting ................................................................19 

5.3 Parental Lock.................................................................20 

5.4 USALS Setup ................................................................................20 

5.5


Language Setting ............................................................................20 

6. Edit Channel 

6.1 Edit Channel ..........................................................................21 

6.2 Edit Favorites ...............................................................23 

Содержание SR-999USB

Страница 1: ...ntrol Unit 8 3 Installation and Connection 3 1 Connecting to TV 10 3 2 Connecting to Dish LNB 11 4 Installation 4 1 Powering On 13 4 2 Easy Installation 13 4 3 Installation 15 5 System Setup 5 1 System Setting 19 5 2 RF Setting 19 5 3 Parental Lock 20 5 4 USALS Setup 20 5 5 Language Setting 20 6 Edit Channel 6 1 Edit Channel 21 6 2 Edit Favorites 23 ...

Страница 2: ... 7 Timer 27 8 8 Sleep 28 8 9 time setting 28 8 10 Multi Pictures 29 8 11 PIP Picture 29 8 12 Programme Information 29 8 13 STB Status 30 8 14 Reset Factory Default 30 9 USB Menu 9 1 Play Files 31 9 2 PIP Recording and Timeshift 33 9 3 USB tool 35 10 Additional Information 10 1 Problem Solving 37 10 2 Technical Specification Tuner Demodulator 38 10 3 Glossary 39 ...

Страница 3: ... of the receiver uncover to allow sufficient airflow to the unit Do not put the receiver on soft furnishings or carpets Do not expose the receiver to direct light or do not place it near a heater or in humid conditions Do not stack other electronic equipments on top of the receiver Cleaning Plug out the receiver from the wall outlet before cleaning Clean the receiver by a soft cloth or mild soluti...

Страница 4: ... 3 16 9 for TV 4 digi 7 segment LED Display RS232 Port for Updating Software and Additional Information User Friendly OSD Menu with Full Function 256 Colors Graphic User Interface Multi Language Menu 7 Days EPG Electronic Program Guide for On Screen Channel Information Time shift and PIP Record Super Fast 800 Pages OSD Teletext Supported and VBI Teletext Inserted Favorite Channel and Parent Lock F...

Страница 5: ... 5 1 2 Accessories Users manual Batteries A V Cable Remote Control Unit Figure 1 Accessories ...

Страница 6: ...Display 4 digi 7 segment 4 digi displays channel information In Standby mode the 7 segment displays local time 3 Power Button The POWER button is used to turn the power on or to make it on Standby Mode 4 CH CH Button Change channel in viewing mode and move the cursor up down in menu mode ...

Страница 7: ... with Scart cables 3 AUDIO VIDEO Connect to Audio Video of TV Connect Yellow to Video port connect Red and White to Audio Right and Audio Left 4 RS232 Connect to serial port of PC for software upgrade 5 LOOP OUT Output the Dish LNB IN signal 6 ANT Connect to TV Antenna 7 0 12V Supply 12V DC to other apparatus 8 ON OFF Power on off ...

Страница 8: ...d RADIO 6 Moves up down in menu mode 7 Play previous item Play next item 8 OK Confirm the selected operation or display the channel list while watching a programme 9 FAV Display favorite channel list 10 EPG Electronic Program Guide Show the TV Radio program guide 11 EXIT Exit current menu step by step 12 MENU Activate main menu or exit to live channel 13 CH CH UP Down Change program 14 RECALL Move...

Страница 9: ...JPEG enter into Picture list 24 PVR LIST enter into Movie list 25 AUDIO Select or change the Audio 26 PAUSE Freeze the picture 27 SAT Show the scanned satellite list 28 TXT Show the teletext content if teletext is transmitted 29 PGUP PGDN Page up down on menu 30 F1 No function 31 F2 No function 32 F3 No function 33 PIP Picture in Picture ...

Страница 10: ...llowing diagram shows you the connections among receiver TV LNB and other equipment please read this first if you are not sure about the connection and it will guide you to the correct connection 3 1 Connecting to TV Figure 5 Connecting to TV ...

Страница 11: ... 2 Connecting to Dish LNB You can connect one fixed dish LNB directly to the LNB IN or connect at least two dish LNB by DiSEqC Switch you can also connect to HH mount dish LNB Figure 6 Connecting to Dish LNB ...

Страница 12: ... 12 Figure 7 Connecting to Dish LNB ...

Страница 13: ... STANDBY button on the remote control or the STANDBY button at the front of the product 4 2 Easy Installation Press the MENU key to Select Easy Installation The Easy Installation window will be displayed Here you can select satellite specify DISEqC1 0 and search channels 4 2 1 Satellite Press the OK key to enter Satellite list Press the CH CH UP Down key to choose the satellite which you want to s...

Страница 14: ...rd is 0000 If you have forgotten your password please contact your local product distributor 4 2 4 MULTI Search Press the OK key select the MULTI Search the enter the password 0000 into the MULTI Search menu A Press the CH CH UP Down Highlight one satellite then press the OK key to sign the sat B After press the VOL Next key to enter theDiSEqC1 0 menu press the CH CH UP Down key select the DiSEqC ...

Страница 15: ...o choose the satellite which you want to search then press the OK to confirm the setting you can set other parameters b Transponder List If you change the satellite the transponder will be changed automatically You will find the transponder list of selected satellite here Choose the transponder you want to use then press the OK key to confirm the setting you can set other parameters c LNB frequenc...

Страница 16: ...otorized to East West continuously it will stop until it find the best signal Move Dish The motor can drive only when you hold on pressing theVOL VOL Previous Next key Fine Tuning Set the driving step Move Step W E Press theVOL VOL Previous Next button the motor will drive several steps according to the Step Size You can set the maximum motor limit for both East and West to prevent damage to the a...

Страница 17: ...Search 1 Press the OK key to enter the satellite list then press theCH CH UP Down key select the satellite and press the OK button 2 Complete the antenna setting of this satellite 3 Highlight the Transponder and press theVOL VOL Previous Next choose the transponder which you want search 4 Choose TP Search in Search Type menu then press the OK button you can start TP search C blind search 1 Choose ...

Страница 18: ...te 3 Choose Network search in Search Type menu then press the OK button you can start Satellite search 4 After Searching it will save the transponder which search program 4 3 4 Motorized System If you connect receiver to DiSEqC 1 2 or DiSEqC 1 3 antenna set Motorized System to DiSEqC1 2 or USALS you can change the direction of the dish to aim to the satellite you selected through the option ...

Страница 19: ...ing Menu System Setup System Setting 1 OSD Mixweight Set the transparency of all menus 2 TTXT Mixweight Set the transparency of teletext 3 TV Type Set the TV system mode 4 TV Screen Mode Set the display format according to the screen ratio 5 0 12V Support 0 12v Voltage 5 2 RF Setting Menu System Setup RF Setting You can set RF output mode PAL NTSC M PAL D K B G and RF channel Num ...

Страница 20: ... using Installation Lock Edit Service Lock and System Lock 5 4 USALS Setup Menu System Setup USALS Setup If you set the Motor Mode to USALS you need set local the longitude and the latitude in USALS Setup 5 5 Language Setting 1 Display Language Set the menu language 2 Main Audio Set the preferred audio language 3 Sub Audio Set the sub prime audio language 4 EPG Language Set the EPG language ...

Страница 21: ...Edit Channel Edit Channels Press the RED button Highlight the option you want and press the OK button to sort the channel list Note The Original Channel List is back to the channel list you sort it last time 6 1 2 Edit Menu Edit Channel Edit Channels Press the GREEN button 1 Lock and Unlock Channels 1 Press the GREEN button then highlight the Lock 2 Press the OK button then enter the password ...

Страница 22: ... OK button to select the channel 4 Press the YELLOW button then press the NUMERIC 0 9 buttons to the destination in the channel list and press the OK button 3 Rename channels 1 Highlight the channel you want to rename 2 Press the GREEN button then select the Rename 3 Enter a channel name directly using the keyboard displayed on the screen 4 Press the RED button to complete 6 1 3 Find channels Pres...

Страница 23: ...Edit Favorites You can add or cancel channels from the favorite groups 1 Press theVOL VOL Previous Next button selects the favorite group 2 Highlight the channels you want to add or cancel to the favorite channel list 3 Press the CH CH UP Down button to change the channel and press theVOL VOL Previous Next button to select the favorite group you like 3 Press the EXIT button to exit the menu and sa...

Страница 24: ... you quickly find the channel you want 7 2 Favorite List 1 If you have set several favorite groups press the FAV button can enter the favorite list 2 Press the VOL VOL Previous Next button to change different favorite group and press the OK button can select a programme you like 3 Press the RED button can move the highlighted channel from the favorite list 5 Press the GREEN button can rename the f...

Страница 25: ...u prefer 3 Select audio direction Left Right and Stereo using theVOL VOL Previous Next button 4 Press the EXIT button to close 8 2 Zoom In You can zoom in the current video picture 1 Press the ZOOM button 2 Press the VOL VOL Previous Next CH CH UP Down button to move the icon to the position you want to zoom in 3 Press the OK button to display 4 Press the EXIT button to close 8 3 Satellite You can...

Страница 26: ...ls in time and date 1 Press the EPG button 2 Press the CH CH UP Down button to change channel or EPG event 3 Press the VOL VOL Previous Next button to change the date and it displays the EPG list in one day of the highlighted channel 8 5 Subtitle You can select the language for the subtitle if the programme provides subtitle information 1 Press the SUB button 2 Select the required subtitle languag...

Страница 27: ...ording to the timer event list that you set 1 Go to Main Menu Tools Time Settings Timer Event 2 Press the GREEN button to setup a timer and press the OK button to save the timer after setup Source Switch TV and Radio Channel Press the VOL Next button and using the CH CH UP DOWN button select channel which you want then press the OK button to confirm the channel Date Input the date of the timer Sta...

Страница 28: ...set the automatic turn off time 1 Go to Main Menu Tools Time Settings Sleep 2 Press the VOL VOL Previous Next button to select the option or input the number at Min option 3 Press the OK button to save 8 9 time setting Main menu Tools Time Settings Time Setting You can setup the system time 1 Timer Mode Set the system time mode 4 Time Offset Set the timer zone according to your city 5 Summer Time ...

Страница 29: ...i picture 8 11 PIP Picture You can view the Programme at the same TP 1 Press the PIP button And select the PIP 2 Press the CH CH UP Down button select the channel Which channel you want then press the OK bottom to confirm 3 Press the YELLOW bottom show the help information 8 12 Programme Information You can view the programme information by pressing the INFO button while watching a programme It is...

Страница 30: ... about the STB such as model ID software hardware version and so on When you need service from the dealer you need to submit this information in order to get the correct and fast after sales service 8 14 Reset Factory Default 8 14 1 Factory Default You can restore the product to the factory default and you can also setup it according to the wizard Warning Please note that once Reset Factory u want...

Страница 31: ...y All scramble channels data will be d Note after factory default you can press the power key for 3 seconds then go to the autoDiSEqC function it will load the default channels and find diseqc ports automatically 8 You can save or load the chann Main menu Tools Reset Factory Default Save 1 Press the VOL VOL Previous Next select the s 2 Select the Yes to save or load the channel list You can play m...

Страница 32: ...ay the selected file in play list CH UP Down Play selected file in play list Stop playing I I PAUSE Paus Fast backward Fast forward I Play the pre I Play the next item EXIT Exit playing state an INFO Display playing progress Press the INFO but press the RED button to jump AUDIO Select or change the a EXIT Exit the current menu 9 It supports mp OK Play the selected file in pla list CH CH UP Down Ch...

Страница 33: ...op recording automatically according to the ord Two Different Programmes EXIT Exit p BLUE Switch the loop mode 9 1 3 Picture It OK Display the p I Play the previous item I Play the next item CH CH UP Down Play the previo EXIT Exit playing state and return to file list 9 2 PIP Recording and Timeshift 9 2 1 PIP Recording Y programmes from two diffe do many operations while recording 1 Start Recordin...

Страница 34: ...rogramme and press the REC button to start recording 3 At the same time you ca press the CH CH UP Down button change the program from the same transponder 4 Recording 1 the recording information sh the TV screen bottom 2 Press the INFO button can display or hide the informa 3 Press the F1 button will sho the small window data then pres the F2 button you can edit the small window 9 2 2 Timesh Times...

Страница 35: ... can p button can fast rewind or fast forward If you change to another programme or do other operations it will stop timeshift 3 Press the 0 button set the time that you want 4 Press the Exit button you will be asked whether exit or data select yes or no you want 9 3 USB tool 9 3 1 Upload Download You can up o 1 Enter the USB M 2 press the OK button can upload data 3 Highlight the file you wa the ...

Страница 36: ...ll be B Menu and highlight the Disk Information n show the USB disk information 9 3 4 Set Recording Path 1 2 Select the folder you want to s 3 Press the YELLOW an 4 Press the OK button can save the path 9 3 5 Format Disk 1 2 Press the YELLOW button and hi 3 Press the OK button ca FAT32 format 9 3 6 Disk Information 1 Enter the US 2 Press the YELLOW button 3 Press the OK button ca ...

Страница 37: ...tely Signal too strong Satellite dish is too small LNB noise factor too high The LNB is faulty Adjust the dish Connect a attenuator to LNB input Change to a larger dish Change LNB with lower noise factor Replace the LNB No startup menu on screen after turning on STB for the first time The system is connected by SCART cables and the TV is not in AV EXT mode Switch the TV to the appropriate AV input...

Страница 38: ...tream MPEG 2 ISO IEC 13818Transport stream specification Profile Level MPEG 2 MP ML Input Rate 15 Mbit s Max Aspect Ratio 4 3 16 9 Video Resolution 720 x 576 PAL 720 480 NTSC Audio Decoding MPEG Musical Layer I II Audio Mode Single channel Dual channel Joint stereo Stereo Sampling 32 44 1 and 48 KHz A V and Data In Out Connector TV SCART RGB CVBS L R out VCR SCART CVBS L R out AUDIO L R 3RCA AUDIO...

Страница 39: ...oduction of digital video broadcasting systems LNB low noise block converter or LNBF An electronic unit mounted on the satellite dish It receives the signals reflected by the dish and converts them to signals that can be used by the digital satellite receiver GHz The prefix giga means milliard and Hertz means cycles per second Signals in the GHz range are often called microwaves MHz The prefix meg...

Страница 40: ...om a satellite are transmitted either with linear vertical or horizontal polarization or circular right or left polarization QPSK Quaternary Phase Shift Keying Phase shift keying in which four different phase angles are used Transponder An automatic device that receives amplifies and retransmits a signal on a different frequency Symbol rate Speed of the digital transmission Scrambled TV programmer...

Отзывы: