background image

>> 8

 • Instruction manual • Staring Mega 300


Before the mixer is started the following instructions should  

 be 

followed:


1. Check that the power cable is not damaged, if so, 


    replace it.


2. Check the mixer and remove all major foreign matters.


3. Check that the mixer blades are correctly fastened in   


    order to avoid damage to the mixer.


4. Place the mixer on a surface which is as level as 


    possible.


>> 5. Starting Procedure

Содержание Mega 300

Страница 1: ...Instruction manual Staring Mega 300 1 Before you use the Mixer pleace read the Intruction manual Mega Mixer 300 Instruction manual ...

Страница 2: ... 2 Instruction manual Staring Mega 300 ...

Страница 3: ...technology field In order to achieve safe handling of the STARING MEGA 300 we ask you to read the following instruction manual carefully Mega Mixer 300 1 Technical Data 4 2 Safety and Prevention of Accidents 5 3 Special Safety Equipment 7 4 Transport 7 5 Starting Procedure 8 6 Using the Mixer 9 7 Optimum Mixing 10 8 Adjustment of Discharge Height 10 9 Adjustment af Mixer Blades 11 10 Cleaning and M...

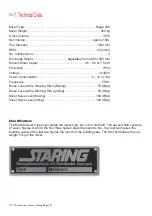
Страница 4: ...A Frequency 50 Hz Noise Level at the Working Place Mixing 78 dB A Noise Level at the Working Place Idling 58 dB A Mixer Noise Level Mixing 68 dB A Mixer Noise Level Idling 66 dB A Identification The Manufacturer s type sign states the mixer type No in the first field The second field consists of seven figures of which the first three figures state the machine No the next two figures the building year and ...

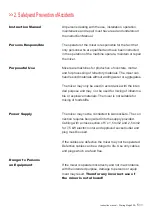
Страница 5: ... accordance with the inten ded purpose and may not be used for mixing of inflamma ble or explosive materials The mixer is not suitable for mixing of foodstuffs Power Supply The mixer may not be connected to wall sockets The con nection requires being wired into the supply provided Cabling with a cross section of 5 x 1 5 mm2 and 2 5 mm2 for 7 5 kW electric motor and approved socket outlet and plug m...

Страница 6: ...ety equipment protection equipment cables plugs and switches excessive soiling In connection with maintenance and repair work the power supply must be disconnected and arrangement made so that it is not possible to engage the mixer again Declaration of Conformity The mixer is in conformity with the provisions in the Council Directive of 14 June 1989 on mutual approxima tion of the laws of the Memb...

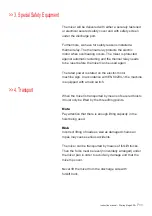
Страница 7: ...e electric motor machine sign In accordance with EN 60204 1 the machine is equipped with a main switch When the mixer is transported by means of secured hoists it must only be lifted by the three lifting points Note Pay attention that there is enough lifting capacity in the hoist being used Risk Incorrect lifting of loads as well as damaged chains an ropes may cause serious accidents The mixer can...

Страница 8: ... be followed 1 Check that the power cable is not damaged if so replace it 2 Check the mixer and remove all major foreign matters 3 Check that the mixer blades are correctly fastened in order to avoid damage to the mixer 4 Place the mixer on a surface which is as level as possible 5 Starting Procedure ...

Страница 9: ...adjustment of two of the three phases This work must be carried out by a qualified electrician If the machine is equipped with a directional plug the direction of rotation can be changed by turning the terminals with a screwdriver Fig 3 Whenever the mixer has been moved to another place the direction of rotation should be checked Filling and discharge of the mixer should only take place when the mi...

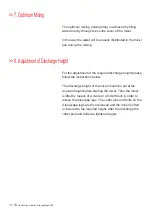
Страница 10: ...ht please follow the instructions below The discharge height of the mixer should be set at the required height before starting the mixer Then the mixer is lifted by means of a crane or a forklift truck in order to relieve the telescope legs The cotter pins and bolts on the 4 telescope legs are then removed and the mixer is lifted or lowered to the required height After the discharge the cotter pin...

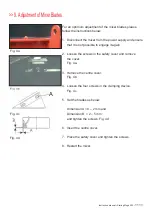
Страница 11: ...t again 2 Loosen the screws in the safety cover and remove the cover Fig 4a 3 Remove the centre cover Fig 4b 4 Loosen the four screws in the clamping device Fig 4c 5 Set the blades as below Dimension A 0 2 mm and Dimension B 2 5 mm and tighten the screws Fig 4d 6 Insert the centre cover 7 Place the safety cover and tighten the screws 8 Restart the mixer 9 Adjustment of Mixer Blades Fig 4b Fig 4d F...

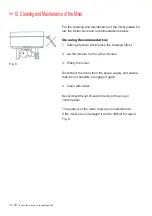
Страница 12: ...g effect 2 Let the mixture run for a few minutes 3 Empty the mixer Disconnect the mixer from the power supply and ensure that it is not possible to engage it again 4 Clean with water Never direct the jet of water directly at the plug or control panel The gearbox of the mixer requires no maintenance If the mixer pan is damaged it will be difficult to clean it Fig 6 10 Cleaning and Maintenance of the...

Страница 13: ...10 1310 1 11 Centre Mixer Arm 0310 1320 1 12 Internal Mixer Arm 0310 1330 1 13 Mixer Paddle centre internal 0290 1520 2 14 Mixer Paddle external 0290 1510 1 15 Mixer Pan complete 0310 5000 1 16 Gear Benzler 0310 3010 1 16 Gear Leroy Somer 0310 3011 1 17 Telescope Legs 0310 6200 4 18 Motor Protection 5 5 kW 3x380 V 0310 4010 1 18 Motor Protection 7 5 kW 3x380 V 0310 4020 1 18 Motor Protection 11 0K...

Страница 14: ...with regard to consequential damages and possible loss of production 7 In order for the guarantee to be complied with the defect must be reported immediately after it has occurred THE GUARANTEE DOES NOT COVER 1 Damages due to incorrect connection 2 Repair executed by others 3 Damage as a result of wrong operation negligent treatment or transportation damages 4 Natural wear and tear 5 Only use appr...

Страница 15: ...conformity with the COUNCIL DIRECTIVE of 14 June 1989 on mutual approximation of the laws of the Member States on the safety of machines 89 392 EEC as amended by directives 91 368 EEC 93 44 EEC and 93 68 EEC with special reference to Annex 1 of the Directive on essential safety and health requirements in relation to the construction and manufacture of machines Company Name Position Date Signature ...

Страница 16: ... 16 Instruction manual Staring Mega 300 Staring Maskinfabrik A S Starengvej 9 11 DK 9700 Brønderslev Tlf 45 9882 1622 Fax 45 9882 5591 www staring dk staring staring dk CVR nr DK 2767 2701 ...

Отзывы: