background image

FIRST

®

 Tech Challenge 

Basic ‘Bot Guide for TETRIX- Part 1 

| 5 


Gracious Professionalism

®

 - 

“Doing your best work while treating others with respect and kindness - It’s what makes 

FIRST

, first.”


Introduction 

What is FIRST

®


Tech Challenge? 

FIRST

®

 Tech Challenge is a student-centered program that focuses on giving students a unique and 

stimulating experience. Each year, teams engage in a new game where they design, build, test, and program 
autonomous and driver operated robots that must perform a series of tasks.


To learn more about 

FIRST

®

 Tech 

Challenge and other 

FIRST

®


Programs, visit


www.firstinspires.org


FIRST


Core Values 

We express the 

FIRST

®


philosophies of 

Gracious Professionalism

®

 and 

Coopertition

®

 through our Core 

Values:


Discovery: We explore new skills and ideas. 


Innovation: We use creativity and persistence to solve problems. 


Impact:  We apply what we learn to improve our world. 


Inclusion: We respect each other and embrace our differences.  


Teamwork: We are stronger when we work together. 


Fun: We enjoy and celebrate what we do! 
 

Gracious Professionalism

®


FIRST

®

 uses this term to describe our programs

’ intent. 

Gracious Professionalism

®

 is 

a way of doing things that encourages high-quality work, emphasizes the 

value of others, and respects individuals and the community. 

Watch Dr. Woodie Flowers explain 

Gracious Professionalism


in this 

short video

.


Содержание FIRST GAME CHANGERS TETRIX

Страница 1: ...FIRST GAME CHANGERSSM powered by Star Wars Force for Change 2020 2021 FIRST Tech Challenge Basic Bot Guide for TETRIX Part 1...

Страница 2: ...2 FIRST Tech Challenge Basic Bot Guide for TETRIX Part 1 Revision 1 7 17 2020 Sponsor Thank You Thank you to our generous sponsors for your continued support of the FIRST Tech Challenge...

Страница 3: ...he right rail 8 Step 3 Connect the left and right rails 9 Step 4 Add Structural Support Brackets 10 Step 5 Add the Structural Support Plate 11 Step 6 Build Left Electronics Plate 12 Step 7 Attach Left...

Страница 4: ...30 Step 1 Add the Switch 30 Step 2 Connect the Switch to the Motor and Sensor Controller 31 Battery 32 Step 1 Adding the Battery 32 Step 2 Connect the Battery to the Switch 33 Final Steps 34 What s N...

Страница 5: ...sit www firstinspires org FIRST Core Values We express the FIRST philosophies of Gracious Professionalism and Coopertition through our Core Values Discovery We explore new skills and ideas Innovation...

Страница 6: ...and axle collar Refer to the legend provided in the Kit of Parts if any parts are unfamiliar Make sure that all assemblies are square It is hard to drive a crooked robot straight The drive wheels are...

Страница 7: ...g your best work while treating others with respect and kindness It s what makes FIRST first Frame Step 1 Build the left rail Figure 1 Unassembled view Figure 2 Assembled view Parts Needed 39067 160 m...

Страница 8: ...uide for TETRIX Part 1 Revision 1 7 17 2020 Step 2 Build the right rail Figure 3 Unassembled view Figure 4 Assembled View Parts Needed 39068 288 mm channel 1 39067 160 mm channel 1 39098 5 16 socket h...

Страница 9: ...sm Doing your best work while treating others with respect and kindness It s what makes FIRST first Step 3 Connect the left and right rails Figure 5 Unassembled view Figure 6 Assembled View Parts Need...

Страница 10: ...t Guide for TETRIX Part 1 Revision 1 7 17 2020 Step 4 Add Structural Support Brackets Figure 7 Unassembled view Figure 8 Assembled view Parts Needed 39281 inside corner bracket 2 39098 5 16 socket hea...

Страница 11: ...sembled view Figure 10 Assembled view Parts Needed 39073 flat building plate 1 39098 5 16 socket head cap screws 4 39094 keps nuts 4 Helpful Hints Make sure that the frame is square by looking at the...

Страница 12: ...nics Plate Figure 11 Unassembled View Figure 12 Assembled view Parts Needed 39073 flat building plate 1 39107 32 mm stand off post 2 39098 5 16 socket head cap screws 2 red 39097 1 2 socket head cap s...

Страница 13: ...ng others with respect and kindness It s what makes FIRST first Step 7 Attach Left Electronics Plate to Frame Figure 13 Unassembled view Figure 14 Assembled view Helpful Hint The plate does NOT attach...

Страница 14: ...ision 1 7 17 2020 Step 8 Build Right Electronics Plate Figure 15 Unassembled view Figure 16 Assembled view Parts Needed 39073 flat building plate 1 39107 32 mm stand off post 2 39098 5 16 socket head...

Страница 15: ...g others with respect and kindness It s what makes FIRST first Step 9 Attach Right Electronics Plate to Frame Figure 17 Unassembled view Figure 18 Assembled view Helpful Hint The plate does NOT attach...

Страница 16: ...sembled View from below the robot Figure 21 Assembled view from above the robot Helpful Hint Do not tighten the motor mount bolts that control the clamp i e the gap on one side of the mount until the...

Страница 17: ...acious Professionalism Doing your best work while treating others with respect and kindness It s what makes FIRST first Step 2 Add Drive Motors Figure 22 Unassembled view Figure 23 Assembled View Part...

Страница 18: ...Bot Guide for TETRIX Part 1 Revision 1 7 17 2020 Step 3 Secure Drive Motors Tighten the motor mount bolt so the motor will not rotate Figure 24 Real view Figure 25 Left rail motor view highlighting th...

Страница 19: ...ur best work while treating others with respect and kindness It s what makes FIRST first Step 4 Secure Drive Motor Wires Figure 26 Secured drive motor wires Helpful Hint Use the plastic coated wire ti...

Страница 20: ...re 28 Assembled view Helpful Hints Install the hubs 10 mm from the outside end the end furthest from the motor of the axle Install motor hub set screws so that the screws are on the flat side of the m...

Страница 21: ...ous Professionalism Doing your best work while treating others with respect and kindness It s what makes FIRST first Step 6 Add Drive Wheels Figure 29 unassembled view Figure 30 Assembled view Parts N...

Страница 22: ...of one wheel assembly Make two of these Figure 32 Assembled view 1 Figure 33 Assembled view 2 Parts Needed 36466 4 omni wheel halves 2 with included joining ring 1 and included screws 4 Helpful Hint A...

Страница 23: ...ssembly Make two of these Figure 35 Assembled view Parts Needed 39091 11 mm bronze bushings 4 Wheel assemblies from previous step Helpful Hints To make it easier to insert the bronze brushings secure...

Страница 24: ...t wheel assembly Figure 37 Assembled view of left wheel assembly Parts Needed 39100 1 8 axle spacers 6 39092 axle set collars 4 39091 11 mm bronze bushings 4 REV 41 1361 Nut Locking M3 4 Helpful Hint...

Страница 25: ...llenge Basic Bot Guide for TETRIX Part 1 25 Gracious Professionalism Doing your best work while treating others with respect and kindness It s what makes FIRST first Figure 38 Both wheels fully assemb...

Страница 26: ...Basic Bot Guide for TETRIX Part 1 Revision 1 7 17 2020 Control Hub Step 1 Add the REV Robotics Control Hub Figure 39 Unassembled view Parts Needed REV 31 1595 control hub 1 REV 41 1360 screws 2 REV 4...

Страница 27: ...nge Basic Bot Guide for TETRIX Part 1 27 Gracious Professionalism Doing your best work while treating others with respect and kindness It s what makes FIRST first Figure 40 Assembled view 1 Figure 41...

Страница 28: ...8 FIRST Tech Challenge Basic Bot Guide for TETRIX Part 1 Revision 1 7 17 2020 Step 2 Add the Left Drive Motor Power Cable Figure 42 Top view Parts Needed REV 31 1381 JST to Anderson Power Pole Cable 1...

Страница 29: ...ETRIX Part 1 29 Gracious Professionalism Doing your best work while treating others with respect and kindness It s what makes FIRST first Step 3 Add the Right Drive Motor Power Cable Parts Needed REV...
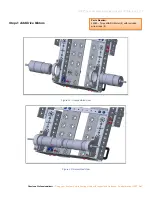
Страница 30: ...evision 1 7 17 2020 Power Switch Step 1 Add the Switch Figure 43 Unassembled view The wires attached to the switch are not shown in this image Figure 44 Assembled view The wires attached to the switch...

Страница 31: ...for TETRIX Part 1 31 Gracious Professionalism Doing your best work while treating others with respect and kindness It s what makes FIRST first Step 2 Connect the Switch to the Motor and Sensor Control...

Страница 32: ...32 FIRST Tech Challenge Basic Bot Guide for TETRIX Part 1 Revision 1 7 17 2020 Battery Step 1 Adding the Battery Figure 45 Unassembled view Figure 46 Assembled view Parts Needed 39057 Battery...

Страница 33: ...r some other mechanism to prevent it from being separated from the robot during competition Standard 4 inch zip ties should be purchased for securing wires to the chassis Electrical tape can be used t...

Страница 34: ...o show whether more cables need to be secured or re routed Check the game rules for all the applicable stickers Make sure to also go over the robot checklists o Robot Self Inspection Checklist o Robot...

Страница 35: ...rstinspires org FIRST Tech Challenge Page For everything FIRST Tech Challenge FIRST Tech Challenge Event Schedule Find FIRST Tech Challenge events in your area FIRST Tech Challenge Social Media FIRST...

Отзывы: