


19
620-7921 Rev A
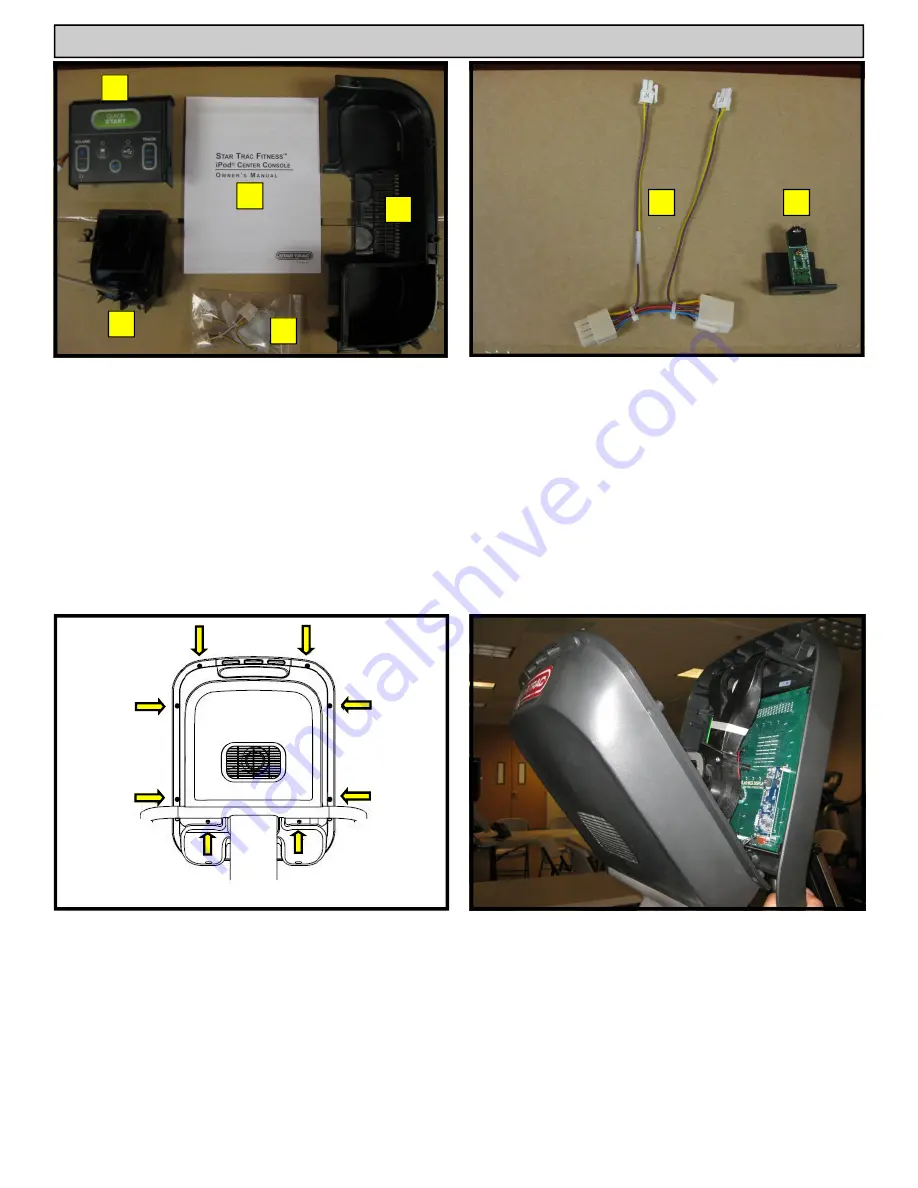
Step 1.
Remove all contents from the packaging and
verify that you have the following parts:
1. iPod® center console.
2. iPod® cradle.
3. Owner’s manual.
4. Cable kit.
5. Lower back cover.
Note:
If the center console is being installed on a new
unit, then perform this installation prior to mounting the
display assembly onto the frame.
Step 3.
Using a #2 Phillips screwdriver, remove the (8)
screws on the back of the display plastic. Set
the screws aside, you will need them for re-
assembly.
Step 4.
Carefully open the display plastic, so as to not
detach the inner cables from the display.
iPod® CENTER CONSOLE INSTALLATION INSTRUCTIONS
Step 2.
Verify the cable kit has the following two parts:
1. Center console power cable.
2. Headphone jack and mount.
1
2
3
4
5
1
2


