background image

SR700

 User’s Manual 


Revision Date: NOV. 23. 2016


24 

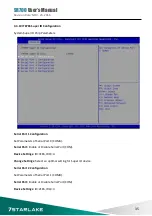
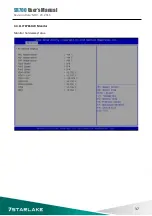
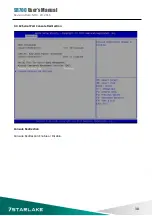
3.4.4 SATA Configuration 

This section is used to configure the SATA drives 


Содержание SR700

Страница 1: ...User s Manual Revision Date NOV 23 2016 SR700 MIL STD Rugged Computer User s Manual ...

Страница 2: ...mpany If the power supply is broken do not try to fix it by yourself Contact a qualified service technician or your local distributor Operation safety Before installing the motherboard and adding devices on it carefully read all the manuals that came with the package Before using the product make sure all cables are correctly connected and the power cables are not damaged If you detect any damage ...

Страница 3: ... STD Rugged Computer XR DIMM up to 8 GB RAM optional NVIDIA GTX950M MXM Graphic Card Accessories Kit M12 4 PIN DC Connector x 1pcs CD Driver User s Manual Cable kits Mounting Bracket Ordering Information Model Number Description SR700 Intel QM87 MIL STD IP65 Rugged System with Intel Core i7 4700EQ Processor NVIDIA GT950M GPU M12 Rugged Connectors 9V to 36V DC in Wide Temp 40 to 70 C ...

Страница 4: ...Front Panel Components 7 1 3 Mechanical Dimensions 8 Chapter 2 Jumpers and Connectors 9 2 1 Front Panel Connector Pin Definitions 9 2 2 Internal Connector and Jumper Setting 11 Chapter 3 AMI BIOS UTILITY 12 3 1 Starting 12 3 2 Navigation Keys 12 3 3 Main Menu 13 3 4 Advanced Menu 14 3 4 1 PCI Subsystem Settings 15 3 4 2 ACPI Settings 17 3 4 3 CPU configuration 18 3 4 4 SATA Configuration 24 3 4 5 ...

Страница 5: ...3 4 9 USB Configuration 32 3 4 10 IT8786 Super IO Configuration 35 3 4 11 IT8786 HW Monitor 37 3 4 12 Serial Port Console Redirection 38 3 4 13 Network Stack 40 3 4 14 Intel I210 Gigabit Network Connection 41 3 5 Chipset 42 3 5 1 PCH IO configuration 43 3 5 2 System AGENT SA 52 3 6 Boot 54 3 7 Security 55 3 8 Save and Exit 56 ...

Страница 6: ...x VGA X5 1 x RS232 1 x RS485 Display Display Interface VGA Resolution Up to 1920 x 1080 GPU NVIDIA GTX950M MXM Module Mechanical Environment Power Requirements 9V to 36V DC in AT ATX mode supports with power delay on off Power consumption Under 120 Watt while system fully loading Dimension W x H x D 308 x 230 x 76 mm 12 13 x 9 06 x 2 99 Operating Temp 40 to 70 C ambient with air flow Storage Temp ...

Страница 7: ...igh Temperature Method 501 5 Procedure II Operation High Temperature Method 502 5 Procedure I Storage Low Temperature Method 502 5 Procedure II Operation Low Temperature Method 503 5 Procedure I Temperature shock EMC CE and FCC compliance Green Product RoHS WEEE compliance Specifications are subject to change without notice ...

Страница 8: ...00 User s Manual Revision Date NOV 23 2016 7 1 2 Front Panel Components DC IN 1 x DC input X1 2 x USB2 0 X2 1 x GbE LAN X3 1 x GbE LAN X4 1 x VGA X5 1 x RS232 1 x RS485 PWR Power Button with LED backlight ...

Страница 9: ...SR700 User s Manual Revision Date NOV 23 2016 8 1 3 Mechanical Dimensions ...

Страница 10: ...SR700 User s Manual Revision Date NOV 23 2016 9 Chapter 2 Jumpers and Connectors This chapter describes the jumpers and connectors on the systems motherboard 2 1 Front Panel Connector Pin Definitions ...

Страница 11: ...SR700 User s Manual Revision Date NOV 23 2016 10 ...

Страница 12: ...SR700 User s Manual Revision Date NOV 23 2016 11 2 2 Internal Connector and Jumper Setting ...

Страница 13: ...steps Turn on the computer and press the Del key immediately After the Del key is pressed the main BIOS setup menu displays Other setup screens can be accessed from the main BIOS setup menu such as the Chipset and Power menus 3 2 Navigation Keys The BIOS setup utility uses a key based navigation system called hot keys Most of the BIOS setup utility hot keys can be used at any time during the setup...

Страница 14: ...SR700 User s Manual Revision Date NOV 23 2016 13 3 3 Main Menu The Main menu is the screen that first displays when BIOS Setup is entered unless an error has occurred ...

Страница 15: ...SR700 User s Manual Revision Date NOV 23 2016 14 3 4 Advanced Menu This section allows you to configure and improve your system and allows you to set up some system features according to your preference ...

Страница 16: ...ress settings PCI Common Settings PCI Latency Timer Value to be programed into PCI Latency Timer Register VGA Palette Snoop Enable or disable VGA Palette Registers Snooping PERR Generation Enables or Disables PCI Device to Generate PERR SERR Generation Enables or Disables PCI Device to Generate SERR ...

Страница 17: ...e AUTO BIOS auto configure DISABLE Disables ASPM WARNING Enabling ASPM may cause some PCI E devices to fail Extended Synch If ENBLED allows generation of extended synchronization patterns Link Training Retry Defines number of retry attempts software will take to retrain the link if previous training attempt was unsuccessful Link Training Time out uS Defines number of Microseconds software will wai...

Страница 18: ... 3 4 2 ACPI Settings System ACPI Parameters Enable ACPI Auto Configuration Enable disable BIOS ACPI Auto Configuration Enable Hibernation Enables or Disables system ability to hibernate OS S4 sleep state This option may be not effective with some OS ...

Страница 19: ...eep State Select ACPI sleep state the system will enter when the suspend button is pressed Lock Legacy Resources Enable or disable lock of legacy resource S3 Video Repost Enable or disable S3 Video Repost 3 4 3 CPU configuration CPU Configuration Parameters ...

Страница 20: ...SR700 User s Manual Revision Date NOV 23 2016 19 ...

Страница 21: ...optimized for Hyper Threading Technology When Disabled only one thread per enabled core is enabled Active Processor Cores Number of cores to enable in each processor package Overclocking lock FLEX_RATIO 194 MSR Limit CPUID Maximum Disable for Windows XP Execute Disable Bit XD can prevent certain classes of malicious buffer overflow attecks when combined with a supporting OS ...

Страница 22: ...bo mode Energy performance Optimize between performance and power savings Package power limit lock When enabled PACKAGE_POWER_LIMIT MSR will be locked and a reset will be required to unlock the register CPU Power limit1 CPU power limit1 value CPU Power limit1 time Time window which the power limit1 is maintained CPU Power limit2 CPU power limit2 value Platform power limit lock When enable PLATFORM...

Страница 23: ...able CPU C states Enhanced C1 State Enhanced C1 State CPU C3 Report Enable disable CPU C3 report to OS CPU C6 Report Enable disable CPU C6 report to OS C6 Latency Configure short long latency for C6 CPU C7 Report Enable disable CPU C7 report to OS C7 Latency Configure short long latency for C7 C1 state auto demotion processor will conditionally demote C3 C6 C7 requests to C1 based on uncore auto d...

Страница 24: ...rature Intel TXT LT Support Only Disable ACPI T state Enable Disable ACPI T state support CPU DTS Disabled ACPI thermal management uses EC reported temperature value Enabled ACPI thermal management uses DTS SMM mechanism to obtain CPU temperature values Out of Spec ACPI Thermal Management uses EC reported temperature values and DTS SMM is used to handle Out of spec Debug interface Enable Disable C...

Страница 25: ...SR700 User s Manual Revision Date NOV 23 2016 24 3 4 4 SATA Configuration This section is used to configure the SATA drives ...

Страница 26: ...on Determines how SATA controller s operate The options are IDE AHCI RAID SATA Test Selection Enable or disable Test Mode Aggressive LPM Support Enable PCH to aggressively enter link power state SATA Controller Speed Indicates the maximum speed the SATA controllers can support The options are default Gen1 Gen2 Gen3 ...

Страница 27: ... enabled indicates that the LED SGPIO hardware is attached and ping yo locate features isenabled on the OS IRRT Only on eSATA If enabled then only IRRT volumes can span internal and eSATA drives If disabled then any RAID volume can span internal and eSATA drives Smart Response Technology Enabled or disable Smart Response Technology OROM UI Delay If enabled indicates the delay of the OROM UI Splash...

Страница 28: ...cted to Solid State Drive or Hard Disk Drive Spin Up Device On an edge detec from 0 to 1 the PCH starts a COMRESET initialization sequence to the device Serial ATA Port 3 Port 3 Enable or disable SATA port Hot Plug Designates this port as Hot Pluggable External SATA External SATA support SATA device type Identify the SATA port is connected to Solid State Drive or Hard Disk Drive Spin Up Device On ...

Страница 29: ...e or disable SATA port Hot Plug Designates this port as Hot Pluggable External SATA External SATA support SATA device type Identify the SATA port is connected to Solid State Drive or Hard Disk Drive Spin Up Device On an edge detec from 0 to 1 the PCH starts a COMRESET initialization sequence to the device 3 4 5 Intel Rapid Start Technology Enable or disable Intel Rapid Start Technology ...

Страница 30: ... Disable MDES BIOS Status Code Firmware Update Configuration Configure Management Engine Technology Parameters Me FW Image Re Flash Enable Disable Me FW Image Re Flash function 3 4 7 Intel Anti Theft Technology Configuration Disabling Intel AT allow user to login to platform This is strictly for testing only This does not disable Intel AT services in ME ...

Страница 31: ... Revision Date NOV 23 2016 30 Intel Anti Theft Technology Enable Disable Intel AT in BIOS for testing On Enter Intel AT Suspend Mode Only Disabled 3 4 8 AMT Configuration Configure Active Management Technology Parameters ...

Страница 32: ...s option just controls the BIOS extension execution If enabled this requires additional firmware in the SPI device BIOS Hotkey Pressed OEMFlag Bit 1 Enable Disable BIOS hotkey press MEBx Selection Screen OEMFlag Bit 2 Enable Disable MEBx selection screen Hide Un Configure ME Confirmation OEMFlag Bit 6 Hide Un Configure ME without password Configuration prompt ...

Страница 33: ... wait before sending ASF_GET_BOOT_OPTIONS Disable ME Set ME to Soft Temporary Disabled ASF Enable Disable Alert Specification Format Activate Remote Assistance Process Trigger CIRA boot USB Configure Enable Disable USB Configure function PET Progress User can Enable Disable PET Events progress to receive PET events or not WatchDog Enable Disable WatchDog Timer 3 4 9 USB Configuration USB Configura...

Страница 34: ...ll keep USB devices available only for EFI applications USB3 0 Support Enable Disable USB3 0 XHCI Controller support XHCI Hand off This is a workaround for OSes without XHCI hand off support The XHCI ownership change should be claimed by XHCI driver EHCI Hand off This is a workaround for OSes without EHCI hand off support The EHCI ownership change should be claimed by EHCI driver ...

Страница 35: ...trol Bulk and Interrupt transfers The options are 1sec 5 sec 10 sec 20 sec Device reset time out USB mass storage device Start Unit command time out The options are 10 sec 20 sec 30 sec 40 sec Device power up delay Maximum time the device will take before it properly reports itself to the Host Controller Auto uses default value for a Hub port the delay is taken from Hub descriptor The options are ...

Страница 36: ...1 Configuration Set Parameters of Serial Port 0 COMA Serial Port Enable or Disable Serial Port COM Device Settings IO 3F8h IRQ 4 Change Settings Select an optimal setting for Super IO device Serial Port 2 Configuration Set Parameters of Serial Port 1 COMB Serial Port Enable or Disable Serial Port COM Device Settings IO 2F8h IRQ 3 ...

Страница 37: ...Serial Port 3 COMD Serial Port Enable or Disable Serial Port COM Device Settings IO 2E8h IRQ 7 Change Settings Select an optimal setting for Super IO device Serial Port 5 Configuration Set Parameters of Serial Port 4 COME Serial Port Enable or Disable Serial Port COM Device Settings IO 2F0h IRQ 7 Change Settings Select an optimal setting for Super IO device Serial Port 6 Configuration Set Paramete...

Страница 38: ...SR700 User s Manual Revision Date NOV 23 2016 37 3 4 11 IT8786 HW Monitor Monitor hardware status ...

Страница 39: ...SR700 User s Manual Revision Date NOV 23 2016 38 3 4 12 Serial Port Console Redirection Console Redirection Console Redirection Enable or Disable ...

Страница 40: ...VT100 and then VT100 See above in Console Redirection Settings page for more Help with Terminal Type Emulation The options are VT100 VT100 VT UTF8 ANSI Bits per second selects serial port transmission speed The speed must be matched on the other side Long or noisy lines may require lower speeds The options are 9600 19200 57600 115200 Flow Control Flow control can prevent data loss from buffer over...

Страница 41: ...SR700 User s Manual Revision Date NOV 23 2016 40 3 4 13 Network Stack Network stack settings Network Stack Enable Disable UEFI network stack ...

Страница 42: ...et device parameters PORT CONFIGURATION MENU NIC Configuration Configure Boot Protocol wake on LAN Link Speed and VLAN Blink LEDs Identify the physical network port by blinking the associated LED PORT CONFIGURATION INFORMATION Link Status Link Status Virtual MAC Address Programmatically assignable MAC address for port ...

Страница 43: ...nual Revision Date NOV 23 2016 42 3 5 Chipset This section gives you functions to configure the system based on the specific features of the chipset The chipset manages bus speeds and access to system memory resources ...

Страница 44: ...SR700 User s Manual Revision Date NOV 23 2016 43 3 5 1 PCH IO configuration ...

Страница 45: ... Correctable Error Reporting CTO Enable or disable PCI Express Completion Timer TO SEFE Enable or disable Root PCI Express System Error on Fatal Error SENFE Enable or disable Root PCI Express System Error on Non Fatal Error SECE Enable or disable Root PCI Express System Error on Correctable Error PME SCI Enable or disable PCI Express PME SCI Hot Plug Enable or disable PCI Express Hot Plug PCIe Spe...

Страница 46: ...r SENFE Enable or disable Root PCI Express System Error on Non Fatal Error SECE Enable or disable Root PCI Express System Error on Correctable Error PME SCI Enable or disable PCI Express PME SCI Hot Plug Enable or disable PCI Express Hot Plug PCIe Speed Select PCI Express port speed Detect Non Compliance Device Detect Non Compliance PCI Express Device If enable it will take more time at POST time ...

Страница 47: ...r SENFE Enable or disable Root PCI Express System Error on Non Fatal Error SECE Enable or disable Root PCI Express System Error on Correctable Error PME SCI Enable or disable PCI Express PME SCI Hot Plug Enable or disable PCI Express Hot Plug PCIe Speed Select PCI Express port speed Detect Non Compliance Device Detect Non Compliance PCI Express Device If enable it will take more time at POST time ...

Страница 48: ...r on Fatal Error SENFE Enable or disable Root PCI Express System Error on Non Fatal Error SECE Enable or disable Root PCI Express System Error on Correctable Error PME SCI Enable or disable PCI Express PME SCI Hot Plug Enable or disable PCI Express Hot Plug PCIe Speed Select PCI Express port speed Detect Non Compliance Device Detect Non Compliance PCI Express Device If enable it will take more tim...

Страница 49: ...r SENFE Enable or disable Root PCI Express System Error on Non Fatal Error SECE Enable or disable Root PCI Express System Error on Correctable Error PME SCI Enable or disable PCI Express PME SCI Hot Plug Enable or disable PCI Express Hot Plug PCIe Speed Select PCI Express port speed Detect Non Compliance Device Detect Non Compliance PCI Express Device If enable it will take more time at POST time ...

Страница 50: ...r SENFE Enable or disable Root PCI Express System Error on Non Fatal Error SECE Enable or disable Root PCI Express System Error on Correctable Error PME SCI Enable or disable PCI Express PME SCI Hot Plug Enable or disable PCI Express Hot Plug PCIe Speed Select PCI Express port speed Detect Non Compliance Device Detect Non Compliance PCI Express Device If enable it will take more time at POST time ...

Страница 51: ...ompliance Device Detect Non Compliance PCI Express Device If enable it will take more time at POST time Extra Bus Reserved Extra Bus Reserved 0 7 for bridges behind this Root Bridge Reseved Memory Reserved Memory Range for this Root Bridge Prefetchable Memory Prefetchable Memory Range for this Root Bridge Reserved I O Reserved I O 4K 8K 12K 16K 48K Range for this Root Bridge PCIE LTR PCIE Latency ...

Страница 52: ...at Sx state SLP_LAN Low on DC Power Enable Disable SLP_LAN Low on DC Power Board Capability Board Capability SUS_PWR_DN_ACK Send Disabled to PCH DeepSx Show DeepSx Policies GP27 Wake From DeepSx Wake from DeepSx by the assertion of GP27 pin PCIE Wake From DeepSx Wake from DeepSx by the assertion of PCIE Serial IRQ Mode Configure Serial IRQ Mode SLP_S4 Assertion Width Select a minimum assertion wid...

Страница 53: ...SR700 User s Manual Revision Date NOV 23 2016 52 3 5 2 System AGENT SA VT d Check to enable VT d function on MCH ...

Страница 54: ... be activated during POST This has no effect if external graphics present Secondary boot display selection will appear based on your selection VGA modes will be supported only on primary display LCD Panel Type Select LCD panel used by Internal Graphics Device by selecting the appropriate setup item SDVO LFP Panel Type Select SDVO panel used by Internal Graphics Device by selecting the appropriate ...

Страница 55: ...f seconds to wait for setup activation key 65535 0xFFFF means indefinite waiting Bootup NumLock State Select the keyboard NumLock state Quiet Boot Enables or disables Quiet Boot option Fast Boot Enables or disables boot with initialization of a minimal set of devices required to launch active boot option Has no effect for BBS boot options ...

Страница 56: ... UPON REQUEST GA20 can be disabled using BIOS serices ALWAYS do not allow disabling GA20 this option is useful when any RT code is executed above 1MB Option ROM Messages Set display mode for option ROM INT19 Trap Response BIOS reaction on INT19 trapping by option ROM IMMEDIATE execute the trap right away POSTPONES execute the trap during legacy boot CSM Parameters OpROM execution boot options filt...

Страница 57: ...nistrator Password Set Administartor Password User Password Set User Password HDD Security Configuration Set HDD Password 3 8 Save and Exit This screen provides functions for handling changes made to the BIOS settings and the exiting of the Setup program ...

Страница 58: ...ny changes Save Options Save Changes Save Changes done so far to any of the setup options Discard Changes Discard Changes done so far to any of the setup options Restore Defaults Restore Load Default values for all the setup options Save as User Defaults Save the changes done so far as User Defaults Restore user Defaults Restore the User Defaults to all the setup options Launch EFI Shell from file...

Отзывы: