


STORAGE
1. To store the
InMotion® II Treadmill,
simply keep it in a clean dry place.
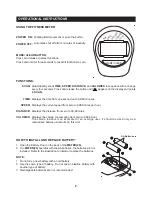
2. To avoid damage to the electronics, remove the batteries before storing the
InMotion® II Treadmill
for
one year or more.
3. To fold the
InMotion® II Treadmill
for easy storage, follow this process. Refer to the illustrations below.
12
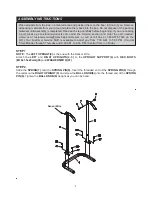
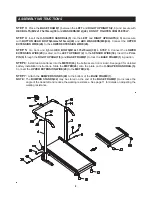
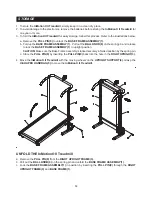
UNFOLD THE InMotion® II Treadmill
a. Remove the
PULL PIN(9)
from the
RIGHT UPRIGHT FRAME(3).
b. Pull out the
BALL KNOB(8)
on the spring pin and unfold the
BASE FRAME ASSEMBLY(1).
c. Lock the
BASE FRAME ASSEMBLY(1)
in position by inserting the
PULL PIN(9)
through the
RIGHT
UPRIGHT FRAME(3)
and
BASE FRAME(1).
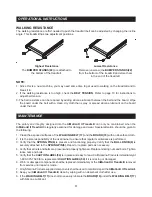
4. Move the
InMotion® II Treadmill
with the moving wheels on the
UPRIGHT SUPPORT(4).
Grasp the
U-SHAPED HANDRAIL(5)
to move the
InMotion® II Treadmill.
a. Remove the
PULL PIN(9)
to unlock the
BASE FRAME ASSEMBLY(1).
b. Fold up the
BASE FRAME ASSEMBLY(1).
Pull out the
BALL KNOB(8)
on the spring pin and release
to lock the
BASE FRAME ASSEMBLY(1)
in upright position.
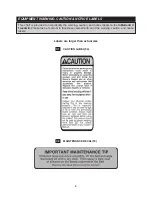
CAUTION:
Make sure the Base Frame Assembly is locked securely in folded position by the spring pin.
c. Store the
PULL PIN(9)
by inserting the
PULL PIN(9)
back into the hole in the
RIGHT UPRIGHT(3).
Содержание InMotion II 45-1002C
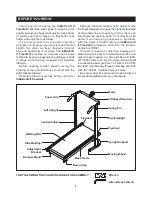
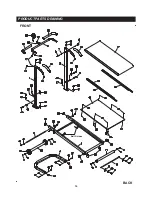
Страница 16: ...PRODUCT PARTS DRAWING 16 FRONT BACK Belt Guides...
Страница 18: ...NOTES 18...


