


LEVELING:
Adjust the location of
InMotion® E3000
to ensure
InMotion® E3000
sits on the floor
without rocking.
MOVING:
Grasp the
REAR STABILIZER(2)
and
HANDLEBAR(72)
to move the
InMotion® E3000
.
Do not use the
PEDAL ARMS(3,4)
to move the
InMotion® E3000
.
The
PEDAL ARMS(3,4)
will move and may pinch your hand or fingers.
FUNCTION INSPECTION:
Visually inspect the
InMotion® E3000
to verify that assembly is as shown in the above illustration. Check
the function of the
InMotion® E3000.
Stand on the foot pedals. Slowly move your highest foot forward
and follow the natural path of the machine. Turn the crank slowly through one complete revolution to verify
that the drive train functions properly. Adjust the
TENSION KNOB(21)
and verify that it functions properly.
CAUTION:
Locate and read the
WARNING LABEL(55)
on the
InMotion® E3000
.
Make sure that all
users read the
WARNING LABEL(55).
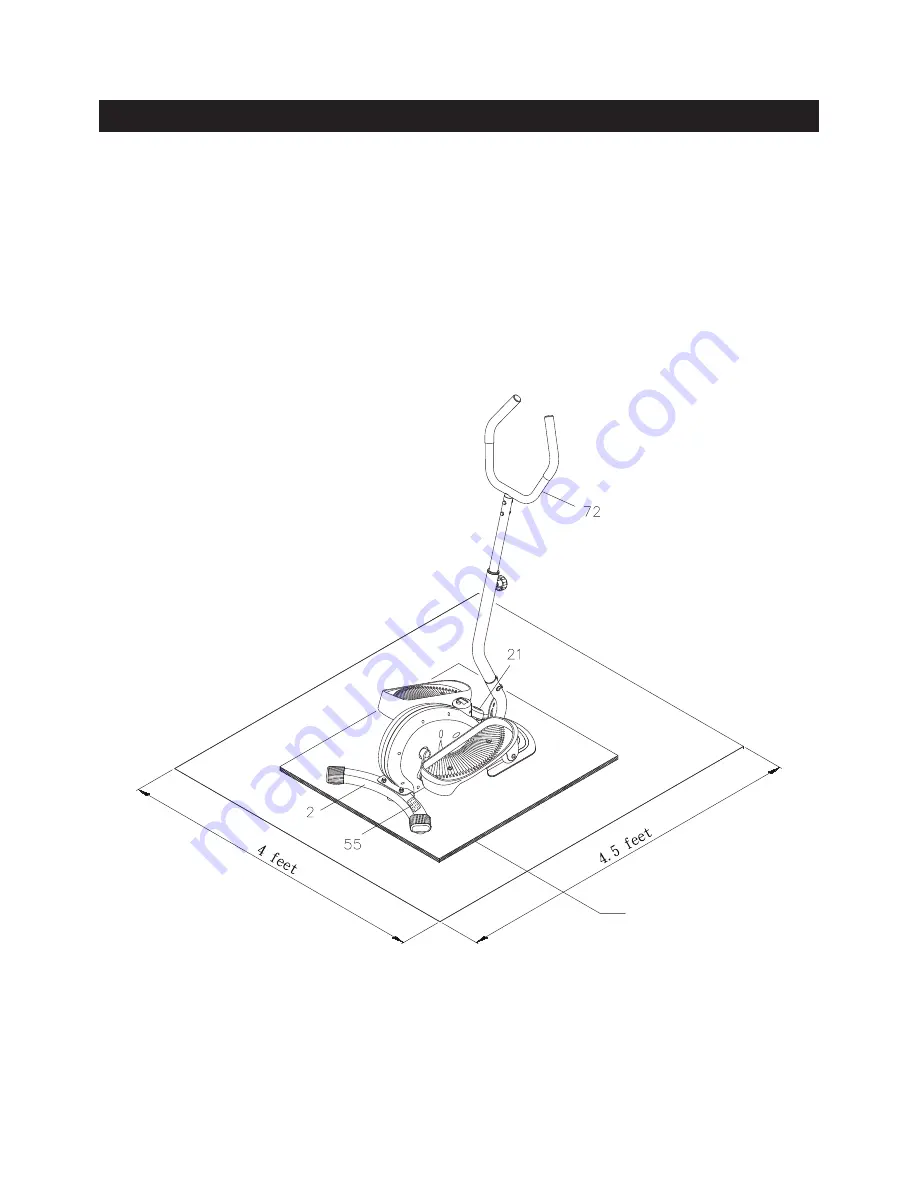
SET UP INSTRUCTIONS
9
Equipment Mat
Place the
InMotion® E3000
in the area where it will be used. It is recommended that the
InMotion®
E3000
be placed on an equipment mat. The maximum operation dimensions of the
InMotion® E3000
are
approximately 30.2 inches long x 18.5 inches wide x 48.8 inches tall. (These dimensions may vary up to
one inch.) An area 4 feet wide x 4.5 feet long is required for safe operation of the
InMotion® E3000.
Make
sure that adequate space is available for access to and passage around the
InMotion® E3000.
Содержание InMotion E3000
Страница 14: ...PRODUCT PARTS DRAWING 14 FRONT BACK...
Страница 18: ...NOTES 18...