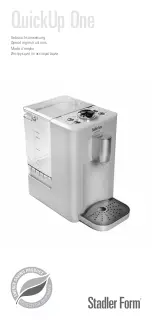
Stadler Form QuickUp One Скачать руководство пользователя страница 6

THERMOPOT SFQ.010

Congratulations on your purchase of the SFQ.010 thermopot.

The thermopot makes preparing drinks really easy and fun.

IMPORTANT SAFETY INSTRUCTIONS 
Please read the instruction manual before using this appliance.


• The manufacturer assumes no responsibility for any injury or damage 

caused by improper use of the device.


• The thermopot is an electrical appliance and is designed for use at home 

only in strict accordance with the instruction manual. Misuse or technical 
modification of the device can create conditions hazardous to the life and 
health of the user. 


• This appliance is not intended for children or incapacitated adults without 

adequate supervision, or those without sufficient skills in the use of elec-
trical appliances or not familiar with the manual. 


• Before plugging in the thermopot, make sure that the mains voltage corre-

sponds to the voltage for which this appliance is certified.


• Do not use the thermopot with a damaged or overloaded power strip.


• Keep the cord away from surfaces that can damage it and make sure it 

doesn’t get tangled or twisted. 


• Do not touch the power cord or plug with wet hands.


• Do not use electrical appliances in areas of high humidity.


• Do not place the thermopot near a heat source. Do not let the cord touch 

the hot surface of any heating appliance, and do not let the power cord 
come into contact with oily 


• substances. 


• To avoid injuries and dangerous situations, do not switch on the ther-

mopot with the lid open. Do not open the lid or add water during boiling.


• Only use the thermopot to heat water; never use it to heat other liquids 

or foods.


• Unplug the thermopot after use and before cleaning.


• Never immerse the thermopot, power cord or plug in water or other liquid.


• To store the thermopot, pack it in a box and store it in a dry place out of 

the reach of children.


• Keep these instructions for future reference. If you transfer the thermo-

pot to another owner, include the instructions with it

DESCRIPTION 

1. 

lid

2. 

Temperature knob

3. 

Function buttons

a. Control panel lock button (protection against children)
b. Push button for water delivery without heating (200ml)
c. Push button for hot water delivery to small cap (100ml)
d. Push button for hot water delivery to large cap (200ml)

4. 

Water supply nozzle

5. 

Cup stand 

English

hinzu. Lassen Sie den Thermopot für 12 Stunden oder über Nacht stehen. 
Gießen Sie danach dieses Wasser ab, füllen Sie den Behälter mit reinem 
Wasser, kochen Sie es auf und gießen Sie es wieder ab. 

REPARATUREN UND STÖRUNGSBEHEBUNG


• In Sicherheitszwecken dürfen Reparaturen am Elektrogerät nur von einem 

qualifizierten Fachmann eines autorisierten Servicecenters ausgeführt 
werden. 


• Die Garantie verbreitet sich nicht auf Störungen, die durch unqualifizierte 

Reparaturen, sowie durch eine inkorrekte Anwendung des Elektrogeräts 
hervorgerufen wurden.


• Es wird verboten das Elektrogerät zu benutzen, wenn es fehlerhaft funk-

tioniert, sowie bei mechanischen oder sonstigen Schäden des Elektroge-
räts, des Stromkabels oder der Steckgabel.


• Nehmen Sie das Elektrogerät niemals selbst auseinander, stecken Sie 

keine Fremdgegenstände in die Öffnungen im Gehäuse des Elektrogeräts. 


• Wenn das Gerät nicht reparabel ist, werfen Sie es nicht mit den Haus-

haltsabfällen weg. Sorgen Sie für den Umweltschutz! Ein mangelhaftes 
Gerät muss an einer speziellen Entsorgungsstelle abgegeben werden. Die 
Adressen der Entsorgungsstellen für Haushaltsgeräte erhalten Sie bei 
den munizipalen Diensten Ihrer Ortschaft. 


• Bei dem Austausch eines mangelhaften Elektrogeräts gegen ein neues 

haftet der Verkäufer für die Entsorgung.

SPEZIFIKATION

Stromspeisung: Spannung 230 V, Frequenz 50 Hz
Leistung: 2200 W
Fassungsvermögen: 1,7 l
Abmessungen: 265 x 149 x 280 mm
Gewicht: 

2220 gr

Der Hersteller behält sich das Recht auf eine Änderung der technischen 
Kennwerte vor.

Содержание QuickUp One

Страница 1: ...QuickUp One Gebrauchsanweisung Operating instructions Mode d emploi Инструкция по эксплуатации ...

Страница 2: ...QuickUp One 3d 3b 4 6 5 3c 3a 1 2 9 8 7 ...

Страница 3: ...nnung entspricht die im Datenblatt dieses Geräts angegeben ist Verwenden Sie beim Anschluss keine beschädigten oder überlasteten Verlängerungskabel Achten Sie darauf dass das Stromkabel mit keinen Oberflächen in Berüh rung kommt die es beschädigen können sich nicht verwickelt und nicht überdreht wird Fassen Sie das Stromkabel oder dessen Steckgabel nicht mit nassen Hän den an Benutzen Sie Elektrog...

Страница 4: ...ch tung aller Tasten auf der Bedientafel blinken und die Wasserzufuhr wird blockiert Vermeiden Sie ein zufälliges Einschalten des Thermopots ohne Wasser oder wenn der Behälter unter der Markierung des Mindestpegels gefüllt ist Bewahren Sie diese Bedienungsanleitung auf um später darauf zurück greifen zu können und falls der Thermopot den Besitzer wechseln sollte so übergeben Sie diesem den Thermop...

Страница 5: ...gion jedoch mindestens einmal im Monat von Kesselstein zu rei nigen Füllen Sie den Wasserbehälter zur Kesselsteinbeseitigung bis zur Höchst pegelmarkierung mit Wasser und fügen Sie ein paar Tropfen Weißessig Programmabbruchtaste Diese Taste ist für den Abbruch einer gewählten Funktion bestimmt Pressen Sie diese Taste um die Wasserzufuhrfunktion für eine kleine oder große Tasse abzubrechen ANMERKUN...

Страница 6: ...ut of the reach of children Keep these instructions for future reference If you transfer the thermo pot to another owner include the instructions with it DESCRIPTION 1 Lid 2 Temperature knob 3 Function buttons a Control panel lock button protection against children b Push button for water delivery without heating 200ml c Push button for hot water delivery to small cap 100ml d Push button for hot w...

Страница 7: ...will blink and then blue lighting of the tempe rature regulator will go on it means that Thermopot was switched in standby mode Push button of water delivery without heating 200ml This button is intended for delivering water 200 ml with indoor tempe rature Press this button to pour in a cup 200 ml of water with indoor temperature button illumination thus will go on After water delivery button ligh...

Страница 8: ...al surfaces of the appliance with a soft damp cloth and then dry them with a soft dry cloth NOTE To avoid water contamination and scale formation change the water in the tank regularly Removing scale Minerals contained in tap water can accumulate on the inner surfaces of the thermopot To keep your thermopot in good working order remove the scale inside it once a month or more often depending on th...

Страница 9: ...on nettoyage Ne plongez jamais le thermo pot électrique son cordon électrique ou sa fiche dans de l eau ou un autre liquide Emballez le thermo pot électrique dans son emballage et conservez le dans un local sec dans des endroits inaccessibles pour les enfants Conservez ce mode d emploi pour pouvoir vous y référer plus tard En cas de transmission du thermo pot électrique transmettez le mode d emplo...

Страница 10: ...tez d allumer le thermo pot électrique sans eau ou rempli en dessous de la marque de niveau minimum Régulateur de température Le régulateur est prévu pour choisir la température de chauffage de l eau Quand le thermo pot électrique est dans le régime d attente tournez le ré gulateur afin de choisir la température de chauffage d eau 60 C 70 C 80 C 85 C 90 C 95 C 100 C Bouton de versement de l eau po...

Страница 11: ...solution dans le thermo pot électrique 12 heures ou toute la nuit Videz ensuite cette eau et remplissez le réservoir avec de l eau propre faites bouillir et versez la REPARATION ET ELIMINATION DES PANNES La réparation de l appareil électrique doit être réalisée seulement par des spécialistes qualifiés d un centre de service autorisé pour des raisons de sécurité La garantie ne s applique pas aux pa...

Страница 12: ...и по окончании использования и перед чисткой Никогда не погружайте термопот сетевой шнур и вилку сетевого шну ра в воду или иную жидкость Для хранения упакуйте термопот в коробку и храните в сухом помеще нии в местах недоступных для детей Сохраните эту инструкцию для дальнейших справок а в случае пере дачи термопота другому владельцу передайте инструкцию вместе с прибором ОПИСАНИЕ УСТРОЙСТВА 1 Кры...

Страница 13: ...атем нажмите эту кнопку при этом включится подсветка кнопки Подсветка регулятора температуры будет менять интенсив ность свечения это означает что выполняется нагрев воды Через несколько секунд после того как подсветка регулятора темпера туры зафиксируется на ярком свечении будет выполнена автоматиче ская подача воды в чашку После подачи воды подсветка кнопки отключится а термопот автомати чески п...

Страница 14: ...220 гр Высота 265 мм Ширина 149 мм Глубина 280 мм Производитель сохраняет за собой право на внесение изменений в тех нические характеристики ИНФОРМАЦИЯ О СЕРТИФИКАЦИИ Товар сертифицирован в соответствии с законом О защите прав потребителей Установленный производителем в соответствии с п 2 ст 5 Федерального Закона РФ О защите прав потребителей срок службы для данного изделия равен 2 годам при услов...

Страница 15: ...e came up with the idea to develop attractive and appealing household products Martin Stadler CEO Stadler Form Наша общая цель наслаждаться процессом делая жизнь яркой Она также подразумевает внедрение ди зайнерских вещей в повседневную жизнь человека это наш основной принцип Множество бытовых приборов являются важными и полезными обитателями нашего дома вместе с тем они часто гадкие утята в семье...

Отзывы: