10
11
English
English
"BUSY" LED
The "BUSY" light, located next to the screen, lights up when
the camera is recording.
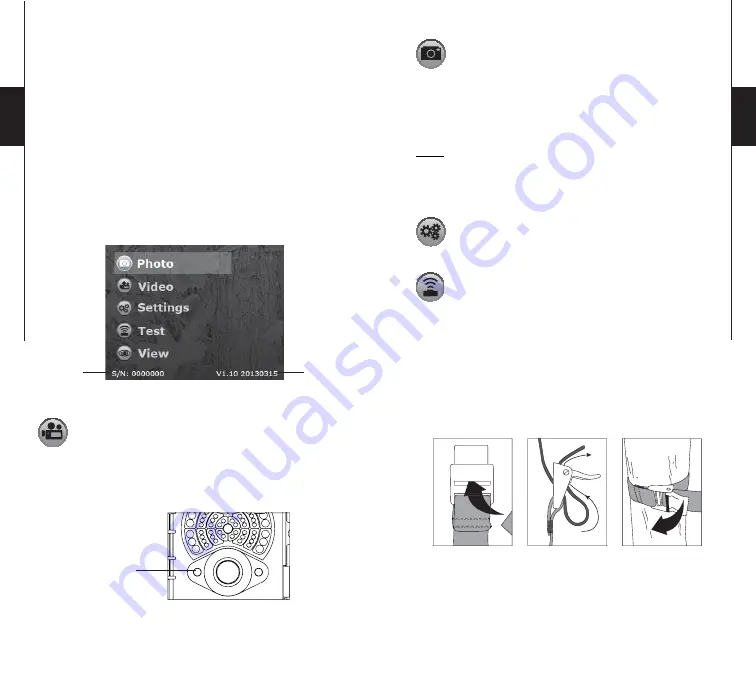
MAIN MENU
Use the
▲
and
▼
button to navigate the interface or to modify a
selection, the OK button to select and the BACK button to return to
the previous menu.
The following information appears on the main menu screen:
1.Serial number
2.Software version
PHOTO
Allows the camera to take pictures in
Standalone
,
Cellular
or
Security
mode.
The PHOTO mode must be selected by
pressing OK; the test light in front of the camera (see below) will
fl
ash for 60 seconds
to allow the user to leave the area without being
photographed.
A countdown is also displayed on the screen during
boot time.
1.
2.
Test light
VIDEO
Allows the camera to record movies in
Standalone
mode
only.
The VIDEO mode must be selected by pressing
OK; the test light in front of the camera (see above) will
fl
ash for
60 seconds to allow the operator
to leave the area without being
recorded.
A countdown is also displayed on the screen during boot
time.
Note:
If the camera is set to
Cellular
or
Security
mode, a message
indicates that the camera will be transferred in
Standalone
mode
and then boots up normally.
SETTINGS
Sets the advanced options of the camera
(see SETTINGS MENU for details).
TEST
Allows the user to test the detection system of the camera.
When the TEST mode is selected, no photo or video is
recorded. Pass in front of the camera from left to right. When the
camera detects motion, the test light blinks to indicate that the
camera would normally have saved a photo or video. If the system
does not detect movement, increase the detection range using the
option “Sensitivity” in the Settings menu (“Low”, “Medium” or
“High”). Realign the system if necessary.
How to properly install your camera
using the supplied installation strap:
(Recommended installation height: about 3 feet)


