4
Package contents
USB
cable
Installation
strap
SPYPOINT
camera
RC-1
remote control
Quick start
guide
Nous recommandons l’utilisation de piles neuves afin
d’assurer un rendement maximal de la caméra. Les piles
AA rechargeables sont déconseillées.
3.
INSÉRER UNE CARTE MÉMOIRE
Insérer une carte mémoire de type SD/
SDHC (jusqu’à une capacité de 32 Go) dans
la fente pour carte SD, contacts dorés vers
le haut. La carte est correctement insérée
lorsqu’un clic se fait entendre.
Avant d’insérer ou de retirer une
carte mémoire, toujours mettre la
caméra à OFF pour éviter que les images
présentes sur la carte soient supprimées ou
endommagées.
4.
POUR UTILISER LA TÉLÉCOMMANDE
A. Allumer la caméra.
B. Mettre l'option TÉLÉCOMMANDE à «Marche».
(Menu principal
Configuration
Général)
C. Retourner au menu principal de la caméra.
D. Appuyer simultanément sur les boutons ON et
FN de la télécommande. Les lumières rouge et verte
clignoteront quelques instants avant de s’allumer
et de s’éteindre. Si les lumières clignotent sans
cesse, c’est que la synchronisation n’a pas
fonctionné. Réessayer à nouveau.
Schnellstartanleitung
Quick start guide
v1.0
P INT
SPY
INT
P
SPY
Surveillance
camera
HAWK
1-888-779-7646
www.spypoint.com
under Support section
In the box
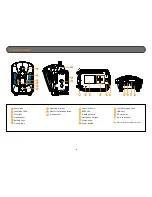
Components
Installation
strap
USB
cable
Note:
Memory card and batteries are sold separately.
Camera
Quick start
guide
Remote
control
BUSY LED
Viewing screen
Navigation buttons
Microphone
Power button
12V/Solar panel jack
USB port
SD card slot
*
Built-in speaker
Photo lens
Invisible LEDs
Test light
Battery case
Detection lens
Mounting bracket
Slot for installation strap
Tripod mount
Cable lock hole
1
2
3
4
5
6
7
8
9
12
13
14
15
16
17
18
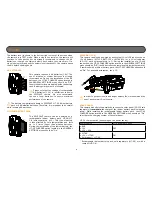
We recommend the use of new batteries to ensure a
maximum performance of the camera. Rechargeable AA
batteries are not recommended.
3.
INSERT THE MEMORY CARD
Insert an SD/SDHC memory card (up to 32
GB capacity) in the card slot, gold contacts
facing up. The card is inserted correctly
when a click is heard.
Before inserting or removing a memory
card, always turn off the camera to
prevent loss or damage of the photos already
recorded.
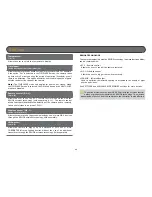
4.
TO USE THE REMOTE CONTROL
A. Turn on the camera.
B. Set the REMOTE CONTROL option to "On".
(Main menu Settings General)
C. Return to the main menu of the camera.
D. Press simultaneously the ON and FN buttons of the
remote control. The red and green lights will flash a
few moments before turning on and then, turning
off. If the lights are flashing constantly, it means
that the synchronization did not work. Try again.
Guide de
démarrage rapide
v1.0
P INT
SPY
INT
P
SPY
Caméra de
surveillance
HAWK
1-888-779-7646
www.spypoint.com
sous la section Support
Dans la boîte
Composants
Courroie
d'installation
Câble
USB
Note:
Carte mémoire et piles sont vendues séparément.
Lumière BUSY
Écran de visionnement
Boutons de navigation
Microphone
Bouton de mise sous tension
Prise 12V/panneau solaire
Port USB
Fente pour carte SD
*
Haut-parleur
Lentille photo
DEL invisibles
Lumière de test
Compartiment à piles
Lentille de détection
Socle
Fente pour courroie
d’installation
Support pour trépied
Ouverture pour câble
cadenas
1
2
3
4
5
6
7
8
9
10
11
12
13
14
15
16
17
18
Mise en route
v1.0
P INT
SPY
INT
P
SPY
Überwachungs
kamera
HAWK
+49 (0) 36331 50540
www.spypoint.com
www.spypoint.info
In der box
Komponenten
Befesti-
gungsgurt
USB-
Kable
Hinweis:
Speicherkarte und Batterien separat eRhältlich.
BUSY LED
Betrachtungs-Bildschirm
Bedienschaltfläche
Mikrofon
Power-Taste
12V/Solar-Panel Anschluss
USB-Anschluss
SD-Kartensteckplatz
*
Eingebauter Lautsprecher
Fotolinse
Unsichtbare LEDs
Test-LED
Batteriefach
Erfassungslinse
Montagehalterung
Löcher für den
Befestigungsgurt
Stativgewinde
Löcher für das Kabelschloss
1
2
3
4
5
6
7
8
9
10
11
12
13
14
15
16
17
18
1.
ENTFERNEN SIE DIE KAMERA VON MONTAGE-KLAMMER
A. Drücken Sie die Lasche an der Montage
halterung.
B. Entfernen Sie die Kamera.
2.
WÄHLEN SIE IHRE STROMQUELLE
Um die besten Ergebnisse zu erzielen und die Batterielaufzeit zu
erhöhen, empfehlen wir die Verwendung einer externen 12V Batterie.
Startem
Wir empfehlen, neue Batterien zu verwenden, um die
maximale Leistung aus Ihrer Kamera herauszuholen.
Weiterhin wird die Verwendung von wiederaufladbaren AA-
Batterien nicht empfohlen.
3.
LEGEN SIE EINE SPEICHERKARTE EIN
Legen Sie eine SD/SDHC Speicherkarte (bis
zu 32 GB) in den Kartenleser der Kamera,
goldene Kontakte nach oben. Wenn ein
klicken zu hören ist, wurde die Karte korrekt
eingelegt.
Vor dem Einsetzen oder Entfer-
nen einer Speicherkarte, schalten Sie
die Kamera immer vorher aus, um
einen Verlust oder eine Beschädigung von den
bereits vorhandenen Aufnahmen zu verhindern.
4.
UM DIE FERNBEDIENUNG ZU VERWENDEN
A.
Schalten Sie die Kamera ein.
B.
Schalten Sie die FERNBEDIENUNG-Option "Ein".
(Hauptmenü Einstellungen Allgemein)
C.
Kehren Sie zum Hauptmenü der Kamera zurück.
D.
Drücken Sie gleichzeitig die ON und FN Tasten der
Fernbedienung. Die rote und grüne Lampe blinken
nun für einen kurzen Moment auf. Wenn die Lichter
konstant weiter blinken, bedeutet dies, dass die
Synchronisation nicht erfolgreich war. Bitte
versuchen Sie es erneut.
Guida di avvio rapido
v1.0
P INT
SPY
INT
P
SPY
Telecamera
per
sorveglianza
Adventure
series · série
expedition
series · série
summit pro
series · série
smart
series · série
TINY
series · série
LIVE
series · série
HAWK
+49 (0) 36331 50540
www.spypoint.com
www.spypoint.info
Guía de inicio rápido
v1.0
P INT
SPY
INT
P
SPY
Cámara de
vigilancia
HAWK
+49 (0) 36331 50540
www.spypoint.com
www.spypoint.info
Nella confezione
Componenti
Cinghia di
fissaggio
Cavo
USB
Nota:
Scheda di memoria e batterie acquistabili
separatamente.
BUSY LED
Diplay visualizzativo
Telecomando
Microfono
Tasto Power
Connessione pannello solare/
12V
Attaco USB
Lettore SD
*
Altoparlante incorporato
Lente fotografica
LED invisibili
LED test
Vano batterie
Lente di rilevazione
Dispositivo di montaggio
Fori per il nastro di
posizionamento
Filettatura per treppiede
Fori per il cavo lucchetto
1
2
3
4
5
6
7
8
9
10
11
12
13
14
15
16
17
18
1.
REMOVE CAMERA FROM THE MOUNTING BRACKET
A. Push the tab to release the camera from
the mounting bracket.
B. Remove the camera.
2.
CHOOSE A POWER SOURCE
In order to get best results and longer battery life, we
recommend the use of an external 12-volt source.
Getting started
1.
RIMUOVERE LA VIDEOCAMERA DAL GANCIO DI
MONTAGGIO
A. Prema il tasto sul dispositivo di
montaggio.
B. Stacchi la telecamera.
2.
SCEGLIERE LA FONTE D'ENERGIA
Per ottenere risultati migliori e una durata di batteria maggiore si
raccomanda l'uso di una presa esterna da 12 Volt.
Avvio
Consigliamo di utilizzare batterie nuove, per avere il
Massimo della telecamera. Inoltre si sconsiglia l’uso
di batterie ricaricabili.
3.
INSERIRE LA SCHEDA DI MEMORIA
Inserite una scheda SD/SDHC (fino a 32 GB)
nell’apposita fessura, I contatti riversi verso
l’alto. Se è udibile un click la scheda è stata
inserita correttamente.
Prima di inserire o di togliere una
scheda memoria, spegnete sempre la
telecamera, per evitare il danneggiamento o
la perdita di dati registrati.
4.
UTILIZZO DEL CONTROLLO REMOTO
A. Accendere la videocamera.
B. Impostare l'opzione CONTROLLO REMOTO su
"On". (Menù principale impostazioni generali)
C. Tornare al menù principale della videocamera.
D. Premere contemporaneamente i tasti ON e FN del
controllo remoto. La spia rossa e quella verde
lampeggeranno alcuni secondi prima di accendersi
e poi spegnersi. Se le spie continuano a
lampeggiare costantemente allora la sincronizzazione
non funziona. Riprovare.
En la caja
Componentes
Cinturón
de fijación
Cable
USB
Nota:
La tarjeta de memoria y las pilas se venden por
separado.
BUSY-LED
Pantalla de visualización
Botones de ajustes
Micrófono
Tecla de alimentación
12V/Conexión al panel solar
Conexión USB
Ranura de la tarjeta SD
*
Altavoz integrado
Lentes fotográficas
LED invisibles
Luz de prueba
Compartimento de las pilas
Lente de la detección
Soporte de montaje
Orificios para la cinta de
fijación
Trípode
Orificios para el candado
del cable
1
2
3
4
5
6
7
8
9
10
11
12
13
14
15
16
17
18
1.
SAQUE LA CÁMARA DEL SOPORTE DE MONTAJE
A. Presione la pestaña para soltar la cámara
del soporte de montaje.
B. Retire la cámara.
2.
SELECCIONE SU FUENTE DE CORRIENTE
Para obtener los mejores resultados y una vida más larga de la
batería, le recomendamos el uso de una salida externa de 12
voltios.
Para empezar
Le recomendamos emplear nuevas pilas para
obtener los mejores resultados de su cámara. Además, no se
recomienda el uso de baterías AA recargables.
3.
INTRODUZCA UNA TARJETA DE MEMORIA
Inserte una tarjeta de memoria SD/SDHC
(de hasta 32 GB) en el lector de tarjetas de
la cámara con los contactos dorados hacia
arriba. Cuando oiga clic esto significará que
la tarjeta ha sido correctamente colocada.
Antes de insertar o retirar la tarjeta
de memoria, apague la cámara para
prevenir que las imágenes ya tomadas sean
dañadas o borradas.
4.
PARA UTILIZAR EL MANDO A DISTANCIA
A. Encienda la cámara.
B. Ponga la opción MANDO A DISTANCIA en "On"
(Menú principal Ajustes General).
C. Vuelva al menú principal de la cámara.
D. Pulse a la vez los botones ON y FN del mando a
distancia. Las luces roja y verde parpadearán
durante unos momentos antes de encenderse y,
después, se apagarán. Si las luces parpadean
constantemente, significa que no se ha producido la
sincronización y que debe intentarlo de nuevo.
Caméra
Guide de
démarrage rapide
Télécommande
Kamera
Schnellstar-
tanleitung
Fernbedienung
Telecamera
Guida di
avvio rapido
Telecomando
Cámara
Guía de
inicio rápido
Mando a
distancia
10
11
*
No SIM card slot for HAWK model
*
Pas de carte SIM pour le modèle HAWK
*
Das HAWK Modell verwendet keine SIM-Karte
*
Per il modello HAWK non è possibile l'impiego di una scheda SIM.
*
No es posible utilizar una tarjeta SIM con el modelo HAWK.
Adventure
series · série
expedition
series · série
summit pro
series · série
smart
series · série
TINY
series · série
LIVE
series · série
Adventure
series · série
expedition
series · série
summit pro
series · série
smart
series · série
TINY
series · série
LIVE
series · série
Adventure
series · série
expedition
series · série
summit pro
series · série
smart
series · série
TINY
series · série
LIVE
series · série
Adventure
series · série
expedition
series · série
summit pro
series · série
smart
series · série
TINY
series · série
LIVE
series · série
1
2
3
5
4
6
8
7
1
2
3
5
4
6
8
7
1
2
3
5
4
6
8
7
1
2
3
5
4
6
8
7
1
2
3
5
4
6
8
7
9
10
11
12
13 14
9
10
11
12
13 14
9
10
11
12
13 14
9
10
11
12
13 14
9
10
11
12
13 14
15
17
16
18
15
17
16
18
15
17
16
18
15
17
16
18
15
17
16
18
A.
B.
A.
B.
A.
B.
A.
B.
A.
B.
Boutons
ON/OFF
Permet d'activer ou de désactiver à distance la
détection de la caméra.
Bouton
CAMÉRA
Permet de prendre des photos ou des vidéos dans
une zone de 150 mètres.
ON/OFF
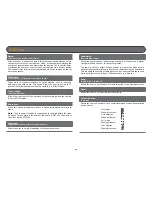
Buttons
Allows the user to enable or disable remotely the
detection of the camera.
CAMERA
Button
Allows the user to take photos or videos (up to
500ft).
ON/OFF-
Tasten
Tasten : Ermöglicht es, die Erfassung der Kamera
ferngesteuert Aus- und Einzuschalten.
KAMERA-
Taste
Löst eine Aufnahme aus (bis zu 150m).
Tasti
ON/OFF
Permette all'utente di attivare o disattivare in
remoto il rilevamento della videocamera.
Tasto
VIDEO-
CAMERA
Permette all'utente di scattare foto o riprendere
video (fino a 500 piedi).
Botones
ON/OFF
Permiten al usuario habilitar o deshabilitar en
remoto la detección de la cámara.
Botón
CÁMARA
Permite al usuario tomar fotografías o vídeos
(hasta 152 metros).
1.
RETIRER LA CAMÉRA DU SOCLE
A. Pousser sur la languette afin de dégager
la caméra du socle.
B. Retirer la caméra.
2.
CHOISIR UNE SOURCE D'ALIMENTATION
Afin d'obtenir de meilleurs résultats et une plus grande
autonomie, nous vous recommandons l'utilisation d'une
source d'alimentation externe de 12 volts.
Bloc pile lithium
LIT-09/LIT-C-8
6 piles AA
alcalines
ou
2
1
Ouverture du
compartiment
des piles
Lithium battery pack
LIT-09/LIT-C-8
6 alkaline AA
batteries
or
2
1
Opening the
battery compatment
Lithium-Akku-Pack
LIT-09/LIT-C-8
6 Alkaline
AABatterien
oder
2
1
Den Batteriedeckel
öffnen
Pacco pile Lithio
LIT-09/LIT-C-8
6 pile AA
alcaline
or
2
1
Aprire il vano
batterie
Una batería de litio
LIT-09/LIT-C-8
6 pilas
alcalinas AA
o
2
1
Apertura de la cubierta
de la batería


