8
9
English
English
MEMORY CARD
Using a memory card (sold separately, refer to the section
OPTIONS) is required to operate the camera. When the
PHOTO, VIDEO or VIEW mode is selected, the screen
displays "Insert memory card" if no memory card is present.
The camera is compatible with SD/SDHC memory card, up
to 32 GB capacity. Before inserting or removing a memory
card, the camera must be turned off. Failing to do so may
cause loss of pictures or damage the pictures already recorded
on the memory card. When the SD card is full, the viewing
screen indicates "Disk Full". The following data shows an
approximate quantity of photos or video length that can be
taken by the camera depending on the memory card capacity.
RESOLUTION
2.0Go
4.0Go
8.0Go
32Go
5 MP
8 MP
12 MP
1700
1200
790
3400
2400
1580
6800
4800
3160
27300
19000
12640
VIDEO
RESOLUTION
2.0Go
4.0Go
8.0Go
32Go
1280 x 720 (720p)
20 min
40 min
1h20
5h20
"BUSY" LED
The BUSY light, located next to the screen, lights up when the
camera is recording.
WIRELESS
REMOS
TM
TECHNOLOGY
This REMOS
TM
compatible camera benefits from wireless
capabilities and can be combined with:
• RC-1
―
Remote control (remotely controls the camera )
• MS-1
―
Motion sensor (triggers the camera remotely)
• IRB-W-B
―
Infrared Booster (increases the lighting power)
Refer to the section SETTINGS for details
Note:
The optional steel security box (SB-91)
affects the
wireless functionalites of products compatible with REMOS
TM
technology.
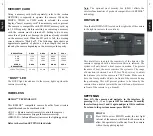
DISTANCE
Turn the dial DISTANCE located on the right side of the camera
to the right to increase the sensitivity.
This dial allows to adjust the sensitivity of the detector. The
camera is equipped with a detector sensitive to infrared. The
system will only detect a heat source in motion. The greater
the mass of heat, the more sensitive the system is. The range
of detection is between 5 and 50 feet. The best way to adjust
the distance is to set the camera in TEST mode. Make sure to
have the least possible objects in front of the camera during
the positioning. This will prevent pictures to be taken by the
camera when oriented towards the sun while an object moves
in front of the camera (e.g. a branch).
SETTINGS
Turn ON the camera and navigate in the interface by
pressing
,
,
or
, press OK for selection. To modify
the selection, press
and
again and press OK to confirm.
To return to the previous menu, press BACK.
PHOTO
Press OK to select PHOTO mode; the test light
in front of the camera will flash for 60 seconds to
allow the operator to walk away from the camera
without being photographed
.
Photo


