


Page 10
English Manual
1019622-C
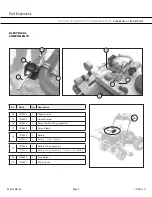
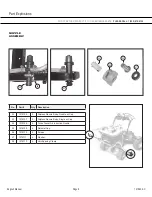
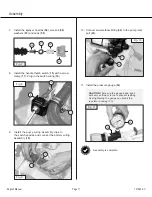
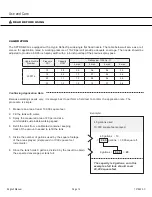
6. Hook up the boom hose wingnut (
48
) to the boom
line valve (
26
).
Fig. 6
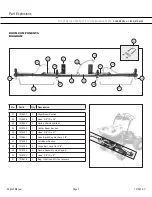
Assembly
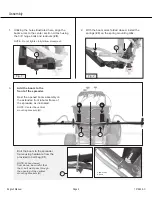
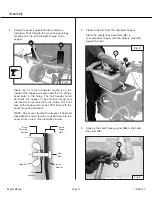
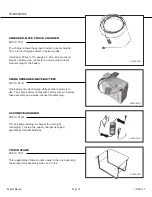
4. Using the boom support brackets (
A
) as a
template: Drill through the mounting openings,
creating two 1/4 inch diameter holes in the
hopper.
5. Clean all debris from the spreader hopper.
Place the empty tank assembly (
32
) in
your spreader hopper with the battery mounted
toward the rear.
Place the 1-1/2 inch diameter washers on the
inside of the hopper wall and insert the 1/4-20 hex
head bolts in the holes. The bolt heads should
be inside the hopper. They should be snug and
will need to be screwed into the holes. The front
face of the hopper will not be 100% flush with the
boom mounting brackets.
NOTE:
Do not over-tighten the wingnut.
The small
lockwashers and wingnuts are used to secure the
boom while in use.
See illustration below
32
Fig. 5
Fig. 4
Hex
Bolt
Inside
Washer
Lock
Washer
Inside
Hopper
Wall
Boom
Mounting
Bracket
Wing Nut
26
48
A
A


