14
ProSpray 3.20
GB
Repairs at the unit
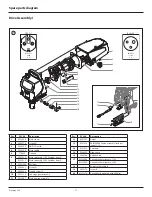
11.4 Replacing the Motor
i
The following procedure must only be performed by
a Wagner Authorized Service Center.
1. Open the relief valve, valve position PRIME (
k
circulation).
Switch the unit OFF. Unplug the power plug from the outlet.
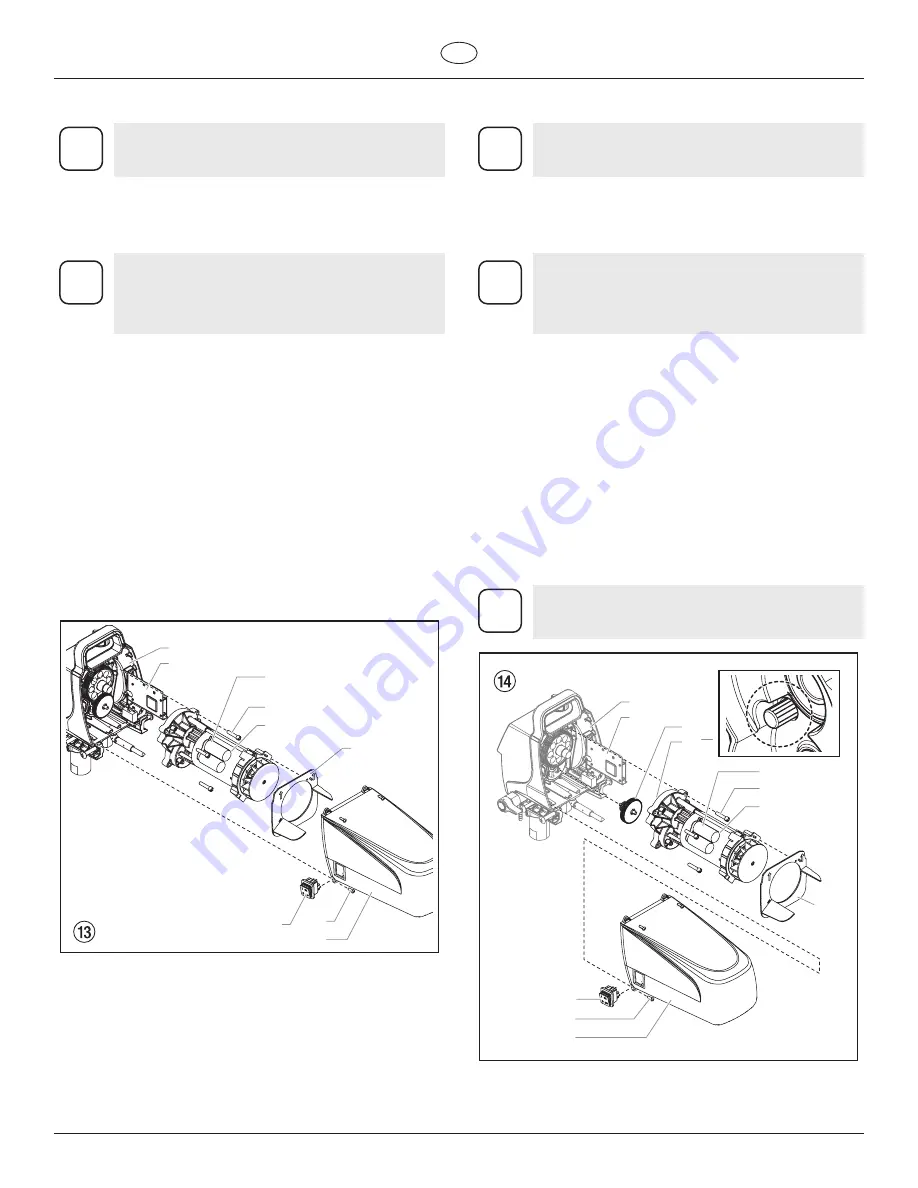
2. Loosen and remove the four motor cover screws (1). Remove
the motor cover (2).
i
The ON / OFF switch (3) is housed inside the
motor cover. In order to remove the motor cover
completely, you must disconnect all of the wires at
the rear of the switch. Note the position of the wires
before disconnecting.
3. On the back of the motor (4), disconnect the two wires (black
and red) coming from the circuit board (5). Remove the
ground wire from the motor housing.
4. Slide the motor baffle (7) off the rear of the motor.
5. Loosen and remove the four motor mounting screws (8).
6. Pull the motor (4) out of the pump housing (9).
7. With the motor removed, inspect the gears in the pump
housing (9) for damage or excessive wear. Replace the gears,
if necessary.
8. Install the new motor (4) into the pump housing (9).
9. Secure the motor with the four motor mounting screws (8).
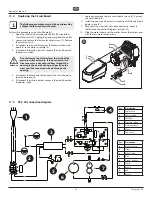
10. Reconnect the wires (Refer to the Connection Diagram,
section 11.9).
11. Slide the motor baffle (7) onto the rear of the motor. The
arrows on the baffle should be pointed up.
12. Slide the motor cover (2) over the motor. Secure the motor
cover with the four motor cover screws (1).
1
3
2
8
5
9
6
4
7
11.5 Replacing the Gears
i
The following procedure must only be performed by
a Wagner Authorized Service Center.
1. Open the relief valve, valve position PRIME (
k
circulation).
Switch the unit OFF. Unplug the power plug from the outlet.
2. Loosen and remove the four motor cover screws (1). Remove
the motor cover (2).
i
The ON / OFF switch (3) is housed inside the
motor cover. In order to remove the motor cover
completely, you must disconnect all of the wires at
the rear of the switch. Note the position of the wires
before disconnecting.
3. On the back of the motor (4), disconnect the two wires (black
and red) coming from the circuit board (5). Remove the
ground wire from the motor housing.
4. Slide the motor baffle (7) off the rear of the motor.
5. Loosen and remove the four motor mounting screws (8).
6. Pull the motor (4) out of the pump housing (9).
7. Inspect the armature gear (10) on the end of the motor for
damage or excessive wear. If this gear is completely worn out,
replace the entire motor.
8. Remove and inspect the 2nd stage gear (11) for damage or
excessive wear. Replace if necessary.
9. If the armature gear (10) or 2nd stage gear (11) are damaged,
the pump housing (9) must be cleaned of any debris caused
by damaged gears.
10. Reassemble the pump by reversing the above steps.
i
Refill the gear box in the pump housing with five
ounces of Lubriplate (P/N 314-171).
1
3
2
8
6
7
4
5
9
11
10

