Sports Art Industrial Co., Ltd. TUV-CERT ISO 9001/9002/14000 Certified Quality Products 2013.08.12
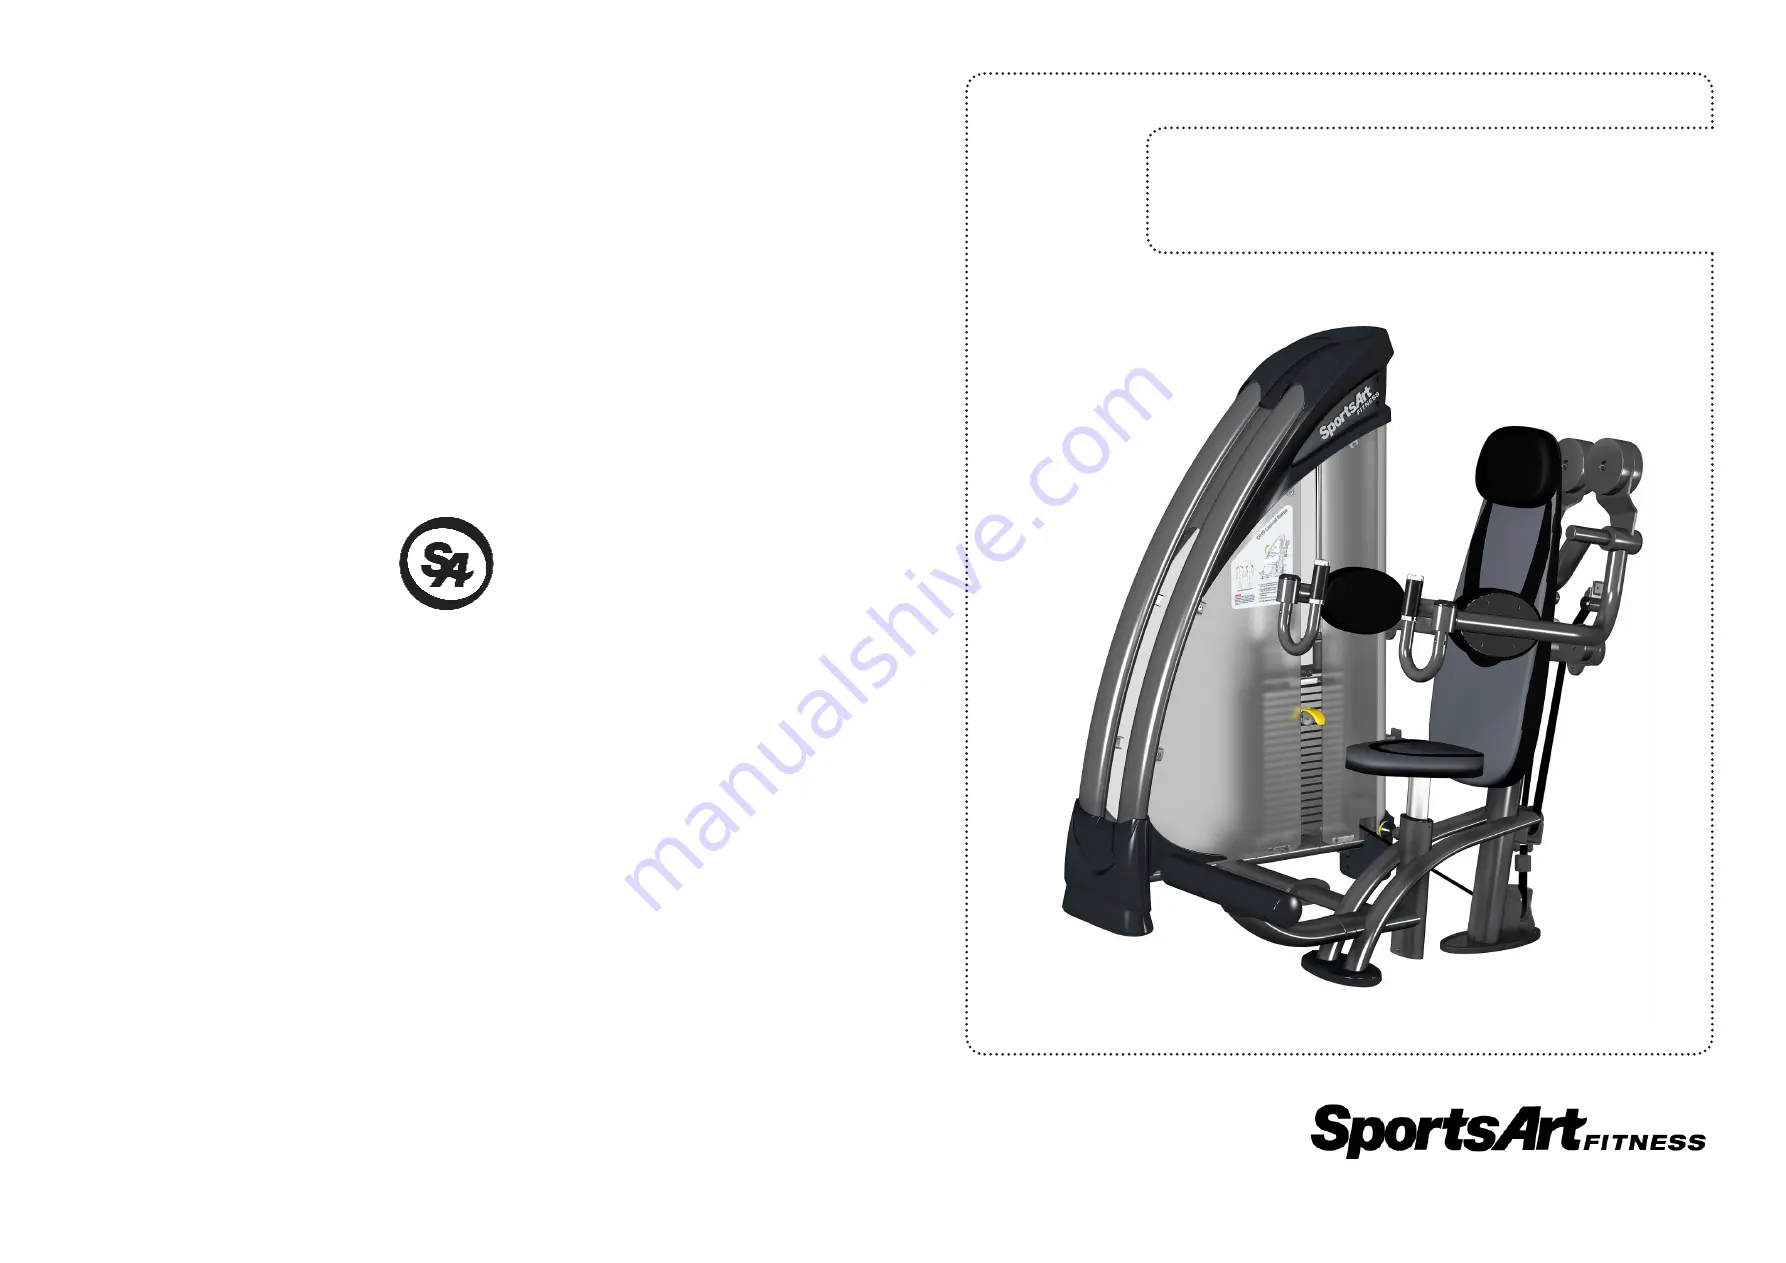
S919 Independent Lateral Raise
Owner’s Manual
Страница 1: ...Sports Art Industrial Co Ltd TUV CERT ISO 9001 9002 14000 Certified Quality Products 2013 08 12 S919 Independent Lateral Raise Owner s Manual ...
Страница 2: ...est 8 STEP 4 Install the Weight Stack Covers 9 STEP 5 Install the Storage Tray Holder 10 STEP 6 Seat Adjustment Instructions 11 STEP 7 Belt Tension Adjustment Instructions 12 STEP 8 Minor Weight Stack Instructions 13 5 MAINTENANCE 14 MAINTENANCE Machine Maintenance 14 MAINTENANCE Schedule 16 MAINTENANCE Task List 17 MAINTENANCE One Year Maintenance Log 18 6 CONSIGNES DE SÉCURITÉ IMPORTANTES 19 ...
Страница 3: ...ality materials and designedforyearsofreliableperformance thisproductwasmadeforfullcommercial use Before this product is assembled or operated we recommend that you familiarize yourself with this manual Understanding the correct assembly and operation of this product will help ensure that exercisers obtain their fitness goals safely and successfully ...
Страница 4: ...way If it is not working properly or has been dropped or damaged contact a service technician for repairs Do not use accessories that are not specifically recommended by the manufacturer Such parts might cause injuries or cause the unit to fail This product is not intended for use by persons including children with reduced physical sensory or mental capabilities or by people who are otherwise defi...
Страница 5: ... Name Qty No Name Qty A1 Weight Stack Frame 1 A7 Dual 80 Oval Foot Cover A 1 A2 Seat Frame 1 A8 Dual 80 Oval Foot Cover B 1 A3 Connecting Tube 1 A9 Storage Tray 1 A4 Foot Rest 1 A5 Weight Stack Front Cover 1 A6 Weight Stack Rear Cover 1 ...
Страница 6: ...lon hex nut M6 P1 0 6 22 Mushroom head hex screws M8 P1 25 L25 Spring washer M8 Flat washer D17 d8 3 t2 23 Plastic round head hex socket screws M6 P1 0 L20 Components in the Hardware Kit No Name Qty Specification Notes 10 Push revits 2 L shaped Allen wrench 1 M5 L shaped Allen wrench 1 M6 Double open end wrench 1 8 10 Double open end wrench 1 8 17 Double open end wrench 1 12 15 Double open end wre...
Страница 7: ...vity the word screws or nuts is used where washers and other hardware may be involved STEP 1 Install the Main Frame When assembling the main frames please have at least three people to assemble due to safety reasons a Please remove screws 20 from the weight stack frame A1 and the seat frame A2 b With one person holding the weight stack frame attach the connector tube A3 onto the weight stack frame...
Страница 8: ...7 STEP 2 Install the Belt a First remove the screws 21 and the pulley from its housing Attach the belt onto the pulley then secure the assembly with screws 21 ...
Страница 9: ...8 STEP 3 Install the Foot Rest a First remove the screws 22 from the foot rest A4 b Attach the foot rest A4 onto the seat frame A2 then secure the assembly with screws 22 ...
Страница 10: ...ure the inside hanger is hooked to the frame before securing it to the weight stack frame b Attach the oval foot covers A7 A8 onto the seat frame A2 legs Align the ends before use push revits 10 to secure the foot covers together Note While installing the oval foot covers if the holes don t match up please change the direction of the covers The cutout should face the inner side of foot tube ...
Страница 11: ...s a through b to install the storage tray a Locate the position where the storage tray A9 attaches to the weight stack frame A1 then remove the screws 23 from the weight stack frame b Attach the storage tray A9 to the main frame A1 and use screws 23 to secure the assembly ...
Страница 12: ...g the seat height pull the seat lever to adjusted to the desired height and then release the seat lever If the machine has not been used for a long time or the seat is adjusting slowly Please put presuure on the seat several times before normal operation ...
Страница 13: ...ong adjust downward if the belt length is too short adjust upward Adjust the belt to the proper position then tighten nut A to secure the belt length Note After adjusting the belt the gap between nut Aand B must be within 35mm 1 4 If the gap still exceeds the 35mm limit after the first step you need to A Loosen the screws on C and adjust the belt to the proper length B Tighten the scrwes on C 3 Af...
Страница 14: ...nor Weight Stack Instructions To adjust the minor weight stack insert the upper pin to add 3 5Lbs 1 5kgs or the lower pin to add 6 5Lbs 3kgs When the minor weights are not in use pull the pin to release the weight ...
Страница 15: ...nance 1 Please clean and lubricate the guide rod once a week a Use a clean lint free towel to apply the lubricant onto the guide rods b Test the weight stack on the guide rod and make sure the operation is smooth c Repeat operations a and b 2 to 3 times 2 Check the tightness of the cable or belt and follow the steps to make adjustments ...
Страница 16: ...he belt 2 Belt safety check after a year in use check belt weekly Depend on the use conditions increase the frequency of inspections As shown A a belt B the belt extension During inspection if found cracks in the belt or the belt is exposed to other unusual circumstances please immediately stop using the machine and replace the belt ...
Страница 17: ...Clean 2 Screws Inspect for looseness and secure if necessary 3 Testing To confirm that the machine is working properly 4 Cushions Wipe with a damp cloth 5 Belt Check for damage or wear If so need for replacement 6 Guide Rod Clean and lubricate 7 Seat Tube Clean and lubricate ...
Страница 18: ...ll screws Secure if necessary 3 Make sure the machine is working properly 4 Wipe cushions clean with a damp cloth Weekly tasks 1 Check the belt for damage or tear 2 Clean and lubricate guide rods 3 Clean and lubricate seat tube Caution Please follow standard safety precautions when working on this product Do NOT use cleaners with alcohol ammonia or other damaging chemi cals The use of such chemica...
Страница 19: ...rter 2 Quarter 3 Quarter 4 Completed Yearly Tasks Year 1 Completed Notes __________________________________________________________ ________________________________________________________________ ________________________________________________________________ ________________________________________________________________ MAINTENANCE One Year Maintenance Log Facility _______________________ Sup...
Страница 20: ...ce product uniquement pour l usage prévu dans ce manuel La limite de poids de l utilisateur pour le produit est de 227 kg 500 lb Ce produit n est pas destiné à être utilisé par des personnes y compris des enfants dont les capacités physiques sensorielles ou mentales sont réduites ou qui ne disposent pas de l expérience ou du savoir nécessaires sauf si celles ci ont au préalable été formées eu égar...
Страница 21: ...20 ...