EN: FCC STATEMENT: This device complies with Part 15 of the FCC rules. Operation is subject to the following two conditions: (1) This device may not cause harmful interference, and (2) This device must accept
any interference received, including interference that may cause undesired operation.
This equipment has been tested and found to comply with the limits for Class B digital devices pursuant to Part 15 of the FCC rules. These limits are designed to provide reasonable protection against harmful
interference to radio communications. This equipment generates, uses and can radiate radio frequency energy and, if not installed and used in accordance with the instruction, may cause harmful interference to
radio communication. However, there is no guarantee that interference will not occur in a particular installation. If this toy does cause interference to radio or television reception (you can check this by turning the
toy off and on while listening for the interference), one or more of the following measures may be useful:
• Reorient or relocate the receiving antenna
• Increase the separation between the toy and the radio or the TV
• Consult the dealer or an experienced TV-radio technician for help.
NOTE: Changes, adjustments or modifications to this unit, including but not limited to, replacement of any transmitter component (crystal, semiconductor, etc) could result in a violation of FCC rules under part 15
and/or 95 and must be expressly approved by Spin Master Ltd or they could void the user’s authority to operate the equipment. Spin Master Inc., PMB #10053, 300 International Drive, Suite 100, Williamsville, NY
14221. To contact the responsible party please visit fcc.spinmaster.com
FR : DÉCLARATION FCC : Le présent appareil est conforme à l’article 15 de la réglementation de la FCC. L'exploitation est autorisée aux deux conditions suivantes : (1) l'appareil ne doit pas produire de brouillage,
et (2) l'appareil doit accepter tout brouillage radioélectrique subi, même si le brouillage est susceptible d'en compromettre le fonctionnement.
Cet équipement a été testé et jugé conforme aux limites de la classe B pour les équipements numériques en vertu de l’article 15 de la réglementation de la FCC. Ces limites ont été instaurées pour assurer une
protection raisonnable contre toute interférence nuisible avec les communications radio. Cet équipement génère, utilise et peut émettre de l’énergie de fréquence radio. S’il n’est pas installé et utilisé selon le mode
d’emploi, il peut causer des interférences nuisibles aux communications radio. Cependant, il n'existe aucune garantie contre ces interférences dans le cas où l'installation ne serait pas conforme. Si ce jouet cause
des interférences à la réception radio ou télévisée (ce qui est vérifiable en l’éteignant, puis en le rallumant tout en écoutant s’il y a des interférences), suivre une ou plusieurs des recommandations suivantes :
• Réorienter ou déplacer l’antenne réceptrice
• Augmenter la distance entre le jouet et la radio ou la télévision
• Consulter le revendeur ou demander l’aide d’un technicien radio/T.V. expérimenté.
REMARQUE : tout changement, réglage ou modification de cet appareil, incluant mais ne se limitant pas au remplacement de tout composant du transmetteur (cristal, semi-conducteur, etc.), pourrait constituer
une violation de l’article 15 et/ou 95 de la règlementation de la FCC, et doit être expressément approuvé par Spin Master Ltd., sous peine d’entraîner l’annulation du droit de l’utilisateur d’exploiter l’équipement.
Spin Master Inc., PMB #10053, 300 International Drive, Suite 100, Williamsville, NY 14221. Pour contacter la partie responsable, rendez-vous sur fcc.spinmaster.com
ES: DECLARACIÓN DE LA FCC: Este dispositivo cumple con la sección 15 de la normativa de la FCC. El funcionamiento está sujeto a estas dos siguientes condiciones: (1) el dispositivo no debe causar
interferencias dañinas, y (2) el dispositivo debe admitir la recepción de cualquier tipo de interferencia, incluidas aquellas que puedan causar un funcionamiento indeseado.
Este equipo ha sido probado y cumple los límites para dispositivos de clase B digital establecidos en la sección 15 de la normativa de la FCC. Estos límites han sido diseñados para proporcionar una protección
razonable contra la interferencia dañina en las comunicaciones por radio. Este equipo genera, utiliza y emite energía en forma de radiofrecuencias, por lo que si no se instala y utiliza como indican las
instrucciones, podría provocar interferencias dañinas en comunicaciones de radio. No obstante, no se puede garantizar que no habrá interferencias en una instalación determinada. Si este juguete provoca
interferencias en la recepción de radio o televisión (puede comprobarlo apagando y encendiendo el juguete mientras escucha si se producen interferencias), puede tomar alguna de las siguiente medidas:
• Reorientar o cambiar de lugar la antena receptora
• Aumentar la separación entre el juguete y la radio o el televisor
• Consultar con el vendedor o un técnico de televisión y radio si necesita asistencia adicional.
NOTA: Los cambios, los ajustes o las modificaciones realizadas en este dispositivo, como, entre otros, la sustitución de cualquier componente transmisor (cristal, semiconductor, etc.) podría suponer la infracción
de las secciones 15 o 95 de la normativa de la FCC, y debe ser explícitamente aprobada por Spin Master Ltd.; en caso contrario, el usuario podría verse privado del derecho de operar el equipo. Spin Master Inc.,
PMB #10053, 300 International Drive, Suite 100, Williamsville, NY 14221. Para ponerse en contacto con la parte responsable, visite fcc.spinmaster.com
CAN ICES-3(B) / NMB-3(B)
4
AAA
AAA
AAA
AAA
5
e
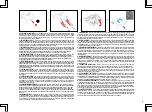
HOW TO INSTALL BATTERIES: 1.
Open the battery door with a screwdriver.
2.
If used batteries are present,
remove these batteries from the unit by pulling up on one end of each battery. DO NOT remove or install
batteries using sharp or metal tools.
3.
Install new batteries as shown in the polarity diagram (+/-) inside
the battery compartment.
4.
Replace battery door securely.
5.
Check your local laws and regulations for
correct recycling and/or battery disposal.
f
INSTALLATION DES PILES :
1.
À l’aide d’un tournevis, ouvrir le couvercle du compartiment des piles.
2.
Si
des piles usagées sont présentes, les extraire en tirant sur l'une des extrémités. NE PAS utiliser d’objet
coupant ou métallique pour extraire ou installer les piles.
3.
Installer des piles neuves comme indiqué sur le
schéma de polarité (+/-) du compartiment des piles.
4.
Bien refermer le compartiment des piles.
5.
Consulter
la législation locale concernant le recyclage et/ou l’élimination des piles.
E
INSTALACIÓN DE LAS PILAS: 1.
Abra el compartimento de las pilas con la ayuda de un destornillador.
2.
Si
las pilas están gastadas, tire hacia arriba de uno de sus extremos para extraerlas. NO utilice herramientas
metálicas o puntiagudas para instalar o extraer las pilas.
3.
Coloque las pilas nuevas en el compartimento
correspondiente, tal y como se indica en el diagrama de polaridad (+ / -).
4.
Cierre bien la tapa del compartimento
de las pilas.
5.
Consulte la normativa local relativa al reciclaje y a la eliminación de las pilas.
d
EINLEGEN DER BATTERIEN:
1.
Batteriefachabdeckung mit einem Schraubenzieher öffnen.
2.
Wenn sich
gebrauchte Batterien darin befinden, diese einzeln herausziehen. Batterien NICHT mit scharfen oder metallenen
Gegenständen entfernen oder einlegen.
3.
Neue Batterien unter Beachtung des Polaritätsdiagramms (+/-)
in das Batteriefach einlegen.
4.
Batteriefachabdeckung wieder anbringen.
5.
Örtliche Gesetze und Bestimmungen
für das Recycling bzw. die Entsorgung von Altbatterien beachten.
n
DE BATTERIJEN PLAATSEN:
1.
Open het batterijdeksel met een schroevendraaier.
2.
Verwijder eventueel
gebruikte aanwezige batterijen uit de unit door één kant van elke batterij omhoog te trekken. Verwijder of
plaats batterijen NIET met behulp van scherpe of metalen voorwerpen.
3.
Plaats de nieuwe batterijen zoals
weergegeven op het polariteitsdiagram (+/-) aan de binnenkant van het batterijvak.
4.
Sluit het vak af met
het batterijdeksel.
5.
Lees de plaatselijke voorschriften en regelgeving om de batterijen op de juiste wijze te
recyclen of af te voeren.
i
COME INSTALLARE LE PILE: 1.
Aprire lo scomparto pile con un cacciavite.
2.
Se sono presenti pile usate,
rimuoverle dall'unità sollevandole da un'estremità. NON usare oggetti metallici o appuntiti per rimuovere o
installare le pile.
3.
Inserire le pile nuove con le polarità (+/-) direzionate come indicato.
4.
Richiudere
correttamente lo scomparto pile.
5.
Eliminare e/o riciclare le pile secondo quanto previsto dalle normative
locali vigenti.
p
COMO COLOCAR AS PILHAS: 1.
Abra a tampa do compartimento das pilhas com uma chave de fenda.
2.
Se
houver pilhas usadas, retire-as da unidade individualmente, puxando pela extremidade de cada uma. NÃO
retire ou coloque pilhas com qualquer acessório pontiagudo ou metálico.
3.
Instale pilhas novas seguindo
o diagrama de polaridade (+/-) dentro do compartimento das pilhas.
4.
Coloque de novo a porta do
compartimento com cuidado.
5.
Consulte as leis, as normas e os regulamentos locais de reciclagem e/ou
descarte de pilhas e baterias.
r
УСТАНОВКА ЭЛЕМЕНТОВ ПИТАНИЯ: 1.
Откройте крышку отсека элементов питания с помощью отвертки.
2.
Извлеките старые или истощенные элементы питания из отсека (при их наличии), подняв каждый
элемент питания за край. ЗАПРЕЩАЕТСЯ извлекать или устанавливать элементы питания с помощью
острых или металлических предметов.
3.
Установите новые элементы питания внутри отсека, соблюдая
полярность (+/-).
4.
Надежно закройте крышку отсека.
5.
Ознакомьтесь с законами и нормативами
вашей страны, установленными в отношении правил переработки и/или утилизации элементов
питания.
P
WKŁADANIE BATERII: 1.
Otwórz drzwiczki komory baterii za pomoc
ą
ś
rubokr
ę
tu.
2.
Je
ś
li w komorze znajduj
ą
si
ę
zu
ż
yte baterie, wyjmij je, podwa
ż
aj
ą
c ka
ż
d
ą
za jeden z ko
ń
ców. Do wyjmowania i wkładania baterii NIE
wolno stosowa
ć
ostrych narz
ę
dzi.
3.
Umie
ść
nowe baterie w komorze zgodnie z oznaczeniami biegunowo
ś
ci
(+/-).
4.
Starannie zamknij drzwiczki komory baterii.
5.
Zapoznaj si
ę
z lokalnymi przepisami i zaleceniami
prawnymi dotycz
ą
cymi prawidłowego recyklingu i/lub utylizacji baterii.
c
VLOŽENÍ BATERIÍ: 1.
Pomocí šroubováku otevřete dvířka baterií.
2.
Jestliže se zde nacházejí použité baterie,
vyndejte je z jednotky postupným vytahováním za jejich konec. NEVYNDÁVEJTE ANI NEVKLÁDEJTE baterie
pomocí ostrých nebo kovových nástrojů.
3.
Nové baterie vkládejte podle schématu polarity (+/-) uvnitř oddílu
pro baterie.
4.
Pevně nasaďte dvířka baterií zpět na místo.
5.
Seznamte se s místními zákony a předpisy
ohledně správné recyklace či likvidace baterií.
s
INŠTALÁCIA BATÉRIÍ: 1.
Dvierka batérií otvorte skrutkovačom.
2.
Ak sú prítomné použité batérie, odstráňte
ich z jednotky tak, že každú batériu vytiahnete za jeden koniec. NEODSTRAŇUJTE ani nevkladajte batérie
pomocou ostrého alebo kovového predmetu.
3.
Vložte nové batérie do priestoru pre batérie, ako je zobrazené
na diagrame polarity (+/–).
4.
Pevne znova nasaďte dvierka batérií.
5.
Pozrite si miestne predpisy a nariadenia
o správnej recyklácii alebo likvidácii batérií.
h
AZ ELEMEK BEHELYEZÉSÉNEK MÓDJA: 1.
Nyissa ki az elemtartó fedelét egy csavarhúzóval.
2.
Ha használt elemek
vannak benne, távolítsa el ezeket az elemeket a készülékből úgy, hogy az elemeket egyik végüknél felfelé emeli.
Az elemek eltávolításához vagy behelyezéséhez NE használjon éles vagy fémeszközöket.
3.
Helyezze az új
elemeket az elemtartóba a polaritási ábrának (+/-) megfelelően.
4.
Helyezze vissza biztonságosan az elemtartó
fedelét.
5.
Ellenőrizze az elemek újrahasznosítására és/vagy ártalmatlanítására vonatkozó helyi törvényeket és
rendelkezéseket.
R
INSTALAREA BATERIILOR: 1.
Deschideţi uşa compartimentului bateriilor cu ajutorul unei şurubelniţe.
2.
Dacă
sunt prezente baterii uzate, scoateţi-le pe acestea din unitate trăgând în sus de capătul fiecărei baterii. NU
demontaţi sau instalaţi bateriile cu ajutorul unor instrumente ascuţite sau metalice.
3.
Instalaţi bateriile noi
după cum indică marcajele de polaritate (+/-) din interiorul compartimentului bateriei.
4.
Închideţi bine uşa
compartimentului bateriei.
5.
Consultaţi legile şi reglementările locale pentru reciclarea şi/sau eliminarea
corectă a bateriei.
g
ΤΟΠΟΘΕΤΗΣΗ ΜΠΑΤΑΡΙΩΝ:
1.
Ανοίξτε το πορτάκι των μπαταριών με ένα κατσαβίδι.
2.
Εάν υπάρχουν
χρησιμοποιημένες μπαταρίες, αφαιρέστε τις από τη μονάδα, τραβώντας προς τα επάνω το άκρο της κάθε μπαταρίας.
ΜΗΝ αφαιρείτε ή τοποθετείτε μπαταρίες χρησιμοποιώντας αιχμηρά ή μεταλλικά εργαλεία.
3.
Τοποθετήστε τις νέες
μπαταρίες σύμφωνα με το διάγραμμα πολικότητας (+/-) μέσα στη θήκη των μπαταριών.
4.
Τοποθετήστε καλά το
πορτάκι των μπαταριών.
5.
Ελέγξτε τους τοπικούς νόμους και κανονισμούς για πληροφορίες σχετικά με τη σωστή
ανακύκλωση και/ή απόρριψη των μπαταριών.
C
KAKO UMETNUTI BATERIJE:
1.
Odvijačem otvorite vratašca odjeljka za baterije.
2.
Ako se u odjeljku
nalaze iskorištene baterije, izvadite ih tako da podignete jedan od krajeva baterije. Za vađenje ili umetanje
baterija NEMOJTE upotrebljavati oštre ili metalne alate.
3.
Nove baterije umetnite u skladu s oznakom polova
(+/-) koja se nalazi u odjeljku za baterije.
4.
Pričvrstite vratašca odjeljka za baterije.
5.
Informacije o pravilnom
recikliranju i/ili odlaganju baterija potražite u lokalnim zakonima i propisima.
B
КАК СЕ ПОСТАВЯТ БАТЕРИИТЕ:
1.
Отворете капака на батериите с помощта на отвертка.
2.
Ако
са налични използвани батерии, извадете ги от устройството, като издърпате нагоре единия край на
всяка батерия. НЕ изваждайте и не поставяйте батерии с помощта на остри или метални инструменти.
3.
Поставете нови батерии, както е показано на диаграмата за полярност (+/–) в гнездото за батериите.
4.
Поставете сигурно капака на батериите обратно на мястото му.
5.
Прегледайте местните закони и
разпоредби за правилното рециклиране и/или изхвърляне на батериите.
l
NAMESTITEV BATERIJ:
1.
Z izvijačem odprite pokrovček predalčka za baterije.
2.
Morebitne rabljene
baterije odstranite iz enote, tako da posamezne baterije pridvignete ob strani. Baterij NE odstranjujte ali
nameščajte z ostrim ali kovinskim orodjem.
3.
Pri nameščanju novih baterij upoštevajte pravilno polarnost
(+/-), prikazano v predalčku za baterije.
4.
Znova trdno namestite pokrovček predalčka za baterije.
5.
Za
pravilno recikliranje in/ali odlaganje baterij upoštevajte lokalne zakone in predpise.
Содержание Meccano 19205
Страница 2: ...2...
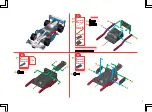
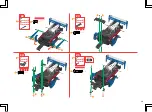
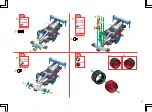
Страница 18: ...42 x 2 x 2 41 x 2 x 2 40 41 B3 B3 B3 43 x 2 x 2 x 2 40 42 5 0 10 15 20 25 30 mm 23 mm B3 18...
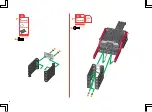
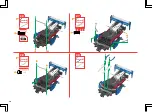
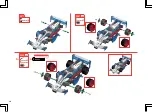
Страница 30: ...42 x 2 x 1 43 x 3 x 1 44 x 2 x 4 x 4 x 2 30...
Страница 31: ...5 0 10 15 20 25 30 mm 23 mm B3 45 x 2 x 2 x 2 x 2 46 x 2 x 2 x 2 A238 B3 B3 B3 43 44 44 45 31...

