


O
O
2
2
i
i
B
B
3
3
M
M
U
U
s
s
e
e
r
r
’
’
s
s
G
G
u
u
i
i
d
d
e
e
4.2. Quick Installation Guide
4.2.1. Connect PC and O2iB3M to network.
1. Prepare a PC to run programs for the installation and video connection
(PC is needed to assign IP address to
2. In the case of using PoE, connect the PC and
If your LAN Switch does not support standard PoE, connect
The DC power is applied through DC adapter.
Figure 4
4.2.2. Install Speco-NVR and set IP parameters on
Speco-NVR is a multi-channel VMS program for the IP camera. Install Speco
connect to these products. It is needed to assign connection information to Speco
connection. Insert the CD provided with product into the PC and install Speco
to network.
Prepare a PC to run programs for the installation and video connection
(PC is needed to assign IP address to O2iB3M)
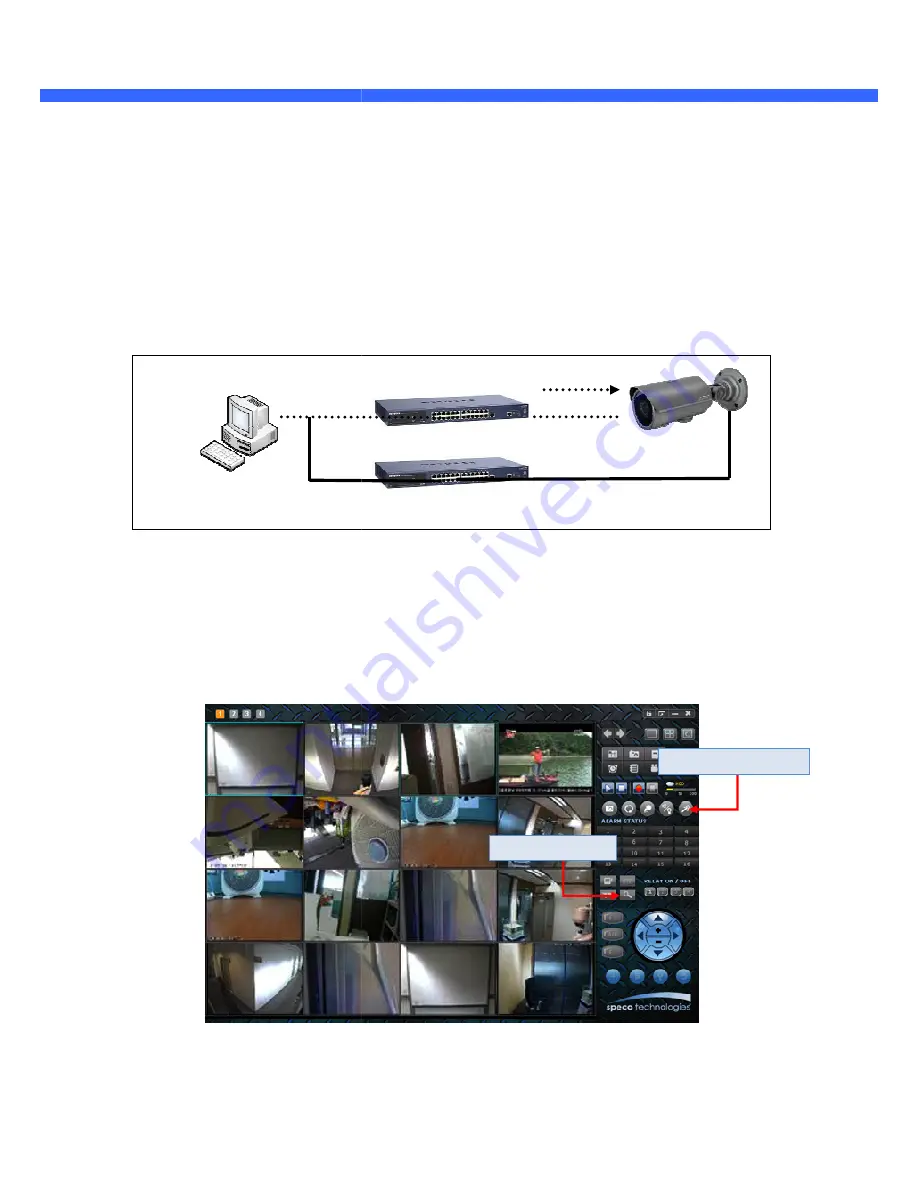
In the case of using PoE, connect the PC and O2iB3M to the network using one of the following ways.
If your LAN Switch does not support standard PoE, connect O2iB3M as shown in dotted line in Figure
The DC power is applied through DC adapter.
Figure 4-1. Power and network connection
and set IP parameters on O2iB3M
channel VMS program for the IP camera. Install Speco-NVR on remote
connect to these products. It is needed to assign connection information to Speco-NVR program before
connection. Insert the CD provided with product into the PC and install Speco-NVR.
Figure 4-2. Speco-NVR
LAN switch with
standard POE
(802.3af)
LAN switch
DC adaptor
Admin Page Button
ONSIP Installer
to the network using one of the following ways.
own in dotted line in Figure.
NVR on remote PC to
NVR program before
Admin Page Button


