


O
O
i
i
M
M
D
D
1
1
U
U
s
s
e
e
r
r
’
’
s
s
G
G
u
u
i
i
d
d
e
e
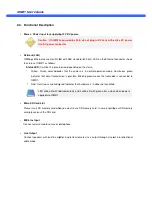
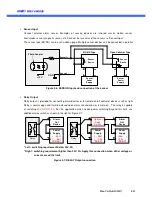
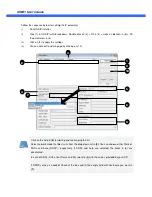
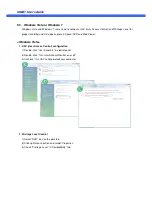
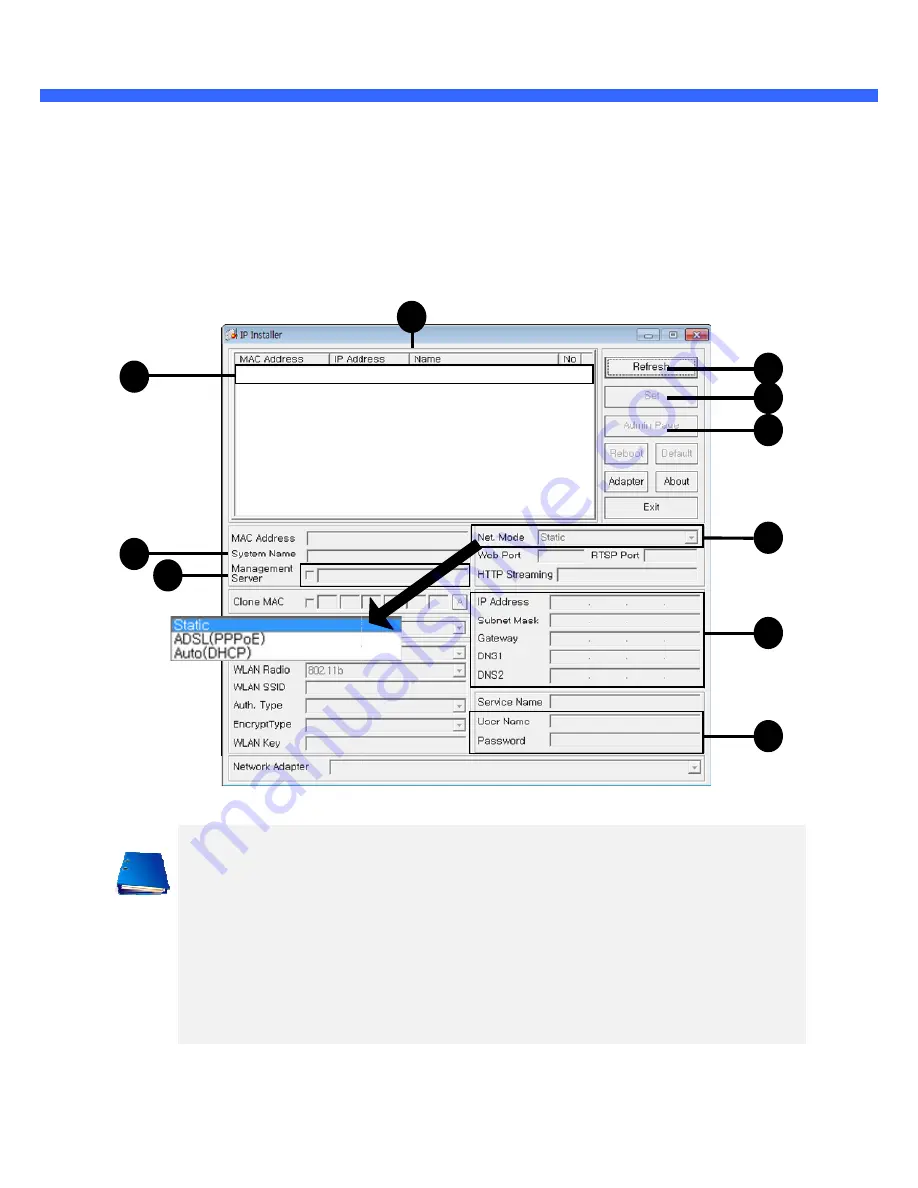
Follow the sequence below for setting the IP parameter
i)
Run ONSIP installer
ii)
Click (1) in ONSIP installer window.> Double click on (2) > Fill in (4) > make a selection in (5) > Fill
the parameters in (6)
iii)
Click on (9) to apply the settings.
iv)
You can connect to admin page by clicking on (10).
Click on the field in
(3)
for sorting and rearranging the list.
Select network mode that best suits from the drop down list in
ADSL and Auto (DHCP), respectively. If ADSL and Auto
deactivated.
In case of ADSL, fill the User Name and Password in (8) with the values provided by your ISP.
If DDNS service is needed, Check at the box and fill the empty field with hostname you want in
(7)
.
2
4
7
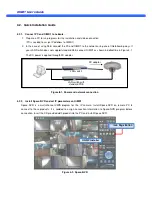
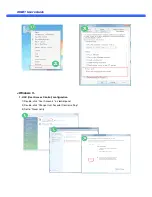
Follow the sequence below for setting the IP parameter
(1) in ONSIP installer window.> Double click on (2) > Fill in (4) > make a selection in (5) > Fill
(9) to apply the settings.
You can connect to admin page by clicking on (10).
for sorting and rearranging the list.
Select network mode that best suits from the drop down list in
(5)
. You can choose either Static or
ADSL and Auto (DHCP), respectively. If ADSL and Auto are selected, the fields in (6)
In case of ADSL, fill the User Name and Password in (8) with the values provided by your ISP.
If DDNS service is needed, Check at the box and fill the empty field with hostname you want in
3
(1) in ONSIP installer window.> Double click on (2) > Fill in (4) > make a selection in (5) > Fill
. You can choose either Static or
are selected, the fields in (6)
are
In case of ADSL, fill the User Name and Password in (8) with the values provided by your ISP.
If DDNS service is needed, Check at the box and fill the empty field with hostname you want in
1
6
9
5
8
10


