background image


2.


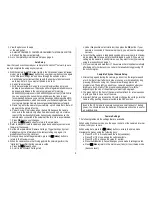
View the photos on the app   

or the web portal: 

a.


Select MY CAMERAS > CAMERA MANAGEMENT or MANAGE PHOTOS

b.


Refresh the browser periodically. 

3.


Go to Complete Physical Camera Setup on page 5. 

Auto Setup 

Now that you have connected your camera to the Verizon network, you are 

ready to complete the setup on your camera. 

1.


With the camera in SETUP mode (switch in the ON position, screen in Preview 

mode), press the 

 (Menu) button then use the arrow buttons to navigate 

to the Wireless Settings tab and move through the submenu items. 

a.


Send Mode: select Instant, then specify the number of photos to send 

each day. Enter 0 if you want all photos to be sent. 

b.


Send Via: select Auto

c.


With Auto selected for Send Via, move to Recipient then enter one 

destination email address. This may be either a regular email address or a 

device email address in the carrier’s picture email format (e.g., 

[email protected] or [email protected]). Note: While 

you can use your phone number email address, that is no longer 

recommended because some carriers have begun blocking some MMS 

messages and senders, which can result in your not receiving pictures from 

your camera. Spartan Camera does not guarantee the delivery of emails. 

d.


Name Tag: enter the name for your camera, up to 8 characters, that will 

appear on the picture info strip. 

e.


Power SavingOn provides longer battery life because the camera 

connects to the network only when it needs to send a photo or status 

report, Off provides slightly faster transmission speeds because the 

camera stays connected to the network all the time. On is recommended. 

f.


Press OK to save your changes. 

g.


Press the 

 (Menu) button to return to the main menu. 

2.


Refer to Manual Firmware Update on page 8 and update your camera’s 

firmware if necessary. 

3.


Set the other parameters (Camera SettingsTrigger SettingsSystem 

Settings) using the information in the tables starting on page 6. It is 

probably best to set the clock last. 

4.


Once you have set all the parameters, press the 

 (Menu) button to 

return to the Preview screen. 

5.


When the camera shows that it is logged into the network, perform the 

“Hello test” to confirm that the camera is online. 

a.


Press the 

 (Menu) button. 

b.


Scroll to the Wireless Settings tab. 

c.


Under Diagnostics, select Hello test then press the OK button. If your 

camera is connected to the network properly, you will see the message 

Success

6.


To test that the camera is taking and sending pictures properly, in Preview 

mode, press OK to take a picture then OK again to send it. If you are not 

setting up the camera to send pictures, you may want to test your camera 

using the instructions on page 7. 

7.


Arm your camera and walk test it. The camera will arm itself automatically 

after being on for 3 minutes or you can arm it manually by long pressing 


then choosing Yes

Complete Physical Camera Setup 

1.


After setting up and testing the camera, position it on the target area and 

arm it. It will arm itself after 3 minutes or you can arm it manually by long 

pressing 

 then choosing Yes. The camera will take pictures as 

programmed. The height you mount your camera depends on what your 

targets are, but 2-4 feet off the ground is generally best for wildlife, 

depending on the size of the animals you want to photograph. 

2.


The green light on the front of the camera should flash for a few seconds 

to give you time to move out of the area.   

3.


Important: Before you retrieve the SD card or change the settings, turn the 

camera off by pushing the power switch to the OFF position.   

Even in the OFF mode, the camera consumes a small amount of battery 

power. You should remove the batteries if the camera will not be in use for 

an extended time. 


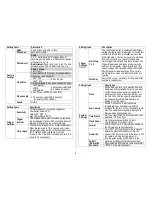
Camera Settings 

The following tables list the settings that are available. 
When using Premium service, use the app or portal, not the camera’s internal 

menus, to set your camera. 
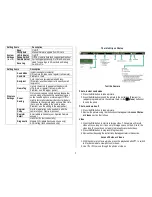
When using Auto, press the 

 (Menu) button to access the Setup menu. 

Navigate the menus using the following keys: 


Press 

 or 

 to move between the tabs (submenus).   


Press 

 or 

 move among the submenu items.   


Press 

 or 

 to change the value for an item.   


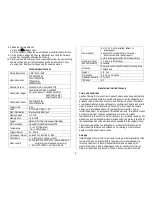
Press the OK button to save all changes you’ve made to settings in a tab. 


Press 

 (Menu) return to the main menu (tabs) or to exit Setup mode 

(back one level). 

Содержание GoCam GV-W4Gb

Страница 1: ...Spartan GoCam Cellular Camera User Manual Model GV W4Gb Ghost Important Please read this manual carefully before using your camera ...

Страница 2: ...this manual other technical articles and more information about your camera and using Premium service at www spartancamera com If you experience any difficulties operating this product please do not return it to the store Call Tech Support at 770 582 0004 9 AM 6 PM EST Monday Friday or email us at support spartancamera com ...

Страница 3: ... or Videos 7 View a Photo 8 Watch a Video 8 Delete Photo or Video 8 Firmware Update 8 Check the Firmware Version 8 Premium 8 Auto 8 Over The Air OTA Firmware Update 8 Manual Firmware Update 8 Technical Specifications 9 Manufacturer Limited Warranty 9 Terms and Conditions 9 Shipping 9 Proof of Purchase or Proof of Warranty Coverage 10 Exclusions and Limitations 10 Unclaimed Items 10 Camera Repair 1...

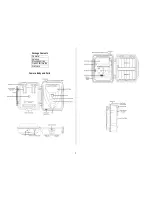
Страница 4: ...1 Package Contents Camera Antenna Mounting strap Quick Start Guide SIM card Camera Body and Ports ...

Страница 5: ...n Camera includes premium service at no additional charge Before you begin locate your camera s IMEI number which is printed on a sticker inside the camera Spartan Camera Data service from Spartan Camera includes Premium service app portal 1 Log in to your account at https my spartancamera com If you don t have an account you must register and then you ll be able to log in 2 SHOP DATA SERVICE ente...

Страница 6: ... log in to your account or follow the prompts to create one if you don t already have one Your camera will be displayed on the portal CAMERA MANAGEMENT screen iii On the camera press the OK button to verify that registration is complete then press the Menu button to return to the Preview screen 5 Format the SD card It is very important that you format the SD card in the camera before using it and ...

Страница 7: ... set all the settings you want to use 2 It is recommended that you set several scheduled events either status reports or photos There are nine available events for you to set plus the default daily status report that you can set the time for You will probably want to use most or all available events at least for status reports throughout the day so that you don t have to wait too long to get reque...

Страница 8: ...eturn to the Preview screen 5 When the camera shows that it is logged into the network perform the Hello test to confirm that the camera is online a Press the Menu button b Scroll to the Wireless Settings tab c Under Diagnostics select Hello test then press the OK button If your camera is connected to the network properly you will see the message Success 6 To test that the camera is taking and sen...

Страница 9: ...OK to access the Start Stop menu You can set one or two start stop intervals For each you can set start and stop times trigger interval and time lapse interval The trigger intervals and time lapse intervals are the same as for the regular Trigger Interval and Time Lapse settings The start stop setting will override all other general camera settings If you set two start stop times make sure that th...

Страница 10: ...p portal Register Code Get the registration code needed to add the camera to your Premium account Register Email Email address linked to your Spartan Camera account Diagnostic Hello Test to test connectivity Module FW Update tech support use only APN Setting tech support use only The Info Strip on Photos Test the Camera Photo instant send mode 1 Press the OK button to take a picture 2 Press the OK...

Страница 11: ...ection that follows Over The Air OTA Firmware Update If you are using Premium the easiest way to perform a firmware update is Over TheAir OTA App FWupdatewillbeontheStatusReportpagewhenitbecomesavailableintheapp Portal 1 Log into your account MY CAMERAS FIRMWARE UPDATE 2 Click the Update button The FW should update after the next time the camera contacts the server to send a photo video or status ...

Страница 12: ...mAh lithium battery Stand by Current 0 20 mA 5 mAh day Sound Recording Available Mounting Rear and bottom tripod threads mounting strap Python lock Weight 1 lb 4 oz Dimensions 5 3 x 6 1 x 3 4 inches Operation Humidity 5 90 IP Rating 65 Manufacturer Limited Warranty Terms and Conditions Spartan Camera SC warrants our Spartan Camera products against defects in material or workmanship for a period of...

Страница 13: ...mstances cover the refund or reimbursement of the cost of any wireless data charges incurred while warranty services are being rendered Wireless data plan management is solely the purview of the account holder and should be managed accordingly if warranty service is necessary Warranty coverage is specifically limited to the original purchaser of the product and does not extend to any subsequent pa...

Страница 14: ...s security measures to help protect the information under our control no data transmission over the Internet or any wireless network can be guaranteed to be 100 secure SC tries to protect your personal information and ensure the security of your communications on our systems by maintaining physical organizational and technological safeguards appropriate to the sensitivity of such information desig...

Страница 15: ... Cost and Pricing Visiting There is no cost to visit the Site or to register as a Member Free Credit Each newly registered Spartan GoCam camera will add one free credit to your account providing full use of the portal services for one month for one camera This is not applicable to all models Premium Service These are in the form of monthly credits that you purchase online A monthly credit will pro...

Страница 16: ...s you ve used the Site after the change regardless of any separate notice you agree to the current posted version of the Terms Our Site is hosted in the US There may be more or fewer protections for you in your country than here Software available in connection with the Site and services offered through the Site the Software is further subject to United States export controls No Software may be do...

Страница 17: ...violation of that and or arising from any Content that you post on or through the Site and Spartan Camera Services Some Obligations Continue Even After You ve Gone Even if you close your account or we terminate your Membership you will still be responsible for indemnifying us for breaches that took place while you used the Site and Spartan Camera Services Obligations you owed to us and Users of th...

Страница 18: ... Customer Service Contact E mail support spartancamera com Website www spartancamera com Phone 1 770 582 0004 11420 Johns Creek Pkwy Bldg B Johns Creek GA 30097 U S A ...

Отзывы: