


BIOS Setup Utility
SY-K7ADA XP
40
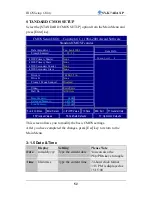
2-3.7 Power On
You have now completed the hardware installation of your Motherboard
successfully.
1. Turn the power on
2. To enter the BIOS Setup Utility, press the <DEL> key while the system
is performing the diagnostic checks,
Note:
If you have failed to enter the BIOS, wait until the boot up
sequence is completed. Then push the RESET button and press
<DEL> key again at the beginning of boot-up, during diagnostic
checks.
Repeat this operation until you get the following screen.
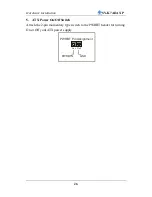
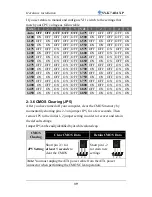
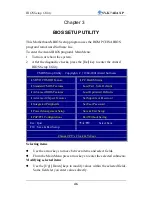
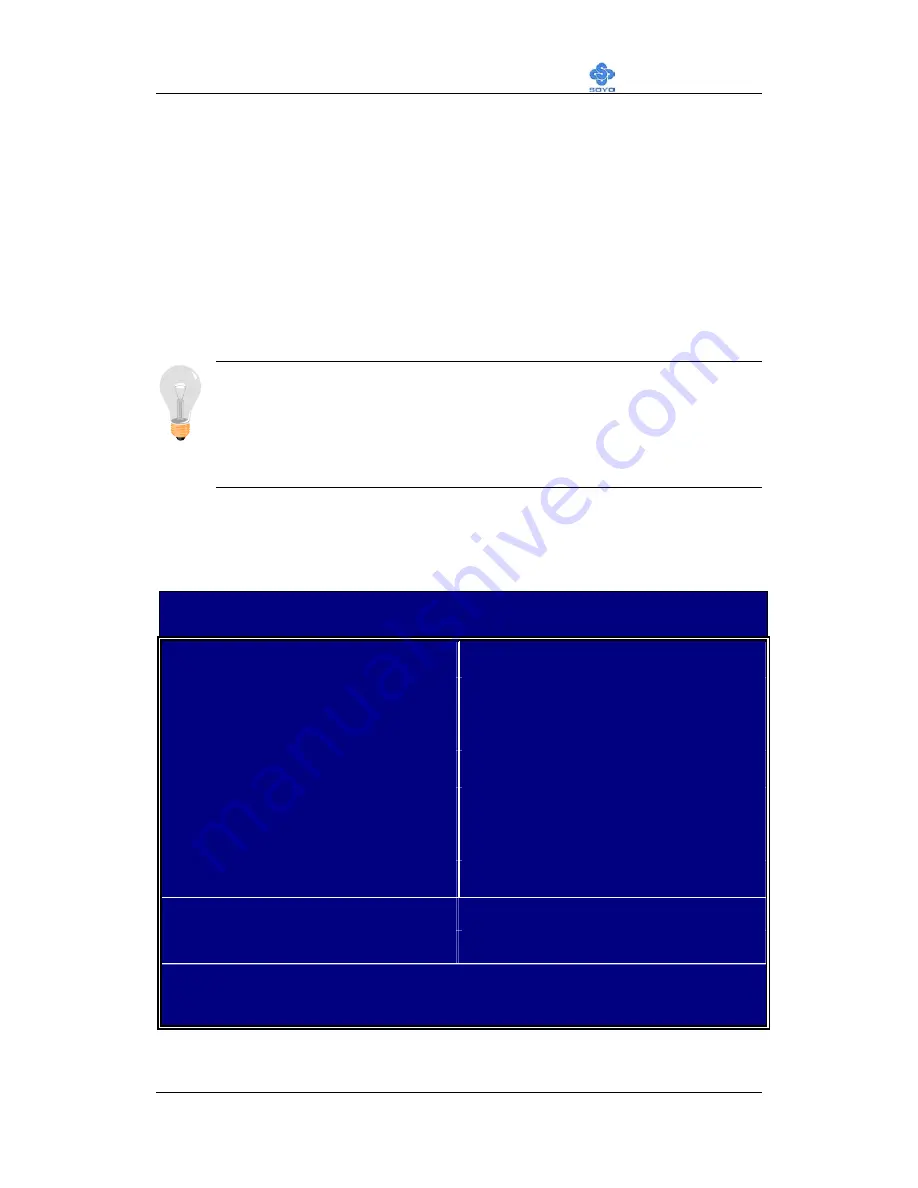
3. The BIOS Setup screen appears:
CMOS Setup Utility – Copyright ( C ) 1984-2001 Award Software
Soyo Combo Feature
PC Health Status
Standard CMOS Features
Load Fail - Safe Defaults
Advanced BIOS Features
Load Optimized Defaults
Advanced Chipset Features
Set Supervisor Password
Integrated Peripherals
Set User Password
Power Management Setup
Save & Exit Setup
PnP/PCI Configurations
Exit Without Saving
Esc : Quit
: Select Item
F10 : Save & Exit Setup
Change CPU’s Clock & Voltage
Содержание SY-K7ADA
Страница 75: ...BIOS Setup Utility SY K7ADA XP 71 saving ...
Страница 91: ...Drivers installation SY K7ADA XP 87 Remove USB device ex USB keyboard mouse etc Refresh ...
Страница 93: ...89 ...


