background image

4

ASSEMBLY

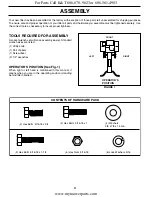
OPERATOR’S POSITION (See Fig. 1)

When right or left hand is mentioned in this manual, it 
means when you are in the operating position (standing 
behind tiller handles).

Your new tiller has been assembled at the factory with exception of those parts left unassembled for shipping purposes.  
To ensure safe and proper operation of your tiller all parts and hardware you assemble must be tightened securely.  Use 
the correct tools as necessary to insure proper tightness.

TOOLS REQUIRED FOR ASSEMBLY

A socket wrench set will make assembly easier.  Standard 
wrench sizes are listed.

(1) Utility knife

(1) Pair of pliers

(1) Screwdriver 

(2) 1/2" wrenches 


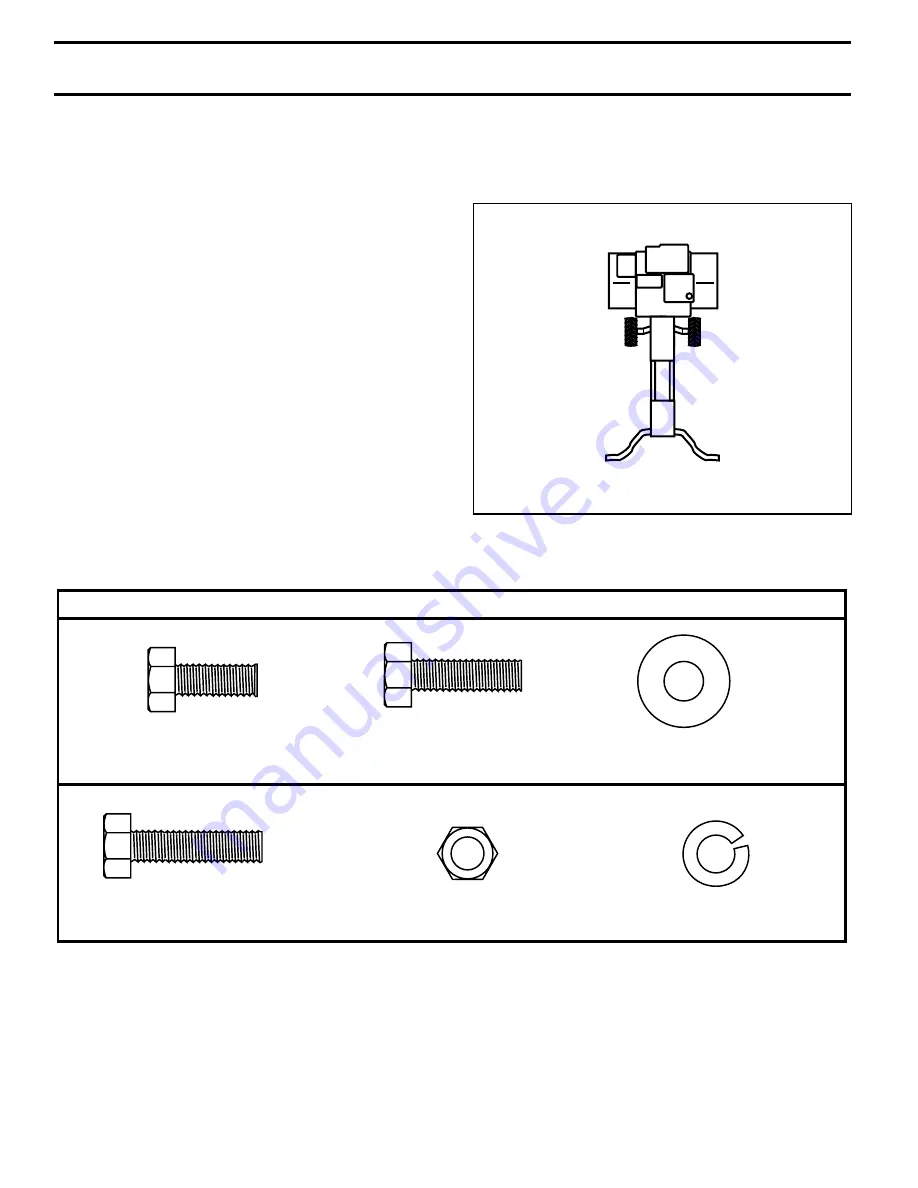
OPERATOR'S 
POSITION

RIGHT

FRONT

LEFT

FIGURE 1

(6) Lock Washers  5/16

(6) Hex Nuts  5/16-18

(2) Hex Bolts  5/16-18 x 1-1/4

(2) Hex Bolts  5/16-18 x 1

(2) Hex Bolts  5/16-18 x 3/4 

(4) Washers  
3/8 x 7/8 x 14 Ga.

CONTENTS OF HARDWARE PACK

For Parts Call K&T 606-678-9623 or 606-561-4983

www.mymowerparts.com

Содержание SO620A

Страница 1: ...rts OWNER S MANUAL 185167 Rev 1 01 14 03 TR PRINTED IN U S A MODEL NO SO620A 3 5 HP 17 Inch Tiller For Parts and Service contact our authorized distributor call 1 800 849 1297 For Technical Assistance...

Страница 2: ...controls quickly Never allow children to operate the equipment Never allow adults to operate the equipment without proper instruction Keep the area of operation clear of all persons par ticularly smal...

Страница 3: ...E MAINTAINED IN EFFECTIVE WORKING ORDER BY THE OPERATOR IN THE STATE OF CALIFORNIA A SPARK ARRESTER IS REQUIRED BY LAW SECTION 4442 OF THE CALIFORNIA PUBLIC RESOURCES CODE OTHER STATES MAY HAVE SIMILA...

Страница 4: ...are you assemble must be tightened securely Use the correct tools as necessary to insure proper tightness TOOLS REQUIRED FOR ASSEMBLY A socket wrench set will make assembly easier Standard wrench size...

Страница 5: ...GEMENT in the Service and Adjustments section of this manual TINE OPERATION Check tine operation before first use See TINE OP ERATION CHECK in the Service and Adjustments section of this manual UNPACK...

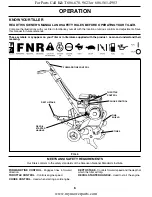
Страница 6: ...appear on your Tiller or in literature supplied with the product Learn and understand their meaning FIG 4 MEETS ANSI SAFETY REQUIREMENTS Our tillers conform to the safety standards of the American Nat...

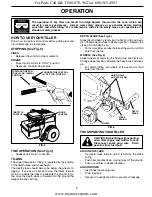
Страница 7: ...STOP position Never use choke to stop engine HOW TO USE YOUR TILLER Know how to operate all controls before adding fuel and oil or attempting to start engine TINE OPERATION See Fig 5 Squeeze tine cont...

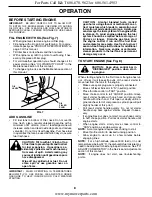
Страница 8: ...er plug Fill engine with oil to point of overflowing For approx imate capacity see PRODUCT SPECIFICATIONS on page 3 of this manual Tilt tiller back on its wheels and then re level With engine level re...

Страница 9: ...e with throttle in slow position mid way between FAST and IDLE To help tiller move forward lift up the handles slightly thus lifting depth stake out of ground To slow down the tiller press down on han...

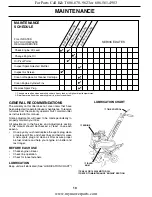
Страница 10: ...CH USE Check engine oil level Check tine operation Check for loose fasteners LUBRICATION Keep unit well lubricated See LUBRICATION CHART MAINTENANCE SCHEDULE FILL IN DATES AS YOU COMPLETE REGULAR SERV...

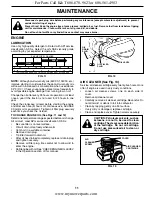
Страница 11: ...de according to your expected temperature NOTE Although multi viscosity oils 5W 30 10W 30 etc improve starting in cold weather these multi viscosity oils will result in increased oil consumption when...

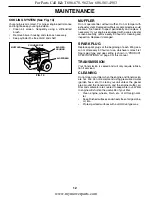
Страница 12: ...ur engine is air cooled For proper engine performance and long life keep your engine clean Clean air screen frequently using a stiff bristled brush Remove blower housing and clean as necessary Keep cy...

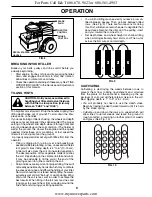
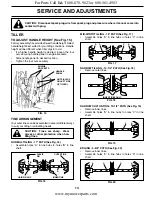
Страница 13: ...assembled in several different ways to suit your tilling or cultivating needs CAUTION Tines are sharp Wear gloves or other protection when han dling tines NORMAL TILLING 17 PATH See Fig 16 Assemble ho...

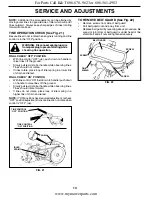
Страница 14: ...should rotate forward If tines do not rotate place loop of idler spring in a higher link of chain and retest NOTE If ON positioncheckrequiredadjustment recheck OFF positionadjustmenttoinsuretinesdonot...

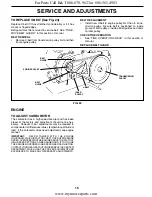
Страница 15: ...OPERATION See TINE OPERATION CHECK in this section of manual REPLACE BELT GUARD ENGINE TO ADJUST CARBURETOR The carburetor has a high speed fixed jet and has been preset at the factory and adjustment...

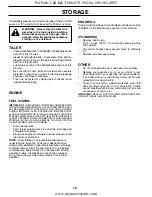
Страница 16: ...sary See belt re placement instructions in the Service and Adjustments section of this manual Lubricate as shown in the Maintenance section of this manual Be sure that all nuts bolts and screws are se...

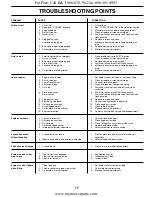
Страница 17: ...l tank and refill with fresh gasoline 7 Water in fuel 7 Drain fuel tank and carburetor and refill tank with fresh gasoline 8 Clogged fuel tank 8 Remove fuel tank and clean 9 Spark plug wire loose 9 Co...

Страница 18: ...18 x 3 4 10 10040500 Washer Lock 5 16 11 73220500 Nut Hex 5 16 18 12 98000129 Nut Flanged 5 16 18 KEY PART NO NO DESCRIPTION KEY PART NO NO DESCRIPTION NOTE All component dimensions are given in U S...

Страница 19: ...ESCRIPTION 1 23230506 Screw Set 5 16 18 x 3 8 2 130812 Sheave Engine 4 74610812 Bolt Hex 1 2 20 x 3 4 5 17490440 Bolt Thd Roller 1 4 20 X 2 1 2 6 174898 Shield Inner Guard Belt 7 170488 Screw Hex Wsh...

Страница 20: ...17J Support Depth Stake L H 15 5388J Spring Stake KEY PART NO NO DESCRIPTION 16 121117X Bolt Shoulder 17 9186R Wheel 18 19131311 Washer 13 32 x 13 16 x 11 Ga 19 9190R Bracket Wheel 20 73680600 Locknut...

Страница 21: ...1H Retainer Spring 3 165772 Tine Inner R H 4 165771 Tine Inner L H 5 165773 Tine Outer L H 6 9194R Pin Clevis KEY PART NO NO DESCRIPTION REPAIR PARTS TILLER MODEL NUMBER SO620A TINE ASSEMBLY For Parts...

Страница 22: ...T NO NO DESCRIPTION 1 74760524 Bolt Hex 5 16 18 x 1 1 2 Gr 2 2 74780652 Bolt Hex Fin 3 8 16 x 3 1 4 3 19131311 Washer 13 32 x 13 16 x 11 5 73800600 Locknut Hex w washer 3 8 16 6 9056R417 Shield Tine 7...

Страница 23: ...86309 Decal Tine Control 6 141907 Decal Hand Placement 8 141906 Decal Warning Rotating Tines 9 171803 Decal Briggs Stratton 10 171806 Decal 3 5 HP 11 162215 Decal Warning 12 165327 Decal Speed Control...

Страница 24: ...which has been subjected to alteration misuse abuse improper assembly or installation delivery damage or to normal wear of the product 5 Exclusions Excluded from this Warranty are belts tines tine ad...

Отзывы: