

33
MSH/MPH series
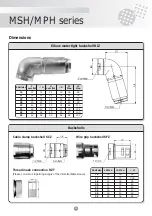
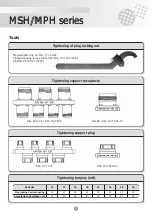
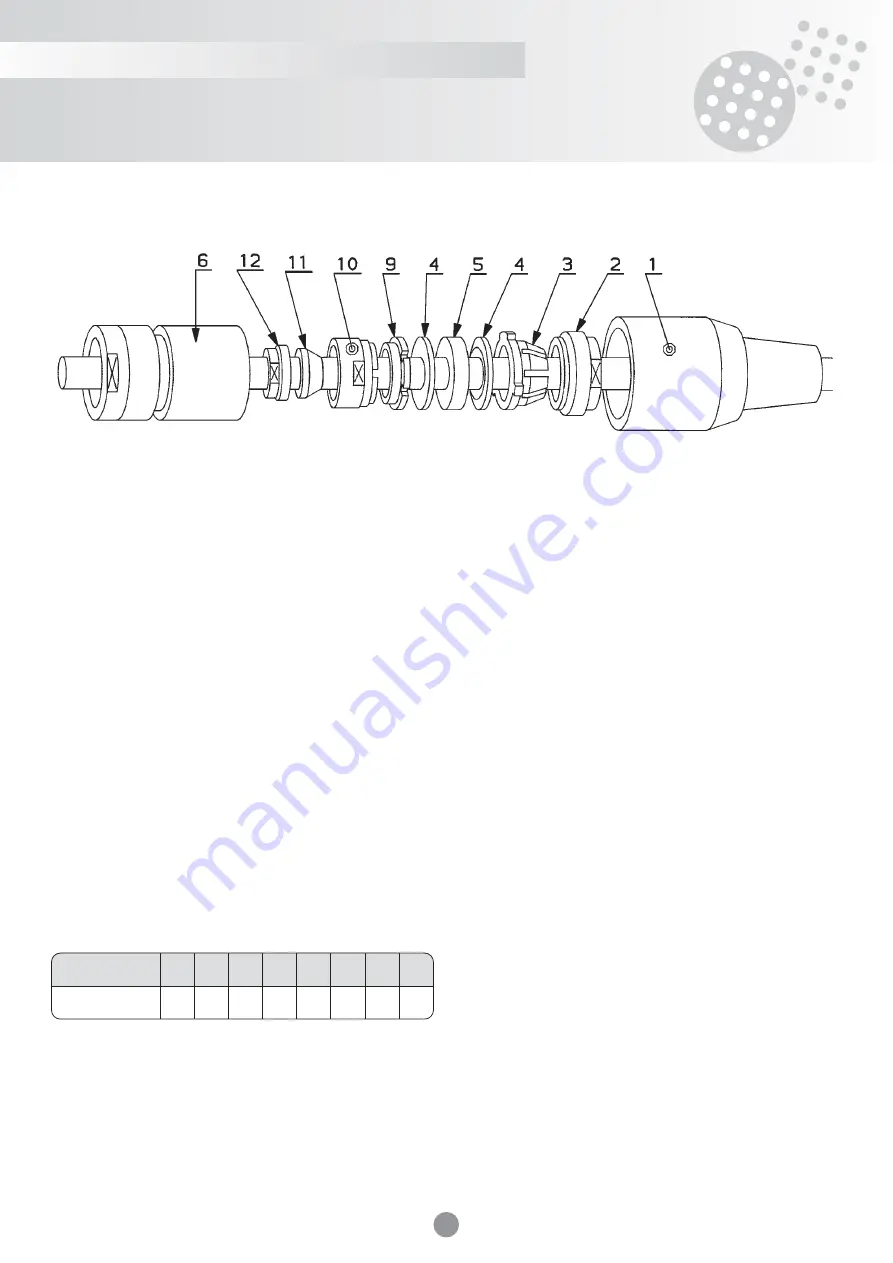
Assembly
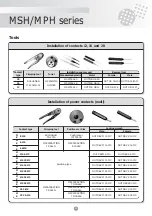
Thread the following onto the wire, in the order shown in fig.2:
• the cable boot (1)
• the locking screw (2)
• the crimping tool (3)
• the support washer (4)
• the sealing washer (5)
• the front support washer (4)
• the slotted nut (9)
• the grip bush (10)
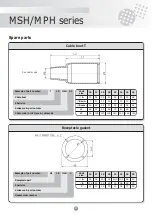
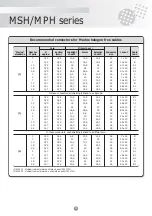
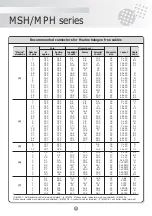
Strip the cable in accordance with the table above and fig.4.
Move the braid aside, and slide the cone (11) under the braid.
Bring the grip bush (10) up to the cone (11) and firmly tighten the screw
(12) into the grip bush (10).
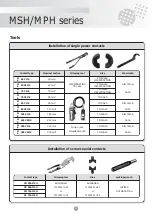
Crimp the contacts to the end of the conductor wires. Before each crim-
ping (or each soldering in the case of soldering contacts), check that the
conductor wire is clearly visible in the sight hole (Fig. 1).
Insert the cable into the connector, having taken care to bundle the
contacts using adhesive tape or another suitable system.
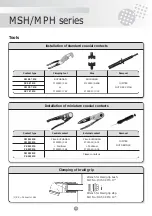
• Insert the contacts in accordance with the procedure described above.
• Move the connector forward, and tighten the nut, checking that the
toothing is functioning correctly (position elbow connectors according
to direction; nuttorque following table here after).
It is advisable to fit the plug to a dummy receptacle for all screw and nut
tightening operations.
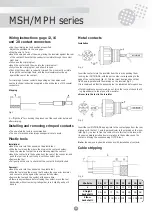
Connecting nut torque
Fig. 5
Shell size
16
17
18
20
22
24
26
28
Torque (mN)
10
13
16
20
22
25
28
30
Содержание MPH Series
Страница 1: ...Connectors for Navy Applications and Heavy Duty Industries MSH MPH SERIES...
Страница 2: ......