Mounting
Steps 3 and 4
7
24/96 AD-DA Converter 2053
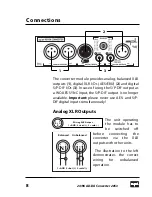
Step 3:
Connect the cable carefully, without turning,
to the socket of the converter. Guideways on socket
and plug exclude a wrong connection.
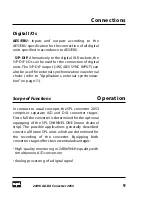
Step 4:
Put the converter, as illustrated, without
lateral turning in the unit (circuit board above,
connection sockets on the head) and connect it with
the screws of the cover. The converter is now opera-
tional.
Sockel
Содержание 2053
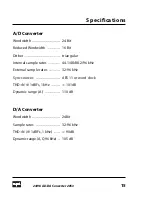
Страница 1: ...24 96 AD DA Converter Manual Model 2053 ...
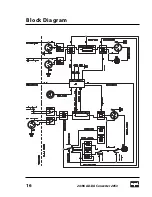
Страница 16: ...Block Diagram 16 24 96 AD DA Converter 2053 ...
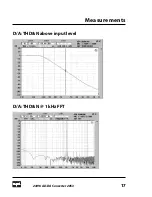
Страница 17: ...Measurements 17 24 96 AD DA Converter 2053 D A THD N above input level D A THD N 1 kHz FFT ...
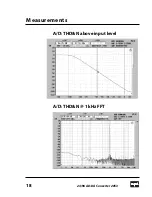
Страница 18: ...Measurements 18 24 96 AD DA Converter 2053 A D THD N above input level A D THD N 1 kHz FFT ...


