background image

4

Actual total number:

Sony XR-C400 (

E

) 3-810-309-11 (2)

EN

Getting Started

Resetting the unit

Before operating the unit for the first time or
after replacing the car battery, you must reset
the unit.
Press the reset button with a pointed object,
such as a ball-point pen.

Note

Pressing the reset button will erase all the memorized
stations.

Detaching the front panel

The front panel of this unit can be detached in
order to prevent the unit from being stolen.

1

Press 

(OFF)

.

2

Press 

(RELEASE)

 to open up the front

panel, and detach the panel by pulling it
towards you.

Notes

• Be sure not to drop the panel when detaching it from the

unit.

• If you press 

(RELEASE)

 to detach the panel while the

unit is still turned on, the power will be automatically
turned off in order to protect the speakers from being
damaged.

B

A

Reset button

Attaching the front panel

Attach part 

A

 of the front panel to part 

B

 of

the unit as illustrated and push until it clicks.

Notes

Make sure that the front panel is the right way up when
attaching it to the unit as it cannot be attached upside
down.

Do not press the front panel hard against the unit when
attaching it to the unit. It can easily be attached by
pressing it lightly against the unit.

When you carry the front panel with you, put it in the
supplied front panel case.

Do not press hard or give excessive pressure to the
display windows of the front panel.

Do not expose the front panel to direct sunlight, heat
sources such as hot air ducts or leave it in a humid place.
Never leave it on the dashboard etc. of a car parked in
direct sunlight where there may be a considerable rise in
temperature inside the car.

Caution alarm

If you turn the ignition key to the OFF position
without removing the front panel, the caution
alarm will beep for a few seconds (only when
the POWER SELECT switch is set to the 

A

position).

(RELEASE)

Содержание XR-C400 - Fm/am Cassette Car Stereo

Страница 1: ...0 309 11 2 For installation and connections see the supplied installation connections manual Owner s Record The model and serial numbers are located on the bottom of the unit Record the serial number in the space provided below Refer to these numbers whenever you call upon your Sony dealer regarding this product Model No XR C400 Serial No ...

Страница 2: ...lled and used in accordance with the instructions may cause harmful interference to radio communications However there is no guarantee that interference will not occur in a particular installation If this equipment does cause harmful interference to radio or television reception which can be determined by turning the equipment off and on the user is encouraged to try to correct the interference by...

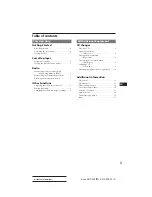
Страница 3: ... the memorized stations 7 Other Functions Adjusting the sound characteristics 8 Muting the sound 8 Changing the sound and display settings 8 With Optional Equipment CD changer Playing a CD 8 Scanning the tracks Intro scan 9 Playing tracks repeatedly Repeat play 9 Playing tracks in random order Shuffle play 9 Labelling a CD Disc memo 9 Selecting the specific tracks for playback 10 Additional Inform...

Страница 4: ...hing the front panel Attach part A of the front panel to part B of the unit as illustrated and push until it clicks Notes Make sure that the front panel is the right way up when attaching it to the unit as it cannot be attached upside down Do not press the front panel hard against the unit when attaching it to the unit It can easily be attached by pressing it lightly against the unit When you carr...

Страница 5: ...he hour digit blinks to go back to go forward 1000 The minute digit blinks to go back to go forward 1008 1000 1008 The clock activates Getting Started Cassette Player Cassette Player Listening to the tape Insert the cassette Playback will start automatically If the cassette is already inserted press TAPE to start playback The side facing up is being played The side facing down is being played Tip ...

Страница 6: ...hen you want to listen to a CrO2 TYPE II or metal TYPE IV tape MTL appears on the display To cancel this function press 4 Locating the beginning of the tracks Automatic Music Sensor AMS You can skip up to nine tracks at one time During playback press either side of SEEK AMS momentarily Note The AMS function may not work when the blanks between tracks are shorter than 4 seconds there are noises the...

Страница 7: ...elect the band Cassette Player Radio 2 Press SEEK AMS to search for the station which you wish to store on the preset number button 3 Press the desired preset number button 1 to 6 for two seconds until a beep sounds The number of the pressed preset number button appears on the display Receiving the memorized stations 1 Press TUNER repeatedly and select the band 2 Press the preset number button 1 t...

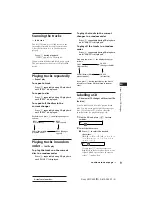
Страница 8: ... pressing SEL To obtain the beep tone again press these buttons once more With the Optional Equipment CD Changer Playing a CD Press CD and select the changer CD playback starts When a CD changer is connected all the tracks play from the beginning Each time you press DSPL momentarily during CD playback the displayed item changes as follows Elapsed playback time Clock Locating a specific track Autom...

Страница 9: ...1 Track repeat To play the tracks in the current changer in a random order Press 3 repeatedly during CD playback until SHUF 2 is displayed To play all the tracks in a random order Press 3 repeatedly during CD playback until SHUF 3 is displayed Each time you press 3 the display changes as follows If you press 1 during shuffle play the first 10 seconds of all tracks will be played in random order La...

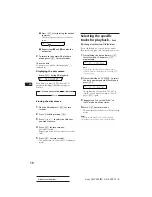
Страница 10: ...you want erase other titles 5 Press LIST for two seconds The unit returns to the normal CD playback mode Selecting the specific tracks for playback Bank CD changer with custom file function If you label the disc you can set the unit to skip tracks and play only the tracks you want 1 Start playing the disc and press LIST for two seconds Then press LIST momentarily Note If you do not label the disc ...

Страница 11: ...f a 2 speaker system set the fader control to the center position If you have any questions or problems concerning your unit that are not covered in this manual please consult your nearest Sony dealer Notes on Cassettes Cassette care Do not touch the tape surface of a cassette as any dirt or dust will contaminate the heads Keep cassettes away from equipment with built in magnets such as speakers a...

Страница 12: ...tors between the unit and the front panel are not clean In order to prevent this open the front panel by pressing RELEASE then detach it and clean with a cotton swab dipped in alcohol Do not apply too much force Otherwise the connector may get damaged Dismounting the unit 1 2 3 4 Release key supplied Main unit Back of the front panel The rotary commander labels You can control this unit with the o...

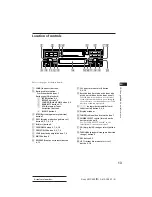
Страница 13: ...on 4 12 SEL control mode select button 5 8 10 Reset button located on the front side of the unit hidden by the front panel Press this button when you use this unit for the first time when you have changed the car battery or when the buttons of this unit do not function properly volume bass treble balance fader control button 5 8 9 Display window TUNER radio on band select button 7 POWER SELECT swi...

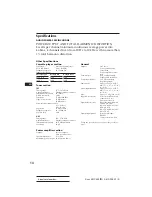
Страница 14: ...710 kHz Antenna terminal External antenna connector Intermediate frequency 10 71 MHz 450 kHz Sensitivity 30 µV Power amplifier section Outputs Speaker outputs sure seal connectors Speaker impedance 4 8 ohms Maximum power output 30 W 4 at 4 ohms General Outputs Line out 1 Power antenna relay control lead Power amplifier control lead Tone controls Bass 8 dB at 100 Hz Treble 8 dB at 10 kHz Power requ...

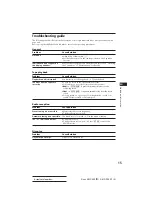
Страница 15: ...n the head There is a noise in the space between tracks A blank space is too short less than four seconds on SEEK AMS is pressed immediately before the following track on SEEK AMS is pressed immediately after the track starts A long pause or a passage of low frequencies or very low sound level is treated as a blank space Problem Playback sound is distorted The AMS does not operate correctly Radio ...

Страница 16: ...e The disc is dirty The disc is inserted upside down The CD changer cannot be operated because of some problem The ambient temperature is more than 50 C Solution Insert a disc magazine with discs into the CD changer Take out the magazine and insert the discs Clean the disc Insert the disc correctly Press the reset button on the unit Wait until the temperature goes down below 50 C If the above ment...

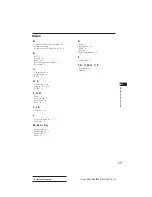
Страница 17: ...S 6 8 Automatic tuning 7 Automatic Tuner Activation ATA 6 B Bass 8 Balance 8 Bank 10 Best Tuning Memory BTM 7 Blank skip 6 C Caution alarm 4 CD playback 8 Clock 5 D E Disc memo 9 10 Display 5 6 8 10 Dolby 6 F G H Fader 8 Fast forward 5 Front panel 4 Fuse 12 I J K Intro scan 6 9 L Local seek mode LCL 7 Loudness 8 M N O P Q Manual search 8 Manual tuning 7 Metal tape 6 Mute 8 Index Additional Informa...

Страница 18: ...Actual total number Sony XR C400 E 3 810 309 11 2 Sony Corporation Printed in Japan ...

Отзывы: