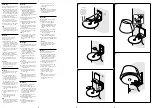
Assembly
Refer to the illustrations on the right
during the assembly process.
Tightly attach the mounting plate
(
) to the wall (making sure the
wall is sufficiently thick) using 2 or
more sufficient length screws (M4 or
No. 8) (not supplied) so it is stable.
Pass the speaker cord through the
hole in the mounting plate.
Push down and slide the plate cover
(
) on the mounting plate.
Connect the speaker cord (passed
through the hole) to the speaker.
Secure the speaker to the mounting
plate using a supplied screw (
).
Note
Do not loosen the screws of the
mounting plate or the screws to
secure the speaker to the mounting
plate during the assembly process.
Montage
Tout au long de la procédure de
montage, reportez-vous aux
illustrations de droite.
Fixez solidement la plaque de
fixation (
) au mur (en vérifiant
que celui-ci est suffisamment épais)
à l’aide d’au moins 2 vis de longueur
suffisante (M4 ou No. 8) (non
fournies) afin qu’elle soit stable.
Faites passer le cordon de l’enceinte à
travers l’orifice de la plaque de
fixation.
Abaissez et faites glisser le cache
(
) sur la plaque de fixation.
Raccordez le cordon de l’enceinte (à
travers l’orifice) à l’enceinte.
Fixez l’enceinte à la plaque de
fixation à l’aide de la vis fournie
(
).
Remarque
Ne desserrez pas les vis de la plaque
de fixation ou celles qui servent à
fixer l’enceinte sur la plaque de
fixation lors du montage.
Montaje
Consulte las ilustraciones que aparecen
a la derecha durante el proceso de
montaje.
Coloque la placa de montaje
correctamente (
) en la pared
(asegúrese de que la pared es lo
suficientemente gruesa) mediante
dos o más tornillos de longitud
suficiente (M4 o No. 8) (no
suministrados) para que sea estable.
Pase el cable del altavoz a través del
orificio de la placa de montaje.
Presione hacia abajo y deslice la
cubierta de la placa (
) en la placa
de montaje.
Conecte el cable del altavoz (que ha
pasado a través del orificio) al
altavoz.
Sujete el altavoz a la placa de
montaje mediante el tornillo
suministrado (
).
Nota
No afloje los tornillos de la placa de
montaje ni los tornillos que fijan el
altavoz a la placa de montaje durante
el proceso de montaje.
Montage
Ziehen Sie bei der Montage die
Abbildungen rechts heran.
Befestigen Sie die Montageplatte
(
) mithilfe von mindestens 2
ausreichend langen Schrauben (M4
oder Nr. 8) (nicht mitgeliefert)
sicher und fest an der Wand.
Vergewissern Sie sich, dass die Wand
dafür stark genug ist.
Führen Sie das Lautsprecherkabel
durch die Bohrung in der
Montageplatte.
Drücken Sie die Plattenabdeckung
(
) nach unten und schieben Sie sie
auf die Montageplatte.
Schließen Sie das durch die Bohrung
geführte Lautsprecherkabel an den
Lautsprecher an.
Befestigen Sie den Lautsprecher mit
einer mitgelieferten Schraube (
)
an der Montageplatte.
Hinweis
Lösen Sie beim Montieren nicht die
Schrauben der Montageplatte oder
die Schrauben, mit denen der
Lautsprecher an der Montageplatte
befestigt ist.
Montaggio
Durante l’operazione di montaggio fare
riferimento alle illustrazioni riportate
sulla destra.
Fissare saldamente la piastra di
montaggio (
) alla parete
(accertandosi che la parete abbia
uno spessore sufficiente) utilizzando
2 o più viti della lunghezza
sufficiente (M4 o n. 8) (non in
dotazione), in modo tale che sia
stabile.
Far passare il cavo del diffusore
attraverso la cavità nella piastra di
montaggio.
Spingere verso il passo e far scorrere
il copripiastra (
) sulla piastra di
montaggio.
Collegare il cavo del diffusore (fatto
passare in precedenza attraverso la
cavità) al diffusore.
Fissare il diffusore alla piastra di
montaggio utilizzando una vite in
dotazione (
).
Nota
Durante il montaggio non allentare le
viti della piastra di montaggio o le
viti che fissano il diffusore alla piastra
di montaggio.
Installatie
Raadpleeg tijdens de installatie de
illustraties aan de rechterkant.
Bevestig de wandplaat (
) stevig
aan de muur (zorg dat de muur dik
genoeg is) met 2 of meer schroeven
die voldoende lang zijn (M4 of Nr.
8) (niet bijgeleverd). Zorg dat de
wandplaat stabiel is.
Trek de luidsprekerkabel door de
opening in de wandplaat.
Druk de plaatdeksel naar beneden
en schuif hem (
) over de
wandplaat.
Verbind de luidsprekerkabel (door
de opening getrokken) met de
luidspreker.
Maak de luidspreker vast op de
wandplaat met een bijgeleverde
schroef (
).
Opmerking
Maak de schroeven van de wandplaat
of de schroeven die de luidspreker op
de wandplaat bevestigen niet los
tijdens de installatie.
Montering
Referera till bilderna till höger under
monteringen.
Fäst monteringsplattan (
) på
väggen (och se till att väggen är
tillräckligt tjock) med hjälp av 2 eller
flera tillräckligt långa skruvar (M4
eller nr 8) (medföljer ej) så den är
stabil.
Led högtalarsladden genom hålet i
monteringsplattan.
För ner och skjut plattskyddet (
)
på monteringsplattan.
Anslut högtalarsladden (som du
drar genom hålet) till högtalaren.
Fäst högtalaren på monteringsplattan
med hjälp av en medföljande skruv
(
).
Observera!
Lossa inte monteringsplattans
skruvar eller skruvarna för att fästa
högtalarna på fästplattan under
monteringen.
Montaż
Podczas montażu należy korzystać z
ilustracji po prawej stronie.
Dokładnie dokręć płytę montażową
(
) do ściany (ściana musi mieć
odpowiednią grubość) za pomocą co
najmniej 2 śrub o odpowiedniej
długości (M4 lub nr 8) (brak w
zestawie), tak aby płyta była stabilna.
Przełóż przewód głośnika przez
otwór w płycie montażowej.
Wciśnij i przesuń osłonę płyty (
)
na płycie montażowej.
Podłącz przewód (przełożony przez
otwór) do głośnika.
Przymocuj głośnik do płyty
montażowej za pomocą śruby
dołączonej do zestawu (
).
Uwaga
Podczas montażu nie należy odkręcać
śrub płyty montażowej ani śrub
mocujących głośnik do płyty
montażowej.
Not supplied
Non fournies
No suministrados
Nicht mitgeliefert
Non in dotazione
Niet bijgeleverd
Medföljer ej
Brak w zestawie


