


20
Projecting
Projecting
1
Plug the AC power cord into a wall
outlet, then connect all equipment.
The ON/STANDBY indicator lights in
red and the projector goes into standby
mode.
2
Press the
?
/
1
key.
The ON/STANDBY indicator flashes in
green, and then lights in green.
3
Turn on the equipment connected to
the projector.
4
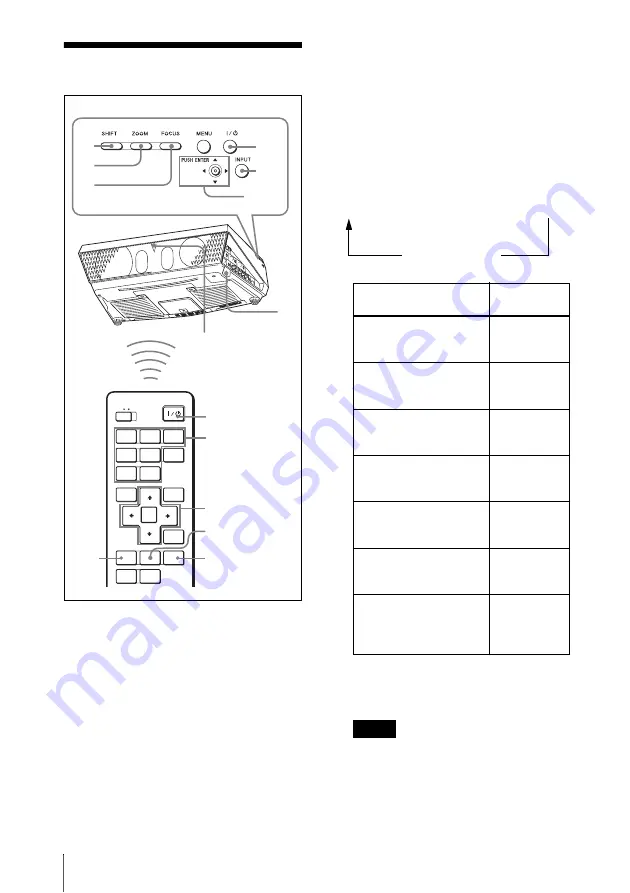
Press the INPUT key to select the
input source.
You can select directly the input signal
you want to project by pressing one key
from among INPUT A, B, C, D or E on
the Remote Commander.
Each time you press the INPUT key on
the control panel, the input signal
switches as follows:
Smart APA (Auto Pixel Alignment)
adjusts the picture of the connected
equipment so that it is projected clearly.
• If “Auto Input Search” is set to “On,” the
projector searches for the signals from
the connected equipment and displays
the input channel where the input signals
are found.
COMMAND
INPUT
A
INPUT
B
INPUT
C
INPUT
D
VIDEO
ENTER
MENU
APA
RESET
SHIFT
ZOOM
FOCUS
ASPECT
KEY
STONE
S VIDEO
INPUT
E
AIR
SHOT
OFF ON
7
8
2
1
2
4
6,7,8
8
7
8
4
6,7,8
8
Rear remote control
detector
To input from
Press INPUT
to display
Computer, etc.
connected to the
INPUT A connector
Input-A
Computer, etc.
connected to the
INPUT B connector
Input-B
Computer/VCR, etc.
connected to INPUT C
connector
Input-C
Computer/VCR, etc.
connected to INPUT D
(Digital) connector
Input-D
Computer connected to
LAN to use the network
presentation function
Input-E
Video equipment
connected to the VIDEO
input connector
Video
Video equipment
connected to the
S VIDEO input
connector
S-Video
Notes
Input-A
t
Input-B
t
Input-C
t
Input-D
t
Input-E
S-Video
T
Video
T
Содержание VPL-FE40/FE40L
Страница 59: ...Sony Corporation ...


