


152
Upgrading Your VAIO Computer
10
Place a new hard disk drive into the drive holder and align the holes on each side of the holder.
11
Secure the drive to the drive holder with screws, through the holes on each side of the holder.
!
A new hard disk drive comes with the necessary screws. Do not overtighten these screws when securing the drive to the drive holder.
12
Connect the Serial ATA power cable and the Serial ATA cable to the new drive.
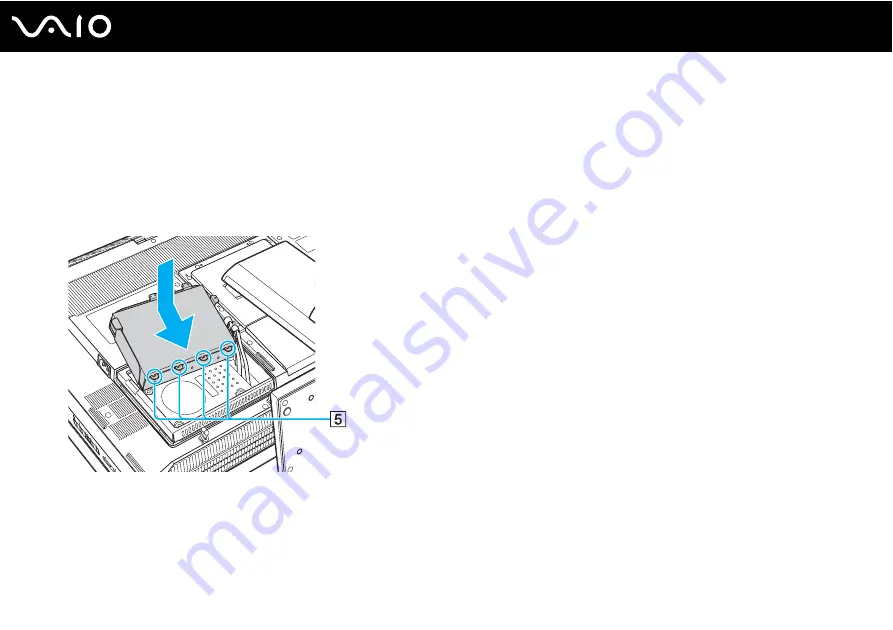
13
Insert the four tabs (5) underneath the hard disk bay frame and place the drive holder with the new drive into the bay.
14
Secure the drive holder with the screws that you removed in step 6.
15
Replace the hard disk bay cover.
16
Connect the power cord and the peripheral devices to the back of the computer.
17
Replace the back panel cover.
See
Removing and Replacing the Back Panel Cover
for the procedure.
Содержание VAIO VGC-RT100 Series
Страница 1: ...N User Guide Personal Computer V G C R T 1 0 0 S e r i e s V G C R T 1 5 0 S e r i e s ...
Страница 25: ...25 n N Getting Started To open and close the left cable clamps twist the clamp tips as illustrated below ...
Страница 64: ...64 n N Using Your VAIO Computer ...
Страница 66: ...66 n N Using Your VAIO Computer ...
Страница 150: ...150 n N Upgrading Your VAIO Computer 6 Unscrew the three screws 3 securing the drive holder ...
Страница 168: ...168 n N Troubleshooting HDMI page 199 Memory Stick page 201 Peripherals page 202 ...
Страница 220: ... 2008 Sony Corporation n ...