9
Getting Started
Getting Started
5
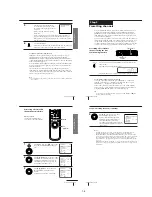
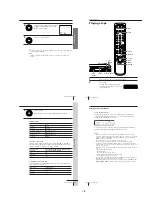
Tune the TV to the same channel as
shown in the display window so that
the picture on the right appears on the
TV screen.
Refer to your TV manual for tuning
instructions.
If you select the wrong TV system in step 4, the picture may not
appear. Select the appropriate TV system and tune the TV again.
If the picture does not appear clearly, see “To obtain a clear picture
from the VCR” below.
6
Press RF CHANNEL.
You have now tuned your TV to the VCR. From now on, whenever
you want to play a tape, set the TV to the video channel.
To obtain a clear picture from the VCR
If the picture does not appear clearly in step 5 above, first go to step 6 to
finish this procedure once. Then start from step 2. After pressing RF
CHANNEL twice in step 2 to display the RF channel, press P/–
so that another RF channel appears. Then tune the TV to the new RF channel
until a clear picture appears.
To set another RF channel number on the VCR, select a channel number that
does not receive a broadcast signal in your area and is clear of interference
from other channels.
If you cannot obtain a clear picture after performing this procedure, we
recommend you connect the VCR and TV using the audio/video cable (see
“To a TV that has audio/video input jacks” on page 7). If the same symptom
persists, consult your nearest Sony dealer.
Note
• If you set the wrong TV system, you may have no sound or sound may be distorted
(noisy sound).
SONY VIDEO CASSETTE
RECORDER
RF CHANNEL
10
Getting Started
Step 5
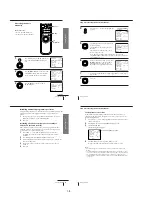
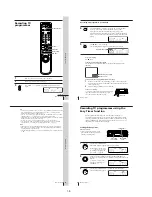
Press and hold ONE TOUCH TUNING on the VCR for more than
three seconds.
The VCR starts presetting the channels.
The WAIT indicator goes off when all receivable channels are preset.
To check if the channels are preset correctly
Set the TV to the video channel and press P/– on the VCR.
If the TV screen changes to a different programme each time you press
P/–, the channels are preset correctly.
If the sound is distorted or noisy, the VCR is set to a TV system different
from your area’s system. Select the correct TV system and preset channels
using the TUNER PRESET menu as shown on the next page.
Tip
• To stop the One Touch Tuning function, press ONE TOUCH TUNING or
x
STOP
on the VCR during the setting.
ONE TOUCH
TUNING
Presetting channels
First, we recommend that you preset the receivable channels in your area
using the One Touch Tuning function or AUTO PRESET in the TUNER
PRESET menu. Then, if some channels cannot be preset automatically, set
them manually. If there are any unwanted channels among the preset ones,
you can disable the channels.
If you live in the area where various TV systems coexist, and have channels
that do not match the TV system you selected in automatic presetting, reset
the TV system for those channels (see “Resetting the TV system” on page
15). If the channels do not match the TV system, the sound may be distorted
or noisy, or the colour TV programme may become black and white, etc.
Presetting all receivable
channels using the One
Touch Tuning function
P/–
ONE TOUCH
TUNING
SP
APC
11
Getting Started
Getting Started
OK
M
/
m
/
<
/
,
MENU
Presetting all receivable
channels automatically
Before you start…
• Turn on the VCR and the TV.
• Set the TV to the video channel.
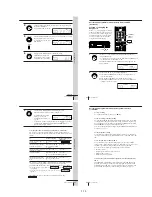
1
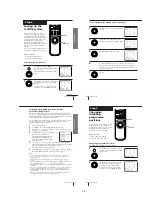
Press MENU, then press
M
/
m
to move the
cursor (
B
) to TUNER PRESET and press
OK.
2
Press
M
/
m
/
<
/
,
to move the cursor (
B
)
to SYSTEM, then select B/G, D/K, I or M,
whichever is applicable in your area. If
SYSTEM is set to the wrong position, the
sound will be distorted or noisy.
3
Press
M
/
m
/
<
/
,
to move the cursor
(
B
) to NORMAL/CATV, then select
NORM.
To preset CATV channels, select CATV.
continued
OK
PLAY
MENU
OK
PLAY
TUNER PRESET
PROG 1
NORMAL / CATV
SYSTEM
AUTO PRESET
CHANNEL SET
AFT
FINE TUNING
NORM
ON
•
•
CATV
B / G
•
D / K
M
I
OFF
1
SELECT
SET
: [
]
: [
]
TUNER PRESET
PROG 1
NORMAL / CATV
SYSTEM
AUTO PRESET
CHANNEL SET
AFT
FINE TUNING
NORM
ON
•
•
CATV
B / G
•
D / K
M
I
OFF
1
SELECT
SET
: [
]
: [
]
TUNER PRESET
PROG 1
NORMAL / CATV
SYSTEM
AUTO PRESET
CHANNEL SET
AFT
FINE TUNING
NORM
ON
•
•
CATV
B / G
•
D / K
M
I
OFF
1
SELECT
SET
: [
]
: [
]
OK
PLAY
12
Getting Started
Step 5: Presetting channels (continued)
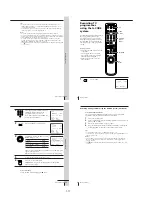
4
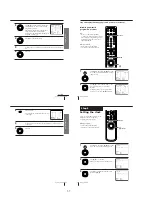
Press
M
/
m
to move the cursor (
B
) to
AUTO PRESET, then press OK.
All receivable channels are preset in
numerical sequence. When no more
receivable channels can be found,
presetting stops and the picture from the
lowest numbered channel is displayed on
the TV screen.
Notes
• Picture might disappear for a few seconds during One Touch Tuning and auto
presetting functions. This is for tuning procedure, and not a malfunction.
• The channel numbers in the CHANNEL SET column may not be the same as those
in your area. This is because this VCR’s channel search system is based on the fixed
TV system that has the widest channel coverage. If necessary, apply your local
channel numbers to the programme positions (see “Presetting channels manually”
on page 13).
• If the received channel is on cable TV, “C” appears on the left of the channel in step
4 in most areas. However, this will not be applied in some areas (see pages 17 to 24
for reference).
TUNER PRESET
PROG 1
NORMAL / CATV
SYSTEM
AUTO PRESET
CHANNEL SET
NORM
ON
•
•
CATV
B / G
•
D / K
M
I
OFF
1
AFT
FINE TUNING
PLEASE WAIT
OK
PLAY
1-2


