background image

Note

The connection mode cannot be set while the remote control is connected to the camera via Wi-Fi.

[54] Changing the Settings

Remote control settings

Bluetooth setting

The remote control can be communicated with the camera via Bluetooth.

The mutual registration process that allows the devices (the remote control and camera) to

communicate with each other via Bluetooth is called “pairing.” Once pairing is complete, these devices

can automatically communicate via Bluetooth when they are connected again.

Hint

The default Bluetooth setting for the remote control is ON. When the Bluetooth compatible camera is

connected to Wi-Fi for the first time, Bluetooth pairing with the remote control is automatically completed,

and the   icon displayed on the LCD screen switches to 

.

Note

When Airplane mode is ON, the Bluetooth icon does not appear on the LCD screen, and Bluetooth

communications are disabled, even if the Bluetooth setting is ON.

Press the MENU button.

1

Press the UP button or DOWN button to select 

 (Remote control settings) - 

 (connection mode) - setting value, then press the REC/ENTER button.

 (default) (single connection)

 (multi connection)

2

Press the MENU button.

1

Press the UP button or DOWN button to select 

 (Remote control settings) - 

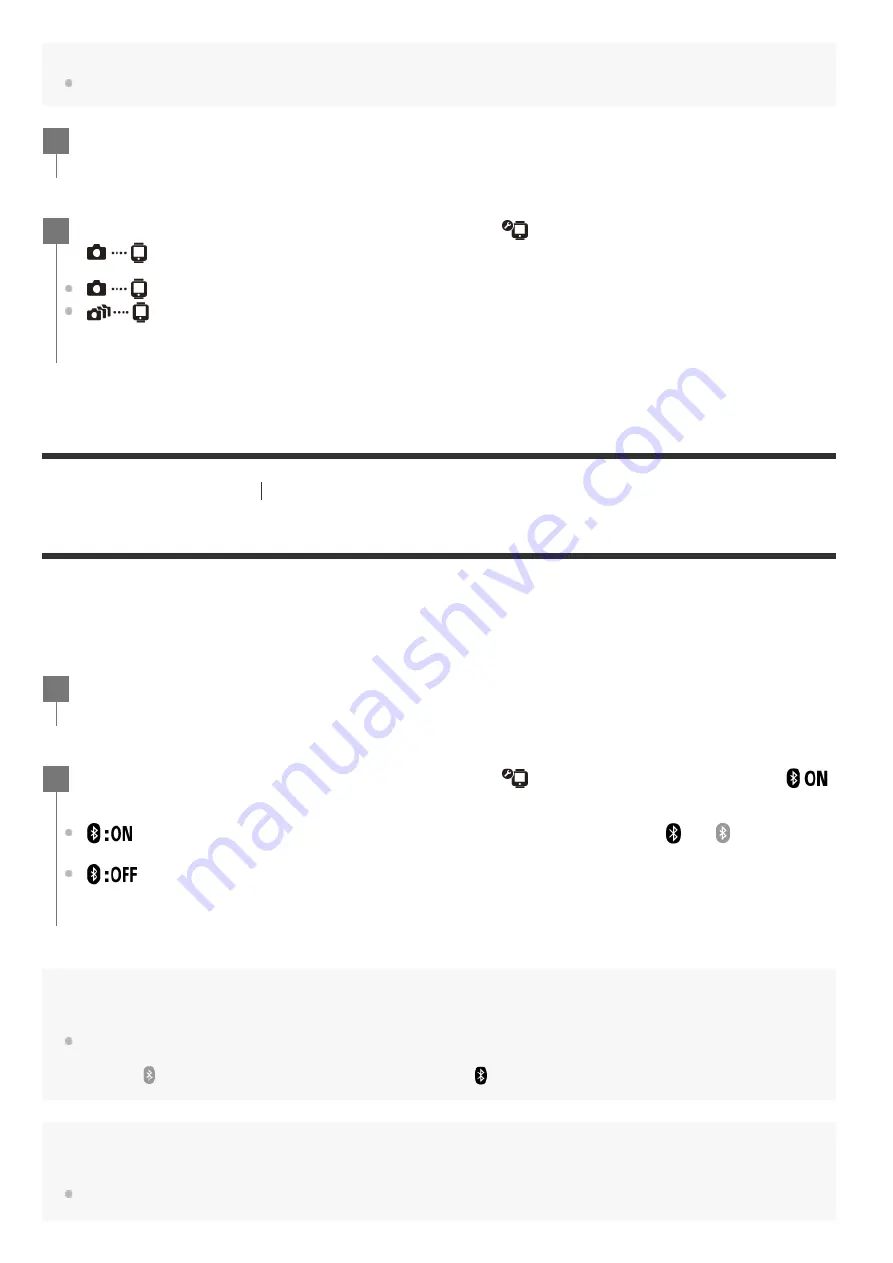
(Bluetooth setting) - setting value, then press the REC/ENTER button.

 (default) (Bluetooth communication enabled. The Bluetooth icon (

 or  ) is displayed

on the LCD screen.)

 (No Bluetooth communication. The Bluetooth icon is not displayed on the LCD screen.)

2

Содержание RM-LVR3

Страница 1: ...to the Mount Adaptor 6 Turning on off the power of the remote control 7 Setting the date and time 8 Connecting the remote control to a camera via Wi Fi Single connection Checking the connection mode 9 Connecting the remote control to a single camera via Wi Fi 10 Connecting the remote control to multiple cameras via Wi Fi Multi connection Connecting the remote control to multiple cameras via Wi Fi ...

Страница 2: ...ms List of setting items 18 How to set the setting items 19 Shooting settings Image quality setting 20 Movie format 21 Time lapse capture image size 22 Loop recording time 23 Still image mode switching 24 Still image shooting interval 25 Self timer 26 Time lapse shooting interval 27 Time lapse shot number 28 SteadyShot Movie 29 SteadyShot Still FDR X3000 HDR AS300 30 Angle setting 31 Zoom setting ...

Страница 3: ...e 44 Beep 45 Beep volume 46 Lamp setting 47 One touch recording 48 Auto power off 49 Switching NTSC PAL 50 Version Camera 51 Remote control settings Airplane mode 52 Connection mode 53 Bluetooth setting 54 Network reset settings 55 Auto monitor off while shooting 56 Mirror Mode 57 Display rotate 58 Monitor brightness 59 Date time setting 60 Area setting 61 Daylight saving time summer time setting ...

Страница 4: ...9 On carrying 70 On operating temperatures 71 Handling the LCD screen 72 Waterproof performance 73 The list of time differences for world capitals 74 Specifications 75 Trademarks 76 Note on the License 77 Care and storage Care and storage 78 Maintenance of the LCD screen 79 Maintenance of the remote control in water or at a waterfront 80 ...

Страница 5: ...connect the remote control and the camera via Wi Fi 84 Cannot turn on the remote control 85 The power of the remote control turns off suddenly 86 Cannot charge the remote control 87 The remaining charge indicator is incorrect 88 Warning indicators and error messages Error display on the Live View Remote 89 1 Read This First Identifying the parts ...

Страница 6: ...ode The indicators in parentheses are displayed when shooting still images Icons differ depending on the settings Terminal section 1 on standby button 2 CHG Charge lamp 3 LCD screen 4 UP button DOWN button 5 REC ENTER button 6 REC Wi Fi lamp 7 MENU button 8 Wi Fi connection setting 1 Bluetooth connection status 2 GPS receiving status of a camera 3 Clock time 4 Remaining battery charge indicator of...

Страница 7: ... shot number 12 Recordable time Recording time Memory card warning icon recordable number 13 Shooting mode indicator During movie recording appears During still image shooting appears During time lapse capturing appears During loop recording appears is displayed on the upper right area of an icon while recording 14 Audio recording setting 15 Temperature increase indicator is displayed when the tem...

Страница 8: ...era are displayed The position of the orange cursor indicates which camera is currently displaying Live View is displayed on the upper right area of an icon while recording 6 Temperature increase indicator is displayed when the temperature of the connected camera increases Leave the power turned off to allow the temperature of the camera or the battery to decrease 7 Check that the power of the rem...

Страница 9: ...ly discharged Also even if the remote control is not fully charged you can use the partial charge capacity of the battery pack as is When the remote control is fully charged the CHG Charge lamp turns off immediately Note When the power of the remote control is turned on it is supplied with power but not charged Be careful not to short out the terminal section of the cradle by using materials such ...

Страница 10: ... remote control with the concave portion of the belt while pulling the release lever on the rear of the belt toward the opposite side with your finger 1 Make sure that the remote control is set into the belt then remove your finger from the release lever 2 To fasten the remote control to your arm pass the one end of the belt through the hole on the other end of the belt and fasten the belt with Th...

Страница 11: ... with the concave portion of the Mount Adaptor while pulling the release lever of the Mount Adaptor toward the opposite side with your finger 1 Make sure that the remote control is set into the Mount Adaptor then remove your finger from the release lever The release lever returns to the original position and the remote control is attached to the Mount Adaptor 2 Press the on standby button When the...

Страница 12: ... and time before using the remote control Hint Regions are defined by the time difference between Greenwich Mean Time GMT and the standard time of your residence For details on the time difference see The list of time differences for world capitals You can set the above settings from the remote control settings See Date time setting Area setting Daylight saving time summer time setting and Date fo...

Страница 13: ...a via Wi Fi Single connection Connecting the remote control to a single camera via Wi Fi You can operate a single camera at a distance when the remote control is connected to the camera via Wi Fi For details about how to operate a camera refer to the operating instructions of the camera Turn on the power 1 Press the MENU button 2 Press the UP button or DOWN button to select Remote control settings...

Страница 14: ...n the camera FDR X3000 HDR AS300 HDR AS50 Press the on standby button The camera excluding FDR X3000 HDR AS300 HDR AS50 HDR AZ1 Press the NEXT or PREV button HDR AZ1 Lens style Camera QX series Press the ON OFF Power button 2 Check the camera settings The camera excluding HDR AZ1 3 ...

Страница 15: ...0V insert a memory card to the camera Select the camera you want to connect to the remote control If you press the REC ENTER button in the standby status the remote control will be released from the standby status In this case select the model name of the camera again 4 Press the UP button or DOWN button to select the model name of the camera which you want to connect to the remote control 1 Press...

Страница 16: ... AS50 HDR AZ1 When ACPT is displayed on the display panel of the camera press the REC ENTER button of the camera If ACPT is not displayed on the display panel of the camera restart the camera and try again from step HDR AZ1 Lens style Camera QX series When you hear the connection confirmation beep press and hold the Wi Fi button of the camera Shutter button for the DSC QX100 QX10 until you hear th...

Страница 17: ...ove to another location and try again 11 Getting Started Connecting the remote control to multiple cameras via Wi Fi Multi connection Connecting the remote control to multiple cameras via Wi Fi You can connect the remote control to a maximum of five cameras and operate all cameras simultaneously Note Once all procedures until step are completed the remote control and the camera will automatically ...

Страница 18: ...ction setting multi connection then press the REC ENTER button of the camera The camera excluding FDR X3000 HDR AS300 HDR AS50 HDR AZ1 Select MULTI NEW in the Wi Fi settings HDR AZ1 Lens style Camera QX series Press the Wi Fi button of the camera and switch the connection mode of the camera to the multi connection mode then press and hold the Wi Fi button of the camera Refer to the Help Guide of t...

Страница 19: ...the registration fails reconnect by performing each step again 12 Getting Started Connecting the remote control to multiple cameras via Wi Fi Multi connection Resetting the connection information of the registered camera This function is only available when the camera is in multi connection 13 Shooting Shooting movies and still images Switching shooting modes Switch the shooting mode by pressing t...

Страница 20: ...ect shooting mode in the setting items Press the UP button or DOWN button to select the shooting mode then press the REC ENTER button If you connect to the zoom function compatible camera while the Zoom setting of the camera is ON press the UP button or DOWN button to operate camera zoom in the Live View display If you connect to a Lens style Camera QX series press the UP button or DOWN button to ...

Страница 21: ... cameras press the UP button or DOWN button to switch the Live View display of the connected cameras on the remote control Some cameras may not be compatible with this function 16 Shooting Shooting movies and still images Operating with the multi camera control To stop shooting press the REC ENTER button again The REC Wi Fi lamp turns from red to blue 2 Be sure that is displayed on the LCD screen ...

Страница 22: ...mera control is sent to all connected cameras The following camera operations are available on the remote control Other camera settings such as image quality etc should be performed on the camera Changing the shooting mode Starting Stopping recording in Movie mode Time lapse capture mode or Loop recording mode Shutter operation for shooting still images The reaction time of the connected cameras m...

Страница 23: ... function cannot be used while the MENU item is displayed When the Wi Fi connection between the remote control and the camera is disconnected the button hold function is canceled 18 Changing the Settings List of setting items List of setting items You can display and change the settings by pressing the MENU button while the camera and remote control are connected via Wi Fi Some setting items canno...

Страница 24: ...e mode switching 2 Still image shooting interval Self timer Time lapse shooting interval Time lapse shot number 2 SteadyShot Movie FDR X3000 HDR AS300 SteadyShot Still Angle setting Zoom setting Flip AE shift Time lapse AE mode Scene ...

Страница 25: ...ording Auto power off Switching NTSC PAL Remote control settings Airplane mode 5 Connection mode 5 6 Bluetooth setting 5 6 Network setting reset 6 7 Auto monitor off while shooting Mirror Mode Display rotate Monitor brightness Date time setting Area setting Daylight saving time summer time setting Date format 8 Version Resetting the settings White balance Color mode Audio recording setting Wind no...

Страница 26: ...ollowing 4 buttons on the remote control MENU button Displays the menu UP button Goes to the previous menu DOWN button Goes to the next menu REC ENTER button Executes the menu Displayed only in the single connection 1 The icon varies depending on the connected camera 2 Displayed only when a memory card is inserted into the camera 3 Displayed only when set to movie mode loop recording mode 4 Not di...

Страница 27: ... cancel then press the REC ENTER button 3 Press the MENU button 1 Press the UP button or DOWN button to select Shooting settings Image quality setting setting value then press the REC ENTER button When the movie record format is set to XAVC S 4K 1 XAVC S 4K 100Mbps XAVC S 4K 60Mbps XAVC S 4K 100Mbps 2 XAVC S 4K 60Mbps 2 When the movie record format is set to XAVC S HD 1 XAVC S HD 50Mbps XAVC S HD ...

Страница 28: ...e High speed recording smooth image recorded at 8 frame rate Slow recording slow motion image recorded at 2 frame rate Super slow recording slow motion image recorded at 4 frame rate Standard resolution 1 Frame rate changes depending on the NTSC PAL setting 2 The setting is available only when the NTSC PAL setting is set to NTSC Press the MENU button 1 Press the UP button or DOWN button to select ...

Страница 29: ... image in 4K 3840 x 2160 image size 8 3 M Shoots still image in HD 1920 x 1080 image size 2 1 M 2 Press the MENU button 1 Press the UP button or DOWN button to select Loop recording mode setting Loop recording time setting value then press the REC ENTER button Sets the loop recording time to 5 minutes The size of created movie is 1 minute per file Sets the loop recording time to 20 minutes The siz...

Страница 30: ...ed 25 Changing the Settings Shooting settings Still image shooting interval of created movie is 15 minutes per file Press the MENU button 1 Press the UP button or DOWN button to select Photo mode setting Still image mode switching setting value then press the REC ENTER button Single shooting Shoots a single still image Burst shooting Shoots at the interval set in the Still image shooting interval ...

Страница 31: ...terval setting value then press the REC ENTER button Records a total of 10 still images in 1 second at a speed of 10 still images per second Suitable for shooting fast moving objects Records a total of 10 still images in 1 25 seconds at a speed of 8 still images per second Suitable for shooting fast moving objects Records a total of 10 still images in 2 seconds at a speed of 5 still images per sec...

Страница 32: ...ess the UP button or DOWN button to select Photo mode setting Self timer setting value then press the REC ENTER button Does not use self timer Sets the self timer to 2 second Sets the self timer to 10 second 2 Press the MENU button 1 Press the UP button or DOWN button to select Time lapse capture mode setting Time lapse shooting interval setting value then press the REC ENTER button Continues to r...

Страница 33: ...l images Shoots 600 still images Shoots 900 still images Continues to shoot still images until stop shooting 2 Press the MENU button 1 Press the UP button or DOWN button to select Shooting settings FDR X3000 HDR AS300 except for FDR X3000 HDR AS300 SteadyShot Movie setting value then press the REC ENTER button FDR X3000 HDR AS300 Uses all encompassing the SteadyShot function when shooting movies U...

Страница 34: ...1 Press the UP button or DOWN button to select Photo mode setting SteadyShot Still setting value then press the REC ENTER button Uses the SteadyShot function when shooting still images Does not uses the SteadyShot function when shooting still images 2 Press the MENU button 1 Press the UP button or DOWN button to select Shooting settings Angle setting setting value then press the REC ENTER button W...

Страница 35: ...hooting settings AE shift Press the MENU button 1 Press the UP button or DOWN button to select Shooting settings Zoom setting setting value then press the REC ENTER button Uses the digital zoom function Does not use the digital zoom function 2 Press the MENU button 1 Press the UP button or DOWN button to select Shooting settings Flip setting value then press the REC ENTER button Flips the image ve...

Страница 36: ...OWN button to select Shooting settings AE shift setting value then press the REC ENTER button Does not use the AE shift Uses the AE shift Set 0 3EV for example 2 Press the MENU button 1 Press the UP button or DOWN button to select Time lapse capture mode setting Time lapse AE mode setting value then press the REC ENTER button Adjusts the exposure for each shot Smoothly follows changes in brightnes...

Страница 37: ... or DOWN button to select Shooting settings White balance setting value then press the REC ENTER button Adjusts the white balance automatically so that the colors appear natural Adjusts for the color temperature of the light source from 2500K to 9900K Uses the setting acquired from Acquires the base white color for shooting under the light source 2 Place a white reference object under the same lig...

Страница 38: ...ttings Camera settings Bluetooth remote controller power setting Press the MENU button 1 Press the UP button or DOWN button to select Shooting settings Audio recording setting setting value then press the REC ENTER button Records sound when shooting a movie Does not record sound when shooting a movie 2 Press the MENU button 1 Press the UP button or DOWN button to select Shooting settings Wind nois...

Страница 39: ...ol is connected to the camera The power of the camera may not be operated with the remote control simultaneously depending on your surroundings when in use In this case operate the power of the remote control again 42 Changing the Settings Camera settings Format Delete all movies and still images in the media on the camera to restore the media to its initial state Press the MENU button 1 Press the...

Страница 40: ...layed Press the REC ENTER button to return to the previous MENU Press the MENU button 1 Press the UP button or DOWN button to select Camera Settings Time code user bit setting item then press the REC ENTER button The set items and details are as follows Sets the time code 1 Press the UP button or DOWN button to select 2 digit numbers then press the REC ENTER button 2 Repeat step 1 until you set fo...

Страница 41: ...ion of the camera Sets the time code to be recorded The newly set up time code is recorded on recording media The last time code of the previous recording is read out from the recording media and the new time code is recorded sequentially from the last time code Sets the user bit 1 Press the UP button or DOWN button to select 2 digit numbers then press the REC ENTER button 2 Repeat step 1 until yo...

Страница 42: ...a function that can record information 8 digit hexadecimal numbers such as date time scene number This function is useful for editing movies created using two or more cameras 44 Changing the Settings Camera settings IR remote You can initialize the time code of the camera and start stop recording using the infrared remote control sold separately Note The remote commander IR receiver kit RMT VP1K a...

Страница 43: ...to select Camera Settings Beep setting value then press the REC ENTER button All operation sounds are enabled Operation sounds are emitted for the following operations only Power turned on Recording started Recording stopped Shutter pressed A disabled operation was selected or an error occurred Connection confirmation beep Power turned off FDR X3000 HDR AS300 All operation sounds are disabled 2 wi...

Страница 44: ...tings Camera settings One touch recording Press the REC ENTER button of the camera while the camera is off and the camera will turn on and start recording This function is available when the shooting mode is movie time lapse capture live streaming or loop recording soft beep volume Press the MENU button 1 Press the UP button or DOWN button to set Camera Settings Lamp setting setting value then pre...

Страница 45: ...he remote control is connected to the camera via Wi Fi When the remote control is not connected to the camera via Wi Fi the camera settings cannot be changed Press the MENU button 1 Press the UP button or DOWN button to select Camera Settings One touch recording setting value then press the REC ENTER button One touch recording enabled One touch recording disabled 2 Press the MENU button 1 Press th...

Страница 46: ...e Settings Camera settings Version Camera Displays the software version of the camera Press the MENU button 1 Press the UP button or DOWN button to select Camera Settings Switching NTSC PAL then press the REC ENTER button Switches the TV system of the camera from NTSC to PAL Switches the TV system of the camera from PAL to NTSC When you try to change the current setting the confirmation screen app...

Страница 47: ...te Airplane mode cannot be set while the remote control is connected to the camera in the single connection mode 53 Changing the Settings Remote control settings Connection mode Set the number of cameras a single camera or multiple cameras to which the remote control is connected Press the MENU button 1 Press the UP button or DOWN button to select Remote control settings Airplane mode setting valu...

Страница 48: ...he first time Bluetooth pairing with the remote control is automatically completed and the icon displayed on the LCD screen switches to Note When Airplane mode is ON the Bluetooth icon does not appear on the LCD screen and Bluetooth communications are disabled even if the Bluetooth setting is ON Press the MENU button 1 Press the UP button or DOWN button to select Remote control settings connection...

Страница 49: ...e reset Note You cannot reset the network settings in single connection mode If multi connection is established after having reset the network settings register devices once again even if they had already been registered before 56 Changing the Settings Remote control settings Auto monitor off while shooting Press the MENU button 1 Press the UP button or DOWN button to select Remote control setting...

Страница 50: ... the LCD screen display was turned off it takes 5 to 6 seconds until the LCD screen display is turned on This function is available only when the remote control is connected to the camera in the single connection mode 57 Changing the Settings Remote control settings Mirror Mode Images on the LCD monitor are displayed as mirror reversed This is useful when you take self portraits with the camera mo...

Страница 51: ...ettings Mirror Mode setting value then press the REC ENTER button Images are displayed as mirror reversed default Images are not displayed as mirror reversed 2 Press the MENU button 1 Press the UP button or DOWN button to select Remote control settings display rotate setting value then press the REC ENTER button Rotates the screen default Does not rotate the screen 2 Press the MENU button 1 Press ...

Страница 52: ... to the camera automatically Press the MENU button 1 Press the UP button or DOWN button to select Remote control settings Date time setting then press the REC ENTER button 2 Set the year month day Press the UP button or DOWN button to set the year then press the REC ENTER button The cursor moves to month so repeat the same operation to set the month and day The display order of the date differs de...

Страница 53: ... whether to reflect the daylight saving time summer time in the date and time setting Press the MENU button 1 Press the UP button or DOWN button to select Remote control settings Area setting time difference then press the REC ENTER button 2 Confirm the time on the displayed screen then press the REC ENTER button 3 Press the MENU button 1 Press the UP button or DOWN button to select Remote control...

Страница 54: ...he settings Reset each setting of the remote control to its default The camera settings are not reset even if the remote control settings are reset Press the MENU button 1 Press the UP button or DOWN button to select Remote control settings date format setting value then press the REC ENTER button Day Month Year Month Day Year Month in English Day Year Year Month Day 2 Press the MENU button 1 Pres...

Страница 55: ...ess the UP button or DOWN button to select Remote control settings Resetting the settings then press the REC ENTER button 2 Press the UP button or DOWN button to select the setting then press the REC ENTER button Select cancel to return to the remote control settings menu screen Select execute to reset the remote control settings 3 Press the MENU button 1 Press the UP button or DOWN button to sele...

Страница 56: ...ages saved in the memory card of the camera Note You can delete images only in the single connection You can delete each image once You cannot delete multiple images simultaneously Format the memory card when you want to delete all of the images Press the MENU button 1 Press the UP button or DOWN button to select playback on the remote control then press the REC ENTER button 2 Press the UP button ...

Страница 57: ...ion moisture may condense inside or outside the remote control This moisture condensation may cause a malfunction to the remote control If moisture condensation occurs Turn off the remote control and wait about 1 hour for the moisture to evaporate Note on moisture condensation Moisture may condense when you bring the remote control from a cold place into a warm place or vice versa or when you use ...

Страница 58: ...cing the remote control by a window If the remote control is used in a cold place horizontal lines or a residual image may appear on the LCD screen This is not a malfunction The LCD screen returns to normal when the remote control warms up If a still picture or a fixed picture is displayed for a long time an image may remain superimposed on the LCD screen as a ghosting image Bright point and vanis...

Страница 59: ... not leave behind any fibers If you have used the remote control near water or with wet or sandy hands perform the procedure described in Maintenance of the remote control in water or at a waterfront before charging the remote control with the cradle Notes on using the remote control under near water Do not subject the remote control to shock such as by jumping into water The remote control sinks ...

Страница 60: ...w Delhi Almaty 06 00 Dhaka Yangon 06 30 Bangkok 07 00 Jakarta Hong Kong 08 00 Singapore Beijing Tokyo 09 00 Seoul Adelaide 09 30 Darwin Melbourne 10 00 Sydney New Caledonia 11 00 Fiji 12 00 Wellington Midway 11 00 Hawaii 10 00 Alaska 09 00 San Francisco 08 00 Tijuana Denver 07 00 Arizona ...

Страница 61: ... 5 0 V 500 mA Charging time Via a computer Internal battery Approx 2 h 25 min Power supply method USB power supply 1 5 A or more is recommended Power consumption 0 8 W when connected by Wi Fi and during Live View display Continuous operating time 155 min 1 Battery Chicago 06 00 Mexico City New York 05 00 Bogota Santiago 04 00 St John s 03 30 Brasilia 03 00 Montevideo Fernando de Noronha 02 00 Azor...

Страница 62: ...Adobe logo and Adobe Acrobat are either registered trademarks or trademarks of Adobe Systems Incorporated in the United States and or other countries The Bluetooth word mark and logos are registered trademarks owned by Bluetooth SIG Inc and any use of such marks by Sony Corporation is under license Other trademarks and trade names are those of their respective owners In addition system and product...

Страница 63: ...t use any of the following as they may damage the finish or the casing Chemical products such as thinner benzine alcohol disposable cloths insect repellent sunscreen or insecticide etc Do not touch the remote control with any of the above on your hand Do not leave the remote control in contact with rubber or vinyl for a long time Remove the battery pack when not in use for a long time Remove the U...

Страница 64: ...f performance 81 Information Battery pack Battery pack On charging the battery pack Charge the battery pack before using the remote control We recommend charging the battery pack in an ambient temperature of between 10 C to 30 C 50 F to 86 F until the CHG Charge lamp turns off The battery pack may not be effectively charged in temperatures outside this range The CHG Charge lamp may blink during ch...

Страница 65: ...ting of the camera to and turn off the power of the camera frequently from the remote control while in shooting standby mode This enables further reduction of battery consumption on both the camera and remote control 83 Information Disposal of the remote control Remove the built in battery pack before disposing of the remote control Do not remove the screws except when disposing of the remote cont...

Страница 66: ...t to injure your nails or fingers 84 Troubleshooting Cannot connect the remote control and the camera via Wi Fi If you cannot connect the camera to the remote control properly try the operation below Check the camera and the remote control connection mode are set to the single connection mode If not change the connection mode and connect again Detach the cover 3 Remove the battery pack 4 ...

Страница 67: ...ge the battery pack in an ambient temperature of 10 C to 30 C 50 F to 86 F Turn on the computer then connect it to the cradle to which the remote control is attached Release the computer from sleep or hibernation status Connect the micro USB cable supplied directly to the USB connector of the computer 88 Troubleshooting The remaining charge indicator is incorrect This phenomenon occurs when you us...

Страница 68: ... compatible 02 01 No memory card is inserted into the camera The memory card is inserted in the incorrect direction Insert the memory card in the correct direction then turn on the camera 02 03 Camera error Confirm the accessing camera or memory card 03 01 Signal traffic is heavy The camera operation for connecting to the remote control has failed Change the conditions and try the connecting proce...

Страница 69: ...iled Check the camera 04 04 No response from the camera Check the camera Signal traffic may be heavy or the remote control may be too far from the access point 05 01 Failed to shoot still images Check the camera 05 02 Recording with the memory card inserted in the incorrect direction No memory card is inserted into the camera The memory card has no free memory space Check the orientation of the me...

Страница 70: ... an abnormality in the recording media Signal traffic may be heavy or the remote control may be too far from the access point 07 04 Failed to delete the file Signal traffic may be heavy or the remote control may be too far from the access point 10 01 The camera s temperature has risen Turn the power of the camera off and leave the camera alone for 10 minutes or longer Code starting with an E or a ...

Отзывы: