47
R
e
cor
d
in
g (Fo
r
d
ig
ita
l t
e
rre
st
ri
a
l bro
adc
as
ting
)
4
Select “OK,” and press ENTER.
The “Timer List” display appears.
The timer recording indicator lights up
on the front panel display and the
recorder is ready to start recording.
• To record a satellite programme, turn
on the satellite tuner and select the
satellite programme you want to
record. Leave the satellite tuner turned
on until the recorder finishes
recording.
• To modify the timer setting, see
page 48.
To stop recording during timer recording
Press
x
REC STOP.
Note that it may take a few seconds for the
recorder to stop recording.
On-screen instructions may appear after
pressing
x
REC STOP. In this case, follow
the on-screen instructions.
To make the detailed settings
1
Select “Set Details” in step 3 above, and
press ENTER.
2
Select an item using
M
/
m
and set using
<
/
,
.
“Record to”: Sets the recording
destination. If there is not enough
available DVD disc space for the
recording, the recorder automatically
records the programme to the HDD even
if you select “DVD” (Recovery
Recording).
“Recording Mode”: Sets the recording
mode (page 136).
“Update”: Sets the recorder
automatically replacing the previous
timer recording with the new one.
“Genre”: Sets the genre.
To enter a title name
Select “Set Title Name” in step 3 above, and
press ENTER (page 36).
z
Hint
You can use the “Rec. Mode Adjust” function
(page 46).
b
Notes
• If a message indicating that the HDD is full
appears on the screen, change the recording
destination to “DVD,” or make available space
for the recording (page 66).
• Check that the clock is correctly set before
setting the timer recording. If not, the timer
recording cannot be made.
• Even if the timer is set for the same daily or
weekly programme, the timer recording cannot
be made if it overlaps with a programme that has
priority. “Overlap” will appear next to the
overlapped setting in the Timer List. Check the
priority order of the settings (page 48).
• Even if the timer is set, timer recordings cannot
be made while recording a programme that has
priority.
• The “Rec. Mode Adjust” function only works
with a timer recording. It does not function with
Quick Timer.
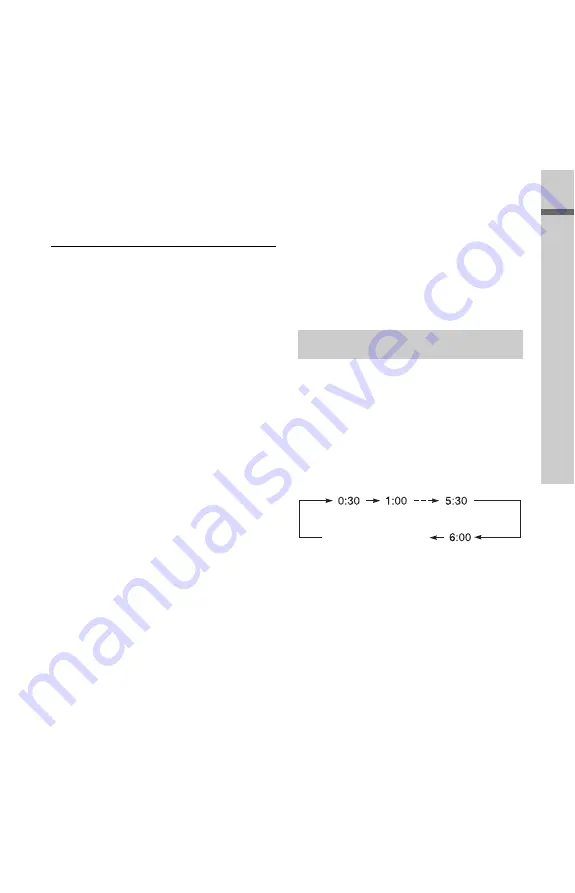
You can set the recorder to record in 30-
minute increments.
Press
z
REC repeatedly to set the
duration.
Each press advances the time in 30-minute
increments. The maximum duration is six
hours.
The time counter decreases minute by
minute to 0:00, then the recorder stops
recording (the power turns off).
To cancel the Quick Timer
Press
z
REC repeatedly until “0:00”
appears in the front panel display. The
recorder returns to normal recording mode.
To stop recording, press
x
REC STOP.
b
Note
If you turn off the recorder during recording,
recording is stopped.
Using the Quick Timer function
(normal recording)
,
continued
Содержание RDR-HXD890
Страница 1: ...3 879 466 11 1 2008 Sony Corporation RDR HXD890 HXD990 DVD Recorder Operating Instructions ...
Страница 150: ...150 ...
Страница 151: ...151 ...
Страница 152: ...3 879 466 11 1 Sony Corporation Printed in Malaysia ...


