26
Installation
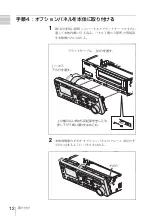
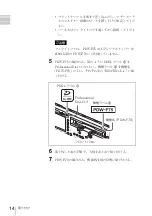
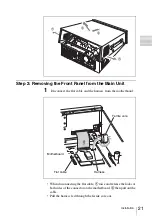
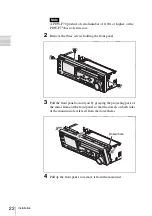
Step 4: Attaching the Option Panel to the Main Unit
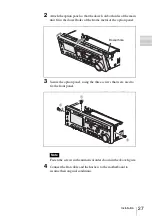
1
Pass the harness connected to the HP-130 board and the flat cable
through the respective openings into the main unit then fit the three
projections at the bottom of the option panel into the respective
holes on the main unit.
F RE
V
F FW
D
PREV
SUB
CLIP
CLIP
MEN
U
CH 1
CH 2
CH 3
CH 4
DISP
LAY
KEY I
NHI
SHIF
T
TOP
END
STAN
DBY
VARIA
BLE
REC
PRES
ET
PB
PAGE
F1
NETW
ORK
REM
OTE
LEVE
L
PHO
NES
LOCA
L
NEXT
PLAY
STO
P
JOG
VER
EJEC
T
PRO
FES
SION
AL D
ISC R
ECO
RDE
R P
DW-F
70
THUM
B
NAIL
ESSE
NCE
MAR
K
SET
S.SE
L
MAR
K1
MAR
K2
OUT
IN
MEN
U
RESE
T
F2
F3
F4
F5
CHAP
TER
EXPA
ND
REC
Insert the projection through the upper wide
area of the hole then slide it downward to fit
the narrow block.
Flat cable: Pass it through the upper opening.
Harness:
Pass it through the
lower opening.
Содержание PDBK-A640
Страница 15: ...取り付け 15 1 2 1 2 機銘板 ...
Страница 30: ...30 Installation ...
Страница 31: ...31 Installation ...

