VAIO Digital Studio™ Reference Manual
24
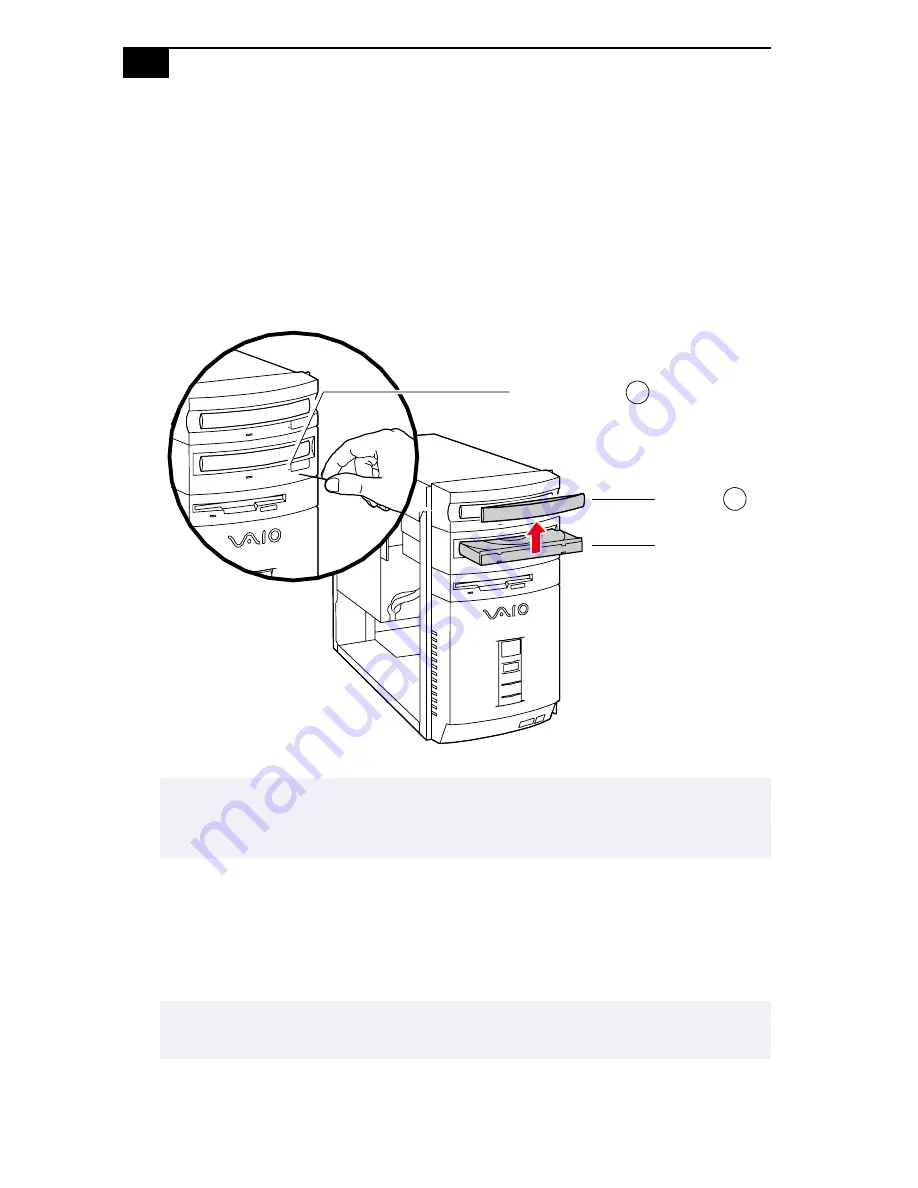
Removing the Front Panel
You must remove the front panel to install, remove, or replace internal
components such as a hard drive, optical drive, or diskette drive.
1
Remove the cover (see
“Removing the Cover”
on page 22).
2
Insert a straightened paper clip into the CD-RW optical drive
emergency-eject hole (
1
in diagram) and gently push out the tray.
3
Remove the front plate (
2
in diagram) from the tray by pressing up on
the plate with your fingers while pressing down on the tray (near the
plate end) with your thumbs. The front plate snaps off.
4
Adjust the tray such that it extends out about two inches.
✍
If the tray does not push out, an alternate method is to connect the power cable to the
unit, press the power-on button on the front, then press the eject button on the CD-RW
drive. Then disconnect the power cable from the unit.
✍
If you mistakenly pushed the tray back in all the way, repeat step 2 until the tray extends
out about two inches.
KY0092.VSD
Front plate
Emergency-eject hole
Tray
1
2
Содержание PCV-R553DS - Vaio Digital Studio Desktop Computer
Страница 1: ......
Страница 10: ...x ...
Страница 14: ...xiv ...
Страница 16: ...VAIO Digital Studio Reference Manual 2 Front View Front panel OM04694X VSD ...
Страница 34: ...20 ...
Страница 42: ...VAIO Digital Studio Reference Manual 28 5 Gently press the frame in until it clicks into position KY0068 VSD ...
Страница 64: ...50 ...
Страница 67: ...System Board 53 Diskette Drive Connector OM04701H VSD 2 34 Key pin 5 1 33 ...
Страница 84: ...70 ...
Страница 86: ...72 ...
Страница 88: ...74 ...
Страница 90: ...76 ...
Страница 114: ...100 ...


