background image

29

Adding track marks 
while recording

You can add track marks (track number) 
while recording to divide the material into 
separate parts, that allow you to go to 
specific track quickly and easily.

While the recorder is recording, press 
T MARK at the point you want to add a 
track mark.

Use this feature to add track marks 
automatically at specified intervals when 
recording through the analog input 
connector. This function is convenient for 
recording long period of time, such as 
lectures, meetings, etc.

1

While the recorder is recording or in 
recording pause, enter the menu and 
select “REC Set” - “Time Mark” - 
“On”.

2

Turn the jog dial until the desired 
time interval appears in the display, 
and then press 

N

ENT to enter the 

selection.

One rotation changes the time setting 
(Time:) by 1 minute, within the range 
of 1 to 60 minutes.

To cancel Time Mark

Select “Off” in step 1.

Using Time Mark to add track 
marks while recording

When the elapsed recording time 
exceeds the time interval for Time 
Mark:

The recorder adds track marks at the point 
you set the time interval and from that 
point the recorder adds a track mark 
whenever the time interval has elapsed.

Example: 

Eight minutes of recording 

has been completed when the Time Mark 
time interval is set to 5 minutes.
A track mark will be added at the 8-
minute point (after the start of recording) 
and after each 5-minute interval 
thereafter.

When the time interval set for Time 
Mark exceeds the elapsed recording 
time:

The recorder adds track marks when the 
set Time Mark time interval has elapsed.

Example: 

Three minutes of recording 

has been completed when the Time Mark 
time interval is set to 5 minutes.
A track mark will be added at the 5-
minute point (after the start of recording) 
and after each 5-minute interval 
thereafter.

z

“T” appears before the time display for track 
marks added by Time Mark.

If you add a track mark by pressing T MARK 
or 

X

, etc. while recording, Time Mark will 

begin automatically adding track mark each 
time the selected time interval as elapsed.

The setting is canceled when you connect a 
digital optical cable to the recorder.

Adding track marks manually

Adding track marks 
automatically (Auto Time 
Mark)

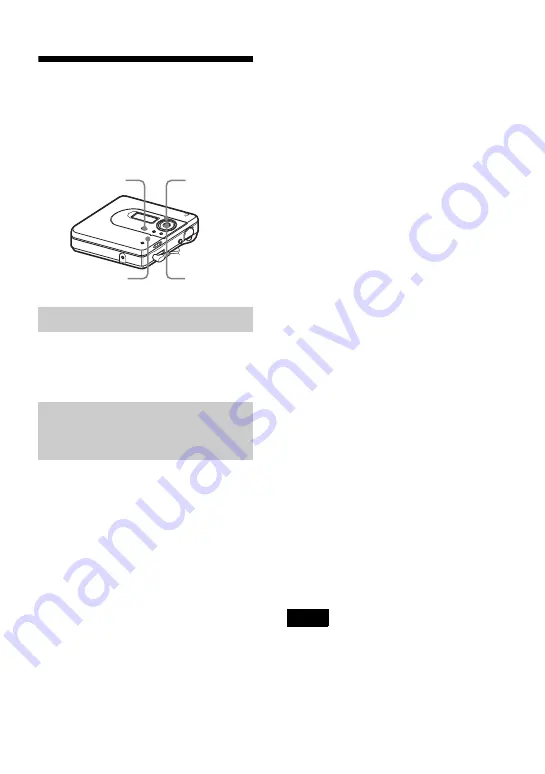
Jog dial

5-way control 
key (

N

ENT)

NAVI/MENU

T MARK/REC

Notes

Содержание MZ-NH600

Страница 1: ...order Operation _____________________________ Software Operation ______________________________ page 10 page 84 2004 Sony Corporation MZ NH600 WALKMAN is a registered trademark of Sony Corporation to represent Headphone Stereo products is a trademark of Sony Corporation ...

Страница 2: ... of optical instruments with this product will increase eye hazard CAUTION INVISIBLE LASER RADIATION WHEN OPEN AVOID EXPOSURE TO BEAM CAUTION CLASS 1M INVISIBLE LASER RADIATION WHEN OPEN DO NOT VIEW DIRECTLY WITH OPTICAL INSTRUMENTS Information The validity of the CE marking is restricted to only those countries where it is legally enforced mainly in the countries EEA European Economic Area Do not...

Страница 3: ... may not be displayed properly on the device This is due to The capability of the connected device The device is not functioning normally SonicStage and SonicStage logo are trademarks or registered trademarks of Sony Corporation MD Simple Burner OpenMG Magic Gate MagicGate Memory Stick Memory Stick Hi MD Net MD ATRAC ATRAC3 ATRAC3plus and their logos are trademarks of Sony Corporation Microsoft Wi...

Страница 4: ...recording 24 Viewing various information 25 Recording from a TV or radio Analog Recording 26 Selecting the recording mode 27 Adjusting the recording level manually 28 Adding track marks while recording 29 Using the group function when recording 30 To start stop recording in sync with the sound source Synchro recording 31 Various ways of playback 33 Viewing various information 33 Selecting the play...

Страница 5: ...r hearing AVLS 52 Turning off the beep sound 53 Storing the settings for individual discs Disc Memory 53 Starting the playback quickly Quick Mode 54 Selecting the disc mode Disc Mode 55 Adjusting the contrast of the display window Contrast Adjustment 55 Changing the operational direction of the display 56 Using the recorder with a computer 57 What you can do through connection with a computer 57 C...

Страница 6: ...ing MD Walkman operations Simple mode 90 Recording by computer operations Standard mode 91 Using SonicStage 93 Importing audio data 93 Transferring audio data from your computer to the MD Walkman 95 Transferring back audio data from the MD Walkman to your computer 97 Using SonicStage Help 100 Referring to SonicStage Help 102 Other information 104 Uninstalling SonicStage MD Simple Burner 104 On cop...

Страница 7: ...7 ...

Страница 8: ...es 10 to 82 This section explains all of the recorder functions It also gives details on the problems you may encounter while using the recorder and how to solve them and about what to do when a message appears in the display When you encounter any problems or need more explanation Refer to Troubleshooting and explanations page 65 Learning more about Hi MD Hi MD is a new MiniDisc format with advan...

Страница 9: ...rted The displayed items in the illustrations that appear in this section may differ from the actual items displayed by the software Explanations in this section assume familiarity with basic Windows operations For details on the use of your computer and the operating system please refer to the respective manuals Explanations in this section cover general Hi MD Net MD products For this reason some...

Страница 10: ...the use of the clamp filter refer to How to use the supplied large clamp filter supplied with this unit CD ROM SonicStage MD Simple Burner 1 Do not play a CD ROM on an audio CD player Dedicated USB cable 1 Headphones earphones 1 When using this unit remember to follow the precautions below in order to avoid warping the cabinet or causing the unit to malfunction Note Make sure not to sit down with ...

Страница 11: ... to the MENU setting mode page 21 F GROUP button G DC IN 3V jack When you use the optional AC power adaptor connect it to this jack H X pause button I Jog dial J 5 way control key Operation Function Press NENT 1 1 There are tactile dots beside the NENT and VOL buttons play enter Press towards find the beginning of the previous track rewind Press towards find the beginning of the next track fast fo...

Страница 12: ...e operation mode of the recorder is in Hi MD mode and MD lights up when the operation mode is in MD mode D REC indication Lights up during recording or file transfers from the computer When flashing the recorder is in record standby mode E Battery indication Shows the approximate remaining battery power If the battery is weak the indication becomes empty and starts flashing F Disc indication Shows...

Страница 13: ...ery condition on the display window of the recorder Battery power decreasing m Weak battery m The battery is drained LOW BATTERY flashes in the display and the power goes off The battery level indication is approximate It may be more or less than the indication depending on the operating condition or the operating environment e E 2Insert a size AA alkaline dry battery minus terminal first 3Close t...

Страница 14: ...hortened if you repeatedly make short recordings Battery life1 Hi MD mode When using a 1GB Hi MD disc Unit approx hours JEITA2 1 When using a new Sony LR6 size AA alkaline dry battery produced in Japan 2 Measured in accordance with the JEITA Japan Electronics and Information Technology Industries Association standard When Linear PCM Hi SP Hi LP Recording continuously 2 5 3 5 4 5 Playing continuous...

Страница 15: ... use the optical cable 1 Connect the optical cable to the recorder and an external component Insert the cables firmly and completely into the appropriate jacks Make sure to disconnect the dedicated USB cable before recording Note To LINE IN OPT Optical plug Optical mini plug CD player MD player DVD video player etc To a digital optical out jack See Optional accessories page 64 Optical cable contin...

Страница 16: ...using a standard disc 60 74 80 minutes the operation mode can be set as follows Make sure to check the record protect tab is closed Disc condition Operation mode Blank disc The mode set for Disc Mode in the menu 1 The Disc Mode is factory set to Hi MD If you want to use the disc on another component that does not support Hi MD set the Disc Mode to MD to use the disc in MD mode 1 Refer to Selecting...

Страница 17: ...xisting contents Track marks are automatically added at the same point as the sound source and the contents are recorded together as a group PAUSE Connected component Make sure that disc indication has stopped T MARK REC NENT PAUSE Connected component To Press Stop Press x Pause Press X1 Press X again to resume recording 1 A track mark is added at the point where you press X again to resume record...

Страница 18: ...d The operation may stop Do not move or jog the recorder or disconnect the power source while recording or while DATA SAVE or SYSTEM FILE WRITING is flashing in the display If you do the data recorded up to that point may not be recorded to the disc or data on the disc may be damaged Recording cannot be done when the disc does not have enough space for recording If the power supply is disrupted i ...

Страница 19: ... earphones when you operate 2Press the 5 way control key towards VOL or to adjust the volume on the recorder The volume will be shown in the display To stop play press x A long beep sounds in the headphones earphones when you operate Playback starts from the point you last stopped playing After you stop the recorder the recorder will automatically turn off in about 10 seconds when using batteries ...

Страница 20: ... track Press the 5 way control key towards Go backwards or forward while playing Press and hold the 5 way control key towards or Search for a point in a track while viewing the elapsed time Time search While pausing press and hold the 5 way control key towards or Search for a specific track while viewing track numbers Index search While the recorder is stopped press and hold the 5 way control key ...

Страница 21: ...ic menu items appear or Advanced all menu items appear Refer to Changing the displayed menu items Menu Mode page 52 for menu mode setting 1 Press and hold NAVI MENU for 2 seconds or more to enter the menu 2 Turn the jog dial to select the item 3 Press the 5 way control key NENT to enter the selection 4 Repeat steps 2 and 3 The setting will be entered when you press the 5 way control key NENT at th...

Страница 22: ... and disc settings Note Menu 1 Menu 2 Function Site page Edit Title Adding a track name artist name album name group name or disc name page 40 Set Assigns recorded tracks or groups to a new group page 43 Release Releases group settings page 44 Move Changes the order of tracks or groups page 45 Erase Erases tracks groups or the entire disc contents page 47 Format Formats the disc and restores it to...

Страница 23: ...peration Group Recording page 30 SYNC REC Simplifies operations during digital recording Synchro Recording page 31 Option Menu Mode Changes the displayed menu items page 52 AVLS Sets a limit on the maximum volume to protect your hearing page 52 Beep Turns the beep sound on or off page 53 Disc Mem Stores the recorder settings Disc Memory page 53 QuickMode Sets the recorder to start playback page 54...

Страница 24: ...start recording on a 1GB Hi MD disc NotENOUGH POWER TO REC may appear and recording cannot be done even if the battery level indication shows sufficient remaining power while the recorder is stopped or playing This is because of a mechanism that disables recording when the remaining battery power is estimated by the recorder to be insufficient due to the high power consumption required for 1GB Hi ...

Страница 25: ... 5 way control key NENT NAVI MENU Jog dial A B C Group number and track number Elapsed time Track name and artist name Hi MD Track name MD Group number and track number Remaining time for recording remaining free space Hi MD Remaining time for recording MD RecRemain and FreeSpace Hi MD RecRemain MD Numbers of tracks after the current track Remaining time after the current location in the disc AllR...

Страница 26: ...ette recorder radio or TV This operation can be done on the recorder only 1 Make connections Use the appropriate connecting cord to suit the source equipment For details see Optional accessories page 64 2 Press NENT while pressing T MARK REC to start recording 3 Play the source you want to record A B C Group number and track number Elapsed time Level meter Group number and track number Remaining t...

Страница 27: ...cause of the special digital audio compression technology that enables the long time recording If noise is produced it is recommended that you record in normal stereo or LP2 mode to obtain better sound quality It is recommended that you use the recorder to edit dividing or combining long tracks recorded in linear PCM stereo Transferring such tracks and editing them on a computer may require an ext...

Страница 28: ...level Each level meter shows the following Upper L channel input level Lower R channel input level 5 Press X again to start recording If your source is an externally connected component play the source to the beginning of the material to be recorded and then start recording To switch back to automatic level control Select Auto AGC in step 2 You cannot adjust the left and right channel levels separ...

Страница 29: ...s at the point you set the time interval and from that point the recorder adds a track mark whenever the time interval has elapsed Example Eight minutes of recording has been completed when the Time Mark time interval is set to 5 minutes A track mark will be added at the 8 minute point after the start of recording and after each 5 minute interval thereafter When the time interval set for Time Mark...

Страница 30: ...n be input in MD mode only The recorder is factory set to create a new group automatically when recording This is convenient when recording several CDs in succession You can check the group recording setting as follows While the recorder is stopped enter the menu and select REC Set REC REC On To record without creating a new group Select REC Off at the end of the procedure above 1 2 4 5 6 7 8 1213...

Страница 31: ...ng the starting and stopping of recording occurs are synchronized with the sound source This simplifies digital recordings e g from a CD player since the need to operate the recorder or the sound source is eliminated Synchro recording is only possible with the optical cable connected 1 Make connections Use the appropriate optical cable to suit the source equipment For details see Optional accessor...

Страница 32: ...o sound on the sound source there may be cases when recording does not pause automatically during synchro recording due to the noise level emitted from the sound source If a silent portion is encountered for approximately 2 seconds during synchro recording from a sound source other than a CD or an MD a new track mark is automatically added at the point where the silent portion ends Notes ...

Страница 33: ...I MENU 5 way control key NENT Jog dial A B C Group number and track number Elapsed time Track name and artist name Hi MD Track name MD Track name and artist name Hi MD Track name MD Remaining time of the current track 1 Remain Numbers of tracks after the current track Remaining time after the current location in the disc AllRemain Disc name and artist name Hi MD 1 Disc name MD 1 1 Track number app...

Страница 34: ...at play selects Repeat play 1 While playing press NAVI MENU The recorder enters navigation mode and the Main play mode display appears 2 Turn the jog dial to select the desired play mode and then press NENT to enter the selection Each time you turn the jog dial A changes as follows When you press NENT B appears in the display Note 5 way control key NENT GROUP NAVI MENU Jog dial Playing tracks in M...

Страница 35: ...selection The name of the group to which current track belongs appears in the display The recorder plays the tracks in that group from the current track to the last track z You can cue to the start of a group While playing press GROUP on the recorder and press the 5 way control key towards or to select a desired group Listening to tracks by a specific artist Artist Play in Hi MD mode only If the t...

Страница 36: ...rent track to the last track z You can cue to the first track of the next or previous album While playing press GROUP on the recorder and press the 5 way control key towards or Listening to selected tracks only Bookmark Play You can bookmark tracks on a disc and play them only The sequence of bookmarked tracks cannot be changed To bookmark the tracks 1 While playing the track you want to bookmark ...

Страница 37: ...ints A and B are within the same track 1 While playing a track that contains the section you want to repeat enter the menu and select SubPMode A BRepeat A flashes in the display 2 Press NENT at the starting point A Point A is entered and B flashes in the display 3 Press NENT at the ending point B Point B is entered A B and lights up and the section between point A and B starts playing repeatedly z...

Страница 38: ... The selected track starts playing After step 4 Main play mode and Sub play mode will be canceled Repeat play will function During a search unlabeled tracks will appear at the end of each list While the recorder is sorting the selected items SORTING appears in the display Wait until this indication disappears from the display before doing any operation Selecting the sound quality 6 Band Equalizer ...

Страница 39: ...om1 or Custom2 2 Press the 5 way control key towards or to select the frequency 3 Turn the jog dial to adjust the level 4 After selecting the level press NENT to enter the selection To cancel the setting Select Normal in step 1 6 Band Equalizer will not function during recording A B Heavy SH Pops SP Jazz SJ Unique SU Custom1 S1 Custom2 S2 A B Level of the each frequency 100Hz 10 kHz Note Frequency...

Страница 40: ... or disconnect the power source while editing or SYSTEM FILE WRITING is flashing in the display If you do the data edited up to that point may not be recorded to the disc or data on the disc may be damaged SYSTEM FILE WRITING flashes while the editing results are being recorded While SYSTEM FILE WRITING is flashing the lid becomes locked Adding titles Title You can add titles to tracks groups and ...

Страница 41: ...up or disc while the recorder is stopped recording or playing You can also label artist names and album names to tracks in a disc used in Hi MD mode Note that if you label a track name an artist name or an album name to a track while the recorder is stopped the track must be the currently selected You can label a group while the recorder is recording or playing a track in the group or while a trac...

Страница 42: ...acter alternate The cursor flashes at the next input position Functions1 Operations To move the cursor in the character palette 5 way control key Turn the jog dial move the cursor to the right or left To select a letter in the letter input area Turn the jog dial To enter a letter Press NENT To enter a title Press NENT for 2 seconds or more To insert a blank space Press GROUP and press the 5 way co...

Страница 43: ...etters that was created by another device in MD mode only Assigning tracks or groups as a new group Group Set With this function you can assign existing tracks or groups to a new group and also you can assign a track that currently belongs to no group to an existing group You can create a maximum of 255 groups on a Hi MD disc or a standard disc in Hi MD mode and 99 groups on a standard disc Regist...

Страница 44: ...the jog dial until the number of the desired last track appears in the display and then press NENT to enter This selects the last track of the new group and the group can be labeled If the disc contains groups only the last track number of each group is displayed 4 Label a group see Adding titles Title page 40 In step 2 the first track must be either the first track of an existing group or a track...

Страница 45: ...k C track number 3 from the third to the second track 1 While playing the track you want to move enter the menu and select Edit Move Move The selected track number appears in the display 2 Turn the jog dial until the destination track number flashes in the display For the example since track C will be moved to track 02 turn the jog dial until 02 appears in the display 3 Press NENT to enter the sel...

Страница 46: ... middle row of the display 2 Turn the jog dial to select the destination point on the disc and then press NENT to enter the selection z If the track or group has been labeled press the 5 way control key towards to make the track or group name appear in the display during operation Press the control key towards to return to the track or group number display If all tracks are moved out of the group ...

Страница 47: ...a recording has been erased you cannot retrieve it Make sure of the track you are erasing 1 While playing the track you want to erase enter the menu and select Edit Erase Erase Erase OK and PUSH YES ENTER NO CANCEL appear in the display If the selected track was transferred from the computer TrkFromPC ERASE OK appears in the display 2 Press NENT to erase the track The track is erased and the next ...

Страница 48: ...e it In case of a Hi MD disc or standard disc in Hi MD mode only audio data is erased Other data such as text or image data will not be erased 1 Play the disc you want to erase to check the contents 2 Press x 3 Enter the menu and select Edit Erase AllErase ALL TRACK Erase OK and PUSH YES ENTER NO CANCEL appear in the display If the disc contains tracks that have been transferred from the computer ...

Страница 49: ...a track mark is added The track number will increase by one To add track marks while recording except while synchro recording Press T MARK at the point you want to add a track mark You can use Time Mark to add track marks automatically at specified intervals except while digital recording page 29 Combining tracks Combine When you record with analog line input unnecessary track marks may be recorde...

Страница 50: ... Hi MD mode By formatting a disc all data including non audio data will be erased If you think a disc contains such data insert the disc into the recorder and connect the recorder to the computer to check the contents of the disc If you format a disc the transferred tracks on the disc will also be erased and the number of transfer authorizations for those tracks will be decreased by one To prevent...

Страница 51: ...l until YES appears in the display and then press NENT to enter the selection When formatting completes NO TRACK appears in the display if a 1GB Hi MD disc is inserted in the recorder or BLANKDISC appears if a standard disc in Hi MD mode is inserted NAVI MENU 5 way control key NENT Jog dial x ...

Страница 52: ...en press NENT to enter the selection Protecting your hearing AVLS The AVLS Automatic Volume Limiter System function keeps down the maximum volume to protect your ears 1 Enter the menu and select Option AVLS 2 Turn the jog dial until AVLS On appears in the display and then press NENT to enter the selection When you try to turn the volume too high AVLS NO VOLUME OPERATION appears in the display The ...

Страница 53: ... is inserted The following setting can be stored Bookmark Custom1 and Custom2 settings of 6 Band Equalizer You can check the setting as follows 1 Enter the menu and select Option Disc Mem 2 Turn the jog dial until On appears in the display and then press NENT to enter the selection To set the recorder so that disc settings are not stored Select Off in step 2 Erasing the disc information 1 Insert t...

Страница 54: ...ayback can start quickly 1 Enter the menu and select Option QuickMode 2 Turn the jog dial until Quick On appears in the display and then press NENT to enter the selection To switch back to the normal setting Selects Quick Off in step 2 When the quick mode is set to Quick On the power remains on within the recorder even when nothing appears in the display This leads to a shorter battery life If no ...

Страница 55: ...e setting the operation mode can only be Hi MD when using a 1GB Hi MD disc The operation mode set in the Disc Mode menu is applied to a blank 60 74 80 minute standard disc used on the recorder even if a different operation mode was selected in the SonicStage software or a different operation mode appeared on the display after the disc was formatted by the SonicStage software Adjusting the contrast...

Страница 56: ...he factory setting You can change the factory setting to scroll in the opposite direction 1 Enter the menu and select Option Jog Dial 2 Turn the jog dial until Reverse appears in the display and then press NENT to enter the selection To turn the setting to normal Select Default in step 2 5 way control key NENT NAVI MENU Jog dial ...

Страница 57: ...he headphones earphones connected to the recorder during MD mode Connecting the recorder to your computer When you connect the dedicated USB cable directly to the USB connecting jack on the recorder power bus power is supplied from the USB port of the computer This allows the recorder to be used without power being supplied from the battery When using Windows 2000 Professional Be sure the dedicate...

Страница 58: ... you insert a new alkaline dry battery as a precaution against power failures disconnection of the dedicated USB cable or other unforeseen occurrences We do not assure the results should there be a mis operation transfer failures or destruction of audio data caused by unforeseen occurrences If you disconnect the dedicated USB cable from the recorder and want to reconnect it make sure to wait at le...

Страница 59: ...sc in Hi MD mode into the recorder and make connection with the computer the recorder is recognized as an external device and can be viewed on the Windows Explorer You can use the recorder in the same way as other devices When the SonicStage software is active the recorder is not recognized as a data storage device If you format a disc on the computer make sure to format the disc using the SonicSt...

Страница 60: ...r and other factors Therefore the actual space available for use may be lower than that displayed by Windows Explorer Free space 60 minute standard disc 219 MB 229 965 824 bytes 832 KB 851 968 bytes 218 MB 229 113 856 bytes 74 minute standard disc 270 MB 283 312 128 bytes 832 KB 851 968 bytes 269 MB 282 460 160 bytes 80 minute standard disc 291 MB 305 856 512 bytes 832 KB 851 968 bytes 290 MB 305 ...

Страница 61: ...g especially at pedestrian crossings You should exercise extreme caution or discontinue use in potentially hazardous situations Preventing hearing damage Avoid using headphones earphones at high volume Hearing experts advise against continuous loud and extended play If you experience a ringing in your ears reduce the volume or discontinue use Caring for others Keep the volume at a moderate level T...

Страница 62: ... while operating which is caused by the power saving system of the recorder and it is not a problem To protect a recorded disc To record protect a disc slide open the tab at the side of the disc In this position the disc cannot be recorded To record again slide the tab back so the tab is visible If you have any questions or problems concerning your recorder please consult your nearest Sony dealer ...

Страница 63: ... kHz 16 bit PCM ATRAC3plus Adaptive TRansform Acoustic Coding 3 plus MD ATRAC ATRAC3 LP2 LP4 Modulation system Hi MD 1 7RLL Run Length Limited PRML Partial Response Maximum Likelihood MD EFM Eight to Fourteen Modulation Frequency response 20 to 20 000 Hz 3 dB Inputs LINE IN OPT 1 stereo mini jack for analog input minimum input level 49 mV optical digital mini jack for optical digital input Outputs...

Страница 64: ...ailed information about the accessories in your country When using optional headphones use only headphones earphones with stereo mini plugs You cannot use headphones earphones with micro plugs When using the optional AC power adaptor Before using the AC power adaptor do the following procedure to attach the clamp filters to the cord of the AC power adaptor You must affix the ferrite cores to compl...

Страница 65: ...e of a mechanism that disables recording when the remaining battery power is estimated by the recorder to be insufficient due to the high power consumption required for 1GB Hi MD disc recording Insert a new alkaline dry battery or connect the AC power adaptor not supplied to the recorder The remaining recording time appears as 0 00 00 and recording cannot be done even though 2 0MB of free space is...

Страница 66: ...ile recording in monaural This is normal During digital recording the sound will be stereo in the headphones earphones even though the recorded sound is monaural Momentary noise is heard when recording Due to the special digital audio compression technology used in LP4 stereo mode momentary noise may occur on very rare occasions with certain sound sources Record in SP or LP2 mode The lid does not ...

Страница 67: ...unting to 2 seconds 4 seconds or 8 seconds before the next recording This is to prevent accidental erasing of a previous track whenever a new recording is started Therefore the actual recording time will decrease whenever a recording is stopped by a maximum of 6 seconds 12 seconds or 24 seconds TRACK FULL appears even before the disc has reached the maximum track number or recording time This is d...

Страница 68: ...as that of the sound source Or you used a connecting cord with an attenuator Use a correct connecting cord without an attenuator The recording level was low Adjust the recording level manually while recording page 28 Volume cannot be turned up AVLS is on Release AVLS settings page 52 No sound comes through the headphones earphones The headphones earphones plug is not firmly connected Plug in the p...

Страница 69: ...mechanism that disables editing when the remaining battery power is estimated by the recorder to be insufficient due to the high power consumption required for 1GB Hi MD disc editing Insert a new alkaline dry battery or connect the AC power adaptor not supplied to the recorder The lid does not open The power sources have been disconnected during recording or editing or the battery have been exhaus...

Страница 70: ...Hi LP stereo 32 seconds or less MD mode SP stereo 12 seconds or less LP2 stereo Monaural 24 seconds or less LP4 stereo 48 seconds or less You cannot combine tracks recorded in different recording modes e g a track recorded in stereo and a track recorded in monaural nor can you combine a track recorded with digital connection and a track recorded with analog connection The disc cannot edit on other...

Страница 71: ...ecorder and the computer A USB hub is used Connect the dedicated USB cable directly to the USB port of the computer Network communication has failed Disconnect the dedicated USB cable wait at least 2 seconds and then reconnect it If the recorder is still not recognized disconnect the dedicated USB cable restart the computer and then connect the dedicated USB cable again Even though the recorder is...

Страница 72: ...e recorder PC MD appears You cannot operate the recorder while the recorder is connected to the computer The lid does not open It happens if you disconnect the dedicated USB cable in the middle of a data transfer recording or editing operation on the computer but while the dry alkaline battery is drained Reconnect the dedicated USB cable or insert a new dry alkaline battery into the recorder and t...

Страница 73: ... the dedicated USB cable 2 Leave the recorder for about 30 seconds 3 Connect the power source The display window is not normal The recorder was disconnected from the power source Let the recorder sit for a while or disconnect the power source reconnect it and then press any of the operation buttons The operation mode of the blank 60 74 80 minute standard disc differs from the mode following format...

Страница 74: ...t Editing titles cannot be done if the title includes characters that cannot be input on the recorder CANNOT OPERATE You tried to press X or T MARK during synchro recording CANNOT RECORD OR PLAY There is no audio data that can be played on the recorder The audio data or disc management file has been damaged Erase the whole disc page 48 or perform the Format function page 50 CANNOT SET You tried to...

Страница 75: ...he computer make sure to use the SonicStage software GROUP FULL You tried to create a 256th group on a disc used in Hi MD mode or 100th group on a standard disc You can create only up to 255 groups on a disc used in Hi MD mode or 99 groups on a standard disc on a disc Keep the group number within 255 or 99 HOLD The recorder is locked Slide HOLD against the arrow to unlock the recorder page 13 LOW ...

Страница 76: ... tried to record on a 1GB Hi MD disc with insufficient battery power for recording page 65 Insert a new alkaline dry battery or connect the AC power adaptor not supplied to the recorder NO TITLE You tried to select Album in the Main play mode with a disc that has no album name information You tried to select by Album in the Search function with a disc that has no album name information NO TRACK Yo...

Страница 77: ... DATA ERROR The recorder cannot read the disc information correctly Insert another disc If it is no problem to erase the entire disc do so page 48 TRACK FULL You tried to record more than 2 047 tracks on a disc in Hi MD mode or more than 254 tracks on a disc in MD mode Erase unnecessary tracks page 47 TrkFromPC NO EDIT You tried to combine or divide tracks that were transferred from the computer Y...

Страница 78: ...g except in the case of Hi MD discs that support Hi MD mode only When using a blank disc set the Disc Mode setting to select either Hi MD or MD About Linear PCM Linear PCM is a digital non compressed audio coding system You can enjoy high quality sound equal to that of CDs by recording in this mode The meaning of no sound No sound describes a recorder condition in which the input level is about 4 ...

Страница 79: ... 2 When transferring 5 minute tracks Codec Bit rate 1GB Hi MD disc 80 minute standard disc 74 minute standard disc 60 minute standard disc Linear PCM 1 4Mbps 1 hour and 34 minutes 28 minutes 26 minutes 21 minutes ATRAC3plus 256kbps 7 hours and 55 minutes 2 hours and 20 minutes 2 hours and 10 minutes 1 hour and 45 minutes ATRAC3plus 64kbps 34 hours 10 hours and 10 minutes 9 hours and 25 minutes 7 h...

Страница 80: ...es 2 hours LP4 ATRAC3 66kbps 5 hours and 20 minutes 4 hours and 56 minutes 4 hours MONO monaural Monaural 2 hours and 40 minutes 2 hours and 28 minutes 2 hours When transferring from the computer Recording time1 2 2 When transferring 5 minute tracks Codec Bit rate 80 minute standard disc 74 minute standard disc 60 minute standard disc ATRAC stereo 292kbps 80 minutes 74 minutes 60 minutes ATRAC3 13...

Страница 81: ...on the computer About the DSP TYPE S for ATRAC ATRAC3 This recorder supports DSP TYPE S a specification for high level Sony MiniDisc decks equipped with digital signal processors DSP This specification allows the recorder to produce high quality sound from tracks recorded in MDLP mode Since it retains DSP TYPE R support the recorder produces superior results during recording or playback in SP norm...

Страница 82: ...r DVD player etc Equipment with an analog line output jack Casette deck radio record player etc Usable cord Optical cable with an optical or an optical mini plug page 15 Line cable with 2 phono plugs or a stereo mini plug page 26 Signal from the source Digital Analog Even when a digital source such as a CD is connected the signal sent to the recorder is analog Track marks1 1 You can erase unnecess...

Страница 83: ...83 ...

Страница 84: ...ording the music tracks to the computer SonicStage allows you to import audio data to your computer from music sources such as audio CDs and the Internet and then transfer the audio data stored in your computer to an MD What you can do with MD Simple Burner What you can do with SonicStage Audio CD MD Walkman Audio CD MD Walkman Internet Music files in the MP3 WAV formats Import Transfer ...

Страница 85: ...age 87 SonicStage MD Simple Burner Connecting an MD walkman to your computer see Recorder Operation Recording music tracks from an audio CD in the CD drive of your computer page 89 Importing audio data to your computer page 93 Connecting an MD walkman to your computer see Recorder Operation Transferring audio data from your computer page 95 Listening to an MD ...

Страница 86: ...al users install Service Pack 3 or later version before using the software System requirements Computer IBM PC AT or Compatible CPU Pentium II 400 MHz or higher Pentium III 450 MHz or higher is recommended Hard disk drive space 200 MB or more 1 5 GB or more is recommended The amount space will vary according to Windows version and the number of music files stored on the hard disk RAM 64 MB or more...

Страница 87: ...oftware will co exist with the new version You will still be able to use music data registered by an older software version even after SonicStage has been installed As a precaution we recommend that you back up your music data To back up the data refer to Backing Up My Library Backing Up Data to a Disk on SonicStage Help If the MD Walkman is connected to the computer with the USB cable make sure t...

Страница 88: ...nicStage and MD Simple Burner may differ from those in the illustration above The installation may take 20 to 30 minutes depending on your system environment Make sure to restart your computer only after the installation is completed Was the installation successful If any trouble occurs during the installation see Troubleshooting page 106 Click Install SonicStage and MD Simple Burner ...

Страница 89: ...ord an entire CD or only the first track without launching MD Simple Burner Standard mode page 91 You can launch MD Simple Burner to record using computer operations Record an entire CD or selected tracks Only audio CDs with a mark can be used with MD Simple Burner We do not guarantee normal operation in the case of the copy controlled CDs You cannot record in simple mode while the MD Simple Burne...

Страница 90: ...ng starts All tracks on the CD are recorded as a new group To stop recording Click on the computer display While the first track is being recorded you can use x stop button to stop on the MD Walkman Setting the recording mode Before starting recording right click the MD Simple Burner icon in the task tray and then select in recording mode Recording first track only Before starting recording right ...

Страница 91: ... Simple Burner icon in the task tray or right click and select Show Standard Mode Double click the MD Simple Burner shortcut icon on the desktop The window for recording all tracks on the CD OPEN To open the display as shown on page 92 click here Disc name MD Total time of the selected tracks of CD CD icon MD icon Album name CD Recording mode drop down menu Remaining recording time of the inserted...

Страница 92: ...select all tracks click here All Erase Check boxes Check the box of the tracks that you want to record To select all tracks click here Get CD info Information of an audio CD album name track title etc will be reflected in the track list CD operating section Use these controls to confirm the tracks on audio CD to be recorded CONFIG Click here to do the following Set the CD ROM drive View version in...

Страница 93: ... CDs 1 Start up SonicStage Select Start All Programs SonicStage SonicStage Programs in the case of Windows 2000 Professional Windows Millennium Edition Windows 98 Second Edition SonicStage starts up and the main window appears z You can also start SonicStage with double click SonicStage icon on the desktop 2 Insert the audio CD that you want to record into the CD drive of your computer The source ...

Страница 94: ...it Rate on the right side of the screen CD Recording Format My library dialog box will appear The dialog box will ask you to select the format and bit rate for recording the audio CD 6 Click The recording of the tracks selected in step 4 starts To stop recording Click z If CD information such as album title artist name and track names could not be obtained automatically click CD Info on the right ...

Страница 95: ...cable before the transfer has completed 2 Select the transfer destination from the Transfer Destination list on the right side of the screen and click Transfer The screen is switched to the Transfer Hi MD or Net MD screen 3 Click the tracks you want to transfer in the My Library list on the left side of the screen To transfer more than one track hold down the Ctrl key while selecting the tracks To...

Страница 96: ...Click When transferring to a Hi MD Walkman If you want to play the transferred tracks on a Net MD Walkman that does not support Hi MD select Net MD for the mode operation mode on the right side of the screen after step 2 This operation mode can be selected only when using a standard disc in Hi MD mode for recording A transfer will fail and an error message will appear in the following cases When t...

Страница 97: ...USB cable before the transfer has completed 2 Select the transfer destination from the Transfer Destination list on the right side of the screen and click Transfer The screen is switched to the Transfer Hi MD or Net MD screen 3 In the list on the right side of the screen click to select the tracks you want to transfer to your computer 4 Click in the middle of the screen The transferring of the tra...

Страница 98: ...r 3 Click the tracks you want to transfer in the Hi MD list on the right side of the screen To transfer more than one track hold down the Ctrl key while selecting the tracks To transfer all tracks of the group click the group 4 Click in the middle of the screen The Import dialog box appears 5 Specify the transfer destination in the dialog box To import tracks to a new album select Import to a new ...

Страница 99: ...port tracks to My Library while leaving the copy of them on the Hi MD Walkman check the box Tracks left on the Hi MD Walkman are treated the same as tracks that have been automatically transferred from the computer For this reason they cannot be divided or combined on the Hi MD Walkman When you transfer tracks recorded in linear PCM on the Hi MD Walkman to a computer for editing dividing or combin...

Страница 100: ...lp while SonicStage is running z You can display SonicStage Help by selecting the following Start All Programs SonicStage SonicStage Help Programs in the case of Windows 2000 Professional Windows Millennium Edition Windows 98 Second Edition In SonicStage Help Device Media is the general term for the external device such as the MD Walkman the Network Walkman and the CD Walkman Follow the instructio...

Страница 101: ...dow 2 Type in the words 3 Click List Topics A list of the words that were searched is displayed 4 Click to select the desired item among those displayed 5 Click Display An explanation of the selected item is displayed Understanding SonicStage Help Searching for a word inside an explanation The right side frame The left side frame An explanations of the selected item Type in the keyword to find tex...

Страница 102: ...e Help Listen to audio data from the CD drive or My Library Music Playback Playing Back an Audio CD or Playing Back a Track in My Library Listen to audio data on the MD Walkman connected to the computer Music Playback Playing Back a Track on a Device Media Managing and editing imported tracks To SonicStage Help Change information related to CD information downloading Changing SonicStage Settings C...

Страница 103: ...tage backup Backing Up My Library FAQ About SonicStage Backup Tool Troubleshooting To SonicStage Help Look up troubleshooting procedure Additional Information Troubleshooting When you want to know To SonicStage Help Look up unknown words Additional Information Glossary Look up the kinds of audio data that can be managed by SonicStage Overview Content Handled Within SonicStage Look up the kinds of ...

Страница 104: ...mple Burner 2 0 xx in the Currently Installed Programs list and then click Change and Remove Follow the displayed instruction and restart your computer The uninstallation is completed when the computer has restarted Change Remove in the case of Windows 2000 Professional Add Remove in the case of Windows Millennium Edition Windows 98 Second Edition When you install SonicStage Ver 2 x MD Simple Burn...

Страница 105: ...ur computer to prevent unauthorized distribution Restrictions on audio content High quality digital audio content is widely available through music distribution services on the Internet To protect the copyrights of its holders from unauthorized distribution some audio content is distributed with certain restrictions on recording and playback For example the playback period or playback count for th...

Страница 106: ...system RAM capacity Hard disk drive containing SonicStage MD Simple Burner and audio data Capacity of the drive Free space Version of the software SonicStage Ver 2 x1 MD Simple Burner Ver 2 02 1 To check the SonicStage software version go to Help About SonicStage in the SonicStage window 2 To check the MD Simple Burner software version go to CONFIG Version in the MD Simple Burner window Error Mess...

Страница 107: ...ce on your hard disk tYou need 200MB or more free space on your hard disk The installation appears to have stopped before it has completed Check for the appearance of an error message beneath the installation window t Press the Tab key while holding down the Alt key If an error message has appeared press the Enter key The installation will resume If there is no message the installation is still in...

Страница 108: ...tConnect the supplied dedicated USB cable firmly The connections are made through a USB hub tOperations are not guaranteed for USB hub connections Connect the MD Walkman directly to the USB connector on the computer Even though the dedicated USB cable is used to connect the MD Walkman to the computer the display on the MD Walkman does not indicate it is connected It takes time to recognize SonicSt...

Страница 109: ...105 D Data storage 59 Disc memory 53 Disc Mode 55 Divide 49 DSP TYPE S 81 E EMD service 86 Erasing a whole disc 48 groups 47 tracks 47 F Format 50 G G PROTECTION 81 Group erasing 47 moving 46 recording 30 releasing 44 setting 43 H Hard disk free space 86 Hi MD 78 HOLD 12 I Importing 93 Installing 86 L Labeling 41 Linear PCM 78 M Manual recording 28 MD Simple Burner 89 MDLP 27 Menu 22 Menu Mode 52 ...

Страница 110: ...1 System environment 86 System limitations 86 T Time Mark 29 Title 40 Track mark Add Divide 49 Erase Combine 49 Transferring to the MD Walkman 95 to your computer 97 U Uninstalling 104 USB cable 10 USB port 86 W Windows 2000 Professional 86 91 93 100 104 Windows 98 Second Edition 86 91 93 100 104 Windows Media Player 86 Windows Millennium Edition 91 93 100 104 Windows XP Home Edition 86 Windows XP...

Страница 111: ......

Страница 112: ...Printed in Malaysia 3 2 6 6 4 6 6 1 1 3 ...

Отзывы: