background image

45

Custom setup

Select 

 (CUSTOM SETUP), then select the desired item and option below, using 

M

/

m

 and 

(ENTER)

. For details on this procedure, see “Basic operation of visual setup” on page 43.

Follow the page reference for details. “

z

” indicates the default setting.

*1

Excluding DVD-R/DVD-R DL/DVD-RW in VR mode.

*2

DVD VIDEO only.

Note

If parental control is applied, the resume playback will not work. In this case, playback starts from the beginning of 
the disc when it is inserted.

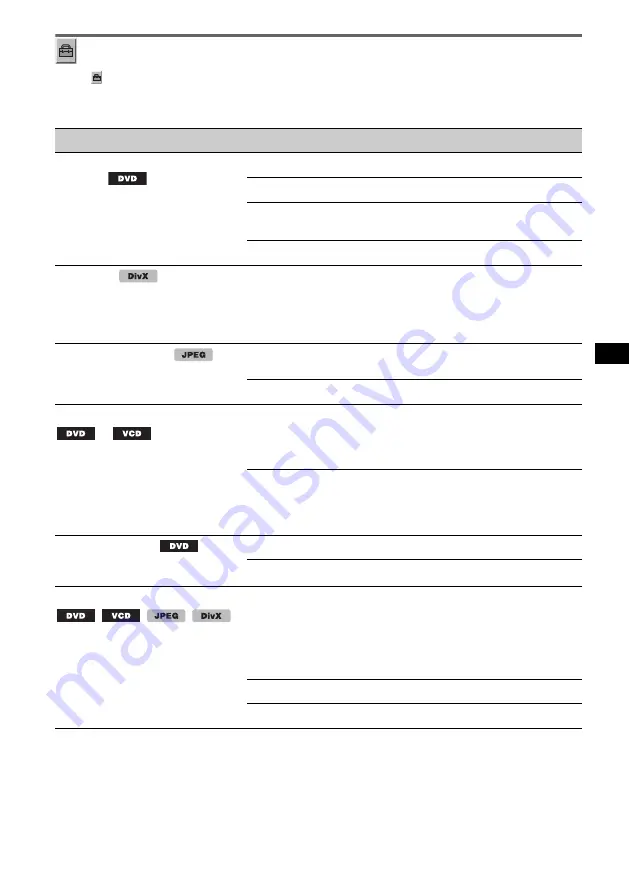
Item

Option

Purpose

PARENTAL CONTROL


(page 29) *

1

Sets the playback restrictions to 
not play inappropriate discs or 
scenes.

OFF 

t

 (

z

)

To deactivate parental control.

ON 

t

To activate parental control.

PLAYER 

t

To set the restriction standard and 
its level.

PASSWORD 

t

To set a new 4-digit password.

DivX VOD 

Displays the registration code for 
this unit. For more information, 
visit the website below:
http://www.divx.com/vod

Done

To close the display.

SLIDE SHOW TIME 

5 sec. (

z

), 10 sec., 

20 sec., 40 sec., 60 sec.

To select the slide show interval.

FIXED

To deactivate the slide show.

MULTI-DISC RESUME 

*

2


ON (

z

)

To store the resume settings in 
memory for up to 5 discs. (The 
settings remain in memory even if 
you set to “OFF.”)

OFF

To not store the resume settings in 
memory.
Resume playback is available only 
for the current disc in the unit.

PLAY LIST PLAY 

(For DVD-R/DVD-R DL/DVD-RW 
in VR mode only)

ORIGINAL (

z

)

To play originally recorded titles.

PLAY LIST

To play edited play list.

PICTURE EQ 

(page 28)


Selects the setting option to show 
in the play mode menu.

AUTO (

z

)

To switch the night time/day time 
use options automatically 
depending on whether the light is 
on/off. (Available only when the 
illumination control lead is 
connected.)

LIGHT OFF

To show the day time use options.

LIGHT ON

To show the night time use options.

Содержание MEX-DV2100

Страница 1: ...Инструкция по эксплуатации Інcтpyкції з eкcплyaтaції 2007 Sony Corporation MEX DV2100 3 276 513 21 1 RU UA Multi Disc Player Multi Disc Player Многодисковый проигрыватель ...

Страница 2: ...iled information about recycling of this product please contact your local Civic Office your household waste disposal service or the shop where you purchased the product Applicable accessory Remote commander Disposal of waste batteries applicable in the European Union and other European countries with separate collection systems This symbol on the battery or on the packaging indicates that the bat...

Страница 3: ...if you fail to set the initial speaker setup correctly due to time out or a mistake the settings can be reconfigured in other menus To set the speaker connection status see page 42 To set the listening position see page 40 Preventing an accident Pictures and karaoke function are available only after you park the car and set the parking brake If the car starts moving during video playback or karaok...

Страница 4: ... 25 Configuring audio settings 26 Changing the audio language format 26 Checking the program format 26 Adjusting the audio output level DVD level 27 Magnifying pictures 27 Adjusting the picture quality Picture EQ 28 Customizing the picture quality 28 Locking discs Parental control 29 Activating parental control 29 Changing the area and its movie rating level 29 Repeat and shuffle play 30 Direct se...

Страница 5: ...42 Settings Visual setup 43 Basic operation of visual setup 43 Language setup for display or soundtrack 44 Display setup 44 Custom setup 45 Audio setup 46 Resetting all settings 47 System setup 47 Basic operation of system setup 47 Setting the clock 51 Using Optional Equipment Auxiliary equipment 51 CD changer 52 Rotary commander RM X4S 53 Additional Information Precautions 54 Notes on discs 54 Pl...

Страница 6: ...ces 5 full bandwidth output channels from 2 channel sources using an advanced high purity matrix surround decoder t page 39 Sony s new sound engine creates an ideal in car sound field with digital signal processing t page 39 Creates a virtual center speaker and simulates multi channel sound field without a center speaker t page 40 Changes the localization of the sound by delaying the sound output ...

Страница 7: ...trademarks DivX and DivX Certified are registered trademarks or trademarks of DivX Inc THIS PRODUCT IS LICENSED UNDER THE MPEG 4 VISUAL PATENT PORTFOLIO LICENSE FOR THE PERSONAL AND NON COMMERCIAL USE OF A CONSUMER FOR DECODING MPEG 4 VIDEO THAT WAS ENCODED BY A CONSUMER ENGAGED IN A PERSONAL AND NON COMMERCIAL ACTIVITY AND OR WAS OBTAINED FROM A VIDEO PROVIDER LICENSED BY MPEG LA TO PROVIDE MPEG ...

Страница 8: ...les can also be stored For details see page 9 2 Video image files can also be stored For details see page 9 Note DVD may be used in this manual as a general term for DVD VIDEOs DVD Rs DVD RWs and DVD Rs DVD RWs Disc symbol in manual Disc format Disc logo VIDEO DVD VIDEO DVD R 1 DVD R DL 1 Video mode VR mode DVD RW 1 Video mode VR mode DVD R 1 DVD R DL 1 DVD RW 1 Video CD Ver 1 0 1 1 2 0 AUDIO Supe...

Страница 9: ...ivX DVD RAM DVD Audio Active Audio Data SVCD Super Video CD CDV Discs created in Packet Write format Note Even compatible discs may not be playable on this unit depending on their recorded condition Region code The region system is used to protect software copyrights The region code is located on the bottom of the unit and only DVDs labeled with an identical region code can be played on this unit ...

Страница 10: ...ower off stop the source press shut off completely press and hold B m Microphone button 33 To activate the karaoke mode C Volume control dial SOUND ENTER button 14 27 33 34 36 38 39 41 42 47 51 52 To adjust the volume adjust a setting rotate open the sound menu apply a setting press D SOURCE button 14 15 20 36 52 To power on change the source Radio Disc AUX E Display window OFF OPEN DSPL AF TA SEE...

Страница 11: ...t an auxiliary device 3 M DSPL Display button 25 37 51 To change display items N Number buttons Disc 1 b REP 16 17 30 52 2 SHUF B 16 17 30 52 3 4 ALBUM V v 16 17 19 22 52 To skip an album or folder move the cursor press skip albums or folders continuously press and hold 4 6 u play pause 16 17 18 19 22 To start pause playback Radio To receive stored stations press store stations press and hold O AF...

Страница 12: ...stored stations press store stations press and hold C CLEAR button 29 32 To delete an entered number D SYSTEM SETUP button 27 35 36 41 42 47 51 52 To open the system setup menu E LIST PTY Program Type button 34 38 To list up 1 select PTY in RDS F SOUND button 33 39 40 To open the sound menu ZXZ OFF ATT AUDIO SUBTITLE ANGLE MENU CLEAR SYSTEM SETUP LIST PTY SOUND PICTURE VISUAL SETUP DSPL TOP MENU 1...

Страница 13: ...on a disc N VISUAL SETUP button 23 26 27 28 29 31 32 35 36 40 43 To open the play mode visual setup menu O DSPL Display button 25 37 51 To change display items P O Return button 23 24 29 30 35 40 43 To return to the previous display return to the menu on a VCD 4 Q M m Cursor ENTER buttons To move the cursor and apply a setting R PLII Pro Logic II button 32 To select a Pro Logic II mode S m Microph...

Страница 14: ...e Pressing the RESET button will erase the clock setting and some stored contents Performing initial setup After resetting the display for initial speaker setup appears Be sure to set correctly following the procedure below to enjoy the various sound functions of this unit To skip the initial setup press OFF SOURCE or insert a disc Note The initial setup display automatically disappears if no oper...

Страница 15: ...ng the card remote commander Before using the card remote commander for the first time remove the insulation film Detaching the front panel You can detach the front panel of this unit to prevent theft Caution alarm If you turn the ignition switch to the OFF position without detaching the front panel the caution alarm will sound for a few seconds The alarm will only sound if the built in amplifier ...

Страница 16: ... monitor corresponding to this unit 2 Press OPEN on the main unit 3 Insert the disc label side up 4 Close the front panel Playback starts automatically If playback does not start automatically press u 5 If the DVD menu appears press 1 b 2 B 3 V 4 v to move the cursor then press 6 u to confirm With the card remote commander press the M m number buttons to move the cursor then press ENTER to confirm...

Страница 17: ...ge To Press pause resume play after pause u skip a chapter track scene file m M reverse fast forward disc and hold m M momentarily and then repeatedly to switch the speed 2 t 12 t 120 t 2 cancel reverse fast forward u show the DVD menu 1 Remote TOP MENU or MENU select items in the DVD menu 1 Main unit 1 b 2 B 3 V 4 v to move the cursor then press 6 u to confirm Remote M m number buttons to move th...

Страница 18: ...ied with your disc To stop playback Press OFF To eject the disc 1 Press OPEN on the main unit 2 Press Z rear of front panel 3 Close the front panel 1 Press OPEN on the main unit 2 Insert the disc label side up 3 Close the front panel Playback starts automatically If playback does not start automatically press u ZXZ u OFF u OFF OPEN Z ...

Страница 19: ... To Press pause resume play after pause u skip a track m M reverse fast forward track and hold m M skip an album Main unit 3 ALBUM 4 ALBUM Remote M m skip albums continuously Main unit and hold 3 ALBUM 4 ALBUM Remote and hold M m ZXZ M m m M u u m M ALBUM ...

Страница 20: ... FM2 FM3 MW or LW appears 3 Perform tuning To tune automatically Press SEEK Scanning stops when the unit receives a station Repeat this procedure until the desired station is received To tune manually Press and hold SEEK to locate the approximate frequency then press SEEK repeatedly to fine adjust to the desired frequency ZXZ MODE m M SRC SEEK MODE SOURCE B A A Radio band Function B Frequency Whil...

Страница 21: ...ust the volume from each speaker so that their perceived level is equal from your listening position tpage 42 4 Set the cut off frequencies of the front rear speaker HPF and subwoofer LPF tpage 50 x For VCD CD MP3 AUX playback or radio reception 1Activate Pro Logic II mode tpage 32 2Activate CSO if a center speaker is not connected tpage 39 x For playback of DVD CD in multi channel format Dolby Di...

Страница 22: ...files You can control the DivX playback in the same way as other video discs page 16 as well as some audio playback control features Tip You can also select a file to play using a list page 34 JPEG image playback You can enjoy a slide show of JPEG files on this unit The slide show starts automatically when you insert a disc or press u For details on how to start playback follow step 1 to 4 of Play...

Страница 23: ...c During PBC playback the track number playback item etc do not appear in the play mode menu page 23 Resume playback is unavailable during playback without PBC Tip To resume PBC playback stop playback by pressing OFF then press u Using play mode menu You can use the play mode menu on this unit to control playback or configure playback settings To show the play mode menu press VISUAL SETUP during p...

Страница 24: ...FLE or REPEAT is activated or ANGLE is available its check box lights up in green e g t However you may not be able to change the angle depending on the scene even if the check box is lit in green TITLE TRACK 32 To select a title scene or track to play ALBUM 32 To select an album or folder to display CHAPTER 32 To select a chapter to play 12 67 018 034 T 1 35 55 1 ENGLISH OFF 1 ENGLISH 2 FRENCH 3 ...

Страница 25: ...sed playback time of the current track T Remaining time of the current track D Elapsed playback time of the current disc D Remaining time of the current disc JPEG playback Album number Total Image number Total DivX playback Album folder number Total File number Total T Elapsed playback time of the current file Checking text information The text information album name image name etc of JPEG DivX fi...

Страница 26: ...al 1 During playback press AUDIO repeatedly until the desired audio channel appears E g when playing an MP3 Note You may not be able to change the audio setting depending on the disc Tip You can also change the settings of video discs by selecting AUDIO in the play mode menu page 23 Checking the program format You can check the number of channels and component position on the DVD VIDEO being playe...

Страница 27: ...just the output level The output level is adjustable in single steps between 10 and 10 6 Press ENTER The setting is complete With the main unit Rotate the volume control dial instead of pressing M m Magnifying pictures You can magnify pictures 1 During playback press VISUAL SETUP The play mode menu appears 2 Press M m to select CENTER ZOOM then press ENTER The current option appears 3 Press M m to...

Страница 28: ...n picture quality setting by adjusting picture tones You can store adjustments for both LIGHT OFF and LIGHT ON settings 1 During playback press VISUAL SETUP The play mode menu appears 2 Press M m to select PICTURE EQ then press ENTER The current option appears 3 Press M m to select CUSTOM then press ENTER 4 Press M m to select the picture tone then press to adjust the level 5 Press ENTER To hide t...

Страница 29: ...sual setup menu press VISUAL SETUP Deactivating parental control Select OFF t in step 4 above then enter your password If parental control is deactivated Parental control canceled appears Changing the password Select PASSWORD t in step 4 above enter your current password enter your new password then reenter to confirm Changing the area and its movie rating level The restriction levels can be set d...

Страница 30: ...e the visual setup menu press VISUAL SETUP Repeat and shuffle play 1 During playback press 1 REP or 2 SHUF on the main unit repeatedly until the desired option appears Repeat or shuffle play starts The repeat options and switching order of each disc format are indicated below PARENTAL CONTROL LEVEL STANDARD USA USA OTHERSt 8 PARENTAL CONTROL LEVEL STANDARD 8 8 7 6 5 4 NC17 R PG13 Disc format Optio...

Страница 31: ... menu Note The selected play mode is canceled when the disc being played is ejected Direct search play You can directly locate a desired point by specifying the title number chapter number etc 1 During playback press the number buttons to enter an item track title etc number then press ENTER Playback starts from the beginning of the selected point Disc format Options 2 OFF TITLE Plays chapters in ...

Страница 32: ...ty matrix surround decoder that extracts the spatial properties of the original recording without adding any new sounds or tonal colorations The Pro Logic II mode options and switching order are indicated below MUSIC Provides a deep wide sound space to stereo audio recordings MOVIE Provides enhanced sound field directionality that approaches the quality of discrete 5 1 channel sound to stereo tele...

Страница 33: ...tedly to set the channel Some karaoke DVDs VCDs CDs may have a control menu where you can cancel vocal sound etc In this case follow the instructions of the disc While the karaoke mode is activated multi channel sources are downmixed to 2 channels and the following are deactivated Pro Logic II page 32 EQ7 page 39 CSO page 39 Intelligent Time Alignment page 40 HPF LPF page 50 Output of SUB OUT The ...

Страница 34: ...e e g if the disc contains video files and image files only video files are played You can select the file type to list up then select the desired file to play 1 During playback press LIST PTY 2 Press M m to select the file type to list up then press ENTER To list up MP3 and WMA files select LIST UP AUDIO FILES To list up DivX files select LIST UP VIDEO FILES To list up JPEG files select LIST UP I...

Страница 35: ...ER visual setup and DISC LAYER system setup are indicated below MULTI visual setup MLT system setup Plays the multi channel area in the Super Audio CD layer 2CH Plays 2 channel stereo area in the Super Audio CD layer CD Plays the CD layer By the visual setup menu 1 Press VISUAL SETUP while the unit is off The visual setup menu appears 2 Press M m to select AUDIO SETUP then press ENTER The audio se...

Страница 36: ...Intelligent Time Alignment page 40 and HPF LPF page 50 settings are deactivated To activate set to STD Tip The setting in visual setup will switch the setting in system setup automatically and vice versa Advanced Operations Radio Storing and receiving stations Caution When tuning in stations while driving use Best Tuning Memory BTM to prevent an accident Storing automatically BTM 1 Press SRC repea...

Страница 37: ...s AF AF TA ON Activates both AF and TA AF TA OFF Deactivates both AF and TA 1 Press AF TA repeatedly until the desired setting appears Storing RDS stations with the AF and TA setting You can preset RDS stations along with the AF TA setting If you use the BTM function only RDS stations are stored with the same AF TA setting If you preset manually you can preset both RDS and non RDS stations with th...

Страница 38: ...ton of the local station Repeat this procedure until the local station is received Selecting PTY 1 Press LIST PTY during FM reception The current program type name appears if the station is transmitting PTY data 2 Press M m to select the program type 3 Press ENTER The unit searches for a station broadcasting the selected program type With the main unit Rotate the volume control dial instead of pre...

Страница 39: ...cessing X DSP contains the following features CSO Center Speaker Organizer Intelligent Time Alignment and EQ7 Creating a virtual center speaker CSO To fully enjoy surround sound it is adequate to have 5 speakers front left right rear left right center and 1 subwoofer CSO Center Speaker Organizer allows you to create a virtual center speaker even if it is not connected To activate CSO press SOUND r...

Страница 40: ...une You can precisely calibrate your listening position from each speaker so that the sound delay reaches the listener more correctly The setting is configurable both from the visual setup menu page 43 and the system setup menu page 47 Before starting measure the distance between your listening position and each speaker By the visual setup menu 1 From the visual setup menu select AUDIO SETUP c POS...

Страница 41: ... or ENTER Customizing the equalizer curve EQ7 Tune CUSTOM of EQ7 allows you to make your own equalizer settings You can adjust the level of 7 different bands 62 Hz 157 Hz 396 Hz 1 kHz 2 5 kHz 6 3 kHz and 16 kHz 1 During playback reception press SYSTEM SETUP The system setup item appears on the main unit 2 Press M m to select EQ7 TUNE then press ENTER 3 Press M m to select CUSTOM then press ENTER 4...

Страница 42: ... page 14 appears 3 Set the connection status of the center speaker and subwoofer To toggle on off press M m To proceed to the next item press 4 Adjust the volume of each speaker To adjust the level press M m The level is adjustable in single steps between 6 and 6 To switch the speaker press The speaker switches as follows FL Front Left t C Center t FR Front Right t SR Rear Right t SL Rear Left t S...

Страница 43: ...age 47 Resets all setting items Basic operation of visual setup You can set items in the menu by the following procedure E g when setting the aspect ratio to 4 3 PAN SCAN 1 Press VISUAL SETUP while the unit is off The visual setup menu appears 2 Press M m to select DISPLAY SETUP then press ENTER The display setup items appear 3 Press M m to select MONITOR TYPE then press ENTER The options appear 4...

Страница 44: ...AN and vice versa Item Purpose MENU To change the disc s menu language AUDIO To change the soundtrack language SUBTITLE To change the subtitle language recorded on the disc Item Option Purpose MONITOR TYPE Selects an aspect ratio suitable for the connected monitor 16 9 z To display the wide picture Suitable when connecting to a wide screen monitor or a monitor with a wide mode function 4 3 LETTER ...

Страница 45: ...the registration code for this unit For more information visit the website below http www divx com vod Done To close the display SLIDE SHOW TIME 5 sec z 10 sec 20 sec 40 sec 60 sec To select the slide show interval FIXED To deactivate the slide show MULTI DISC RESUME 2 ON z To store the resume settings in memory for up to 5 discs The settings remain in memory even if you set to OFF OFF To not stor...

Страница 46: ...tion to obtain the feeling of being in the center of the sound field wherever you sit in the car OFF z To not set the listening position FRONT To set to center front ALL To set to the center of your car FRONT L To set to front left FRONT R To set to front right CUSTOM To precisely calibrate the listening position page 40 AUDIO DRC Makes the sound clear when the volume is low Only for a DVD conform...

Страница 47: ...play settings page 49 R M Receive mode settings page 49 SOUND Sound settings page 50 Basic operation of system setup You can set items in the menu by the following procedure E g when setting the demonstration 1 Press SYSTEM SETUP while the unit is off The system setup item appears on the main unit 2 Press M m to select DEMO then press ENTER The option appears 3 Press M m to select ON or OFF then E...

Страница 48: ...the CT function BEEP ON z To activate the operation sound OFF To deactivate the operation sound RM Rotary Commander Changes the operative direction of the rotary commander controls NORM z To use in the factory set position REV To use on the right side of the steering column A OFF Auto Off Shuts off automatically after a desired time when the unit is off NO z To deactivate the Auto Off function 30S...

Страница 49: ...ead is connected Any status ON To dim the display OFF To deactivate the dimmer A SCRL Auto Scroll Scrolls long items automatically ON z To scroll During playback OFF To not scroll Item Option Purpose Unit status LOCAL Local Seek Mode ON To only tune into stations with stronger signals During radio reception OFF z To tune normal reception MONO Monaural Mode Selects monaural reception mode to improv...

Страница 50: ...X Level page 52 6 18 dB z 0 To select the level During AUX playback DVD LVL DVD Level page 27 10 10 dB z ADJST OFF To select the level During disc playback SP SETUP Speaker Setup page 42 Unit off POS TUNE Position Tune page 41 DISC LAYER page 35 Selects the playback layer area of a Super Audio CD MLT z To play multi channel area in the Super Audio CD layer 2CH To play 2 channel stereo area in the ...

Страница 51: ...ar speakers Up to 2 devices can be connected one to the AUX input jack stereo mini jack on the front and the other to the BUS AUDIO IN AUX AUDIO IN terminals on the rear The volume level is adjustable for any difference between the unit and the auxiliary device Unavailable when another optional device is connected to the BUS CONTROL IN terminal To connect both an auxiliary device and optional devi...

Страница 52: ...R 7 Press M m to adjust the input level The input level is adjustable in single steps between 6 and 18 8 Press ENTER The setting is complete With the main unit Press SOURCE instead of SRC rotate the volume control dial instead of pressing M m CD changer Selecting the changer 1 Press SRC repeatedly until CDC appears 2 Press MODE repeatedly until the desired changer appears Playback starts With the ...

Страница 53: ...ain unit push in and rotate VOL volume control The same as VOL on the card remote commander or the volume control dial on the main unit rotate SEEK AMS control The same as m M on the card remote commander or SEEK on the main unit rotate or rotate and hold Changing the operative direction The operative direction of the controls is factory set as shown below If you need to mount the rotary commander...

Страница 54: ... unit Do not use such discs Before playing clean the discs with a commercially available cleaning cloth Wipe each disc from the center out Do not use solvents such as benzine thinner commercially available cleaners or antistatic spray intended for analog discs Note on playback operations of DVDs and VCDs Some playback operations of DVDs and VCDs may be intentionally set by software producers Since...

Страница 55: ...or 63 126 characters 2 2 2 3 and 2 4 When naming an MP3 file be sure to add the file extension mp3 to the file name During playback or fast forward reverse of a VBR variable bit rate MP3 file elapsed playback time may not display accurately Note on MP3 If you play a high bit rate MP3 such as 384 kbps sound may be intermittent About WMA files WMA which stands for Windows Media Audio is a music file...

Страница 56: ...iginal fuse If the fuse blows check the power connection and replace the fuse If the fuse blows again after replacement there may be an internal malfunction In such a case consult your nearest Sony dealer Cleaning the connectors The unit may not function properly if the connectors between the unit and the front panel are not clean In order to prevent this detach the front panel page 15 and clean t...

Страница 57: ...ontrol terminal Illumination control terminal BUS audio input AUX audio input terminals BUS control input terminal Remote controller input terminal Antenna aerial input terminal Parking break control terminal Microphone input terminal AUX input jack stereo mini jack Power requirements 12 V DC car battery negative ground earth Dimensions Approx 178 50 181 mm 7 1 8 2 7 1 4 in w h d Mounting dimensio...

Страница 58: ...s turned on The Auto Off function activates after turning off the unit tTurn off the unit Card remote commander operation is not possible Make sure the insulation film has been removed page 15 Picture There is no picture picture noise occurs A connection has not been made correctly Check the connection to the connected equipment and set the input selector of the equipment to the source correspondi...

Страница 59: ...re not recorded on the DVD The DVD prohibits changing The display items do not scroll For discs with very many characters those may not scroll A SCRL is set to OFF tSet A SCRL ON page 49 The operation buttons do not function The disc will not eject Press the RESET button page 14 You forgot the password for parental control Enter 5776 in the password input display to unlock page 29 Radio reception ...

Страница 60: ...music CD in this unit or MP3 playable changer NO NAME A disc album folder track image video name is not written in the file NOT READ The disc information has not been read by the unit tLoad the disc then select it on the list NO TP The unit will continue searching for available TP stations OFFSET There may be an internal malfunction tCheck the connection If the error indication remains on in the d...

Страница 61: ...y of a single layer and single sided DVD is 4 7 GB Giga Byte which is 7 times that of a CD The data capacity of a double layer and single sided DVD is 8 5 GB a single layer and double sided DVD is 9 4 GB and double layer and double sided DVD is 17 GB The picture data uses the MPEG 2 format one of the worldwide standards of digital compression technology The picture data is compressed to about 1 40...

Страница 62: ...music piece on a VIDEO CD CD Super Audio CD or MP3 WMA An album is composed of several tracks MP3 WMA only VIDEO CD A compact disc that contains moving pictures The picture data uses the MPEG 1 format one of a worldwide standard of digital compression technology The picture data is compressed to about 1 140 of its original size Consequently a 12 cm VIDEO CD can contain up to 74 minutes of moving p...

Страница 63: ...49 1350 1352 1353 1356 1357 1358 1363 1365 1369 1376 1379 1393 1403 1408 1417 1428 1435 1436 1463 1481 1482 1483 1489 1491 1495 1498 1501 1502 1503 1505 1506 Maori Macedonian Malayalam Mongolian Moldavian Marathi Malay Maltese Burmese Nauru Nepali Dutch Norwegian Occitan Afan Oromo Oriya Punjabi Polish Pashto Pushto Portuguese Quechua Rhaeto Romance Kirundi Romanian Russian Kinyarwanda Sanskrit Si...

Страница 64: ...39 41 Equalizer Picture PICTURE EQ 28 45 Sound EQ7 39 41 F Fader FAD 39 File FILE 32 Folder ALBUM 32 Formats 9 Front AUX 51 Fuse 56 H High Pass Filter HPF 50 I Image IMAGE 32 Initial setup 14 Intelligent Time Alignment 40 J JPEG 9 22 55 K Karaoke 33 L Language code 63 Language setup LANGUAGE SETUP 44 Layer SUPER AUDIO CD LAYER DISC LAYER 35 46 50 List up LIST 34 Listening position POSITION SELECT ...

Страница 65: ... SW 39 Super Audio CD Layer SUPER AUDIO CD LAYER DISC LAYER 35 46 50 Sound quality SUPER AUDIO CD MODE SA CD MOD 36 46 50 System setup 47 T Time text information TIME 25 32 Title TITLE 32 Track TRACK 32 Traffic Announcement TA 37 Traffic Program TP 37 V Visual setup 43 Volume Echo 33 Main unit 10 Microphone 33 Speaker 39 42 Traffic announcement 38 W Wallpaper WALLPAPER 44 WMA 9 55 X X DSP 39 Z Zoo...

Страница 66: ...Sony Corporation Printed in Thailand http www sony net ...

Отзывы: