background image

”Digital Voice Editor“ Software Operations

43

GB

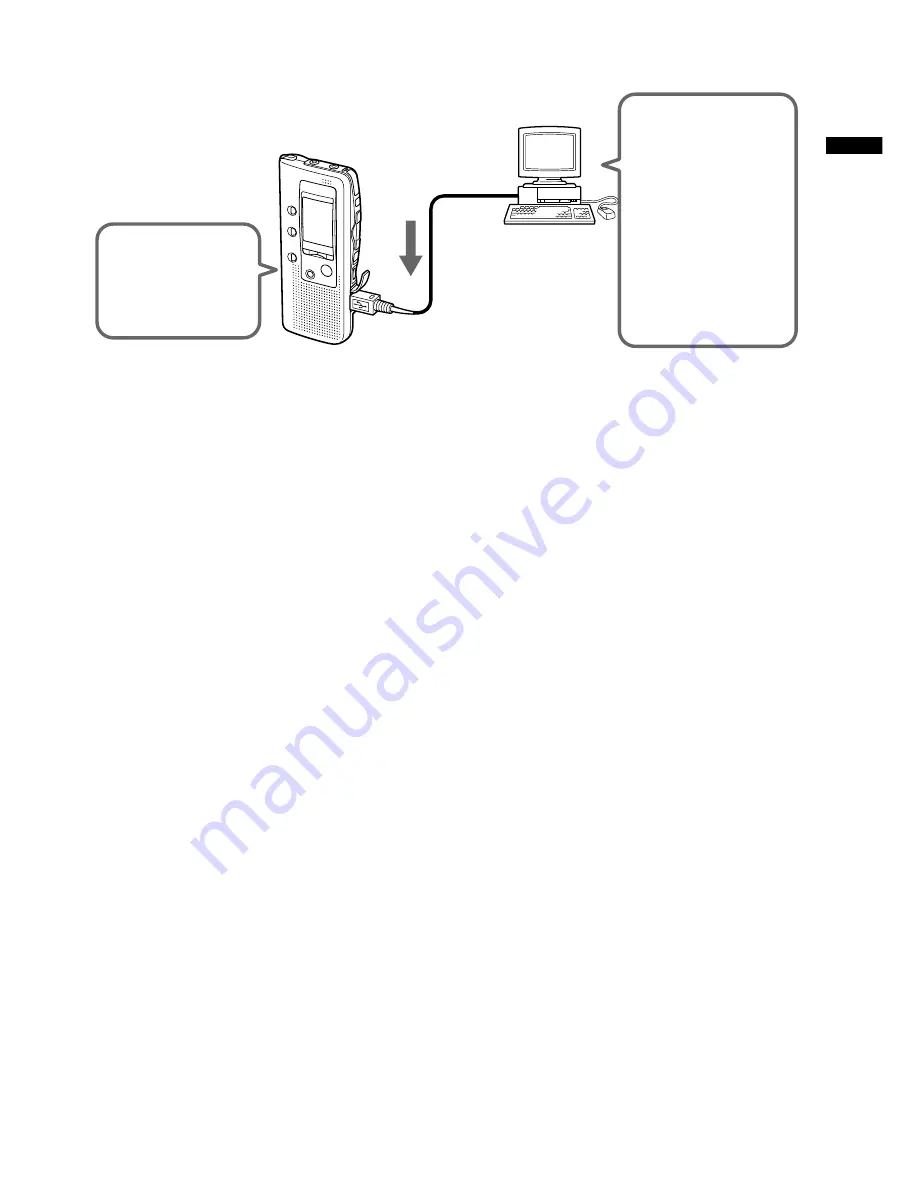
The messages transferred from the computer can be played back on the IC
recorder.

Play back
on the
IC recorder

Transfer
sound files

*

Your computer

• Messages

transferred
from the
IC recorder

• Sound files

you received
via e-mail, etc.

*The sound files you can add to the IC recorder are DVF/ICS files
recorded with a Sony IC Recorder, PCM 16/11/8kHz  sampling, 8/16 bit
monaural WAV files, and MSV files only.

•Editing the messages recorded in the IC recorder or saved
to the computer on the computer screen

You can enjoy various editing functions; you can rename messages and
their user names, sort the messages, add or delete priority marks and
bookmarks. For the messages in the IC recorder, you can change the order
of the messages, divide/combine messages by adding/deleting an index.
For the messages saved to the computer, you can convert the file saving
formats.

•Other functions

– Sending voice e-mails using Digital Voice Mail software

You can send a voice e-mail attaching the selected message(s) from the
Digital Voice Editor window.  With the original address book, you can
register the addresses of the recipients and send the e-mail quickly and
easily.  (To send voice e-mails, you need to register with an Internet
provider.)

Note

You may not be able to send or receive e-mails larger than certain file size.
Before sending voice e–mails, please check with your Internet provider.

– Changing the settings of the IC recorder on the computer screen

On your computer screen, you can change the IC recorder’s user names,
timer recording or alarm setting and other operation modes.

For details on each operation , refer to the online Help files.

Содержание ICD-BP100 - Ic Recorder

Страница 1: ...Owner s Record The model number is located at the rear and the serial number is located inside the battery compartment Record the serial number in the space provided below Refer to these numbers whenever you call upon your Sony dealer regarding this product Model No ICD BP100 Serial No ...

Страница 2: ...that interference will not occur in a particular installation If this equipment does cause harmful interference to radio or television reception which can be determined by turning the equipment off and on the user is encouraged to try to correct the interference by one or more of the following measures Reorient or relocate the receiving antenna Increase the separation between the equipment and rec...

Страница 3: ...The software described herein may also be governed by the terms of a separate user license agreement User registration For the customers in U S A and Europe To receive the customer services complete and return the registration card included in your package This software is for Windows and cannot be used for Macintosh The supplied connecting cable is for the IC recorder ICD BP100 only You cannot co...

Страница 4: ...ack the Specified Section Repeatedly A B Repeat 23 Editing Messages Adding a Recording 24 Dividing a Message into Two Combining Messages Index Function 26 Moving Messages to a Different Folder Move Function 29 Adding Priority Mark s Priority Mark Function 30 Other Functions Starting Recording at a Desired Time Timer Recording 32 Playing Back a Message at a Desired Time with an Alarm 35 Preventing ...

Страница 5: ...s What you can do with the Digital Voice Editor Software 42 Using Online Help Files of the Software 44 System Requirements 45 Installing the Digital Voice Editor Software 46 Connecting the IC Recorder to Your Computer 48 Starting Up the Digital Voice Editor Software 49 Names and Functions of the Main Window 50 Saving Messages to the Computer 51 Adding Messages to the IC Recorder 54 Additional Info...

Страница 6: ...back With this IC recorder you can quickly locate the message you want to play back Reviewing the current recording is also very easy z Erasing You can quickly erase unwanted messages with an easy operation When a message is erased the next message automatically advances leaving no blank space Meet Mr Brown at 2 p m tomorrow 11 30 November 1 12 00 November 1 10 00 November 2 Don t forget to call M...

Страница 7: ...the point and start playback Repeat play function page 18 23 This unit can play back one message or the selected section repeatedly Easy search function page 19 You can quickly search for the point 10 seconds ahead or 3 seconds back and start playback Playback speed control page 18 You can play back messages rapidly or slowly This is useful when playing back a long recording such as a meeting Adva...

Страница 8: ...se the lid If the battery compartment lid is accidentally detached attach it as illustrated Clock setting display appears when you insert batteries for the first time or when you insert batteries after the unit has been without batteries for a certain period of time Please refer to Steps 2 to 4 in Step 2 Setting the Clock on pages 10 and 11 to set the date and time 2 1 1 2 ...

Страница 9: ...xhausted ones Otherwise the display may show the clock setting display or incorrect date and time when you re insert the batteries In this case set the date and time again The recorded messages and alarm setting however will remain When replacing the batteries be sure to replace both batteries with new ones Do not charge dry batteries When you are not going to use the unit for a long time remove t...

Страница 10: ... period of time In this case proceed from step 2 1 Press MENU to enter the menu mode 2 Display the clock setting display Step 2 Setting the Clock NxPLAY STOP MENU 1 Press once to display SET DATE 2 Press NxPLAY STOP The year digits will flash 3 Set the date 1 Press or to select the digits of the year 2 Press NxPLAY STOP The month digits will flash 3 Set the month and day in sequence then press NxP...

Страница 11: ...s NxPLAY STOP The minute digits will flash 3 Set the minute 5 Press NxPLAY STOP at the time signal The display will return to SET DATE 6 Press MENU to exit the menu mode 1 Tip This unit does not have a power on off switch The display is shown at all times Getting Started ...

Страница 12: ...ew batteries and check the battery indicator page 9 Selectthefolder e g Message 1 Message 2 Blank space Newly recorded message Press FOLDER repeatedly to display the folder A B or C in which you wish to record messages Current folder 2 Speak to the built in microphone Startrecording OPR indicator lights in red during recording Remaining memory indicator Current message number Counter display You d...

Страница 13: ...cording by pressing xSTOP instead of zREC STOP To pause recording To Do this pause recording Press XPAUSE During recording pause the OPR indicator flashes in red and PAUSE flashes in the display window release pause and Press XPAUSE or zREC STOP resume recording Recording resumes from that point To stop recording after pausing recording press xSTOP 15 minutes after you pause recording recording pa...

Страница 14: ...inutes in SP standard play mode and 168 minutes in LP long play mode If you record messages in a mixture of SP and LP modes the recordable time varies from 63 to 168 minutes The unit is factory set to SP mode To change the recording mode see page 41 You can check the remaining amount of recording time by selecting the remaining recording time display mode See page 39 Remaining memory indication Du...

Страница 15: ...factory after you have changed the microphone sensitivity or for important recording set the VOR selector to OFF Recording with an external microphone or from other equipment Connect a plug in power type microphone or other equipment to the MIC PLUG IN POWER jack When you connect an external microphone the built in microphone is automatically cut off When a plug in power type microphone is connect...

Страница 16: ... When playing back a message you have just finished recording start from Step 3 Selectthefolder Selectthemessagenumber Press or to display the desired message number for larger message number for smaller message number Selected message number Current folder Counter display Press FOLDER repeatedly to display the folder A B or C you wish to play back 1 2 ...

Страница 17: ...t channels To stop playback To Do this stop at the beginning of Press xSTOP the current message stop at the current position Press NxPLAY STOP Playback Pause function To resume playback from that point press NxPLAY STOP again You can also pause playback by pressing XPAUSE instead of NxPLAY STOP The OPR indicator will flash in green After an hour the unit goes into the stop mode at the current posi...

Страница 18: ...message the unit stops at the bookmark These operations are for when EASY S is set to OFF For operations when EASY S is set to ON see page 19 Playing back a message repeatedly Repeat Play During playback press NxPLAY STOP for more than one second will be displayed and the selected message will be played back repeatedly To resume normal playback press NxPLAY STOP again To stop playback press xSTOP ...

Страница 19: ...e OPR indicator lights up in green You cannot hear the playback sound If you keep pressed while END is flashing the messages are played back rapidly and normal playback will start at the point you release the button When END stops flashing and the OPR indicator goes off the unit will stop at the beginning of the last message If the last message is long and you wish to start playback at a later par...

Страница 20: ...ss ERASE for more than 1 second during stop mode A beep will sound and the message number and ERASE will flash while the first and last 5 seconds of the message are played back 10 times 2 Press ERASE while the message is being played back The message is erased and the remaining messages will be renumbered For example if you erase Message 3 Message 4 will be renumbered as Message 3 When erasing is ...

Страница 21: ...cancel erasing Press xSTOP before step 3 To erase other messages Repeat steps 1 and 2 To erase a message partially First divide the message by adding an index see page 26 and then follow the steps on page 20 to erase the message e g Folder A Folder B Message 1 Message 2 Message 3 Blank space Blank space Message 1 Message 2 Message 3 Message 1 Message 2 Message 3 3 While the display is flashing pre...

Страница 22: ... flashes 3 times To start playback at the bookmark Press or during stop so that the bookmark indicator flashes 3 times Then press NxPLAY STOP To delete the bookmark 1 In stop mode press or to display the number of the message with the bookmark you wish to delete 2 While pressing INDEX BOOKMARK press ERASE for more than 1 second 3 Press ERASE while the bookmark indicator and ERASE are flashing Note...

Страница 23: ...repeatedly is set A B B flashes 2 During playback press A B REPEAT PRIORITY briefly The finishing point B of the section is set A B is displayed and the specified section is played back repeatedly To resume normal playback Press NxPLAY STOP To stop A B Repeat playback Press xSTOP Notes You cannot set A B Repeat for a section that overlaps two or more messages If you do not set the finishing point ...

Страница 24: ...s zREC STOP for more than 1 second The REC indicator appears and ADD flashes three times on the display window The OPR indicator will turn red The new recording will be added at the end of the current message 2 Press zREC STOP or xSTOP to stop the recording During playback of Message 3 After adding a recording Message 3 Message 4 Meeting at 2 o clock on December 1 at Conference room A Added record...

Страница 25: ...start recording REC is displayed and the OPR indicator turns red 3 Press xSTOP to stop the recording Notes The added message will be recorded in the same recording mode SP or LP see page 41 as the original message regardless of the current recording mode setting You cannot overwrite if the remaining memory of the IC recorder is not enough For details see Troubleshooting on page 57 The deleted part...

Страница 26: ...an index to a message during recording or playback By dividing a message you can easily find the point you want to play back when you make a long recording such as a meeting When you add an index the message numbers will increase as follows xSTOP INDEX BOOKMARK ERASE Message 1 Message 2 Message 3 Message 4 Before adding an index After adding an index Message 1 Message 3 Message 4 Message 2 Message...

Страница 27: ...g back a message press INDEX BOOKMARK at the point you want to divide The message is divided in two and the new message number flashes three times An index mark is added and the following index numbers will increase by one 1 Tip You can add an index after you have paused playback with XPAUSE page 17 To play the message you marked with an index Press or to display the message number as the divided ...

Страница 28: ... messages are combined into one and the messages will be renumbered as in the illustration above To cancel erasing Press xSTOP before step 3 Notes After combining messages by erasing an index the latter message s alarm setting priority mark s and bookmark will be deleted If a bookmark has been added to the message the above steps first delete the bookmark page 22 Repeat the steps to erase the inde...

Страница 29: ...ion of the folder to which you want to move the message C in this case The first and last 5 seconds of the message will be played back 10 times while the folder indication and MOVE flash 3 Press NxPLAY STOP To cancel moving the message s Press xSTOP before step 3 Note The move function does not duplicate a message in another folder When you move a message to another folder the one in the previous ...

Страница 30: ... with being the most important To add priority mark s in the stop mode 1 Select the message you want to mark 2 Press A B REPEAT PRIORITY for more than 1 second and the message number flash 3 Press A B REPEAT PRIORITY repeatedly to select the number of priority mark s while and the message number are flashing The setting is finished when the priority mark s light s steadily in the display window an...

Страница 31: ...k s Messages are sorted in order of the number of priority marks in a folder Messages without a priority mark are moved behind the messages with priority mark s 1 Tip If there are over 2 messages with the same number of priority marks in a folder these messages are sorted by the recorded date and time The oldest one comes first e g When there are 3 messages in a folder Note While the messages are ...

Страница 32: ...y 1 Press MENU The unit enters the menu mode and ALARM will be displayed 2 Press or repeatedly to display TIMER and press NxPLAY STOP OFF starts to flash Note The timer cannot be set if the clock has not been set 3 Press or to flash ON 4 Press NxPLAY STOP START is displayed for one second and then DATE will flash in the display window MENU NxPLAY STOP ...

Страница 33: ...t the hour digits and press NxPLAY STOP 2 Press or to select the minute digits and press NxPLAY STOP END is displayed for one second and then the hour digits of the recording end will flash in the display window 4 Repeat Step 3 to set the recording end time 5 Select the recording mode Press or to select SP or LP and press NxPLAY STOP 6 Press MENU to exit the menu mode The display will return to no...

Страница 34: ...r recording exceeds the remaining recording time However in the case of recording once a week or everyday you can set the timer if the remaining recording time is longer than the first recording and for the second or later recording timer recording stops when there is no more remaining time on the IC recorder If 99 messages have been recorded in the selected folder or the memory is full timer reco...

Страница 35: ... everyday You can also sound the alarm without playing back a message 1 Select the message you wish to play back See Steps 1 and 2 on page 16 2 Press MENU ALARM OFF will be displayed If ALARM ON is displayed the alarm has been set Note The alarm cannot be set if the clock has not been set or no message has been recorded in the selected folder 3 Set the alarm setting to ON 1 Press Nx MENU NxPLAY ST...

Страница 36: ... the week and press Nx to play back at the same time every day Press or to select DAILY and press Nx 5 Set the alarm time 1 Press or to select the hour digits and press Nx 2 Select the minute digits and press Nx 6 Press or to select B PLAY playback will start with an alarm or B ONLY only an alarm will sound 7 Press Nx PLAY STOP The setting has been completed 8 Press MENU to exit the menu mode The ...

Страница 37: ...e alarm time comes while another message is being played back with an alarm the playback stops and the new message will be played back If the timer recording start time comes during alarm playback the playback stops and the timer recording will start If the alarm time comes during recording alarm will sound after the recording is finished and will flash If more than one alarm time comes during rec...

Страница 38: ...functions of the buttons are locked To cancel the HOLD function simply slide the HOLD switch in the opposite direction Note When the HOLD function is activated during recording cancel the HOLD function first to stop recording 1 Tip Even if the HOLD function is activated you can stop the alarm playback To stop the alarm or playback press xSTOP HOLD switch ...

Страница 39: ...AY the display mode will change as shown below DISPLAY Counter Elapsed playback recording time in one message Remaining recording time The remaining recording time is displayed during recording or in stop mode During playback the remaining time of the message is displayed m Recorded date The date the current message was recorded If the clock has not been set Y M D will be displayed M Recorded time...

Страница 40: ...LY MODE OFF ON TIMER SP LP BEEP ON OFF CONT OFF ON EASY S OFF ON SET DATE B PLAY B ONLY SP LP Menu map Press MENU to enter the menu mode Year Month Day Hour Minute Initial setting Press NxPLAY STOP to go to the next step Press or to select Set date Set time Set start time Set end time Set date ...

Страница 41: ...EEP BEEP ON A beep will sound to indicate that operation has been accepted BEEP OFF No beep sound will be heard except for the alarm and timer zContinuous Play CONT CONT ON You can play back all messages in a folder continuously CONT OFF Playback stops at the end of each message z Easy search EASY S EASY S ON You can go back for approx 3 seconds with a press of the button or advance for approx 10 ...

Страница 42: ...he messages on the computer The messages in the IC recorder or your computer s hard disk can be played back through your computer s speakers In addition to normal playback you can enjoy various ways of playback such as Repeat Play and A B Repeat Play Adding sound files saved in the computer to your IC recorder and playing them back on the IC recorder page 54 You can add the messages saved to the c...

Страница 43: ...an change the order of the messages divide combine messages by adding deleting an index For the messages saved to the computer you can convert the file saving formats Other functions Sending voice e mails using Digital Voice Mail software You can send a voice e mail attaching the selected message s from the Digital Voice Editor window With the original address book you can register the addresses o...

Страница 44: ...click to display the titles of the contents Double click to display the explanations To search with a key word Click Key word in the search dialog box in the Help topics The list of key words is displayed Input the key word or scroll the list of key words To display the explanations of the key word select the key word from the list and click Find Notes From the Help menu or in the Toolbar you can ...

Страница 45: ...patible You cannot use this software with Macintosh CPU 200MHz PentiumR processor or higher RAM 64MB or more Hard disk space 20MB or more depending on the size and number of sound files you store CD ROM drive USB port Sound board Sound Blaster 16 compatible OS Microsoft Windows 2000 Professional Windows Millennium Edition Windows 98 or Windows 98 Second Edition ...

Страница 46: ...your computer and start up Windows Note Be sure to close all running programs before installing the software 2 Insert the supplied CD ROM in the CD ROM drive The installer automatically starts up and the following display appears If the installer does not start up double click DVE setup exe in the English folder 3 Follow the displayed instructions When the Restart dialog box appears click OK to re...

Страница 47: ...ttach the Digital Voice Player setup program When using the supplied Digital Voice Mail Click the check box in the Attach Digital Voice Player on the Digital Voice Mail window When using other e mail software Attach DVP setup exe in the folder that the Digital Voice Editor has been installed You can also open English Digital Voice Player in sequence to attach DVP setup exe in that folder Uninstall...

Страница 48: ...e computer as soon as the cable is connected enabling you to proceed with the operation Notes Do not connect more than two USB devices to your computer Normal operation will not be guaranteed Use of this IC recorder with a USB hub or a USB extension cable is not guaranteed A malfunction may occur depending on the USB devices connected at any one time Check the remaining battery power of the IC rec...

Страница 49: ...the IC RECORDER message window Connect the IC recorder and proceed to the next step 3 If nothing is displayed in the IC RECORDER message window click the Connect button on the lower left side of the window page 50 The messages in the IC recorder are loaded to the computer and displayed on the IC RECORDER message window Notes If no messages are loaded and an error message is displayed after you cli...

Страница 50: ...age window The list of messages stored in your computer s hard disk is displayed 4 IC RECORDER message window The list of messages in the IC recorder is displayed 5 Connect Mail Voice Recognition buttons See the online Help files for details 6 Player window Contains the buttons or sliders to control the playback operations of a message The information of the message being played back is displayed ...

Страница 51: ... is saved to the computer its alarm setting will be cancelled Saving messages one by one 1 Click to select the message you wish to save from the IC RECORDER message window To select multiple messages press and hold down the Shift key as you click the first and last messages in a consecutive group or the Ctrl key as you click each message separately 2 Drag the message and drop it in the PC message ...

Страница 52: ...x and the file type to save the contained message files in the Save as type box The folder and file names within the saved folders are automatically named as IC recorder model name_current year_month_day e g ICD BP100_2001_07_04 To add the messages as they are onto the IC recorder later on save messages as DVF files 4 Click Save All the message folders and their component message files are saved i...

Страница 53: ...Sony Memory Stick Voice Editor write them on the Memory Stick to be restored and played back on the Memory Stick IC recorder ICS file Sony IC recorder Sound file file extension ics icon The ICS file is Sony s original sound file format used in recording messages on the IC recorder ICD R100 The sound data is compressed so that the size of the data is relatively small The ICS files can be played bac...

Страница 54: ...rder its alarm setting will be cancelled Adding messages one by one 1 Click to select the message you wish to add in the PC message window To select multiple messages press and hold down the Shift key as you click the first and last messages in a consecutive group or the Ctrl key as you click each message separately You can select files of different file type together 2 Drag the message and drop i...

Страница 55: ...sage folder and drop it in the IC RECORDER message window The messages in the folder are inserted before the selected message If you drop the message at the last message in the list a dialog box will request you to specify the position Select either before or after the message and click OK 1 Tip If you drop the message folder on one of the message folder icons the messages in the folder will be ad...

Страница 56: ...rce a fluorescent lamp or a mobile phone during recording or playback Noise may be recorded when an object such as your finger etc rubs or scratches the unit during recording On maintenance To clean the exterior use a soft cloth slightly moistened in water Do not use alcohol benzine or thinner Keep personal credit cards using magnetic coding or spring wound watches etc away from the unit to preven...

Страница 57: ...s are plugged in The volume is turned down completely The memory is full Erase some of the messages See page 20 99 messages have been recorded in the selected file Select another file or erase some of the messages See page 20 The remaining memory is too short The overwritten part will be deleted after the overwriting part finishes recording Therefore you can only overwrite within the remaining rec...

Страница 58: ...tor is set to L Set it to H see page 14 The advanced VOR function page 15 is activated Set the VOR selector to OFF This unit is designed to automatically adjust the recording level when recording meetings etc and is not suitable for music recording Set the PLAY SPEED selector to NORMAL See page 18 You have not set the clock see page 10 The date of recording will not be displayed if you recorded th...

Страница 59: ...n successful Refer to the Error messages in the online Help files No sound board is installed page 45 No speaker is built in or connected to the computer The computer has been muted Install the Digital Voice Player When the Digital Voice Editor is installed the Digital Voice Player is automatically installed See the online Help files for details The software does not support playback of WAV files ...

Страница 60: ... set the appropriate date and time You cannot erase an index to combine messages of different modes The selected folder does not have any messages You cannot set the alarm etc because of this If you do not set date and time you cannot make alarm or time recording setting To set date and time see page 10 When there are already 99 messages in the selected folder or the remaining memory of the IC rec...

Страница 61: ...nted as 16 seconds or 42 seconds so the remaining recording time may decrease by more than the actual length of the messages Even when each message is longer than the minimum recording unit if the length of each message cannot be divided by the minimum recording unit the remaining recording time may decrease by more than the total length of the messages The sum of the number on the counter elapsed...

Страница 62: ...operation indicator 12 17 Index to Parts and Controls qf zREC record STOP button 13 24 qg X PAUSE button 13 17 qh REVIEW CUE fast backward review fast forward cue selection of menu mode button 10 16 18 19 22 26 30 32 35 40 41 qj NxPLAY STOP EXECUTE play stop enter button 10 17 18 29 30 32 35 40 41 qk HOLD switch 38 ql VOL volume control 17 w USB connector for connecting to a computer 48 qa qs qd q...

Страница 63: ...lector 15 wf Clip wg Battery compartment 8 wh Hook for handstrap not supplied Press here to lift the clip Continued Using the clip Notes To prevent the clip from breaking avoid hooking it on thick fabric such as a pocket of a heavy coat When bending down or running with the unit clipped on your pocket be careful not to drop the unit ...

Страница 64: ...indicator 9 qa VOR voice operated recording indicator 15 qs REC recording indicator 12 qd Selected message number 12 16 Mode indication of the menu ON OFF etc 10 21 27 32 35 40 8 9 q qa qs qd qf 1 2 3 4 5 6 7 Index to Parts and Controls continued qf Counter Remaining time indication Recording date and time indication Current time indication 15 30 etc 39 Menu indication Messages ERASE HOLD etc Note...

Страница 65: ... Power requirements Two LR03 size AAA alkaline batteries 3 V DC Dimensions w h d not incl projecting parts and controls 44 5 105 3 14 0 mm 1 13 16 4 1 4 9 16 in Mass incl batteries 79 g 2 79 oz Supplied accessories Earphone 1 Carrying case 1 LR03 size AAA alkaline battery 2 U S A model only Connecting cable 1 Digital Voice Editor CD ROM 1 Registration card 1 U S A and European models only Optional...

Страница 66: ...g computer 48 Connecting external microphone 15 Connecting other equipment 15 Continuous playback 41 Control Panel 47 Counter display 39 Cue 19 D Digital Voice Editor 42 Digital Voice Player 47 Display window 64 Display mode 39 Drag drop 51 54 Drive 46 DVF file 53 E Easy search 19 Erase index 28 Erase messages 20 Error messages 60 External microphone 15 F G Folder 12 16 H Hold 38 I J K IC memory 6...

Страница 67: ... message window 50 Personal computer 7 Play back continuously 41 Playback 16 Playback Pause function 17 Playback speed 18 Player window 50 Plug in power 15 Priority mark 30 R ReadMe 44 Recorded date 39 Recording 12 Recording mode 41 Remaining memory 12 14 Remaining recording time 39 Repeat play 18 Restart 46 Review 19 S Save messages 51 Scanning play 18 Search backward 19 Search forward 19 Sound b...

Страница 68: ...68GB Sony Corporation Printed in Japan ...

Отзывы: