background image

10

x

Recording on this unit during camcorder tape
replacement

When connected to a camcorder that has an external REC
control function, you can record video on this unit only
while changing the tape of the camcorder.

1

Press the CAM LINK button of this unit and set it to
ON.

2

Set the [CAM LINK SEL] setting of this unit to
[SYNCHRO].

3

Set the [EXT REC CTRL] setting of the camcorder to
[RELAY].

4

Connect the camcorder to this unit via an i.LINK cable.

5

Press the REC START/STOP button of the camcorder to
start recording.

• When the remaining time of the tape is less than 5 minutes,

the camcorder sends a command to this unit to start
recording.

• The recording by this unit can be stopped from the

camcorder after changing the tape or by pressing the STOP
button of this unit.

• The noise of the tape change is recorded.
• The above Step 3 is for the HVR-Z7/S270 series. For details

on another camcorder you want to connect to this unit,
refer to the operating instructions supplied with that
camcorder.

• For details on camcorders that have an “external REC

control” function and on motion detection, refer to the
“Guide to supported models and their functions” supplied
with this unit.

Notes

• During RELAY recording, the cache recording cannot be

operated.

x

Recording video from this unit

You can use this unit to start or stop recording a video
input signal from an i.LINK without linked operation to a
device connected via i.LINK.

1

Press the CAM LINK button of this unit and set it to
OFF.

2

Slide the REC button to start recording.

REC

Camcorder

STOP

REC

Changing the tape

5 minutes before end of tape

STANDBY

This unit

STANDBY

REC

STANDBY

REC

Camcorder

STANDBY

REC

STANDBY

This unit

STANDBY

REC

REC

REC

STANDBY

STANDBY

Cache recording mode

The most recent approximately maximum 14 seconds of
video and audio captured by the camcorder are held in a
buffer memory and automatically recorded when the
recording button is pressed.

To set cache recording

Select [CACHE] from [REC MODE] on the menu screen.

Notes

• After cache recording, it may take about 30 seconds to write

data of the cache part.

Interval recording mode

Records a series of videos at regular intervals.
This function is useful to observe things like cloud
movements or daylight changes. Only DVCAM/DV format is
valid.

Selecting an interval recording time

Select [SETTING] 

t

 [INTERVAL] 

t

 [REC TIME] on the

menu screen to set the time.
You can select [0.5sec], [1sec], [1.5sec] or [2sec].

Setting the interval time

Select [SETTING] 

t

 [INTERVAL] 

t

 [INT TIME] on the

menu screen to set the time.
You can select [30sec], [1min], [5min] or [10min].

Setting interval recording

Select [INTERVAL] from [REC MODE] on the menu screen.

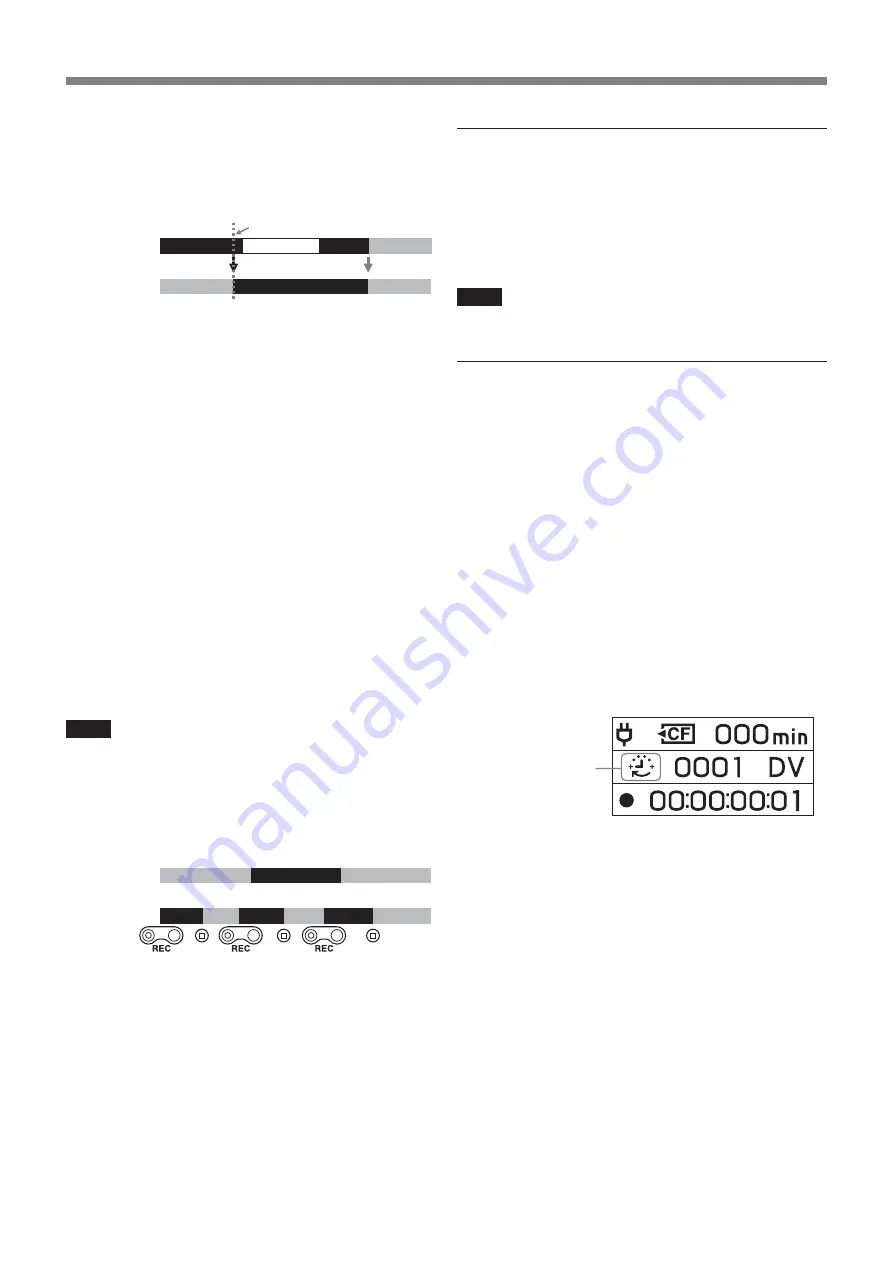
LCD screen display in interval recording mode

Remains on during
recording and blinks
during standby

Содержание HVRMRC1K - Mem Recording Unit

Страница 1: ...el number and the serial number are located at the name plate on the left of the unit Record the serial number in the space provided below Refer to these numbers whenever you call upon your Sony dealer regarding this product Model No HVR Serial No ______________________ Operating Instructions ...

Страница 2: ...NSE UNDER APPLICABLE PATENTS IN THE MPEG 2 PATENT PORTFOLIO WHICH LICENSE IS AVAILABLE FROM MPEG LA L L C 250 STEELE STREET SUITE 300 DENVER COLORADO 80206 Overview 3 Names of parts 4 Memory Recording Unit i LINK Cradle 4 LCD screen display 5 Using in VIDEO mode 6 Connecting this unit to a camcorder 6 Inserting removing optional memory media 6 Menu settings 6 Menu organization VIDEO mode 7 Recordi...

Страница 3: ... range of environments A highly versatile CompactFlash media 16GB enables about 1 hour and 12 minutes of recording of an HDV DVCAM DV stream Connecting the unit to a computer via a commercial CompactFlash reader allows faster data transfer to the computer than when using a tape The data transfer time depends on the specifications of the CompactFlash media and CompactFlash reader Can also connect t...

Страница 4: ...button during playback to stop playback and restart playback from the beginning of the next clip Keep this button pressed down during playback to play the current clip forwards at triple the normal speed When the menu screen is displayed on the LCD screen press this button to move the cursor Memory Recording Unit i LINK Cradle 9 PLAY EXEC button Press this button to play recorded files Press this ...

Страница 5: ...lay Displays the selected clip number or recording playback clip number 5 Remaining CompactFlash capacity display Displays the remaining recording time in minutes 6 Format type display Displays the recording playback clip format 7 TC time code display Displays the time code VIDEO mode During recording During playback 8 Status display Displays the status with an icon x Power is on and playback reco...

Страница 6: ... recording time 2GB Approx 9 min 4GB Approx 18 min 8GB Approx 36 min 16GB Approx 72 min Notes Do not repeatedly insert or remove the CompactFlash over a short amount of time Doing so may cause mis recognition of the CompactFlash and memory malfunction If you open the CompactFlash slot door while the unit is recording or in playback operations will stop If that occurs be sure that the status on the...

Страница 7: ... VIDEO mode REC MODE NORMAL Sets the normal recording mode CACHE Sets the cache recording mode INTERVAL Sets the interval recording mode Only DVCAM DV format is valid LOOP Sets the loop recording mode Notes When inputting the stream signal from the i LINK INTERVAL and LOOP is valid i LINK MODE AUTO Automatically switches to the camcorder recording playback format HDV Plays back HDV format only DV ...

Страница 8: ...EC control function The unit operates simultaneously with the camcorder SLEEP MODE Switches the sleep mode ON OFF OFF Sleep mode is set to OFF 1min If the i LINK cable is disconnected and no operation is done for more than one minute this unit automatically switches to SLEEP status 5min If the i LINK cable is disconnected and no operation is done for more than five minutes this unit automatically ...

Страница 9: ...plied with this unit Camcorder STANDBY R E C STANDBY This unit STANDBY R E C STANDBY REC Camcorder STOP STANDBY REC STANDBY This unit STANDBY REC STANDBY Images recorded by the camcorder can be recorded onto this unit Recording images POWER switch at the ON side The different methods of recording are as follows x Recording video simultaneously on this unit and a camcorder x Recording on this unit ...

Страница 10: ... unit You can use this unit to start or stop recording a video input signal from an i LINK without linked operation to a device connected via i LINK 1 Press the CAM LINK button of this unit and set it to OFF 2 Slide the REC button to start recording REC Camcorder STOP REC Changing the tape 5 minutes before end of tape STANDBY This unit STANDBY REC STANDBY REC Camcorder STANDBY REC STANDBY This uni...

Страница 11: ...s the REC button to starting recording The data recorded by loop recording mode is updated at regular intervals When updating the data the whole recording time may be shortened Updates the data regardless of update intervals when starting recording by a camcorder during loop recording mode in HDV Loop recording mode Repeats overwrite recording using the available space on the CompactFlash You cann...

Страница 12: ...he screen may become momentarily blue or frozen for about 0 5 second at the transition between scenes when switching clips Trick playback When the playback image is output to i LINK the clip is played at 3x 6x and 9x the normal speed To play back at the changed speed Keep pressing or button during playback to start playback at the changed speed The sequence of change is 3x 6x 9x and then back to 3...

Страница 13: ...you can start or stop recording the image on a CompactFlash in this unit STBY COMMAND Desired setting For details refer to the operating instructions for the external REC control of the HVR Z7 S270 Set this unit as follows CAM LINK SEL SYNCHRO Press the CAM LINK button to set to CAM LINK ON TC MAKE REGENERATE PRESET TC RUN REC RUN FREE RUN Time code of this unit with a tape in the HVR Z7 S270 When...

Страница 14: ...llowing information can be displayed on the status check indicator CAMERA mode of the HVR Z7 S270 REC FORMAT Displays the recording format of this unit STATUS Displays the status recording playback etc TIME CODE Displays the time code during recording CLIP Displays the clip number during recording CAM LINK Displays the CAM LINK status of this unit When CAM LINK OFF is set you cannot record from th...

Страница 15: ...VCR mode 2 1 4 CompactFlash mode Mode icon STANDBY x PLAY N FF M REW m PLAY PAUSE u REC z Status check indicator The following information can be displayed on the status check indicator VCR mode of the HVR Z7 S270 PB FORMAT Displays the playback format of this unit STATUS Displays the status recording playback etc CLIP Displays the clip number during playback REPEAT MODE Displays the playback mode...

Страница 16: ...e computer via the optional i LINK cable 3 Slide the POWER switch of this unit to ON Note This unit cannot receive power from the computer Computer requirements For Windows users OS Windows 2000 Professional Service Pack 4 or later Windows XP Home Edition Service Pack 2 or later Windows XP Professional Service Pack 2 or later Windows Vista Standard installation is required Operation is not assured...

Страница 17: ...tes For the following cases operate Safety remove Device for Windows or Remove by putting the media icon into the trash for Mac OS etc and check that the access lamp turns off When switching the each modes DRIVE HDV or DV NTSC DV PAL When disconnecting the i LINK cable from the computer When turning off the power of this unit To recognize this unit again after these operations disconnect i LINK ca...

Страница 18: ...ers number of files number of frames starting time code etc Used with a connection tool Do not delete this file Notes During HDV recording a new file will be created at the recording starting point of the tape Segmented files recorded from HDV stream Some computer applications cannot play back the transitions between segmented files properly If this happens join the files using the Sony Recording ...

Страница 19: ...ns of Windows this unit may not be detected when normal computer operation is restored after standby or hibernation For this reason hibernation is not supported by this unit Due to the specifications of Mac OS X to disconnect this unit from a Mac with Mac OS X and connect it again perform the following steps To reuse this unit 1 To use this unit restart the computer or use Disk Utility To use Disk...

Страница 20: ...ining battery time indication in the AC adaptor charger display window This indication is provided by data communications between the AC adaptor charger and the InfoLITHIUM battery pack This unit does not have a data communications function so the displayed time may differ from the actual remaining time This is not a malfunction Charging time Charging times for a completely exhausted InfoLITHIUM b...

Страница 21: ...AC adaptor charger to VCR CAMERA Notes When the mode change switch is set to CHARGE there is no power supply 2 Connect the DK cable to the DC IN jack on this unit 3 Connect the DK cable to the AC adaptor charger 4 With the power cord connect the AC adaptor charger to a wall outlet Notes You can leave the battery pack installed while operating from AC power The power supply to the DC IN jack has pr...

Страница 22: ...too quickly Recording This unit is writing the video you just shot to the CompactFlash t Wait for a while and then slide the REC switch The CompactFlash of the unit is full t Delete unnecessary images t Format this unit by selecting DELETE and then FORMAT This unit is recording the image you just shot t Do not remove the AC adaptor or the battery pack while the lamp is turned on Fragmentation has ...

Страница 23: ...more high color 16 bits 65 000 colors or more Depending on the computer you are using the played back image or sound may stop temporarily but this does not affect the images or sound copied to your computer Playback software is not installed on your computer t Install playback software on your computer t To display the extension follow the steps below 1 In the window folder click Tools t Folder op...

Страница 24: ...this unit off and then back on P 21 s Internal error has occurred t Turn this unit off and then back on M 21 s Recorded image was not processed correctly t Turn this unit off and then back on F 11 s Internal error has occurred t Turn this unit off and then back on F 12 s There is a conflict in the CompactFlash logic structure t Move the required data to the computer and reformat the CompactFlash u...

Страница 25: ...it to display the screen for formatting a CompactFlash The CompactFlash you are using may be damaged t Check the type you are using If the above symptoms do not improve try with a different CompactFlash If the above symptoms still do not improve even several attempts are made contact your Sony dealer Displays 9999 at the clip number when no more recording is possible t Delete all of the clips reco...

Страница 26: ...cated near the i LINK interface on some equipment The baud rate may vary from the indicated value when this unit is connected to equipment with a different maximum baud rate What is Mbps Mbps stands for megabits per second It is the volume of data that can be sent or received in 1 second For example a baud rate of 100 Mbps means that 100 megabits of data can be sent in 1 second To use i LINK funct...

Страница 27: ...emove the CompactFlash during data reading writing If you move the CompactFlash close to a strong magnetic field The CompactFlash may become hot just after use Handle with care Do not peel the label off the CompactFlash or attach another label to it When storing or carrying the CompactFlash put it in the protective case supplied Do not get water on the CompactFlash Do not apply excessive force on ...

Страница 28: ...me 2 GB Approx 9 minutes 4 GB Approx 18 minutes 8 GB Approx 36 minutes 16 GB Approx 72 minutes General Power requirement DC 7 2 V battery pack DC 8 4 V AC adaptor Power consumption 2 2 W Operating temperature 0 C to 40 C 32 F to 104 F Storage temperature 20 C to 60 C 4 F to 140 F Operating humidity 20 20 C to 90 35 C no condensation Dimensions HVR MRC1 Approx 57 102 34 mm 2 1 4 4 1 8 1 3 8 in HVR ...

Страница 29: ... unit with a towel for example and operate it Doing so might cause heat to build up inside When disconnecting the mains lead pull it by the plug and not the lead Do not damage the mains lead such as by placing anything heavy on it Keep metal contacts clean If the battery electrolytic liquid has leaked consult your local authorized Sony service facility wash off any liquid that may have contacted y...

Страница 30: ...s will correct the remaining capacity indication However if the battery pack is used for a long time at high temperature is left fully charged or has been very heavily used the indication may not be correctly restored In this case use the indication time as a rough guideline to estimate the remaining capacity Battery pack storage If the battery pack is not used for a long time to maintain its perf...

Страница 31: ...Additional information on this product and answers to frequently asked questions can be found at our Customer Support Website ...

Отзывы: