background image

59

US

C:\Documents and 
Settings\pc13\Desktop\J9052007_2662265111HT7000DH_US\2662265111\US05AMP_HT-
7000DH-U.fm

masterpage: Right

HT-7000DH

2-662-265-

11

 (1)

T

uner O

p

e

ratio

ns

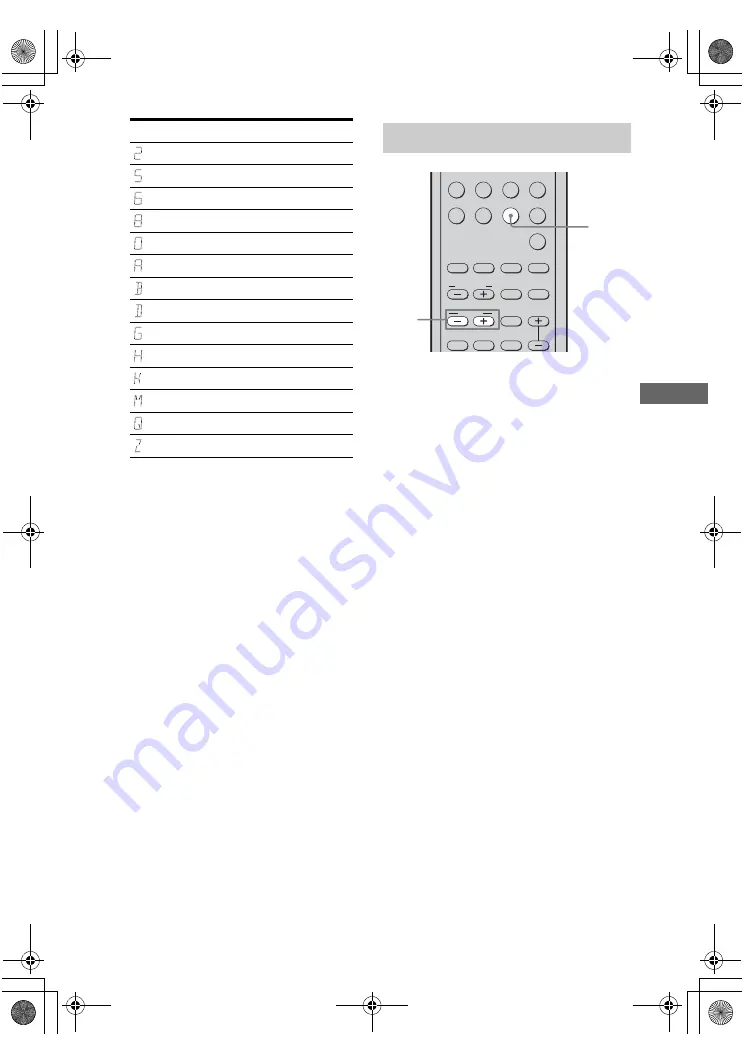
1

Press TUNER repeatedly to 
select the “XM RADIO”.

You can also use INPUT SELECTOR on
the receiver.

2

Press  or TUNING – to 
select a channel.

You can also press TUNING MODE on 
the receiver to select “AUTO T.”, and then 
turn /– to select a channel.

Display

Description

2 (two)

5 (five)

6 (six)

8 (eight)

0 (zero)

A

B

D

G

H

K

M

Q

Z

Receiving XM Radio broadcasts

.

>

VIDEO1

VIDEO2

VIDEO3

DVD 

MD/TAPE SA-CD/CD

TUNER

AUX

MULTI CH

2CH

A.F.D.

1

2

3

4

5

6

7

8

9

MOVIE

SUBTITLE

MEMORY

ENTER

MUSIC

AUDIO

ANGLE

TUNING

JUMP/

TIME

PRESET/

CH/D.SKIP

CATEGORY

MODE

DUAL

MONO

CATEGORY

1

2

US01COV_HT-7000DH-U.book  Page 59  Wednesday, January 25, 2006  3:30 PM

Содержание HT-7000DH

Страница 1: ...orporation 2 662 265 11 1 DVD Home Theatre System Operating Instructions Owner s Record The model and serial numbers are located on the rear of the unit Record the serial number in the space provided below Refer to them whenever you call upon your Sony dealer regarding this product Model No Serial No HT 7000DH US01COV_HT 7000DH U book Page 1 Wednesday January 25 2006 3 30 PM ...

Страница 2: ...ntial installation This equipment generates uses and can radiate radio frequency energy and if not installed and used in accordance with the instructions may cause harmful interference to radio communications However there is no guarantee that interference will not occur in a particular installation If this equipment does cause harmful interference to radio or television reception which can be det...

Страница 3: ...se from Dolby Laboratories Dolby Pro Logic and the double D symbol are trademarks of Dolby Laboratories DTS and DTS Digital Surround are trademarks of Digital Theater Systems Inc This receiver incorporates High Definition Multimedia Interface HDMITM technology HDMI the HDMI logo and High Definition Multimedia Interface are trademarks or registered trademarks of HDMI Licensing LLC The XM name and r...

Страница 4: ...4 Settings for the audio AUDIO menu 44 Settings for the video VIDEO menu 45 Settings for the system SYSTEM menu 46 Calibrating the appropriate settings automatically A CAL menu 48 Enjoying Surround Sound Enjoying Dolby Digital and DTS Surround sound AUTO FORMAT DIRECT 48 Selecting a pre programmed sound field 50 Using only the front speakers and sub woofer 2CH STEREO 52 Resetting sound fields to t...

Страница 5: ...MORY ENTER TUNING MODE TUNING 2CH A F D MOVIE MUSIC MULTI CH IN MUTING DISPLAY INPUT MODE INPUT SELECTOR MASTER VOLUME MULTI CHANNEL DECODING 3 6 8 4 7 5 q 9 qa qs qd w qf qg qh qj qk PUSH ql 1 2 Name Function A 1 Press to turn the receiver on or off page 29 37 38 53 79 B SPEAKERS OFF A B A B Press to select OFF A B A B of the front speakers page 30 C Display The current status of the selected com...

Страница 6: ...ents connected to the MULTI CH IN jacks page 35 K INPUT SELECTOR Turn to select the input source to playback page 35 37 38 54 56 64 66 68 L MOVIE MUSIC Press to select sound fields MOVIE MUSIC page 50 M A F D Press to select A F D mode page 48 N 2CH Press to select 2CH STEREO mode page 52 53 O TUNING Press to scan a station page 54 55 P TUNING MODE Press to select the tuning mode page 56 79 Q MEMO...

Страница 7: ...pplies Pro Logic processing to 2 channel signals in order to output the center and surround channel signals PRO LOGIC II lights up when the Pro Logic II Movie or Music decoder is activated Note Dolby Pro Logic and Dolby Pro Logic II decoding do not function for DTS format signals Name Function F DTS Lights up when DTS signals are input Note When playing a DTS format disc be sure that you have made...

Страница 8: ... Lights up when the sleep timer is activated page 67 O Playback channel indicators L R C SL SR S The letters L C R etc indicate the channels being played back The boxes around the letters vary to show how the receiver downmixes the source sound Front Left Front Right Center monaural Surround Left Surround Right Surround monaural or the surround components obtained by Pro Logic processing Example R...

Страница 9: ...EAKERS SPEAKERS MULTI CH IN 1 2 3 5 4 6 A DIGITAL INPUT section OPTICAL IN jack Connects to a DVD player etc The COAXIAL jack provides a better quality of loud sound page 23 26 COAXIAL IN jack HDMI IN MONITOR OUT jacka Connects to a DVD player or a satellite tuner The image and the sound are output to a TV or a projector page 25 B VIDEO AUDIO INPUT OUTPUT section AUDIO IN OUT jack Connects the vid...

Страница 10: ...h this receiver page 28 XM Connects to the XM connect and Play antenna not supplied with this receiver page 58 White L Red R White L Red R Black Remote commander Name Function A AV 1 Press to turn on or off the audio video components that the remote is programmed to operate If you press 1 B at the same time it will turn off the receiver and other components SYSTEM STANDBY Note The function of the ...

Страница 11: ...er VCD player LD player DVD player MD deck DAT deck tape deck Blu ray disc recorder hard disc recorder or PSX Name Function J MUTING Press to mute the sound K MASTER VOL a Press to adjust the volume level of all speakers at the same time L AMP MENU Press to display the menu of the receiver Then use the control buttons to perform menu operations M TV VIDEO Press to select the input signal TV input ...

Страница 12: ... mistake when you press the incorrect numeric button return to continuous playback etc of the CD player DVD player Blu ray disc recorder PSX or satellite tuner Name Function Z TUNING Press to scan a station Press to skip tracks of the VCR CD player VCD player LD player DVD player MD deck DAT deck tape deck Blu ray disc recorder hard disc recorder or PSX 2CH Press to select 2CH STEREO mode A F D Pr...

Страница 13: ...e deck Press 0 10 to select track number 10 select channel numbers of the TV VCR satellite tuner Blu ray disc recorder hard disc recorder or PSX 10 11 Press ALT G and then press 10 11 to select track numbers over 10 of the CD player VCD player LD player MD deck tape deck TV VCR Blu ray disc recorder hard disc recorder PSX or satellite tuner wj Input buttons Press one of the buttons to select the c...

Страница 14: ...peaker L ESurround speaker R FSub woofer Tip Since the sub woofer does not emit highly directional signals you can place it wherever you want Before you install the speakers and sub woofer be sure to attach the supplied foot pads to prevent vibration or movement as shown in the illustration below For greater flexibility in positioning the speakers use the optional WS FV11 speaker stand available o...

Страница 15: ...board wall is especially fragile attach the screws securely to a beam and fasten them to the wall Install the speakers on a vertical and flat wall where reinforcement is applied Contact a screw shop or installer regarding the wall material or screws to be used Sony is not responsible for accident or damage caused by improper installation insufficient wall strength or improper screw installation na...

Страница 16: ... page 30 b Use the long speaker cords to connect the surround speakers and the short speaker cords to connect the front and center speakers VIDEO 1 MULTI CH IN FRONT CENTER SUB WOOFER SURROUND VIDEO IN AUDIO IN VIDEO IN VIDEO OUT VIDEO 2 AUDIO IN MD TAPE L R L R L R L R OUT IN VIDEO IN DVD AUDIO IN AUDIO OUT VIDEO OUT DVD IN VIDEO 2 IN MONITOR OUT COMPONENT VIDEO Y ASSIGNABLE PB CB B Y PR CR R Y M...

Страница 17: ...y referring to the speaker label on the rear panel of the speakers The center speaker and sub woofer do not have any character on the speaker label For details on the speaker type see page 3 Tip Use the supplied speakers to optimize the system s performance Character on speaker label Speaker type L Front left R Front right SL Surround left SR Surround right US01COV_HT 7000DH U book Page 17 Wednesd...

Страница 18: ...acks etc This connection is used to output audio decoded by the component s internal multi channel decoder through this receiver b Model equipped only with AUDIO OUT L R jacks etc The sound quality depends on the connecting jack Refer to the illustration that follows Select the connection according to the jacks of your components How to hook up your components Component With Page Super Audio CD pl...

Страница 19: ...nd sub woofer using the controls on the connected component Connecting components with multi channel output jacks DIGITAL OPTICAL VIDEO 1 IN VIDEO 2 IN DVD IN COAXIAL VIDEO 1 VIDEO IN AUDIO IN AUDIO OUT VIDEO IN VIDEO OUT VIDEO 2 AUDIO IN MD TAPE SA CD CD L R L R SUB WOOFER L L R R OUT IN IN VIDEO IN DVD AUDIO IN AUDIO OUT VIDEO OUT DVD IN VIDEO 2 IN MONITOR OUT COMPONENT VIDEO Y ASSIGNABLE PB CB ...

Страница 20: ...DEO 1 MULTI CH IN FRONT CENTER SUB WOOFER SURROUND VIDEO IN AUDIO IN AUDIO OUT VIDEO IN VIDEO OUT VIDEO 2 AUDIO IN L R L R SUB WOOFER L R VIDEO IN DVD AUDIO IN AUDIO OUT VIDEO OUT DVD IN VIDEO 2 IN MONITOR OUT COMPONENT VIDEO Y ASSIGNABLE PB CB B Y PR CR R Y MONITOR HDMI DVD IN ASSIGNABLE VIDEO 2 IN MONITOR OUT XM ANTENNA AM SURROUND FRONT A R R L L SPEAKERS MD TAPE SA CD CD R R OUT IN IN CENTER S...

Страница 21: ...tor to the MONITOR OUT jack on the receiver Turn on the receiver when the video and audio of a playback component are being output to a TV through the receiver If the power supply of the receiver is not on neither video nor audio is transmitted Reassigning video input signals to another input Component video input signals can be reassigned to another input page 64 You can also reassign the HDMI in...

Страница 22: ...and audio of a playback component are being output to a TV via the receiver If the power supply of the receiver is not turned on neither video nor audio is transmitted Hooking up a TV monitor DIGITAL OPTICAL VIDEO 1 IN VIDEO 2 IN DVD IN COAXIAL VIDEO 1 MULTI CH IN FRONT CENTER SUB WOOFER SURROUND VIDEO IN AUDIO IN AUDIO OUT VIDEO IN VIDEO 2 AUDIO IN MD TAPE SA CD CD L R L R L R SUB WOOFER L L R R ...

Страница 23: ... Do not bend or tie the optical digital cords Tip All the digital audio jacks are compatible with 32 kHz 44 1 kHz 48 kHz and 96 kHz sampling frequencies Hooking up a DVD player DVD recorder MULTI CH IN FRONT CENTER SUB WOOFER SURROUND VIDEO IN AUDIO OUT VIDEO IN VIDEO OUT VIDEO 2 AUDIO IN MD TAPE SA CD CD L R L L R SUB WOOFER L L R R OUT IN IN VIDEO OUT DVD IN VIDEO 2 IN MONITOR OUT COMPONENT VIDE...

Страница 24: ...For details see Naming inputs page 66 DIGITAL OPTICAL VIDEO 1 IN VIDEO 2 IN DVD IN COAXIAL MULTI CH IN FRONT CENTER SUB WOOFER SURROUND AUDIO OUT VIDEO IN VIDEO OUT VIDEO 2 AUDIO IN MD TAPE SA CD CD L R L R L R SUB WOOFER L L R R OUT IN IN VIDEO IN AUDIO IN MONITOR HDMI DVD IN ASSIGNABLE VIDEO 2 IN MONITOR OUT XM ANTENNA AM SURROUND FRONT A R R L L SPEAKERS DVD DVD IN VIDEO 2 IN MONITOR OUT Y PB C...

Страница 25: ...supply of the receiver is not turned on neither video nor audio is transmitted Audio signals sampling frequency bit length etc transmitted from a HDMI jack may be restricted by the connected component Check the setup of the connected component if the image is poor or the sound does not come out of a component connected via the HDMI cable Refer to the operating instructions of each component connec...

Страница 26: ...48 kHz and 96 kHz sampling frequencies Hooking up a satellite tuner VIDEO 1 MULTI CH IN FRONT CENTER SUB WOOFER SURROUND VIDEO IN AUDIO IN AUDIO OUT VIDEO IN VIDEO OUT MD TAPE SA CD CD L R L R L R SUB WOOFER L L R OUT IN IN VIDEO IN DVD AUDIO IN AUDIO OUT VIDEO OUT MONITOR OUT Y PB CB B Y PR CR R Y MONITOR DVD IN ASSIGNABLE MONITOR OUT XM ANTENNA AM SURROUND FRONT A R R L L SPEAKERS ASSIGNABLE DIG...

Страница 27: ...NTER SUB WOOFER SURROUND VIDEO IN AUDIO OUT VIDEO OUT VIDEO 2 AUDIO IN MD TAPE SA CD CD L R L R SUB WOOFER L L R R OUT IN IN DVD AUDIO IN VIDEO OUT DVD IN VIDEO 2 IN MONITOR OUT COMPONENT VIDEO Y ASSIGNABLE PB CB B Y PR CR R Y MONITOR HDMI DVD IN ASSIGNABLE VIDEO 2 IN MONITOR OUT XM ANTENNA AM SURROUND FRONT A R R L L SPEAKERS CENTER SPEAKERS AUDIO IN L R AUDIO OUT VIDEO 1 VIDEO IN VIDEO IN VIDEO ...

Страница 28: ...After connecting the FM wire antenna keep it as horizontal as possible DIGITAL OPTICAL VIDEO 1 IN VIDEO 2 IN DVD IN COAXIAL VIDEO 1 MULTI CH IN FRONT CENTER SUB WOOFER SURROUND VIDEO IN AUDIO IN AUDIO OUT VIDEO IN VIDEO OUT VIDEO 2 AUDIO IN MD TAPE SA CD CD L R L R L R SUB WOOFER L L R R OUT IN IN VIDEO IN DVD AUDIO IN AUDIO OUT VIDEO OUT DVD IN VIDEO 2 IN MONITOR OUT COMPONENT VIDEO Y ASSIGNABLE ...

Страница 29: ...and ENTER appears on the display alternately 3 Press MEMORY ENTER After CLEARING appears on the display for a while CLEARED appears The following items are reset to their factory settings All settings in the LEVEL TONE SUR TUNER AUDIO VIDEO and SYSTEM menus The sound field memorized for each input and preset station All sound field parameters All preset stations All index names for inputs and pres...

Страница 30: ...er replace all the batteries with new ones 6 Selecting the speaker system You can select the front speakers you want to drive Be sure to use the buttons on the receiver for this operation Press SPEAKERS OFF A B A B repeatedly to select the front speaker system you want to drive To turn off the speaker output press SPEAKERS OFF A B A B repeatedly until the SP A and SP B indicators on the display do...

Страница 31: ...ur listening position Be sure to remove any obstacles in the path between the optimizer microphone and the speakers When you face the speaker towards the optimizer microphone you will get a more accurate measurement Press AUTO CAL The following appears on the display A CAL 5 t A CAL 4 t A CAL 3 t A CAL 2 t A CAL 1 Before you perform Auto Calibration AUTO CAL MIC SPEAKERS OFF A B A B PHONES VIDEO 3...

Страница 32: ...uto Calibration an error code will appear on the display cyclically after each measurement process as follows Error code t blank display t error code t blank display a t PUSH t blank display t ENTER a Appears when there are more than one error code To rectify the error 1 Record down the error code 2 Press the control button 3 Press 1 to turn off the receiver 4 Rectify the error For details see Err...

Страница 33: ...tails refer Surround left speaker distance page 46 f For details refer Surround right speaker distance page 46 Warning code Explanation Solution WARN 40 The environment is noisy Make sure the environment is quiet during Auto Calibration WARN 50 The center speaker is not connected Be sure to connect the center speaker WARN 51 The surround speakers are not connected Be sure to connect the surround s...

Страница 34: ... select T TONE Y The test tone is output from each speaker in sequence as follows Front left t Center t Front right t Surround right t Surround left t Sub woofer 6 Adjust the speaker levels and balance using the LEVEL menu so that the level of the test tone sounds the same from each speaker For details see Adjusting the level LEVEL menu page 42 Tips To adjust the level of all speakers at the same ...

Страница 35: ... volume Turn off the receiver Playback H X m M VIDEO1 VIDEO2 SYSTEM STANDBY SLEEP VIDEO3 DVD MD TAPE SA CD CD TUNER AUX MULTI CH TOP MENU GUIDE AV MENU MUTING MASTER VOL DISPLAY RETURN EXIT D TUNING DISC ALT ANT CLEAR SEARCH MODE 2CH A F D 1 2 3 4 5 6 7 8 9 0 10 10 11 12 MOVIE SUBTITLE MEMORY ENTER MUSIC AUDIO ANGLE TUNING JUMP TIME PRESET CH D SKIP CATEGORY MODE DUAL MONO x O f F G g CATEGORY 1 3...

Страница 36: ...sten to the sub woofer Be sure to use the buttons on the rear panel of the sub woofer for this operation 1 Press POWER The POWER indicator lights up 2 Turn LEVEL to adjust the volume Set the volume level to suit your preference according to the selected input as slight adjustments may enhance the sound Note Do not set the volume of the sub woofer to maximum as extraneous noise may be heard US01COV...

Страница 37: ...IC MULTI CH IN MUTING DISPLAY INPUT MODE INPUT SELECTOR MASTER VOLUME MULTI CHANNEL DECODING 1 5 5 3 2 3 Notes The operation is described for a Sony Super Audio CD player Refer to the operating instructions supplied with the Super Audio CD player or CD player Tips You can select the sound field to suit the music Refer to page 50 for details Recommended sound fields Classical HALL Jazz JAZZ Live co...

Страница 38: ...supplied with the TV and DVD player Check the following if you cannot listen to multi channel sound Be sure the sound source corresponds to the multi channel format the MULTI CHANNEL DECODING lamp on the front panel lights up during playback Be sure this receiver is connected to the DVD player via a digital connection Be sure the digital audio output of the DVD player is set up properly Tips Selec...

Страница 39: ...utton V v repeatedly to select the parameter you want to adjust 5 Press the control button or control button b to enter the parameter 6 Press control button V v repeatedly to select the setting you want The setting is entered automatically To return to the previous display Press control button B To exit the menu Press AMP MENU Note Some parameters and settings may appear dimmed on the display This...

Страница 40: ...aker level SR LVL SUR R 10 dB to SUR R 10 dB 1 dB step SUR R 0 dB Sub woofer level SW LVL SW 10 dB to SW 10 dB 1 dB step SW 0 dB Dynamic range compressora D RANGE COMP OFF COMP STD COMP MAX COMP OFF TONE 43 2 TONE Front speaker bass level BASS LVL BASS 6 dB to BASS 6 dB 1 dB step BASS 0 dB Front speaker treble level TRE LVL TRE 6 dB to TRE 6 dB 1 dB step TRE 0 dB SUR 43 3 SUR Sound field selection...

Страница 41: ...VD for DVD VD2 VD2 for VIDEO 2 HDMI assigna HDMI A DVD VD1 DVD VD3 DVD DVD DVD MD DVD CD VD2 VD1 VD2 VD2 VD2 VD3 VD2 MD VD2 CD DVD DVD for DVD VD2 VD2 for VIDEO 2 Naming inputsa NAME IN SYSTEM 46 7 SYSTEM Front speaker distancea FRT DIST DIST 3 ft to DIST 23 ft 1 ft step DIST 3 0 m Center speaker distancea CNT DIST DIST xx ft between front speaker distance and 5 ft 1 ft step DIST 3 0 m Surround le...

Страница 42: ...ft speaker level x SR LVL Surround right speaker level x SW LVL Sub woofer level x D RANGE Dynamic range compressor Lets you compress the dynamic range of the sound track This may be useful when you want to watch movies at low volumes late at night Dynamic range compression is possible with Dolby Digital sources only COMP OFF The dynamic range is not compressed COMP STD The dynamic range is compre...

Страница 43: ...e Select 3 SUR in the amplifier menus For details on adjusting the parameters see Navigating through menus page 39 and Overview of the menus page 40 SUR menu parameters x S F SELCT Sound field selection Lets you select the sound field you want For details see Enjoying Surround Sound page 48 Note The receiver lets you apply the last selected sound field to an input whenever it is selected Sound Fie...

Страница 44: ... stations For details see Naming preset stations page 56 Settings for the audio AUDIO menu You can use the AUDIO menu to make settings for the audio to suit your preference Select 5 AUDIO in the amplifier menus For details on adjusting the parameters see Navigating through menus page 39 and Overview of the menus page 40 AUDIO menu parameters x DEC PRI Digital audio input decoding priority Lets you...

Страница 45: ...s not delayed Notes This parameter is useful when you use a large LCD or plasma monitor or a projector This parameter is valid only when you use a sound field selected with the 2CH or A F D buttons This parameter is not valid when MULTI CH IN function is selected x NAME IN Naming inputs Lets you set the name of inputs For details see Naming inputs page 66 Settings for the video VIDEO menu You can ...

Страница 46: ...stance from your listening position to the surround right speaker Surround right speaker distance should be set from a distance equal to the front speaker distance A to a distance 15 feet closer to your listening position D Tip The receiver lets you to input the speaker position in terms of distance However it is not possible to set the center speaker further than the front speakers Also the cente...

Страница 47: ...sentation remains fairly consistent even with the surround speakers positioned at a rather wide angle However if the speakers are pointing toward the listener from the immediate left and right of the listening position the surround effects become unclear unless set to SIDE LO or SIDE HI Nevertheless each listening environment has many variables such as wall reflections and you may obtain better re...

Страница 48: ... Enjoying Dolby Digital and DTS Surround sound AUTO FORMAT DIRECT The Auto Format Direct A F D mode allows you to listen to higher fidelity sound and select the decoding mode for listening to a 2 channel stereo sound as multi channel sound Press A F D repeatedly to select the sound field you want For details see Types of A F D mode page 49 Enjoying Surround Sound 2CH A F D 1 2 3 4 5 6 MOVIE MUSIC ...

Страница 49: ... low frequency signal for output to the sub woofer when there is no LFE signals Dolby Pro Logic PRO LOGIC DOLBY PL 4 channel Performs Dolby Pro Logic decoding The source recorded in 2 channel format is decoded into 4 1 channels Dolby Pro Logic II PRO LOGIC II MOVIE PLII MV 5 channel Performs Dolby Pro Logic II Movie mode decoding This setting is ideal for movies encoded in Dolby Surround In additi...

Страница 50: ...d fields They bring the exciting and powerful sound of movie theaters and concert halls into your home Press MOVIE repeatedly to select a sound field for movies or press MUSIC repeatedly to select a sound field for music For details see Types of sound field available page 51 MULTI CH 2CH A F D 1 2 3 4 5 6 7 8 9 MOVIE MUSIC AUDIO ANGLE TUNING JUMP TIME PRESET CH D SKIP CATEGORY MODE DUAL MONO CATEG...

Страница 51: ...udio This mode is ideal for watching science fiction or action movies with lots of sound effects CINEMA STUDIO EX C DCS C ST EX C Reproduces the sound characteristics of the Sony Pictures Entertainment scoring stage This mode is ideal for watching musicals or films where orchestra music is featured in the soundtrack Music HALL HALL Reproduces the acoustics of a classical concert hall JAZZ CLUB JAZ...

Страница 52: ...the virtual speakers you will not be able to hear any sound coming directly from the surround speakers This function does not work in the following cases MULTI CH IN is selected For signals with a sampling frequency of more than 48 kHz Tip You can identify the encoding format of DVD software etc by looking at the logo on the package Dolby Digital discs Dolby Surround encoded programs DTS Digital S...

Страница 53: ...eir initial setting Listening to FM AM radio You can listen to FM and AM broadcasts through the built in tuner Before operation make sure you have connected the FM and AM antennas to the receiver page 28 Tip The tuning scale is FM 100 kHz AM 10 kHz The AM tuning scale can be changed page 79 AUTO CAL MIC SPEAKERS OFF A B A B PHONES VIDEO 3 IN PORTABLE AV IN VIDEO L AUDIO R MEMORY ENTER TUNING MODE ...

Страница 54: ...ECTOR on the receiver 2 Press D TUNING 3 Press the numeric buttons to enter the frequency Example 1 FM 102 50 MHz Select 1 b 0 b 2 b 5 b 0 Example 2 AM 1 350 kHz Select 1 b 3 b 5 b 0 If you have tuned in an AM station adjust the direction of the AM loop antenna for optimum reception 4 Press ENTER You can also use MEMORY ENTER on the receiver If you cannot tune in a station Make sure you have enter...

Страница 55: ...few seconds Perform steps 4 and 5 before MEMORY goes out 4 Press ALT and then press the numeric buttons to select a preset number You can also press TUNING or TUNING to select a preset number If MEMORY goes outbefore you select the preset number start again from step 3 5 Press ENTER You can also use MEMORY ENTER on the receiver The station is stored as the selected preset number If MEMORY goes out...

Страница 56: ...e preset station you want to create an index name for page 56 3 Press AMP MENU 1 LEVEL appears on the display 4 Press control button V v repeatedly to select 4 TUNER 5 Press the control button or control button b to enter the menu Tuning to preset stations H X m M MD TAPE SA CD CD TUNER AUX MULTI CH D TUNING DISC ALT ANT CLEAR SEARCH MODE 2CH A F D 1 2 3 4 5 6 7 8 9 0 10 10 11 12 MOVIE SUBTITLE ME...

Страница 57: ... quality digital sound XM 12 95 monthly service subscription sold separately XM Connect and Play TM antenna required to receive XM service sold separately Installation costs and other fees and taxes including a one time activation fee may apply Subscription fee is consumer only All fees and programming subject to change Channels with frequent explicit language are indicated with an XL Channel bloc...

Страница 58: ...d Most XM customers place the antenna in a south facing window with a clear view to the sky 1 Press TUNER repeatedly to select XM RADIO You can also use INPUT SELECTOR on the receiver 2 Press TUNING or TUNING to select channel 0 You can also press TUNING MODE on the receiver to select AUTO T and then turn TUNING to select channel 0 3 Check the XM Radio ID on the display and write it in the space p...

Страница 59: ...lect a channel You can also press TUNING MODE on the receiver to select AUTO T and then turn TUNING to select a channel Display Description 2 two 5 five 6 six 8 eight 0 zero A B D G H K M Q Z Receiving XM Radio broadcasts VIDEO1 VIDEO2 VIDEO3 DVD MD TAPE SA CD CD TUNER AUX MULTI CH 2CH A F D 1 2 3 4 5 6 7 8 9 MOVIE SUBTITLE MEMORY ENTER MUSIC AUDIO ANGLE TUNING JUMP TIME PRESET CH D SKIP CATEGORY ...

Страница 60: ...annel you selected may not be the one in the category you want This is because one channel may belong to more than one category If you press CATEGORY or CATEGORY in the ALL CAT mode the first channel of the next or previous category is selected CATEGORY SKIP 1 Press TUNER repeatedly to select the XM RADIO You can also use INPUT SELECTOR on the receiver 2 Press D TUNING 3 Press the numeric buttons ...

Страница 61: ... use INPUT SELECTOR on the receiver 2 Tune in the channel you want to preset For details on selecting channels see Listening to the XM Radio page 57 3 Press MEMORY You can also use MEMORY ENTER on the receiver Displaying the XM RADIO information on the front panel display AUTO CAL MIC SPEAKERS OFF A B A B PHONES VIDEO 3 IN PORTABLE AV IN VIDEO L AUDIO R MEMORY ENTER TUNING MODE TUNING 2CH A F D MO...

Страница 62: ...tedly to select the preset channel you want You can also press ALT and then press the numeric buttons to select the preset channel you want Then press ENTER to enter the selection You can also press TUNING MODE on the receiver to select PRESET T and then turn TUNING You can select preset channels from 1 to 30 Note The preset channel information will be updated depending on the service provided by ...

Страница 63: ...as been updated NO SIGNL The signal is too weak Adjust the antenna so that the signal is as strong as possible LOADING The audio channel or information is being acquired Wait until the audio channel or information has been acquired OFF AIR The selected channel is off the air Make sure that you selected the channel properly Try to select another channel space There is no characteristic information ...

Страница 64: ... IN Specifies the digital audio signals input to the DIGITAL COAXIAL jack OPT IN Specifies the digital audio signals input to the DIGITAL OPTICAL jack ANALOG Specifies the analog audio signals input to the AUDIO IN L R jacks Note Some audio input modes may not be set up depending on the input Watching component images from other inputs COMPONENT VIDEO ASSIGN You can reassign a component video inpu...

Страница 65: ...ot use the component video input as the original input when it has been reassigned to another input Watching HDMI images from other inputs HDMI ASSIGN You can reassign a HDMI input to another input 1 Press AMP MENU 1 LEVEL appears on the display 2 Press control button V v repeatedly to select 6 VIDEO 3 Press the control button or control button b to enter the menu 4 Press control button V v repeat...

Страница 66: ...to another input Naming inputs You can enter a name of up to 8 characters for inputs and display it on the receiver s display This is convenient for labeling the jacks with the names of the connected components 1 Press the input button to select the input you want to create an index name for You can also use INPUT SELECTOR on the receiver 2 Press AMP MENU 1 LEVEL appears on the display 3 Press con...

Страница 67: ...tly applied a Index name appears only when you have assigned one to the input or preset station page 56 66 Index name does not appear when only blank spaces have been entered or it is the same as the input name Using the Sleep Timer You can set the receiver to turn off automatically at a specified time Press ALT and then press SLEEP repeatedly while the power is on Each time you press the button t...

Страница 68: ...H IN is selected The analog audio signals of the current or previously used input are output You can record from a video component using the receiver See the operating instructions supplied with your recording component 1 Press one of the input buttons to select the playback component You can also use INPUT SELECTOR on the receiver 2 Prepare the playback component for playing For example insert th...

Страница 69: ...4 Press ENTER Once the numeric code has been verified the indicator slowly flashes twice and the remote automatically exits the programming mode 5 Repeat steps 1 to 4 to control other components To cancel programming Press RM SET UP during any step The remote automatically exits the programming mode To activate the input after programming Press the programmed button to activate the input you want ...

Страница 70: ... is a chance however that your component will not respond to some or all of the codes All of the input buttons on this remote may not be available when used with your particular component To control a CD player To control a DAT deck To control an MD deck To control a tape deck To control an LD player To control a video CD player Maker Code s SONY 101 102 103 DENON 104 123 JVC 105 106 107 KENWOOD 1...

Страница 71: ...LIPS 729 730 731 PIONEER 729 RCA PROSCAN 722 729 730 731 741 747 SAMSUNG 742 743 744 745 SANYO 717 720 746 SHARP 748 749 TELEFUNKEN 751 752 TOSHIBA 747 755 756 ZENITH 754 Maker Code s SONY 401 402 403 PANASONIC 406 408 PHILIPS 407 PIONEER 409 TOSHIBA 404 DENON 405 Maker Code s SONY 403 Maker Code s SONY 501 502 DAEWOO 504 505 506 507 515 544 FISHER 508 GOLDSTAR LG 503 511 512 515 534 544 GRUNDIG 5...

Страница 72: ...mitted together x Dolby Digital Digital audio encoding decoding technology developed by Dolby Laboratories Inc It consists of front left right center surround left right and sub woofer channels It is a designated audio standard for DVD video and also known as 5 1ch surround Since surround information is recorded and reproduced in stereo more realistic sound with fuller presence is delivered than w...

Страница 73: ...s a sampling frequency of 44 1 kHz Generally speaking a higher sampling frequency means better sound quality Precautions On safety Should any solid object or liquid fall into the cabinet unplug the receiver and have it checked by qualified personnel before operating it any further On power sources Before operating the receiver check that the operating voltage is identical with your local power sup...

Страница 74: ...ing or discoloration of the surface may result On operation Before connecting other components be sure to turn off and unplug the receiver If you encounter color irregularity on a nearby TV screen The front and center speakers and the sub woofer are magnetically shielded to allow it to be installed near a TV set However color irregularities may still be observed on certain types of TV sets As the ...

Страница 75: ...rted into the jacks on both the receiver and the component There is no sound from one of the front speakers Connect a pair of headphones to the PHONES jack to verify that sound is output from the headphones If only one channel is output from the headphones the component may not be connected to the receiver correctly Check that all the cords are fully inserted into the jacks on both the receiver an...

Страница 76: ...speakers Select a CINEMA STUDIO EX mode page 51 Adjust the speaker level page 34 There is no sound from the sub woofer Check that the sub woofer is connected correctly and securely Make sure you have turned on your sub woofer The surround effect cannot be obtained Make sure the sound field function is on press MOVIE or MUSIC Sound fields do not function for signals with a sampling frequency of mor...

Страница 77: ...s away from the TV Assign the component video input correctly The MULTI CHANNNEL DECODING lamp does not light up in blue Check that the playback component is connected to a digital jack and the input is selected properly on this receiver Check whether the input source of the software being played back corresponds to the multi channel format Check whether the setup on the playback component is set ...

Страница 78: ... and you will have to readjust all settings on the receiver If the problem persist Consult your nearest Sony dealer Note that if service personnel changes some parts during repair these parts may be retained Reference sections for clearing the receiver s memory Specifications AUDIO POWER SPECIFICATIONS POWER OUTPUT AND TOTAL HARMONIC DISTORTION Models of area code U only With 6 ohm loads both chan...

Страница 79: ...ODE press 1 All preset stations will be erased when you change the tuning scale To reset the scale to 10 kHz or 9 kHz repeat the procedure Video section Inputs Outputs Video 1 Vp p 75 ohms COMPONENT VIDEO Y 1 Vp p 75 ohms PB CB B Y 0 7 Vp p 75 ohms PR CR R Y 0 7 Vp p 75 ohms 80 MHz HD Pass Through General Power requirements Power consumption Power consumption during standby mode 0 2 W Dimensions w...

Страница 80: ... 5 3 8 inches Surround speakers 115 169 141 mm 4 1 2 6 5 8 5 1 2 inches Mass Approx Front speakers 1 4 kg 3 lb 2 oz Center speaker 1 3 kg 2 lb 14 oz Surround speakers 1 0 kg 2 lb 4 oz Sub woofer SA WP780 AUDIO POWER SPECIFICATIONS POWER OUTPUT AND TOTAL HARMONIC DISTORTION With 6 ohm loads from 28 200 Hz rated 120 watts minimum RMS power with no more than 0 7 total harmonic distortion from 250 mil...

Страница 81: ...d 1 Speaker cords Long 2 Short 3 Coaxial digital cord 1 Footpads Speakers 20 Sub woofer 4 Remote commander RM AAP012 1 R6 size AA batteries 2 Optimizer microphone ECM AC2 1 Speakers Front speakers 2 Center speaker 1 Surround speakers 2 Sub woofer 1 Design and specifications are subject to change without notice For details on the area code of the component you are using see page 3 US01COV_HT 7000DH...

Страница 82: ...tial setup 29 INPUT MODE 64 M MD deck connecting 18 Menu A CAL 48 AUDIO 44 LEVEL 42 SUR 43 SYSTEM 46 TONE 43 TUNER 44 VIDEO 45 Muting 35 N Naming 56 66 R Recording onto a MiniDisc or audio tape 68 onto a recording media 68 S Satellite tuner hooking up 21 Selecting component 35 sound field 50 speaker system 30 Sleep Timer 67 Sound fields resetting 53 selecting 50 Speakers connecting 16 installing 1...

Страница 83: ...uments and Settings pc13 Desktop J9052007_2662265111HT7000DH_US 2662265111 US01COV_HT 7000DH UIX fm masterpage Left HT 7000DH 2 662 265 11 1 US01COV_HT 7000DH U book Page 83 Wednesday January 25 2006 3 30 PM ...

Страница 84: ...ts and Settings pc13 Desktop J9052007_2662265111HT7000DH_US 2662265111 US08BKC_HT 7000DH U fm Sony Corporation Printed in Malaysia model name1 STR DG500 2 662 265 11 1 US01COV_HT 7000DH U book Page 84 Wednesday January 25 2006 3 30 PM ...

Отзывы: