background image

O

P

T

IC

A

L

Instructions Guide

Usin

g

the Optical Input

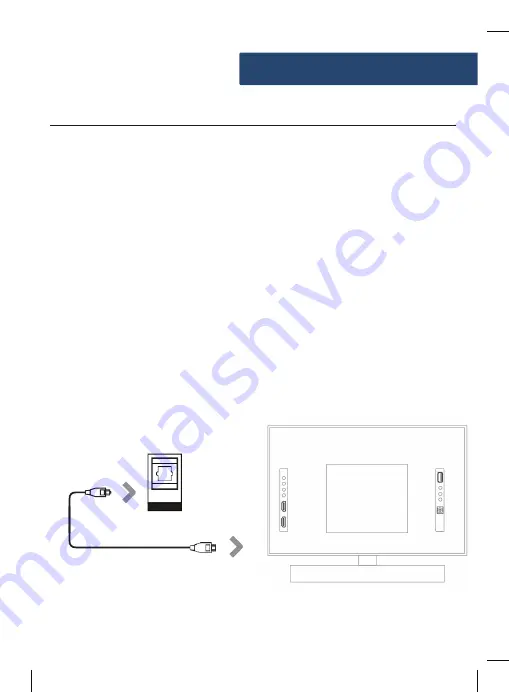
Youwill need: An audio source with an Optical Audio Output and a Di

g

ital

Optical Audio cable (included).

Connect the Digital Optical Audio cable to the optical output

on the audio source and to the Optical Input on the soundbar.
Press the POWER button on the sound bar or POWER button

directly on the remote control (

Ref.10

) to switch on the unit.

Press the MODE button on the remote control (

Rem.18

)to

switch to Optical mode or select the Mode button on main

unit repeatedly to select the Optical mode.
Using the native controls on your connected device, make sure

the audio settings are set to PCM or Optical Audio and are

turned On. Audio from the connected audio source will now be

played through the speakers.

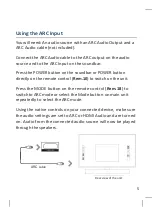
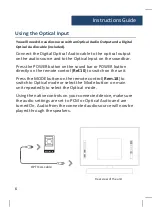
OPTICAL cable

Rear view of the unit

6

OPTICAL IN

Содержание HT-500 - Home Theater In A Box

Страница 1: ...HT 500 B L U E T O O T H S O U N D B A R Instruc ons Guide ...

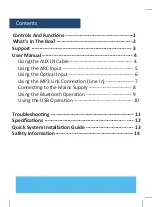
Страница 2: ... the AUX IN Cable 4 Using the ARC Input 5 Using the Op cal Input 6 Using the MP3 Link Connec on Line In 7 Connec ng to the Mains Supply 8 Using the Bluetooth Opera on 9 Using the USB Opera on 10 Troubleshoo ng 11 Specifica ons 12 Quick System Installa on Guide 13 Safety Informa on 14 ...

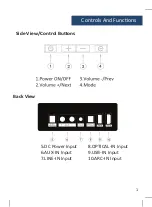
Страница 3: ...Controls And Func ons Side View Control Bu ons Back View 1 5 DC Power Input 6 AUX IN Input 7 LINE IN Input 8 OPTICAL IN Input 9 USB IN Input 10 ARC IN Input ...

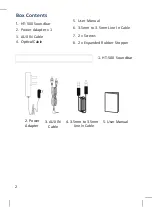
Страница 4: ...Soundbar 2 3 Power Adapter x1 AUX IN Cable 4 Op cal Cable 5 User Manual 6 3 5mm to 3 5mm Line In Cable 7 2 x Screws 8 2 x Expanded Rubber Stopper 1 HT 500 Soundbar 2 Power Adapter 3 AUX IN 4 3 5mm to 3 5mm 5 User Manual Cable Line In Cable 2 ...

Страница 5: ...Support Thank you for your purchasing the HT 500 Soundbar Please follow the guidance of the user manual to set up your new purchase and begin enjoying its features 3 ...

Страница 6: ...ontrol Rem 18 or press the Mode button on the unit to scroll to the AUX INfunction Turn on your television Troubleshooting If you are not receiving a picture or encounteringinterference pleaseensurethatthe AUXcableis being connected to output AUX port on yourTV set This will ensure that the sound is being exported correctly If your TV does not have output AUX port please use an alternative connect...

Страница 7: ...r or POWER button directly on the remote control Rem 10 to switch on the unit Press the MODE button on the remote control Rem 18 to switch to ARC mode or select the Mode button on main unit repeatedly to select theARC mode Using the native controls on your connected device make sure the audio settings are set to ARC or HDMI Audio and are turned on Audio from the connected audio source will now be ...

Страница 8: ... on the sound bar or POWER button directly on the remote control Ref 10 to switch on the unit Press the MODE button on the remote control Rem 18 to switch to Optical mode or select the Mode button on main unit repeatedly to select the Optical mode Using the native controls on your connected device make sure the audio settings are set to PCM or Optical Audio and are turned On Audio from the connect...

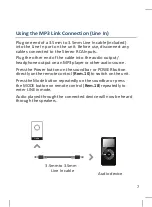
Страница 9: ... output headphone output on an MP3 player or other audio source Press the Power button on the soundbar or POWER button directly on the remote control Rem 10 to switch on the unit Press the Mode button repeatedly on the soundbar or press the MODE button on remote control Rem 18 repeatedly to enter LINE in mode Audio played through the connected device will now be heard through the speakers 3 5mm to...

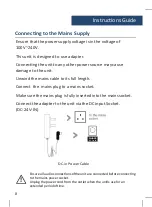
Страница 10: ...t Unwind the mains cable to its full length Connect the mains plug to a mains socket Make sure the mains plug is fully inserted into the mains socket Connect the adapter to the unit via the DC input Socket DC 24V IN DC in Power Cable Ensure all audio connec ons o he unit are connected before connec ng to the mains power socket Unplug the power cord from the outlet when the uni s use for an extende...

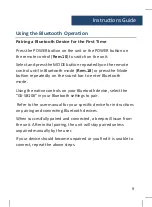
Страница 11: ...repeatedly on the sound bar to enter Bluetooth mode Using the na ve controls on your Bluetooth device select the GS SB106 in your Bluetooth se ngs to pair Refer to the user manual for your specific device for instruc ons on pairing and connec ng Bluetooth devices When successfully paired and connected a beep will issue from the unit A er ini al pairing the unit will stay paired unless unpaired manu...

Страница 12: ...the connected Bluetooth device will now be heard through thespeakers Using the USB Operation Insert USB to Play Music Automatically Select and press the MODE button repeatedly on the remote control until in USB mode Rem 18 or press the Mode button repeatedly on the soundbar to enter USB mode To Play Pause the track or Skip Forwards Backwards to a selected track use the remote control Rem 12 13 19 ...

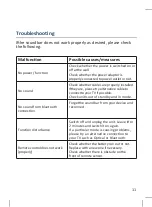
Страница 13: ...erna ve cable to connec o your TV if possible Check uni s out of standby and in mode No sound from bluetooth connec on Forge he soundbar from your device and reconnect Func on disturbance Switch off and unplug the unit Leave i or 2 minutes and switch it on again If a par cular mode is causing problems please try an alterna ve connec on to your TV such as Op cal or Bluetooth Remote control does not ...

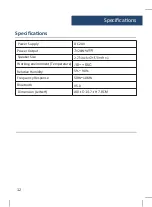
Страница 14: ...a ons Specifica ons Power Supply DC 24V Power Output 20W 4 Speaker Size 2 inch 1 Working environment Temperature 10 55C Rela ve Humidity 5 90 Frequency Response Bluetooth V5 0 Dimension LxWxH 12 7 H 50Hz 18KHz ...

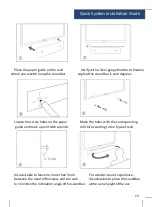
Страница 15: ...ees Locate the screw holes on the paper Make the holes with the corresponding guide and mark a point with a pencil drill bit according to the type of wall I s advisable to leave no more than 5mm For a be er sound experience between the head o he screw and the wall i s advisable to place the soundbar to minimize the inclina on angle o he soundbar a he same height o he ear 13 ...

Страница 16: ...s 13 Disposeof usedelectrical products andba eries safely according to your local authority and regula ons ADDITIONAL WARNINGS The apparatus shall not be exposed to dripping or splashing and no objects filled with liquid such as vases shall be places on the apparatus Main plug is used to disconnect device and it should remain readily operable during intended use In order to disconnec he apparatus f...

Страница 17: ...not installed and used in accordance with the instruc ons may cause harmful interference to radio communica ons However there is no guarantee that interference will not occur in a par cular installa on If this equipment does cause harmful interferenceto radio or television recep on which can be determined by turning the equipment off and on the user is encouraged to try to correct the interference ...

Отзывы: