background image

Chapter 3

Convenient Recording/Playback Functions

Chapter 3

Convenient Recording/Playback Functions

3-7

Repeat Recording

You can set the recorder to record on a single cassette
repeatedly.
When the tape reaches its end during recording, it is
automatically rewound to the beginning, and the
recorder continues recording.
Pictures are stored on the built-in hard disk while the
tape is rewinding so that recording can continue
without a break.

To activate repeat recording

See Chapter 4 “Menu Operations” for additional
information.

1

Enter Menu mode by pressing the MENU key.

2

Highlight REC FUNCTION MENU (or display
“RecFuncMenu” on the front panel) of the Top
menu (page 4-5) by pressing the 

V

 or 

v

 key, then

press the 

b

 key.

The Recording Function menu is displayed.

SETUP MENU

REC FUNCTION MENU

NORMAL REC

: MODE 1

TIMER REC
ALARM REC
REPEAT REC

: OFF

CONTINUOUS REC

1)

: OFF

SETTING OF REC MODE

3

Highlight REPEAT REC (or display “RepeatRec”)
by pressing the 

V

 or 

v

 key, then press the 

b

 key.

The menu shifts to repeat recording ON/OFF
selection.

SETUP MENU

REC FUNCTION MENU

REPEAT REC

: OFF

M

*

OFF

ON

4

Highlight (or display) ON by pressing the 

v

 key.

5

Press the SET key to leave Menu mode.

6

Insert a cassette.

7

Press the REC key.

The REC indicator and the REPEAT indication of
the indicator block light, and recording begins.
Recording is made in Recording mode set in
“Normal Recording” (page 2-5).

To cancel repeat recording

To stop recording in progress

Press the STOP key.

To cancel repeat recording

Return the REPEAT REC setting to OFF in step 

3

.

If there is recording in progress, it will be continued.

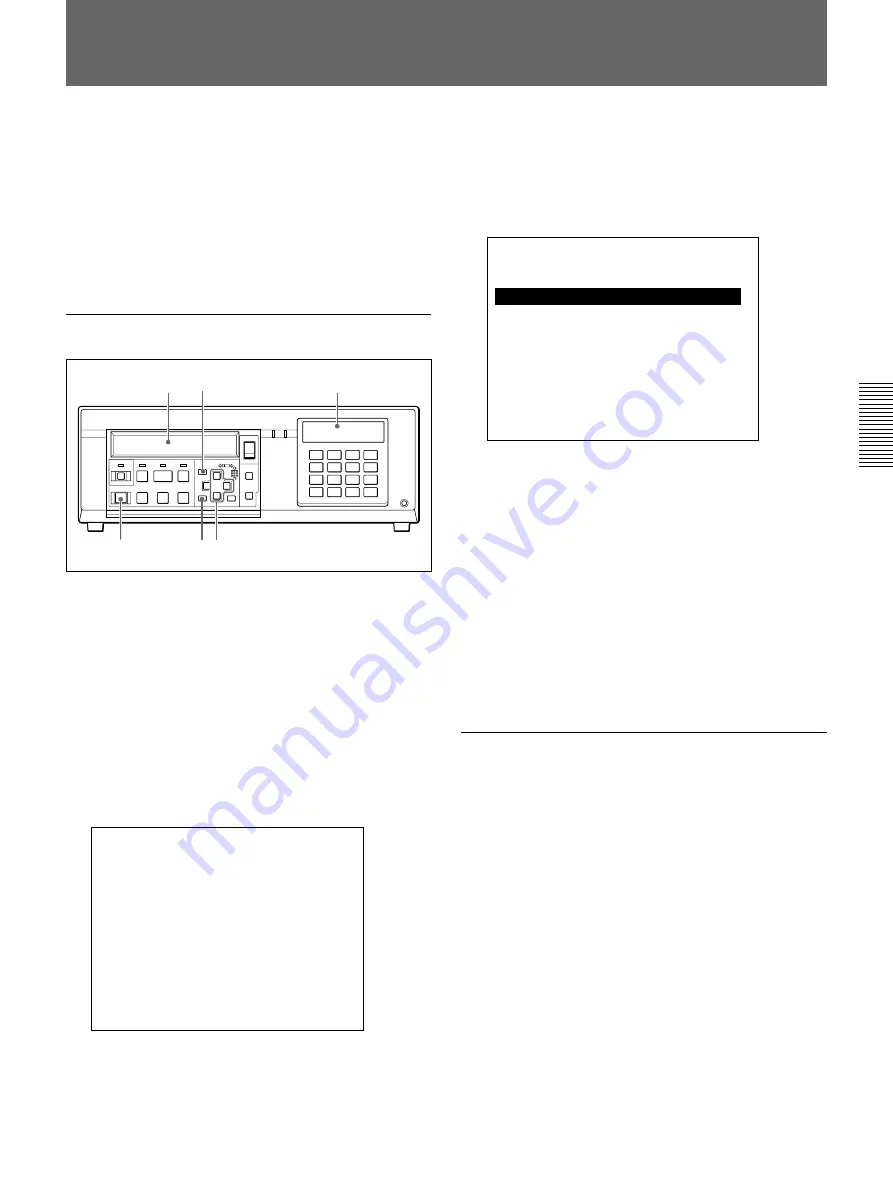
REPEAT indication

S

DIGITAL SURVELLANCE RECORDER HSR-1

DIGITAL

TIMELAPSE

CONTROL-S

REC

EJECT

FRAME 

STOP

FRAME

REC

F FWD

PLAY

REW

§

·

º

π

®

æ

LOCK

TIME

SEARCH

ALARM

SEARCH

CURSOR

MENU

SET/YES

RESET/NO

10

ı

1

2

3

4

5

6

7

8

13

14

15

16

11

12

9

1

6

52,3,4

7

1) HSR-1/1P only

Содержание HSR-1

Страница 1: ...Digital Surveillance Recorder 3 204 007 13 1 HSR 1 HSR 1P HSR 2 HSR 2P Operating Instructions 1999 Sony Corporation ...

Страница 2: ... to radio communications Operation of this equipment in a residential area is likely to cause harmful interference in which case the user will be required to correct the interference at his or her own expense You are cautioned that any changes or modifications not expressly approved in this manual could void your authority to operate this equipment This device requires shielded itnerface cables to...

Страница 3: ...ing the Screen 2 3 Switching the Pictures 2 4 Recording 2 5 Normal Recording 2 5 Playback 2 9 Normal Playback 2 9 Time Search 2 10 Playback During Recording HSR 2 2P only 2 12 Chapter 3 Convenient Recording Playback Functions Timer Recording 3 1 Alarm Recording 3 4 Repeat Recording 3 7 Series Recording 3 8 Alarm Search 3 9 HDD Recording Playback 3 11 High Speed Playback 3 12 Back Space Editing 3 1...

Страница 4: ...n Menu Enhanced Menu 4 10 Function Control Menu 4 11 Remote Control Menu Enhanced Menu 4 13 Maintenance Menu Enhanced Menu 4 15 Chapter 5 Connections and Preparations Connections 5 1 Video Cameras 5 1 Video Monitors 5 1 Remote Controls 5 1 Connection Examples 5 2 Setting the Clock 5 6 Settings 5 7 Selecting the Enhanced Menu Mode 5 7 Setting the Cameras to Use 5 7 Setting Camera Names 5 8 Setting ...

Страница 5: ...3 Chapter 6 Maintenance and Troubleshooting Maintenance 6 1 Condensation 6 1 Head Cleaning 6 1 Regular Checks 6 2 Troubleshooting 6 4 Error Codes and Messages 6 5 Appendices Notes on Use A 1 Specifications A 2 Index I 1 ...

Страница 6: ...gh mode provides higher quality than that of conventional equipment with resolution close to that of the S VHS format and much higher S N ratio By selecting Middle or Low mode you can prolong recording time compared with the upper modes Large storage capacity Using DV cassette tape 270 minute tape as the storage medium the HSR 1 1P 2 2P offers a large storage capacity of more than 60 gigabytes Lon...

Страница 7: ...can be independently selected For example it is possible to monitor the image from one key camera on the B monitor while checking playback on the A monitor Flexible camera assignment There are five preset recording modes which can be flexibly combined with your choice of picture quality mode tape length recording time number of camera inputs and the recording cycle of each camera This feature allo...

Страница 8: ...te and time With a tape on which alarm recordings have been made you can locate a specific picture after checking the list of those recordings Variable speed search with a Jog Shuttle dial By connecting the optional SVRM 100A remote control unit noiseless picture search can be carried out using its Jog Shuttle dial Rec End search The recording end point on a tape can be easily located Quick record...

Страница 9: ...t hand For details see Connection for remote control page 5 5 SNT V304 Video Network Station By connecting the SNT V304 to the HSR 1 1P 2 2P the recorder can be controlled by a personal computer via a network such as a LAN or WAN In this way you can totally control the surveillance systems in various locations from a distance Note Tapes recorded on this unit cannot be played on other DV cassette p...

Страница 10: ...ycle 1 Opening for cassette compartment Insert a DV format cassette of standard or mini size When inserting a mini sized cassette locate it in the center of the opening For compatible cassettes see Handling Cassettes on page 2 1 2 EJECT button Press to eject the cassette 3 Cassette indicator green Lights when a cassette is loaded It flashes while the cassette is being ejected 4 REC recording indic...

Страница 11: ...ping recording For details see Playback During Recording on page 2 12 4 F FWD fast forward key and indicator Press this key to fast forward the tape The LED indicator green lights This key functions as the forward search key during playback 5 REC r record key Press this key to start recording 6 FRAME key Press this key to reverse the picture by one frame 7 STOP p key When you press this key during...

Страница 12: ...ils see Alarm Search on page 3 9 4 Indication window 1 ALARM indication Lights when alarm recording is on For details see Alarm Recording on page 3 4 2 CONT continuous indication Lights when continuous recording is set to ON on the HSR 1 1P It stays lit on the HSR 2 2P For details see Changing the Cassette During Recording on page 3 15 3 REPEAT indication Lights during repeat recording For details...

Страница 13: ...pe position where the current video information is recorded In other modes The current tape position Note As the recorder employs a hybrid configuration of HDD and tape the counter value being displayed in playback may considerably differ from the actual tape position Therefore the tape counter value may jump when you change the operation from PLAY to F FWD REW mode 7 Time data indication Shows th...

Страница 14: ...t connector BNC type Outputs composite video signals The signal to be output is normally the same as that from the A connector The Image Control menu page 4 6 permits you to specify use of this output exclusively for a specific camera Note that the character signal is not superimposed with such usage 3 POWER switch For turning on off the power to the recorder 4 PARALLEL I O connector 37 pin Used t...

Страница 15: ...ication Control menu 4 Image quality mode When recording or monitoring the currently selected Image quality mode is displayed During playback that used for recording is displayed Whether to display them can be set on the Indication Control menu 5 Camera name When recording or monitoring the name specified for the current camera is displayed During playback the camera name recorded on the tape is d...

Страница 16: ...is generated 0 ALARM indication lower If there is an external alarm input the indication ALARM is superimposed on the lower portion of the screen As this information is recorded on the tape the indication is also obtained in playback NOT ORIGINAL indication Thanks to the original watermark system a NOT ORIGINAL indication is superimposed if the image being played may have been artificially altered...

Страница 17: ... in the name by 1 5 corresponds the tape length unit minute Ex 276 minutes with PDV 184N Notes on usage When a cassette is to be stored for a long time rewind the tape to the beginning mount it in the original case and place it vertically Leaving a cassette lying flat may cause noisy pictures If any undue force is applied to the cassette such as by dropping it the tape may become slackened causing...

Страница 18: ...en the front panel cover and insert the cassette through the opening as shown below The cassette is automatically pulled into the operating position and the cassette indicator lights up Ejecting a Cassette Press the EJECT button The cassette indicator flashes while the cassette is being ejected Handling Cassettes REC SAVE REC SAVE switch Set to SAVE EJECT button Cassette indicator Mini sized casse...

Страница 19: ...mage Control menu For the assigning method see Setting the Display Structures on page 5 9 Border lines You can select whether the lines are to be displayed and if so in black or in white on the Indication Control menu Superimposing According to settings made on the Indication Control menu various information such as the camera number name date time etc can be superimposed onto the signal input fro...

Страница 20: ...es can be monitored by selecting the screen division mode To change the structure Press the V or v key Each time you press either of the keys the display switches to the next of night patterns from the full screen to 16 division mode To change the pages Press the B or b key The pages are cyclically switched To automatically switch pages The pages of the structure selected using the V or v key are ...

Страница 21: ... 2 horizontal 720 vertical 240 HSR 1P 2P horizontal 720 vertical 288 pixels for 33 hours on a single cassette of 270 minute tape length Recording modes can be registered by using Setting of Rec Mode of the Recording Function menu For registrating the recording modes see Chapter 5 To select a recording mode A recording mode for normal recording can be selected on the monitor screen or on the charac...

Страница 22: ...V or v key then press the SET key A message NOW SAVING is displayed and the selection is registered To execute recording 1 Insert a cassette The cassette indicator and the tape remaining indication light 2 Press the REC key The REC indicator lights and recording starts in the selected recording mode When the remaining tape capacity becomes less than 3 minutes during recording the tape remaining in...

Страница 23: ...cture frames have been recorded continuously time search and alarm search may fail or the pictures may not be played correctly It is therefore recommended to perform recording for a certain duration continuously The recording duration required for correct playback depends on the recording cycle the number of cameras and the image quality mode Example With a 1 second recording cycle eight cameras H...

Страница 24: ...ording can also be recorded as image on the tape The data recorded as image are always be superimposed on the playback picture Whether to record the data as image is set on the Indication Control menu page 4 8 which is set at the factory to record The superimposing position of the date and time can also be set on the Indication Control menu Recording ...

Страница 25: ... and hold the F FWD key Normal playback is resumed when you release the key To reverse the picture at a high speed Press and hold the REW key Normal playback is resumed when you release the key To advance the picture by one frame Press the FRAME 7 key The picture freezes at the next frame To resume normal playback press the PLAY key To reverse the picture by one frame Press the FRAME key The pictu...

Страница 26: ...sions at maximum and you can assign a camera to each division as desired The camera assignment for playback can be made independent from that for monitoring See Monitoring Picture page 2 3 for the screen dividing structures and Chapter 5 Connections and Prepartions for the camera assignment Monitoring the playback picture and the current camera inputs simultaneously You can assign live camera inpu...

Страница 27: ...nd time The date year month day and time hour minute second can be set by either changing the value in turn using the V or v key or by direcly entering the value using the numeric keys Press the V or v key to switch between AM and PM 4 Press the SET key The tape rewinds or fast forwards searching for the tape position of the specified date time When the search is completed the picture of that posi...

Страница 28: ...cording starting point This key functions as the normal playback start key after a cassette operation TIME SEARCH and ALARM SEARCH keys To execute a Time search Rec end search or Alarm search operation EJECT key To change the cassette F FWD and REW keys To fast forward or rewind a tape STOP key To stop playback during recording A guidance for the next operation is displayed Note Even when the REC ...

Страница 29: ...he latest recorded scenes Pre reverse Playback 1 Start recording as described in Recording 2 Press the PLAY PRE REVERSE PLAY key Playback During Recording mode is activated The point on the hard disc just before the time set for PRE REVERSE TIME in the Function Control Menu 1 to 99 minutes is located and playback starts Recording is continued using the recording buffer of the HDD For details on se...

Страница 30: ...g continues and you can execute Alarm Search or Time Search For details on the search operations see Alarm Search page 3 9 or Time Search page 2 10 You can also perform a search operation using the F FWD and REW keys or frame to frame using the FRAME keys in the same way as in the ordinary playback mode A search operation can also be performed using the Jog Shuttle dial of the SVRM 100A To play ba...

Страница 31: ...yback During Recording mode is canceled and recording continues from the present tape position To continue recording from the original tape position when you have started a Playback During Recording operation 1 Press the NO key The display returns to the guidance in step 1 of To cancel Playback During Recording mode 2 Find the original tape position by using the Rec End Search function If the cass...

Страница 32: ...etected at night The time as well as the recording mode 1 to 5 must be specified To set the timer Timer setting is made on a special display on the monitor screen Once you set the timer it is not necessary to repeatedly set it if it is not to be changed See Chapter 4 Menu Operations for additional information 1 Enter Menu mode by pressing the MENU key 2 Highlight REC FUNCTION MENU of the top menu ...

Страница 33: ...is deleted is displayed Time Mode is automatically calculated and displayed according to the selected recording mode To stop recording at the specified time set 0 in the REC column When you set A in the REC column alarm recording will start at the specified time This alarm recording is performed in the mode set on the alarm set display page 3 5 7 Perform the same settings for each day of the week ...

Страница 34: ... SET key to leave Menu mode 4 Insert a cassette 5 Press the REC key The TIMER indication of the indication window lights and the timer recording selected in step 2 will be activated TIMER indication To cancel timer recording To stop recording in progress Press the STOP key To cancel timer recording Return the TIMER REC setting to OFF on the display in step 1 If there is recording in progress it wi...

Страница 35: ... recorder to start recording or change the recording mode when an alarm signal is input to the PARALLEL I O connector at the rear panel For the alarm signals you can specify a signal common to all cameras or signals for specific cameras The signal assignments are made from the Remote Control menu page 4 13 Alarm recording modes The recorder provides five modes of Alarm recording For alarm recordin...

Страница 36: ...ade on a special display on the monitor screen Once you set the mode it is not necessary to repeatedly set it if it is not to be changed See Chapter 4 Menu Operations for additional information 1 Enter Menu mode by pressing the MENU key 2 Highlight REC FUNCTION MENU of the Top menu page 4 5 by pressing the V or v key then press the b key The Recording Function menu is displayed SETUP MENU REC FUNC...

Страница 37: ...ghts and alarm recording will be activated During execution of alarm recording a beep sounds You can stop the beep by pressing any key Notes When alarm recording is ON recording will be made with a camera that has been set to NO REC with the REC FUNCTION MENU if an alarm to that camera is detected During a period for which A has been set in the REC column on the TIMER set display alarm recording w...

Страница 38: ... REC REPEAT REC OFF CONTINUOUS REC1 OFF SETTING OF REC MODE 3 Highlight REPEAT REC or display RepeatRec by pressing the V or v key then press the b key The menu shifts to repeat recording ON OFF selection SETUP MENU REC FUNCTION MENU REPEAT REC OFF M OFF ON 4 Highlight or display ON by pressing the v key 5 Press the SET key to leave Menu mode 6 Insert a cassette 7 Press the REC key The REC indicat...

Страница 39: ...ies recording signal via the connectors recording is relayed to the subsequent HSR 1 1P 2 2P units The signal assignment is made from the Remote Control menu Once you assign the signal it is not necessary to set it again unless it needs be changed For the Remote Control Menu see Chapter 4 Menu Operations To activate series recording 1 Turn on the power and insert a cassette in to each HSR 1 1P 2 2...

Страница 40: ...AME mode cannot be located by an alarm search operation Any alarm input in FRAME mode is not registered to the alarm list With the HSR 1 1P the alarm list is lost when the cassette is unloaded Alarm search using an alarm list is possible only with a cassette that stays in the unit after being used for recording In Playback During Recording mode of the HSR 2 2P the alarm list temporarily disappears...

Страница 41: ...hat the order is in the forward direction and the mark in the reverse direction The valid range is from 99 to 99 4 Press the SET key The tape runs in rewind or fast forward mode to locate the tape position specified in step 3 When the specified position is located the image at that position is reproduced in Still mode To cancel an alarm search If you have not yet pressed the SET key press the ALAR...

Страница 42: ... overwriting starts the indication for remaining capacity changes to OVERWRITTEN To stop HDD recording 1 Press the STOP key A message to confirm that you want recording to stop is displayed 2 Press the YES key To execute HDD playback 1 Execute HDD recording 2 Stop HDD recording 3 Press the PLAY key The data recorded on the hard disk are played from the beginning Notes High speed search and variabl...

Страница 43: ...le holding down the FRAME 7 key To stop high speed playback Press the STOP key Notes If you switch the operation from high speed playback to variable speed playback by pressing either FRAME key subsequent playback may not be correctly performed To precisely check the data on the tape first stop the high speed playback then use normal playback mode High speed playback in the reverse direction is no...

Страница 44: ...ES key Recording starts successively after the selected frame If you press the NO key the screen returns to the still picture of step 1 Press the STOP key to cancel the playback mode To execute back space editing in Playback During Recording mode HSR 2 2P With the HSR 2 2P back space editing in Playback During Recording mode is also possible It is enabled after changing the cassette For details on...

Страница 45: ...END SEARCH SHIFT Mm CHANGE µ INPUT NUM KEY SEARCH SET KEY ABORT TIME SEARCH KEY 3 Press the B or b key to select Rec End Search mode REC END SEARCH flashes 4 Press the SET key The tape rewinds or fast forwards searching for the tape position of the recording end The message SEARCHING is displayed while searching When you execute a Rec End search in Playback During Recording mode of the HSR 2 2P g...

Страница 46: ...nu on the front panel of the Top menu page 4 5 by pressing the V or v key then press the b key The Recording Function menu is displayed SETUP MENU REC FUNCTION MENU NORMAL REC MODE 1 TIMER REC ALARM REC REPEAT REC OFF CONTINUOUS REC OFF SETTING OF REC MODE 3 Highlight CONTINUOUS REC or display ContRec by pressing the V or v key then press the b key The menu shifts to continuous recording ON OFF se...

Страница 47: ...layer Use the CURSOR b or B key to move from one layer to another Some items incorporate special setting displays on the character display on the front panel of this recorder one by one Chapter 4 Menu Operations Menu Operations First Layer Second Layer Third Layer Fourth Layer IMAGE CONTROL MENU A IMAGE MONITOR MANUAL INDICATION CONTROL MENU B IMAGE ALARM CHANGE AUTO REC FUNCTION MENU CAMERA CONNE...

Страница 48: ...s which layer you are at Example First layer Image Menu no mark Second layer A Image Third layer Monitor Fourth layer Manual The items are displayed in English on the character display Keys Used for Menu Operations For menu operations use the keys of the Menu operation block and the numeric keys 1 MENU key Press to enter Menu mode Press it again to leave Menu mode If you press this key before regi...

Страница 49: ...previous setting Before pressing the SET key press the MENU key The message ABORT is displayed and the previous setting is restored Note If power is cut off while data are being written into nonvolatile memory the setting data may be lost Do not turn off the power to the recorder while the message NOW SAVING is being displayed Current settings Setting the Menu Items 1 Press the MENU key The record...

Страница 50: ...isplayed and the enhanced items will not be displayed when you activate Menu mode the next time Returning to the Default Settings Initializing To restore the factory default settings for the menu items initialize the items after having changed them proceed as follows 1 Highlight MENU INITIALIZE or display Menu Init on the Top menu by pressing the V or v key The MENU INITIALIZE display appears MENU...

Страница 51: ...er and self diagnosis See Maintenance Menu on page 4 15 TIME ADJUST Time Adjust Enters the mode to set the built in clock For details see Setting the Clock on page 5 6 MENU INITIALIZE Menu Init Initializes the menu settings MENU GRADE Menu grade Selects the items to be displayed BASIC Basic Displays only the basic items ENHANCED Enhanced Displays both the basic and enhanced items LANGUAGE Language...

Страница 52: ...cture for monitoring to be switched upon an alarm input OFF OFF Does not switch the picture upon alarm input ON ON Switches the picture to that from the camera for which an alarm is input AUTO CYCLE AutoCycle Enters the setting mode for the cycle of automatic monitor switching n 1 to 60 n SEC 5 n sec For the setting procedure see Setting the Automatic Change Cycle on page 5 11 B IMAGE B Image Sele...

Страница 53: ...N n Div Enters the setting mode to assign cameras to the divisions of the screen in each dividing mode for monitoring n the number of divisions 4 6 7 8 9 10 13 16 For the setting procedure see Setting the Display Structures on page 5 9 PLAY DISP STRUCTURE Play Disp For setting the screen structure for playback n DIVISION n Div Enters the setting mode to assign cameras to the divisions of the scree...

Страница 54: ...s DATE FORMAT DateFormat Determines the format of date indication YEAR MONTH DAY Y M D Displays in the order of year month day MONTH DAY YEAR1 M D Y Displays in the order of month day year DAY MONTH YEAR D M Y Displays in the order of day month year MONTH FORMAT Month Form Determines the format of month indication NUMBER Number ALPHABET Alphabet TIME FORMAT Time Format Determines the format of tim...

Страница 55: ... display the recording mode DISPLAY Display NO No Disp TIME MODE Time Mode Determines whether to display the time mode DISPLAY Display NO No Disp QUALITY MODE Quality Determines whether to display the quality mode DISPLAY Display NO No Disp REC CYCLE RecCycle Determines whether to display the recording cycle DISPLAY Display NO No Disp REC CHAR POSI RecChrPos Determines the position to superimpose ...

Страница 56: ...Alarm recording For the setting procedure see Alarm Recording on page 3 4 REPEAT REC Repeat Rec Determines whether to activate Repeat recording OFF OFF ON ON CONTINUOUS REC1 Contin Rec Determines whether to activate Continuous recording OFF OFF ON ON SETTING OF REC MODE RecModeSet Enters the setting mode for each Recording mode RECORDING MODE n Mode n n Recording mode number 1 to 5 For the setting...

Страница 57: ... the tape end POWER ON REC PowerOnREC Determines whether to start recording when power is turned on OFF OFF ON ON BEEP Beep Determines whether to sound the beep at key input at tape end ON ON in recording or when an error occurs OFF OFF STILL Still Selects still mode FRAME Frame Frame still FIELD Field Field still Select to eliminate blurring of images in a fast moving picture The vertical resolut...

Страница 58: ...CTION LEVEL SET Layer 3 items 1 If no password has been specified at the respective levels the function s is are valid even in LOCK mode Display Char display Contents Layer 2 Layer 3 PRIORITY Priority Selects the priority of operations when the preset recording cycle is smaller than the valid minimum value in Playback During Recording mode PLAY PB Changes the recording cycle and continues recordin...

Страница 59: ...800 9600 19200 38400 PARALLEL INPUT Para Input For assigning a function to each input pin 24 inputs of the PARALLEL I O connector on the rear panel INm n PIN n PIN m 1 to 24 n pin number 2 to 13 21 to 32 NO USE No use Ignores the input signal STOP STOP Command inputs corresponding to the tape transport REC REC control keys on the front panel Active L PLAY PLAY F FWD F FWD REW REW F FRAME F FRAME R...

Страница 60: ...he internal clock counts 00 ADJUSTMENT minute 00 second ALARM AlmRetrn Outputs a signal upon return from alarm recording RETURN ALARM Alarm Outputs a status signal to indicate that alarm recording is in progress TAPE END Tape End Outputs a signal when tape end is reached during recording TAPE EXIST TapeExst Outputs a signal when a cassette is in the recorder ERROR Error Outputs a signal when an er...

Страница 61: ...ay SETUP MENU MAINTENANCE MENU HOURS METER VERSION DISPLAY Character display Mainte Menu Press the b key HoursMeter The Maintenance menu item selected when you left the menu the last time is displayed Display Char display Contents Layer 2 HOURS METER HoursMeter Enters the mode to check the hours meter For the checking procedure see Regular Checks on page 6 2 VERSION DISPLAY Ver Disp Shows the soft...

Страница 62: ...vel to monitors VBS signal 1 0 Vp p 75 ohms unbalanced VIDEO OUT Y signal 1 0 Vp p 75 ohms unbalanced S VIDEO C signal 0 28 Vp p HSR 1 2 or 0 30 Vp p HSR 1P 2P 75 ohms unbalanced S VIDEO Remote Controls The recorder has a PARALLEL I O and an RS 232C connector on the rear and a CONTROL S connector on the front for control from external devices PARALLEL I O connector For 24 input pins and 8 output p...

Страница 63: ...Ω ON OFF 75Ω ON OFF AC IN PARALLEL I O RS 232C RS 232C VIDEO OUT S VIDEO IN VIDEO IN AC IN VIDEO OUT B VIDEO OUT A VIDEO IN 4 VIDEO IN 3 VIDEO IN 2 VIDEO IN 1 Connection Examples Basic system connection Connections Video cameras Video monitors Switches or external interface 1 75 ohm coaxial cable optional 2 S cable optional 3 Multi connector supplied 4 RS 232C cross cable optional 5 AC power cord ...

Страница 64: ...T VIDEO OUT VIDEO OUT VISCA OUT VIDEO OUT VISCA IN VIDEO IN 2 VIDEO IN 3 VIDEO IN 4 COM 2 COM 1 VISCA OUT VIDEO OUT VISCA IN S VIDEO IN S VIDEO IN ETHERNET 10 100Base S VIDEO OUT VIDEO IN 1 VIDEO OUT S VIDEO VIDEO OUT B VIDEO IN 2 VIDEO IN 3 VIDEO IN 4 AC IN EVI D30 31 ID 1 EVI D30 31 ID 2 SNT V304 Video Network Station Computer to an AC outlet Computer LAN WAN etc 1 1 1 1 1 1 4 1 4 5 3 3 2 2 175 ...

Страница 65: ...5 8 33 36 5700 ohms 0 8 mA max VL 0 to 0 6 V 1000 ohms 12 mA max Active time approx 1 sec a a In case of an output which shows a status such as REC it stays active until the status changes Input examples switches Switch 1 Switch 2 Switch 3 HSR 1 1P 2 2P PIN 1 24 Output examples 1 1 Lamp on off circuit 2 LED on off circuit 3 Buzzer on off circuit Lamp Buzzer Output examples 2 Direct connections to ...

Страница 66: ...N VIDEO IN VIDEO IN 1 2 75 ohm coaxial cable optional For 2 use the shortest cables possible 1 2 1 1 2 Assign Series Rec to an output pin Assign Series Rec to an input pin T connector T connector 75 ohm termination switch OFF 75 ohm termination switch OFF 75 ohm termination switch ON Note When the SVRM 100A is used with this recorder the controls function as follows Attach the SVRM sheet supplied ...

Страница 67: ...haracter display 1 1 1999 3 Set the date and time by advancing or retarding the value with the V or v key or by directly entering a value with the numeric keys then press the b key to the next column To switch between AM and PM press the V or v key 4 Press the SET key at a time signal To automatically change the clock for the daylight saving time 1 Highlight DST SET and select USE with the V or v ...

Страница 68: ...ng and recording Use CAMERA CONNECTION CamConnect of the Image Control menu for the setting To use connected cameras for monitoring and recording Set the number of the camera the same as the VIDEO IN connector number to which the camera is connected to CONNECT Setting procedure 1 Highlight IMAGE CONTROL MENU or display Image Menu of the top menu by pressing the V or v key then press the b key The ...

Страница 69: ...and selecting pictures for monitoring it is recommended that the number to be included in the name Setting procedure 1 Highlight INDICATION CONTROL MENU or display Indict Menu of the top menu by pressing the V or v key then press the b key The Indication Control menu is displayed SETUP MENU INDICATION CONTROL MENU M BORDER LINE BLACK m DATE FORMAT M D Y MONTH FORMAT NUMBER TIME FORMAT 12H FRNT TIM...

Страница 70: ...be automatically changed according to the CAMERA CONNECTION settings 1 Highlight IMAGE CONTROL MENU Image Menu of the top menu by pressing the V or v key then press the b key The Image Control Menu page 4 6 is displayed 2 Highlight MONI DISP STRUCTURE Moni Disp by pressing the V or v key then press the b key The menu shifts to monitor display structure setting SETUP MENU IMAGE CONTROL MENU MONI DI...

Страница 71: ...AY DISP STRUCTURE Play Disp of the Image Control menu for making the setting 1 Highlight IMAGE CONTROL MENU Image Menu of the top menu by pressing the V or v key then press the b key The Image Control menu page 4 6 is displayed 2 Highlight PLAY DISP STRUCTURE Play Disp by pressing the V or v key then press the b key The menu shifts to playback display structure setting SETUP MENU IMAGE CONTROL MEN...

Страница 72: ...nonvolatile memory The Image Control Menu is restored To restore the previous setting Before pressing the SET key press the MENU key The message ABORT is displayed and the previous setting is restored Setting the Automatic Change Cycle The picture to be monitored in Full screen nondivided mode can be automatically changed at the specified cycle You can determine whether to automatically change the...

Страница 73: ...stored in nonvolatile memory The Image Control menu is restored To restore the previous settings Before pressing the SET key press the MENU key The message ABORT is displayed and the previous settings are restored Setting the Recording Modes What s recording mode Up to five user preset recording modes to this recorder You may specify a set of recording requirements to each recording mode such as w...

Страница 74: ... 13 CAM 14 CAM 15 CAM 16 REC REC REC REC REC REC REC REC REC REC REC REC NO REC NO REC NO REC NO REC 2 Select the camera to be set by pressing the b or B key Each time you press either key the next or the previous camera is selected and the indication for the selected camera flashes 3 For a camera to be used for recording set the indication to REC by pressing the V or v key The cameras set to NO R...

Страница 75: ...d cycle When you change the REC CYCLE value the TIME MODE value is recalculated and automatically updated The shorter the cycle you set the smaller the TIME MODE value becomes Note With the HSR 2 2P the minimum value of the recording cycle valid for Playback During Recording mode is displayed in parentheses below the currently set value Set the recording cycle to a value that is larger than the va...

Страница 76: ...e menu shifts to password setting SETUP MENU FUNCTION CONTROL MENU PASSWORD SET M LEVEL 1 m LEVEL 2 LEVEL 3 3 Highlight the level for which a password is to be set then press the b key The password setting display for the selected level appears PASSWORD INPUT NEW PASSWORD SHIFT M INPUT NUM KEY TO MENU MENU KEY DATA SET SET KEY CLEAR RESET KEY 4 Enter a 4 digit number from the left digit by using t...

Страница 77: ... the locked keys To release the key lock of Level 1 only Enter the password of Level 1 and press the SET key The LOCK lamp slowly flashes1 and the functions specified for Level 1 are enabled To release the key lock of Levels 1 and 2 Enter the password of Level 2 and press the SET key The LOCK lamp promptly flashes1 and the functions specified for Levels 1 and 2 are enabled To release the key lock ...

Страница 78: ...ighlight FUNCTION CONTROL MENU or display FuncMenu of the top menu by pressing the V or v key then press the b key The Function Control menu is displayed SETUP MENU FUNCTION CONTROL MENU AUTO REW ON POWER ON REC OFF BEEP ON STILL FRAME PRIORITY PLAY PRE REV TIME 5 MIN FUNCTION LEVEL SET PASSWORD SET 2 Highlight PRE REV TIME by pressing the v key then press the b key The setting display for the pre...

Страница 79: ... the air may condense on the head drum This is called condensation If a tape is run in this state note that the tape may stick to the drum and can be easily damaged Head Cleaning Always use the DV 12CL standard size or DVM 12CL mini size Cleaning Cassette to clean the video heads You can run the cleaning cassette for 10 seconds per cleaning operation Follow the instructions for the cleaning casset...

Страница 80: ...le and the cumulative total from manufacture which is unresettable Displaying the digital hours meter For details on menu operations see Chapter 4 Menu Operations 1 Enter Menu mode by pressing the MENU key If MENU GRADE on the top menu is set to BASIC change it to ENH 2 Highlight MAINTENANCE MENU by pressing the V or v key then press the b key The Maintenance menu is displayed SETUP MENU MAINTENAN...

Страница 81: ...odes The right hand indication for each display mode is the indication you can view while holding down the b key T1 OPERATION mode Oper 00000 T2 DRUM ROTATION mode Drum 0000 0000 00000 T3 TAPE RUNNING mode Tape 0000 0000 00000 CT THREADING mode Thread 0000 0000 00000 To end the digital hours meter display Press the MENU key Resetting the trip values About this operation consult your Sony dealer ...

Страница 82: ...ecording specified by timer recording is not in progress even if timer recording is activated Set the REC SAVE switch to REC Press the LOCK key to cancel the key lock function When a password has been specified enter the password see page 5 15 Insert a cassette Set CAMERA CONNECTION of the Image Control Menu for the desired camera to CONNECT see page 5 7 Supply an appropriate video signal Assign t...

Страница 83: ...WITH PANEL KEY BLOCK 92 014 ERROR 92 014 COMMUNICATION ERROR WITH TAPE BLOCK RECORDING IS CONTINUED ON HARD DISK 97 002 ERROR 97 002 ILLEGAL MENU SETTING INITIALIZE THE MENU SETTING 1 001 Cannot access the register 002 Cannot access the data An error detected in the tape block in a mode other than recording An error detected in the tape block during recording Recording fails for some reason such a...

Страница 84: ...Do not insert a cassette forcibly Forcibly inserting a cassette may damage the unit Keep the cover of the front panel closed Open the cover only when changing cassettes or using the keys behind the cover This may minimize dust accumulation inside the unit Avoid violent impacts Dropping the unit or otherwise imparting a violent shock to it is likely to cause it to malfunction Do not obstruct ventil...

Страница 85: ...e Less than 3 minutes with a DV270 cassette Video Input VIDEO IN connectors BNC type 4 VBS or VS signals 1 0 Vp p 75 ohms unbalanced Output VIDEO OUT A B connectors BNC type 2 VBS signal 1 0 Vp p 75 ohms unbalanced S VIDEO connector 4 pin 1 Y signal 1 0 Vp p 75 ohms unbalanced C signal 0 28 Vp p HSR 1 2 0 30 Vp p HSR 1P 2P 75 ohms unbalanced Horizontal resolution 500 TV lines SUPER mode Signal to ...

Страница 86: ... MONI CHAR POS 4 8 MONI CHAR TYPE 4 8 MONI DISP STRUCTURE 4 7 5 9 MONTH FORMAT 4 8 N NORMAL mode alarm recording 3 4 Normal playback 2 9 NORMAL REC 4 10 Normal recording 2 5 Numeric keys see camera number keys O Opening for cassette compartment 1 5 2 2 P PARALLEL INPUT 4 13 PARALLEL I O connector 1 9 5 1 5 4 PARALLEL OUTPUT 4 14 PARALLEL OUT VOLTAGE 4 14 Password 5 15 PASSWORD SET 4 12 5 15 PDV ca...

Страница 87: ...elect 2 5 setting 5 12 Remote controls 5 1 REPEAT indication 1 7 3 7 REPEAT REC 3 7 4 10 Repeat recording 3 7 activate 3 7 cancel 3 7 RESET NO key 1 7 4 2 REW key and indicator 1 6 RS232C 4 13 RS 232C connector 1 9 S S VIDEO connector 1 9 Search speed 2 10 Series recording 3 8 activate 3 8 cancel 3 8 SET YES key 1 7 4 2 SETTING OF REC MODE 4 10 5 12 STILL 4 11 STOP key 1 6 T Tape length 5 14 Tape ...

Страница 88: ...Sony Corporation Printed in Japan ...

Отзывы: