background image

10

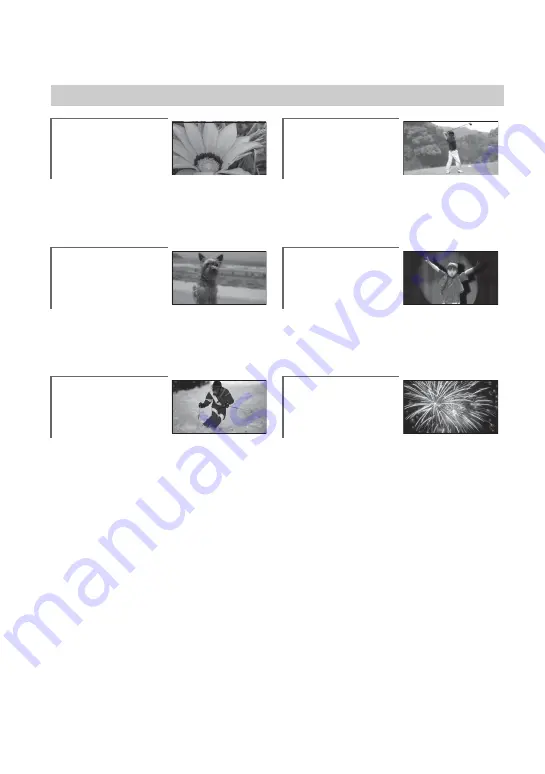
Subject examples and solutions

Shooting

Flowers in close-up

B

PORTRAIT ...................................... 90

B

FOCUS............................................ 89

B

TELE MACRO ................................. 89

Focusing on the 
dog on the left side 
of the screen

B

SPOT MTR/FCS .............................. 88

B

FOCUS............................................ 89

B

SPOT FOCUS.................................. 88

Getting a good shot 
of a ski slope or 
beach

B

Backlight ........................................ 39

B

BEACH............................................ 90

B

SNOW ............................................ 90

Checking your golf 
swing

B

SPORTS ..........................................90

A child on the stage 
under a spot light

B

SPOTLIGHT.....................................90

Fireworks with all 
its splendor

B

FIREWORKS....................................90

B

FOCUS ............................................89

Содержание Handycam DCR-DVD150E

Страница 1: ...questions can be found at our Customer Support Website GB 4 125 250 11 1 2009 Sony Corporation Digital Video Camera Recorder Operating Guide DCR DVD150E DVD450E DVD650E DVD850E Enjoying with Your Camcorder 11 Getting Started 19 Recording Playback 32 Editing 47 Utilizing Media 65 Customizing Your Camcorder 77 Performing with Your Computer 93 Troubleshooting 100 Additional Information 112 Quick Refe...

Страница 2: ...cks promptly as described in the instructions Replace the battery with the specified type only Otherwise fire or injury may result AC Adaptor Do not use the AC Adaptor placed in a narrow space such as between a wall and furniture Use the nearby wall outlet wall socket when using the AC Adaptor Disconnect the AC Adaptor from the wall outlet wall socket immediately if any malfunction occurs while us...

Страница 3: ...mbol on the battery or on the packaging indicates that the battery provided with this product shall not be treated as household waste By ensuring these batteries are disposed of correctly you will help prevent potentially negative consequences for the environment and human health which could otherwise be caused by inappropriate waste handling of the battery The recycling of the materials will help...

Страница 4: ...he supplied interface cable must be used with the equipment in order to comply with the limits for a digital device pursuant to Subpart B of Part 15 of FCC Rules Battery pack This device complies with Part 15 of the FCC Rules Operation is subject to the following two conditions 1 This device may not cause harmful interference and 2 this device must accept any interference received including interf...

Страница 5: ...Memory Stick PRO HG Duo media are both referred to as Memory Stick PRO Duo media in this manual You cannot use any type of memory card other than those mentioned above Memory Stick PRO Duo media can be used only with Memory Stick PRO media compatible equipment Do not attach a label or the like on Memory Stick PRO Duo media or a Memory Stick Duo media adaptor When using Memory Stick PRO Duo media w...

Страница 6: ...DVD RW DVD RW for trial recording DCR DVD450E DVD850E Make trial recording on the internal memory Compensation for the contents of recordings cannot be provided even if recording or playback is not possible due to a malfunction of the camcorder recording media etc TV color systems differ depending on the countries regions To view your recordings on a TV you need a PAL system based TV Television pr...

Страница 7: ...he viewfinder images and indicators shown in this manual were taken with a digital still camera and may look different from what you actually see Discs in this manual refers to 8cm DVD discs In this manual the internal memory DCR DVD450E DVD850E a disc and Memory Stick PRO Duo media are called the media Unless otherwise specifically indicated illustrations in this manual are based on DCR DVD850E D...

Страница 8: ...E 38 Adjusting the exposure for backlit subjects 39 Recording in mirror mode 39 Playback 40 Searching for scenes with pinpoint accuracy Film Roll Index 42 Searching for desired scenes by a face Face Index 42 Searching for desired images by date Date Index 43 Using PB zoom 43 Playing back a series of still images Slide show 44 Playing the images on a TV 45 OTHERS category 47 Deleting images 48 Capt...

Страница 9: ...nd language GENERAL SET 85 Other setup items Activating functions using the OPTION MENU 86 Using the OPTION MENU 86 Recording items on the OPTION MENU 87 Viewing items on the OPTION MENU 87 Functions set in the OPTION MENU 88 What you can do with Windows computer 93 Troubleshooting 100 Warning indicators and messages 108 Using your camcorder abroad 112 File folder structure on the internal memory ...

Страница 10: ...ng on the dog on the left side of the screen BSPOT MTR FCS 88 BFOCUS 89 BSPOT FOCUS 88 Getting a good shot of a ski slope or beach BBacklight 39 BBEACH 90 BSNOW 90 Checking your golf swing BSPORTS 90 A child on the stage under a spot light BSPOTLIGHT 90 Fireworks with all its splendor BFIREWORKS 90 BFOCUS 89 ...

Страница 11: ...es you can select either MOVIE MEDIA SET or PHOTO MEDIA SET DCR DVD450E DVD850E according to your needs Using the MOVIE DUB function on the camcorder you can dub movies recorded on the internal memory DCR DVD450E DVD850E or Memory Stick PRO Duo media to a disc without connecting another device p 52 b Notes You may not be able to dub movie contents depending on the type of your camcorder For detail...

Страница 12: ... disc can be played back in DVD devices that support VR mode Refer to the instruction manual of your DVD device to see whether it supports the VR mode of DVD RW Disc features Figures in parentheses indicate reference pages Disc types and symbols DVD RW DVD RW DVD R DVD R DL Symbols used in this manual Both 16 9 wide and 4 3 movie can be recorded on the same disc 28 z z z z Deleting the most recent...

Страница 13: ...650E Sound is recorded in 2ch stereo You can check the recordable time with MEDIA INFO p 70 When you use a double sided disc you can record images on both sides p 115 See page 31 for the recordable time on Memory Stick PRO Duo media Recording time of movies Media type 9M HQ high quality 230 205 20 18 35 32 6M SP standard quality 340 205 30 18 55 32 3M LP long play 5 1ch 655 435 60 44 110 80 2ch 71...

Страница 14: ...e the disc Select the recording format and format the disc on your camcorder p 28 zTips You can select the disc from DISC SELECT GUIDE p 74 2Recording images p 36 3Editing Saving images The available functions depend on the selected media x Dubbing copying images to another type of media within your camcorder p 52 x Dubbing movies to other devices p 62 x Editing on a computer p 93 Using the suppli...

Страница 15: ...f a finalized disc depend on disc type Recordings cannot be added even if there is free space left Like commercially sold DVD this disc can be played back in most DVD devices after finalizing The disc can be played back in a device compatible with the DVD RW VR mode The disc can be played back without finalizing But finalizing is required in some cases For details see page 66 Unfinalizingallowsyou...

Страница 16: ...YLIST 59 Items Page DELETE 2 48 PHOTO CAPTURE 3 50 MOVIE DUB 3 52 PHOTO COPY 3 53 EDIT 55 PLAYLIST EDIT 59 USB CONNECT 93 BATTERY INFO 64 Items Page MOVIE MEDIA SET 1 26 PHOTO MEDIA SET 1 3 26 FINALIZE 1 66 MEDIA INFO 70 MEDIA FORMAT 1 71 UNFINALIZE 73 DISC SELECT GUIDE 74 REPAIR IMG DB F 75 1 You can also set these items during Easy Handycam operation p 32 For items available in the SETTINGS cate...

Страница 17: ...desired category Example OTHERS category 4 Touch the desired item Example EDIT 5 Follow the guide on the screen for further operation To hide the HOME MENU screen Touch When you want to know something about the function of each item on the HOME MENU HELP 1 Press HOME The HOME MENU appears 2 Touch HELP The bottom of HELP turns orange Using the HOME MENU HOME B HOME A Continued ...

Страница 18: ...therwise touch NO To deactivate the HELP Touch HELP again in step 2 Just a touch on the screen during shooting or playback displays the functions available at that moment You will find it easy to make various settings See page 86 for further details Using the OPTION MENU OPTION HOME and OPTION Taking advantage of two types of menus Continued ...

Страница 19: ...ur camcorder The number in the parentheses indicates the number of that item supplied AC Adaptor 1 p 20 Power cord mains lead 1 p 20 A V connecting cable 1 p 45 62 USB cable 1 p 63 Rechargeable battery pack NP FH30 1 p 20 CD ROM Handycam Application Software 1 p 93 PMB software including PMB Guide Operating Guide This manual 1 ...

Страница 20: ... of your camcorder Open the jack cover and connect the DC plug of the AC Adaptor Match the v mark on the DC plug with the v mark on your camcorder 4 Connect the power cord mains lead to the AC Adaptor and the wall outlet wall socket The CHG charge lamp lights up and charging starts 5 The CHG charge lamp turns off when the battery is fully charged Disconnect the AC Adaptor from the DC IN jack b Not...

Страница 21: ...n you use a fully charged battery pack When recording on the internal memory DCR DVD450E DVD850E or Memory Stick PRO Duo media When recording on a disc Typical recording time shows the time when you repeat recording start stop turning the power on off and zooming b Notes See page 26 for selecting the media All times measured with recording mode SP under the following conditions Top When recording ...

Страница 22: ...e battery pack is damaged The battery pack is worn out for Battery Info only On the charging recording playback time Times measured with the camcorder at 25 C 77 F 10 C to 30 C 50 F to 86 F is recommended The available recording and playback time will be shorter when you use your camcorder in low temperatures The available recording and playback time will be shorter depending on the conditions und...

Страница 23: ...still images Go to step 3 when you turn on your camcorder for the first time 2 Touch HOME t SETTINGS t CLOCK LANG t CLOCK SET The CLOCK SET screen appears 3 Select the desired geographical area with then touch NEXT 4 Set SUMMERTIME then touch NEXT 5 Set Y year with 6 Select M with then set the month with 7 Set D day hour and minute in the same way then touch NEXT 8 Make sure that the clock is corr...

Страница 24: ...s time In the default setting the power turns off automatically if you leave your camcorder unoperated for approximately 5 minutes to save battery power A SHUT OFF p 85 z Tips The date and time does not appear during recording but they are automatically recorded on the media and can be displayed during playback DATA CODE p 82 See page 113 for information concerning World time difference If the but...

Страница 25: ...convenient during playback operations Touch HOME t SETTINGS t SOUND DISP SET t LCD BRIGHT p 83 and adjust the brightness of the LCD screen The information is displayed or hidden display y no display each time you press DISP You can view images using the viewfinder to avoid wearing down the battery or when the image seen on the LCD screen is poor Pull out and look into the viewfinder Adjust the vie...

Страница 26: ... Stick PRO Duo media only DCR DVD450E DVD850E In the default setting both movies and still images are recorded on the internal memory b Notes You can record play back or edit images on the selected media When you record play back or edit images on other media select media again 1 Touch HOME t MANAGE MEDIA t MOVIE MEDIA SET The movie media setting screen appears 2 Touch the desired media 3 Touch YE...

Страница 27: ...ars touch The still image media is changed To confirm the selected media 1 Slide the POWER switch to turn on the lamp of the mode Movie Still that you want to check the media 2 Confirm the media icon displayed at the upper right corner of the screen DCR DVD450E DVD850E Selecting media for still images DCR DVD450E DVD850E Internal memory Disc The icon differs depending on the disc type p 12 Memory ...

Страница 28: ...ording side facing your camcorder then press the center of the disc until it clicks 4 Close the disc cover DISC ACCESS appears on the screen It may take some time for the camcorder to recognize the disc x DVD RW DVD RW A screen appears to ask whether you will use DISC SELECT GUIDE Using DISC SELECT GUIDE lets you format the disc by following the guidance on the screen If you do not want to use it ...

Страница 29: ...e recording side or pickup lens p 121 When using a double sided disc take care not to smudge the surface with fingerprints If you close the disc cover with the disc set incorrectly it may cause your camcorder to malfunction Do not disconnect the power sources while formatting a disc Do not apply shock or vibration to your camcorder since your camcorder is reading writing on the disc while the ACCE...

Страница 30: ... the direction of the arrow 2 Insert the Memory Stick PRO Duo media into the Memory Stick Duo media slot in the right direction until it clicks 3 Close the Memory Stick Duo media cover 3 If you select MEMORY STICK in Step 5 for movie recording slide the POWER switch repeatedly until the Movie lamp lights up If the POWER switch is set to OFF CHG turn it on while pressing the green button The Create...

Страница 31: ...ta on the Memory Stick PRO Duo media will be deleted when you format Do not pinch and remove the Memory Stick PRO Duo media forcibly It may cause a malfunction Recording time of movies on Memory Stick PRO Duo media Figures in the table are approximate recording time in minutes of Memory Stick PRO Duo media Figures in are minimum recording time DCR DVD450E DVD850E b Notes Numbers in the table are o...

Страница 32: ...n the POWER switch G until the Movie lamp lights up 2 Press EASY A 3 Press START STOP H or E to start recording To stop recording press START STOP again 1 Turn the POWER switch G until the Still lamp lights up 2 Press EASY A 3 Press PHOTO F lightly to adjust the focus A a beep sounds then press it fully B a shutter click sounds If the POWER switch is set to OFF CHG turn it while pressing the green...

Страница 33: ...n each of the tab that was lastly played back recorded B for the still image recorded on Memory Stick PRO Duo media Returns to the recording screen When you select DISC on MOVIE MEDIA SET p 26 a disc type appears You cannot search for movies by recording date Film Roll Index p 42 Face Index p 42 Displays movies Displays still images Beginning of the scene previous scene Toggles Play or Pause as yo...

Страница 34: ... You can adjust the volume by touching t adjust with t during playback You can change the movie media with MOVIE MEDIA SET p 26 Still images Touch the tab and the still image to be played back zTips You can switch the still image media with PHOTO MEDIA SET DCR DVD450E DVD850E p 26 Slide show p 44 Previous Next Goes to the VISUAL INDEX screen Returns to the VISUAL INDEX screen Recording date time T...

Страница 35: ... to images or change settings Invalid buttons during Easy Handycam operation You cannot use some buttons functions during Easy Handycam operation since they are automatically set p 78 If you set an invalid operation Invalid during Easy Handycam operation appears To view movies on a disc on other devices Finalize To view movies stored on a disc on other devices or a computer you need to finalize th...

Страница 36: ...finished it means data is still being written onto the media Do not apply shock or vibration to your camcorder and do not remove the battery pack or the AC Adaptor In the case that INT MEMORY DCR DVD450E DVD850E or MEMORY STICK is selected on MOVIE MEDIA SET p 26 when a movie file exceeds 2 GB the next movie file is created automatically z Tips See page 5 for the Memory Stick PRO Duo media you can...

Страница 37: ...s it fully B a shutter click sounds appears next to or When disappears the image has been recorded b Notes You cannot record still images on a disc z Tips See page 13 for the recordable time of movies and page 81 for the number of recordable still images appears when FACE SET is set to ON the default setting during movie recording p 80 You can switch recording between movies and still images by to...

Страница 38: ...e distance between camcorder and subject while maintaining sharp focus is about 1 cm about 13 32 in for wide angle and about 150 cm about 59 1 8 in for telephoto z Tips Using DIGITAL ZOOM p 79 you can zoom to a level greater than 60 Sound picked up by the built in microphone is converted to 5 1ch surround sound and recorded Enjoy realistic sound when playing the movies on devices that support 5 1c...

Страница 39: ...n Open the LCD panel 90 degrees to the camcorder 1 then rotate it 180 degrees to the lens side 2 z Tips A mirror image of the subject appears on the LCD screen but the image will be normal when recorded When recording in mirror mode the images are not displayed in the viewfinder Adjusting the exposure for backlit subjects Recording in mirror mode ...

Страница 40: ...or C The VISUAL INDEX screen appears on the screen It may take some time to display the thumbnails POWER switch A VIEW IMAGES B VIEW IMAGES C HOME E HOME D Previous 6 images Next 6 images Searches for images by recording date p 43 Appears with the image on each of the tab that was lastly played back recorded B for the still image recorded on Memory Stick PRO Duo media Returns to the recording scre...

Страница 41: ...s about 30 times and 4 touches about 60 times faster When playing the movies on a disc one touch of makes the movie reverse fast forward about 5 times faster than normal 2 touches about 10 times faster about 8 times faster for a DVD RW Touch the tab and the still image to be played back Movies Still Images 60min 0 00 14 14 14 101 0014 5 1ch SP VOL Beginning of the movie previous movie Toggles Play...

Страница 42: ...h to select the desired movie 4 Touch to search for the desired scene then touch the scene you want to play back Playback starts from the selected scene z Tips You can display the Film Roll Index screen by touching HOME t VIEW IMAGES t FILM ROLL The detected face images during recording are displayed on the INDEX screen You can play back the movie from the selected face image Select beforehand med...

Страница 43: ...annot use the Date Index with the disc and still images on the Memory Stick PRO Duo media 1 Press VIEW IMAGES on your camcorder The VISUAL INDEX screen appears 2 To search for movies touch the tab To search for still images touch the tab 3 Touch the date button at the upper right corner of the screen The recording dates of images are displayed on the screen 4 Touch to select the recording date of ...

Страница 44: ... show To restart touch again b Notes You cannot operate playback zoom during slide show z Tips You can also play back the slide show by touching OPTION t tab t SLIDE SHOW on the VISUAL INDEX screen While playing back still images you can set continuous slide show playback by touching OPTION t tab t SLIDE SHOW SET As the default setting is ON is displayed on the LCD screen and your camcorder repeat...

Страница 45: ... A V connecting cable Connect the white and red plugs left right audio and the S VIDEO plug S VIDEO channel of the A V connecting cable with S VIDEO sold separately The yellow plug connection is not necessary Connecting only the S VIDEO plug will not output audio When your TV is connected to a VCR Connect your camcorder to the LINE IN input on the VCR Set the input selector on theVCRtoLINE VIDEO1 ...

Страница 46: ...h the 16 9 wide signal set TV TYPE to 4 3 When your TV is monaural When your TV has only one audio input jack Connect the yellow plug of the A V connecting cable to the video input jack and connect the white left channel or the red right channel plug to the audio input jack of your TV or VCR z Tips You can display the counter on the TV screen by setting DISP OUTPUT to V OUT PANEL p 84 If your TV V...

Страница 47: ...corded movie as a still image p 50 MOVIE DUB DCR DVD450E DVD650E DVD850E You can dub movies recorded on the internal memory DCR DVD450E DVD850E or Memory Stick PRO Duo media DCR DVD650E DVD850E to a disc p 52 PHOTO COPY DCR DVD450E DVD850E You can copy still images recorded on the internal memory to Memory Stick PRO Duo media p 53 EDIT You can edit the images on the media p 55 PLAYLIST EDIT You ca...

Страница 48: ... movie is marked with Press and hold the movie on the screen to confirm Touch to return to the previous screen 5 Touch t YES 6 When Completed appears touch To delete all movies at one time 1 In step 3 touch DELETE ALL 2 Touch YES t YES 3 When Completed appears touch To delete all the movies recorded on the same day at one time 1 In step 3 touch DELETE by date 2 Touch to select the recording date o...

Страница 49: ...em before you try to delete them p 55 Even if you delete unnecessary movies from the disc the remaining disc capacity may not increase as much as you can make additional recording z Tips To delete all images recorded on the media and recover all the recordable space of the media format the media p 71 You can delete a movie when viewing it by touching OPTION Select beforehand the media which contai...

Страница 50: ...ordable space of the media format the media p 71 You can delete a still image when viewing it by touching OPTION Previous Next date Capturing a still image from a movie DCR DVD450E DVD650E DVD850E You can capture a still image at any point during movie playback Select the media which contains the movies beforehand and the media where you want to save the still images p 26 When you select MEMORY ST...

Страница 51: ...ill image touch and repeat from step 2 To finish the operation touch t b Notes The media where you want to save still images has to have enough free space Recording date and time of created still images are the same as the recording date and time of the movies If the movies do not have data code recording date and time of still images are saved as the time you create them from the movies Returns t...

Страница 52: ...UB T DATE p 85 to ON the default setting before dubbing movies z Tips To check dubbed movies on the disc select DISC on MOVIE MEDIA SET p 26 1 Touch HOME t OTHERS t MOVIE DUB Or press DUBBING on your camcorder DCR DVD450E DVD850E The MOVIE DUB screen appears 2 DCR DVD850E Touch media which contains the movie to be dubbed DCR DVD450E DVD650E Step 2 is unnecessary Go to step 3 3 Touch DUB by select ...

Страница 53: ...touch BACKUP 2 Touch Backs up unbacked up movies t YES 3 When Completed appears touch If the disc space is not sufficient to record the entire movie Disc is full appears and the number of one sided discs required will be displayed Prepare discs and repeat from step 1 b Notes If movies are backed up on 2 or more discs the movie recorded at the end of each disc is divided automatically to fit in the...

Страница 54: ...ith Press and hold the still image on the screen to confirm Touch to return to the previous screen 4 Touch t YES 5 When Completed appears touch To copy all the still images recorded on the same day at one time 1 In step 2 touch COPY by date 2 Touch to select the recording date of the desired still images then touch The still images recorded on the selected date are displayed on the screen Touch th...

Страница 55: ...ie on the screen to confirm Touch to return to the previous screen 5 Touch t YES 6 When Completed appears touch To unprotect movies In step 4 touch the movie marked with disappears To protect all the movies recorded on the same day at one time 1 In step 3 touch PRT by date 2 Touch to select the recording date of the desired movies then touch The movies recorded on the selected date are displayed o...

Страница 56: ...e protecting movies from the Memory Stick PRO Duo media Formatting p 71 deletes even protected movies z Tips You can protect a movie when viewing it by touching OPTION Select beforehand the media which contains the still images you want to protect p 26 1 Touch HOME t OTHERS t EDIT 2 Touch PROTECT 3 Touch PROTECT 4 Touch the still image to be protected The selected still image is marked with Press ...

Страница 57: ...ompleted appears touch To unprotect all the still images recorded on the same day at one time In step 2 select the recording date of the desired still images then touch t OFF When Completed appears touch b Notes Do not remove the battery pack or the AC Adaptor from your camcorder while protecting still images Do not remove the Memory Stick PRO Duo media while protecting still images from the Memor...

Страница 58: ...lect INT MEMORY DCR DVD450E DVD850E or MEMORY STICK on MOVIE MEDIA SET p 26 and the divided original movie is included in a Playlist the movie in the Playlist will also be divided When you select DISC on MOVIE MEDIA SET p 26 the movie in a Playlist is not divided A slight difference may occur from the point where you touch and the actual dividing point as your camcorder selects the dividing point ...

Страница 59: ...DIT 2 Touch ADD 3 Touch the movie to be added to the Playlist The selected movie is marked with Press and hold the movie on the screen to confirm Touch to return to the previous screen 4 Touch t YES 5 When Completed appears touch To add all the movies to the Playlist 1 In step 2 touch ADD ALL 2 Touch YES t YES 3 When Completed appears touch To add all the movies recorded on the same day at one tim...

Страница 60: ... The movies in the Playlist screen appear 2 Touch the movie from which you want to play back The Playlist is played back from the selected movie to the end then the screen returns to the Playlist screen To erase unnecessary movies from the Playlist 1 Touch HOME t OTHERS t PLAYLIST EDIT 2 Touch ERASE To erase all the movies from the Playlist touch ERASE ALL t YES t YES Then when Completed appears t...

Страница 61: ...ch HOME t OTHERS t PLAYLIST EDIT 2 Touch DIVIDE 3 Touch the movie that you want to divide The selected movie is played back 4 Touch at the point where you want to divide The movie pauses Play and pause toggles as you press 5 Touch t YES 6 When Completed appears touch b Notes A slight difference may occur from the point where you touch and the actual dividing point as your camcorder selects the div...

Страница 62: ... jack of the other device B A V connecting cable with S VIDEO sold separately When connecting to the other device via the S VIDEO jack by using an A V connecting cable with S VIDEO sold separately higher quality movies can be produced than with an A V connecting cable Connect the white and red plugs left right audio and the S VIDEO plug S VIDEO channel of the A V connecting cable with S VIDEO sold...

Страница 63: ...vice has an input selector set it to the input mode 5 Connect your camcorder to the recording device VCR or DVD HDD recorder with the A V connecting cable supplied 1 or an A V connecting cable with S VIDEO sold separately 2 Connect your camcorder to the input jacks of the recording device 6 Start playback on your camcorder and record it on the recording device Refer to the instruction manuals supp...

Страница 64: ...e connected device Refer to the instruction manuals supplied with the connected device for details 5 When dubbing is finished touch END t YES and disconnect the USB cable Checking battery information You can check the approximate remaining capacity of the attached battery Touch HOME t OTHERS t BATTERY INFO The remaining battery capacity is shown To turn off the display touch Dubbing movies to VCR ...

Страница 65: ...evices by finalizing them p 66 MEDIA INFO You can display the media information such as recordable time p 70 MEDIA FORMAT You can format the media and recover the recordable free space p 71 UNFINALIZE You can unfinalize a disc and record more images on the disc p 73 DISC SELECT GUIDE Your camcorder advises you of the right disc for your purpose p 74 REPAIR IMG DB F You can repair the image databas...

Страница 66: ...VD R DL Finalizing is required DVD RW Finalizing is not required except in the following cases 1 To create a DVD menu 2 To play back on a computer DVD drive 3 If the disc has a short total recording time less than 5 min in HQ mode 8 min in SP mode or 15 min in LP mode b Notes Playback compatibility with all devices is not guaranteed No DVD menu is created for DVD RW VR mode To play back a disc in ...

Страница 67: ...izing the disc Cancel Easy Handycam operation To play back a disc in other devices after adding movies p 68 Make a new recording Movies cannot be added Unfinalize the disc When the DVD menu has been created a confirmation screen prompts you to confirm that you wish to add movies Movies can be added as usual Only in case 1 Make desired settings for the DVD menu Playback on other devices Finalize Co...

Страница 68: ...u finalize a double sided disc you must finalize each side of the disc individually Do not apply shock or vibration to your camcorder and do not disconnect the AC Adaptor during finalizing When you need to disconnect the AC Adaptor make sure that the power of your camcorder is set to off and disconnect the AC Adaptor after the Movie or Still lamp goes off Finalizing restarts when you connect the A...

Страница 69: ...unctions may be disabled z Tips Devices that support subtitles can display the recording date and time where the subtitles normally appear p 85 Refer to the instruction manual of your device If you have created a DVD menu p 68 you can select the desired scene in the menu If you finalize the disc p 66 that was recorded on your camcorder you can play back the disc on a computer that DVD playback app...

Страница 70: ...dable time or space of the media selected on MOVIE MEDIA SET p 26 Touch HOME t MANAGE MEDIA t MEDIA INFO You can check other information by touching To turn off the display touch b Notes The calculation for the space of the internal memory DCR DVD450E DVD850E and Memory Stick PRO Duo media is 1MB 1 048 576 bytes The fractions less than 1 MB are discarded when the media space is displayed Therefore...

Страница 71: ...ect the AC Adaptor during formatting Even the images protected against accidental deletion are also deleted p 55 Do not attempt the following operations when Executing is on the screen To operate the POWER switch or buttons To remove the Memory Stick PRO Duo media when formatting the Memory Stick PRO Duo media A DVD R DVD R DL cannot be formatted Replace it with a new disc If you format a finalize...

Страница 72: ...YES 6 When Completed appears touch b Notes Do not apply shock or vibration to your camcorder and do not disconnect the AC Adaptor during formatting When you use a double sided disc formatting is required on each side You can format each side in the different recording format In the case of DVD RW you cannot change the movie aspect ratio midway Format the disc again to change the aspect ratio You c...

Страница 73: ...t 2 Turn on your camcorder 3 Insert the finalized disc into your camcorder 4 Touch HOME t MANAGE MEDIA t UNFINALIZE 5 Touch YES t YES 6 When Completed appears touch If you have created a DVD menu p 68 during finalizing you must perform the following steps prior to recording additional movies 1 Connect the AC Adaptor to the DC IN jack on your camcorder then connect the power cord mains lead to the ...

Страница 74: ...inding the right disc DISC SELECT GUIDE Select the option that is right for you on the screen then you will be informed of the appropriate disc for your purposes 1 Touch HOME t MANAGE MEDIA t DISC SELECT GUIDE 2 Touch the option that is right for you on the screen If you insert the same type of disc as indicated in DISC SELECT GUIDE you can format it with your selected settings p 71 Recording addi...

Страница 75: ...Y STICK 2 Touch YES Your camcorder will check the image database file When mismatching is not found touch to finish the operation 3 Touch YES 4 When Completed appears touch b Notes Do not apply mechanical shock or vibration to the camcorder during this operation Do not disconnect the AC Adaptor or remove the battery pack While the image database file on the Memory Stick PRO Duo media is being repa...

Страница 76: ...less you connect the AC Adaptor to the wall outlet wall socket Disconnect all cables except the AC Adaptor While performing EMPTY do not apply any vibrations or shocks to the camcorder 1 Connect the AC Adaptor to the DC IN jack on your camcorder then connect the power cord mains lead to the wall outlet wall socket 2 Turn on your camcorder 3 Touch HOME t MANAGE MEDIA t MEDIA FORMAT t INT MEMORY The...

Страница 77: ...he operating settings for your convenience 1 Turn on your camcorder then press HOME 2 Touch SETTINGS 3 Touch the desired setup item If the item is not on the screen touch to change the page 4 Touch the desired item If the item is not on the screen touch to change the page 5 Change the setting then touch Using the HOME MENU HOME HOME SETTINGS category Continued ...

Страница 78: ... SIZE 2 81 FILE NO 81 AUTO SLW SHUTTR 80 GUIDEFRAME 80 Items Page DATA CODE 82 Items Page VOLUME 2 83 BEEP 2 83 LCD BRIGHT 83 LCD BL LEVEL 83 LCD COLOR 83 Items Page TV TYPE 84 DISP OUTPUT 84 Items Page CLOCK SET 2 23 AREA SET 84 SUMMERTIME 84 LANGUAGE SET 2 84 Items Page DEMO MODE 85 CALIBRATION 120 A SHUT OFF 85 SUB T DATE 85 1 DCR DVD450E DVD850E 2 You can set these items also during Easy Handy...

Страница 79: ...e separately for each media p 26 REC MODE Recording mode You can select audio recording format B 5 1ch SURROUND Records 5 1ch surround sound 2ch STEREO Records stereo sound When recording images you can select the aspect ratio according to the TV connected Refer also to the instruction manuals supplied with your TV B 16 9 WIDE Records images to the full screen on a 16 9 wide TV screen 4 3 Records ...

Страница 80: ...UTO Displays the remaining recording time of movie for about 8 seconds in the following situations When your camcorder recognizes the remaining media capacity when the POWER switch is set to Movie When you press DISP to switch the indicator from off to on when the POWER switch is set to Movie When you select the movie recording mode on the HOME MENU b Notes When the remaining recordable time for m...

Страница 81: ...512MB 2800 1GB 5700 2GB 11500 4GB 23000 8GB 47000 b Notes Numbers in the table are of when using Memory Stick PRO Duo media made by Sony Corporation The recordable number of still images varies depending on the recording conditions or the type of Memory Stick media z Tips You can use Memory Stick PRO Duo media with a capacity of 256MB or smaller for recording still images The numbers in the table ...

Страница 82: ...matically at the time of recording BOFF Data code is not displayed DATE TIME Displays the date and time CAMERA DATA Displays camera setting data DATE TIME ADate BTime DATA CODE CAMERA DATA CSteadyShot off DBrightness EWhite balance FGain GShutter speed HAperture value IExposure z Tips appears for still images recorded on other cameras using a flash The data code is displayed on the TV screen if yo...

Страница 83: ...way VOLUME BEEP LCD BRIGHT You can adjust the brightness of the LCD screen s backlight B NORMAL Standard brightness BRIGHT Brightens the LCD screen b Notes When you connect your camcorder to outside power sources BRIGHT is automatically selected for the setting When you select BRIGHT battery life is slightly reduced during recording If you open the LCD panel 180 degrees to face the screen outside ...

Страница 84: ...uage Touch 1 then 2 If the item is not on the screen touch to change the page How to set HOME MENU t page 77 See page 23 You can adjust a time difference without stopping the clock Set your local area using when using your camcorder in other time zones Refer to the world time difference on page 113 You can change this setting without stopping the clock Set this to ON to move the time forward 1 hou...

Страница 85: ... demonstration The demonstration starts again after about 10 minutes When you slide the disc cover OPEN switch When you move the POWER switch to still image recording When you press HOME VIEW IMAGES See page 120 DEMO MODE CALIBRATION B 5min The camcorder is automatically turned off when you do not operate your camcorder for more than approximately 5 minutes NEVER The camcorder is not automatically...

Страница 86: ...der touch OPTION on the screen 2 Touch the desired item If you cannot find the desired item touch another tab to change the page 3 Change the setting then touch b Notes The tabs and items that appear on the screen depend on the recording playback status of your camcorder at the time Some items appear without a tab The OPTION MENU cannot be used during Easy Handycam operation p 32 Using the OPTION ...

Страница 87: ... that are included also in the HOME MENU Viewing items on the OPTION MENU Items Page tab DELETE a 48 DELETE by date a 48 DELETE ALL a 48 tab PROTECT a 55 PROTECT by date a 55 DIVIDE a 58 ERASE a 60 ERASE ALL a 60 MOVE a 61 A tab depends on the situation No tab ADD a 59 ADD by date a 59 ADD ALL a 59 SLIDE SHOW 44 VOLUME a 83 DATA CODE a 82 SLIDE SHOW SET 44 DVD MENU 68 Items that are included also ...

Страница 88: ...t and fix the exposure to the subject so that it is recorded in suitable brightness even when there is strong contrast between the subject and the background such as subjects in the spotlight on stage 1 Touch the point where you want to fix and adjust the exposure on the screen appears 2 Touch END To return the setting to automatic exposure touch AUTO t END in step 1 b Notes If you set SPOT METER ...

Страница 89: ...y 1 Touch MANUAL 9 appears 2 Touch focusing on close subjects focusing on distant subjects to sharpen the focus appears when the focus cannot be adjusted any closer and appears when the focus cannot be adjusted farther away 3 Touch To adjust the focus automatically touch AUTO t in step 1 b Notes The minimum possible distance between the camcorder and the subject while maintaining sharp focus is ab...

Страница 90: ...m focusing on glass or metal mesh in windows that comes in between the camcorder and the subject PORTRAIT Select this to bring out the subject such as people or flowers while creating a soft background SPOTLIGHT Select this to prevent people s faces from appearing excessively white when subjects are lit by strong light SPORTS Sports lesson Select this to minimize shake when recording fast moving s...

Страница 91: ...n ONE PUSH under white or cool white fluorescent lamps When you select ONE PUSH keep framing white object while is flashing quickly flashes slowly if ONE PUSH could not be set When ONE PUSH was selected if keeps flashing after touching set WHITE BAL to AUTO If you set WHITE BAL SCENE SELECTION is automatically set to AUTO z Tips If you changed the battery pack or moved your camcorder to or from ou...

Страница 92: ...ORMAL Records various surround sounds converting them into the certain level LOW Records surround sound faithfully This setting is not suitable for recording conversations When you set SELF TIMER to ON appears on the screen When you press PHOTO your camcorder starts counting down and records a still image after about 10 seconds To cancel recording touch RESET To cancel the self timer select OFF BL...

Страница 93: ...n Approximately 500 MB 5 GB or more may be necessary when creating a DVD Display Minimum 1 024 768 dots Others USB port this must be provided as standard Hi Speed USB USB 2 0 compatible DVD burner CD ROM drive is necessary for installation b Notes Your computer must meet hardware requirements other than those described above for each OS Even in a computer environment where the operations are guara...

Страница 94: ...bout PMB in the menu bar of PMB Compare the version with that of the PMB on the supplied CD ROM to make sure that the higher version will be installed over the lower version If the version of the previously installed PMB is higher uninstall it first and install both versions in ascending version order Otherwise some functions of PMB may not work properly 1 Confirm that your camcorder is not connec...

Страница 95: ...lation screens appears depending on the computer environment Check the screen and follow the instructions displayed to install the required software Sonic UDF Reader Software required to recognize a DVD RW VR mode disc Microsoft DirectX 9 0c Software required to handle movies Windows XP only 11Restart the computer if required to complete the installation 12Remove the CD ROM from the disc drive of ...

Страница 96: ...he computer and the imported movies are displayed in the window Movies and still images recorded on the internal memory DCR DVD450E DVD850E or recorded on Memory Stick PRO Duo media that have not yet been imported to a computer by Easy PC Back up function can be imported to your computer automatically b Notes You cannot save movies that are recorded on a disc using this function Connect your camco...

Страница 97: ...eferring to PMB Guide Double click the PMB Guide short cut icon on the computer screen to open PMB Guide If the icon is not displayed on the computer screen click Start All Programs Sony Picture Utility Help PMB Guide You can also open PMB Guide from Help of PMB You can create a disc by putting together movies and still images previously imported to your computer p 95 1 Turn on your computer and p...

Страница 98: ...it then click Manipulate Video Trimming to display the Video Trimming window Refer to PMB Guide for details on the operation p 97 Capturing still images from a movie You can save a frame of a movie as a still image On the movie playback window of PMB click to display the Save Frame window Refer to PMB Guide for details on the operation p 97 To assure the proper functioning of your camcorder connec...

Страница 99: ...e from the camcorder and the computer b Notes Do not disconnect the USB cable while the ACCESS access lamp is lit Before turning off your camcorder disconnect the USB cable following the proper procedures described above Disconnect the USB cable using the proper procedures described above Otherwise files stored on the media may not be updated correctly Also disconnecting the USB cable improperly m...

Страница 100: ...et or remove the battery pack then reconnect it after about 1 minute If the functions still do not work press the RESET button p 126 using a sharp pointed object If you press the RESET button all settings including the clock setting are reset The temperature of your camcorder is extremely high Turn off your camcorder and leave it for a while in a cool place Buttons do not work During Easy Handycam...

Страница 101: ...ile you do not operate your camcorder the camcorder is automatically turned off A SHUT OFF Change the setting of A SHUT OFF p 85 or turn on the power again or use the AC Adaptor Charge the battery pack p 20 The CHG charge lamp does not light while the battery pack is being charged Turn the POWER switch to OFF CHG p 20 Attach the battery pack to the camcorder correctly p 20 Connect the power cord m...

Страница 102: ... is connected correctly p 20 The disc is damaged or is dirty with fingerprints etc In this case it may take up to 10 minutes to remove the disc The temperature of your camcorder is extremely high Turn off your camcorder and leave it for a while in a cool place You turned off your camcorder during finalizing the disc Turn on your camcorder and complete finalizing the disc p 66 Images recorded on a ...

Страница 103: ...nsation has occurred Turn off your camcorder and leave it for about 1 hour p 119 The number of still images exceeds the capacity of your camcorder p 81 81 Delete unnecessary images p 48 You cannot record a still image You cannot record a still image on a disc on your camcorder The ACCESS access lamp lights up even when you stop recording Your camcorder is recording the image you have just record o...

Страница 104: ...s appear when you record a TV screen or computer screen Set STEADYSHOT to OFF p 80 You cannot adjust LCD BL LEVEL You cannot adjust LCD BL LEVEL when The LCD panel is closed on your camcorder with the LCD screen facing out The power is supplied from the AC Adaptor You cannot find the images to be played back Select the media to be played back by touching HOME t MANAGE MEDIA t MOVIE MEDIA SET or PH...

Страница 105: ...ng a soft cloth p 116 is indicated on an image in the DVD menu Loading of the data may have failed while finalizing the disc For the following discs make the disc capable of additional recording p 73 then remake the DVD menu by finalizing the disc again p 66 The DVD menu may be displayed correctly DVD RW VIDEO mode DVD RW Playback freezes for an instant between the scenes The image may freeze for ...

Страница 106: ...you can add 99 movies on the internal memory DCR DVD450E DVD850E or Memory Stick PRO Duo media or 999 movies on a disc p 59 Delete unnecessary images p 48 You cannot add still images in the Playlist Movies cannot be divided A movie that is too short cannot be divided A movie that is protected cannot be divided p 55 Images cannot be deleted You cannot delete following movies p 48 Movies recorded on...

Страница 107: ...eck the computer environment required to install PMB Install PMB in an orderly manner p 94 PMB does not work correctly Finish PMB and restart your computer Your camcorder is not recognized by the computer Install PMB p 94 Disconnect devices from the USB jack of the computer other than the keyboard mouse and your camcorder Disconnect the USB cable from the computer and your camcorder and restart th...

Страница 108: ...20 ss E 31 ss E 61 ss E 62 ss E 91 ss E 94 ss A malfunction that you cannot service has occurred Contact your Sony dealer or local authorized Sony service facility Inform them of the 5 digit code which starts from E 101 0001 Warning indicator pertaining to files Slow flashing The file is damaged The file is unreadable Warning indicator pertaining to discs Slow flashing A disc is not inserted Less ...

Страница 109: ... 48 or format the Memory Stick PRO Duo media p 71 after dubbing copying images p 52 62 93 The image database file is broken p 75 Warning indicators pertaining to Memory Stick PRO Duo media formatting The Memory Stick PRO Duo media is damaged The Memory Stick PRO Duo media is not formatted correctly p 71 116 Warning indicator pertaining to incompatible Memory Stick PRO Duo media Incompatible Memory...

Страница 110: ...enable you to use the disc on your camcorder DVD RW DVD RW only p 71 Reinsert the Memory Stick Reinsert the Memory Stick PRO Duo media a few times If even then the indicator flashes the Memory Stick PRO Duo media could be damaged Try with another Memory Stick PRO Duo media This Memory Stick is not formatted correctly Check the format then format the Memory Stick PRO Duo media with your camcorder i...

Страница 111: ...he Image Database File The image database file is damaged Touch YES to repair x Others No further selection is possible To a Playlist you can add 99 movies on the internal memory DCR DVD450E DVD850E or Memory Stick PRO Duo media or 999 movies on a disc p 59 The maximum number of images that you can select on the INDEX screen at one time is 100 when deleting images protecting images or releasing th...

Страница 112: ...V with an AUDIO VIDEO input jack System Used in PAL Australia Austria Belgium China Czech Republic Denmark Finland Germany Holland Hong Kong Hungary Italy Kuwait Malaysia New Zealand Norway Poland Portugal Singapore Slovak Republic Spain Sweden Switzerland Thailand United Kingdom etc PAL M Brazil PAL N Argentina Paraguay Uruguay NTSC Bahama Islands Bolivia Canada Central America Chile Colombia Ecu...

Страница 113: ...30 Tehran 04 00 Abu Dhabi Baku 04 30 Kabul 05 00 Karachi Islamabad 05 30 Calcutta New Delhi 06 00 Almaty Dhaka 06 30 Yangon 07 00 Bangkok Jakarta 08 00 Hong Kong Singapore Beijing 09 00 Seoul Tokyo 09 30 Adelaide Darwin 10 00 Melbourne Sydney 11 00 Solomon Is 12 00 Fiji Wellington Eniwetok Kwajalein 11 00 Samoa 10 00 Hawaii 09 00 Alaska 08 00 Los Angeles Tijuana 07 00 Denver Arizona 06 00 Chicago ...

Страница 114: ...lder name goes up 101PNV01 t 102PNV01 C Still image files JPEG files The extension of the files is JPG The file numbers go up automatically When the capacity of a file number exceeds 9 999 another folder is created to store new image files The folder name goes up 101MSDCF t 102MSDCF You can access the media in the camcorder from a computer connected by the USB cable p 95 Do not modify the files or...

Страница 115: ... you do so the disc may become unbalanced and this may cause a malfunction of the disc or your camcorder Use of double sided discs Double sided discs allow you to record both sides of a disc x Recording on the A side Place the disc in your camcorder with the side with the symbol at the center facing outwards until it clicks When using a double sided disc take care not to smudge the surface with fi...

Страница 116: ...Micro media M2 M2 is the abbreviation for the Memory Stick Micro media Memory Stick PRO Duo media formatted by a computer Windows OS Mac OS does not have guaranteed compatibility with your camcorder Data read write speed may vary depending on the combination of the Memory Stick PRO Duo media and the Memory Stick PRO Duo media compliant product you use Damaged or lost data may occur in the followin...

Страница 117: ...ry Stick PRO Duo media and up to 8 GB Memory Stick PRO HG Duo media are guaranteed for use with your camcorder Notes on using Memory Stick Micro media To use Memory Stick Micro media with your camcorder you need a Duo sized M2 Adaptor Insert the Memory Stick Micro media into the Duo sized M2 Adaptor and then insert the adaptor into the Memory Stick Duo media slot If you insert Memory Stick Micro m...

Страница 118: ...NP FH100 sold separately Be sure to set the POWER switch to OFF CHG when not recording or playing back on your camcorder The battery pack is also consumed when your camcorder is in recording standby or playback pause Have spare battery packs ready for 2 or 3 times the expected recording time and make trial recordings Do not expose the battery pack to water The battery pack is not water resistant A...

Страница 119: ...Keep the POWER switch setting to OFF CHG when you are not using your camcorder Do not wrap your camcorder with a towel for example and operate it Doing so might cause heat to build up inside When disconnecting the power cord mains lead pull it by the plug and not the cord Do not damage the power cord mains lead such as by placing anything heavy on it Keep metal contacts clean If the battery electr...

Страница 120: ...tons on the touch panel may not work correctly If this happens follow the procedure below It is recommended that you connect your camcorder to the wall outlet wall socket using the supplied AC Adaptor during the operation 1 Turn on your camcorder 2 Touch HOME t SETTINGS t GENERAL SET t CALIBRATION 3 Touch displayed on the screen 3 times with the corner of Memory Stick PRO Duo media or the like The...

Страница 121: ...r dust To prevent mold periodically clean the lens as described above It is recommended that you operate your camcorder about once a month to keep it in optimum state for a long time Cleaning inside the viewfinder Remove any dust from inside the viewfinder by following the steps below 1 Pull out the viewfinder 2 While pushing in the tab on the bottom of the viewfinder with a fine tipped object suc...

Страница 122: ...AC Adaptor or while the battery pack is attached The pre installed rechargeable battery will be fully discharged in about 3 months if you do not use your camcorder at all Use your camcorder after charging the pre installed rechargeable battery However even if the pre installed rechargeable battery is not charged the camcorder operation will not be affected as long as you are not recording the date...

Страница 123: ... 2 0 Compatible Exif Ver 2 21 Compatible MPF Baseline Compatible Viewfinder Electric viewfinder color Image device 2 25 mm 1 8 type CCD Charge Coupled Device Gross Approx 800 000 pixels Effective Movie 16 9 Approx 490 000 pixels Effective Still 16 9 Approx 310 000 pixels Effective Still 4 3 Approx 410 000 pixels Lens Carl Zeiss Vario Tessar Optical 60 Digital 120 2 000 Filter diameter 30 mm 1 3 16...

Страница 124: ...pack NP FH30 and a disc DCR DVD450E DVD850E 390 g 13 oz main unit only 430 g 15 oz including the rechargeable battery pack NP FH30 Supplied accessories See page 19 AC Adaptor AC L200C AC L200D Power requirements AC 100 V 240 V 50 Hz 60 Hz Current consumption 0 35 A 0 18 A Power consumption 18 W Output voltage DC 8 4 V Operating temperature 0 C to 40 C 32 F to 104 F Storage temperature 20 C to 60 C...

Страница 125: ...ARD FOR ENCODING VIDEO INFORMATION FOR PACKAGED MEDIA IS EXPRESSLY PROHIBITED WITHOUT A LICENSE UNDER APPLICABLE PATENTS IN THE MPEG 2 PATENT PORTFOLIO WHICH LICENSE IS AVAILABLE FROM MPEG LA L L C 250 STEELE STREET SUITE 300 DENVER COLORADO 80206 C Library Expat zlib and libjpeg software are provided in your camcorder We provide this software based on license agreements with their owners of copyr...

Страница 126: ... both the internal memory and Memory Stick PRO Duo media C RESET button Initializes all the settings including the setting of the date and time D LCD screen touch panel 16 25 E HOME button 17 77 F Zoom buttons 38 43 G START STOP button 32 37 H VIEW IMAGES button 33 40 I EASY button 32 J Viewfinder lens adjustment lever 25 K Backlight button 39 L USB jack 63 DCR DVD150E DVD450E Output only M DUBBIN...

Страница 127: ...ck 20 F Built in microphone 38 G Power zoom lever 38 43 H PHOTO button 32 37 I DC IN jack 20 J START STOP button 32 37 K Tripod receptacle Attach the tripod sold separately the length of the screw must be less than 5 5 mm 7 32 in to the tripod receptacle using a tripod screw L BATT battery release lever 21 Continued ...

Страница 128: ...isc cover 28 B Hook for a shoulder belt Attach a shoulder belt sold separately C Grip belt 25 D Disc cover OPEN switch and ACCESS lamp 28 E Lens Carl Zeiss Lens 7 F LENS COVER switch 25 G A V Remote Connector 45 62 Connect other optional accessories ...

Страница 129: ...Face Index set 80 K VIEW IMAGES button 33 40 L Image size 81 M Approximate remaining recordable number of still images 81 81 N Recording folder When PHOTO MEDIA SET is MEMORY STICK O Return button P Playback mode Q Current movie number Total number of recorded movies When MOVIE MEDIA SET is INT MEMORY DCR DVD450E DVD850E or MEMORY STICK R Previous Next button 33 41 S Video operation buttons 33 41 ...

Страница 130: ...recording However you can check them as DATA CODE during playback p 82 You can view the recording date and time on another device etc SUB T DATE p 85 Screen indicators Indicator Meaning Audio mode 79 MICREF LEVEL low 92 WIDE SELECT 79 Self timer recording 92 BLT IN ZOOM MIC 92 Indicator Meaning Fader 91 Indicator Meaning E Warning 108 Indicator Meaning Face Index set 80 9 Manual focus 89 SCENE SEL...

Страница 131: ...till images in JPEG format x MPEG MPEG stands for Moving Picture Experts Group the group of standards for the coding image compression of video movie and audio There are MPEG1 and MPEG2 formats Your camcorder records movies in MPEG2 format x Thumbnail Reduced size images which enable you to view many images at the same time VISUAL INDEX FILM ROLL FACE etc are thumbnail display system x VBR VBR sta...

Страница 132: ...C IN jack 20 DC plug 20 DELETE Movies 48 Still images 49 DEMO MODE 85 DIGITAL ZOOM 79 Disc 28 DISC SELECT GUIDE 74 DISP OUTPUT 84 DIVIDE Original 58 Playlist 61 Dolby Digital 5 1 Creator 131 Double sided disc 115 Dubbing movies 52 62 DVD drive 69 DVD menu 68 DVD R 12 DVD RW 12 DVD R DL 12 DVD RW 12 E Easy Handycam operation 32 Editing 47 EXPOSURE 89 F Face Index 42 80 FACE SET Face Index set 80 FA...

Страница 133: ...RTRAIT 90 Power cord mains lead 20 Precautions 115 Preparation 20 Protect 55 111 R REC MODE Recording mode 79 Recording 32 36 Recording format 12 Recording time 13 21 31 Remaining battery 64 REMAINING SET Remaining media display setting 80 REPAIR IMG DB F 75 S S video cable 45 62 SCENE SELECTION 90 107 Self diagnosis display 108 SELF TIMER 92 SETTINGS category 77 Slide show 44 SNOW 90 SOUND SETTIN...

Страница 134: ...134 Index Continued WHITE BAL White balance 91 WHITE FADER 91 WIDE SELECT 79 Windows 93 World time difference 113 Z Zoom 38 ...

Страница 135: ......

Отзывы: