background image


NL

Voorkant

 Disklade

 SCHIJF LEZEN-lampje


 (uitwerp)-knop

 Opening voor nooduitworp

Indien u de disklade niet kunt openen met de 

 (uitwerp)-knop, steekt u een naald of een 

rechtgetrokken paperclip in deze opening om 

de disklade open te maken.

De voeding

Het toestel wordt gevoed door de Handycam

 die erop wordt aangesloten. De Handycam


moet hierbij via een netadapter op een stopcontact zijn aangesloten. Het toestel zelf hoeft niet 

op een stopcontact te worden aangesloten.

Een schijf plaatsen

De disklade kan alleen worden geopend wanneer het toestel op een Handycam

 is 

aangesloten.


Druk op de 

 (uitwerp)-knop om de disklade te openen.

De disklade schuift daardoor half open. Trek de lade vervolgens helemaal uit met de hand.


Leg de schijf in de disklade, met de opnamekant naar beneden.

Klik de schijf voorzichtig vast.

Raak de opnamezijde van de 
schijf niet aan.


Duw de disklade dicht.

Duw op de disklade tot u een klik hoort.


Содержание DVDirect Express VRD-P1

Страница 1: ...ect Express VRD P1 2008 Sony Corporation GB FR DE IT ES RU PT NL Operating Instructions Mode d emploi Bedienungsanleitung Istruzioni per l uso Manual de instrucciones Инструкция по эксплуатации Manual de Instruções Gebruiksaanwijzing ...

Страница 2: ...appliance is classified as a CLASS 1 LASER product The CLASS 1 LASER PRODUCT MARKING is located on the bottom exterior CLASS 1 LASER PRODUCT LASER KLASSE 1 PRODUKT LUOKAN 1 LASERLAITE KLASS 1 LASER APPARAT This label is located on the laser protective housing inside the enclosure This symbol is intended to alert the user to the presence of uninsulated dangerous voltage within the product s enclosu...

Страница 3: ...nto your outlet consult an electrician for replacement of the obsolete outlet 10 Protect the power cord from being walked on or pinched particularly at plugs convenience receptacles and the point where they exit from the apparatus 11 Only use attachments accessories specified by the manufacturer 12 Use only with the cart stand tripod bracket or table specified by the manufacturer or sold with the ...

Страница 4: ...uipment Applicable in the European Union and other European countries with separate collection systems This symbol on the product or on its packaging indicates that this product shall not be treated as household waste Instead it shall be handed over to the applicable collection point for the recycling of electrical and electronic equipment By ensuring this product is disposed of correctly you will...

Страница 5: ...e 12 Disc space recordable time available for recording videos 12 Time required for recording 12 About HD High Definition disc compatibility 13 Troubleshooting 14 Precautions 15 Specifications 16 Also refer to the operating instructions of your Handycam This unit can be used only by connecting to a Handycam For details on operation also refer to the operating instructions of your Handycam In this ...

Страница 6: ... properly Do not use the unit in very loud areas The unit may not operate properly When connecting the unit s USB cable to the Handycam be sure to insert the connector plug in the correct way Pushing the plug forcibly into the terminal may damage the terminal and may result in a malfunction of the unit or the Handycam On recording Television programs movies video tapes and other materials may be c...

Страница 7: ...rect Compatibility You cannot use this unit with an incompatible Handycam or video camera other than Sony You cannot use this unit for copying or playback of a disc by connecting to a computer neither can it be used as an external disc drive Supported discs The following writable new or unused 12 cm discs are compatible with this unit Disc type Logo Writing speed DVD R Up to 16x DVD R Up to 16x Do...

Страница 8: ...out the USB cable Pull out the connector of the USB cable from the side groove of the unit If you have any difficulty doing this push the tip of the connector so that the connector protrudes from the unit then pull out Storing the USB cable Store the USB cable in the side groove of the unit Parts and controls ...

Страница 9: ...to connect the Handycam to a power outlet using an AC adapter You do not need to connect the unit to a power outlet Inserting a disc The unit can open its disc tray only when it is connected to a Handycam Press the eject button to open the disc tray The disc tray opens only halfway Open it fully by hand Place the disc on the disc tray recording side down The disc should click into place Do not tou...

Страница 10: ...erting a disc page 9 4 Press the DISC BURN button The videos which were newly recorded by the Handycam and were not copied yet are recorded to the disc If the video content exceeds a single disc repeat steps 3 and 4 You cannot add videos to a disc already recorded on by this unit Operating from a Handycam Operating from a Handycam several convenient recording functions are available For instance y...

Страница 11: ... it is connected to the Handycam 2 Connect the unit to the USB port of the Handycam USB port Type Mini AB You cannot use a USB extension cable 3 Insert the disc recorded by this unit For details see Inserting a disc page 9 4 Press the play button Playback starts from the beginning of the disc Operating from a Handycam You can also play videos by operating the Handycam itself For details refer to t...

Страница 12: ...eo the length of time required for recording depends on the model of Handycam the REC mode setting used to shoot the video and the number of scenes the video contains Typically more time is required to record videos onto a disc if the video has been recorded at a higher image quality bit rate setting Down converting to SD Standard Definition video takes more than the actual video time Recording HD...

Страница 13: ... disc and compatible devices HD High Definition disc containing High Definition videos No DVD device Yes AVCHD format compatible device Yes Computer SD Standard Definition disc containing Standard Definition videos Yes DVD device Yes AVCHD format compatible device Yes Computer Install the AVCHD compatible application on your computer beforehand Even in the case of a computer environment that satis...

Страница 14: ...sc is new or unused A disc that has already been recorded on or formatted by another device cannot be used Make sure that the disc has no dust dirt or fingerprints on the recording side Make sure that the disc is placed on the disc tray with its recording side down Vibration of the unit may cause a malfunction of the Handycam Do not place the Handycam on the unit A disc cannot be played You can pl...

Страница 15: ...r vinyl objects for a long period of time Transportation Please repack the unit in its original carton when shipping If the unit is to be shipped remove any disc beforehand Precautions Condensation Do not expose the unit to sudden temperature changes Do not use the unit immediately after moving it from a cold to warm location or raising the room temperature suddenly as condensation may have formed...

Страница 16: ...al Consumption 7 W max Operating temperature 5 ºC to 35 ºC Storage temperature 20 ºC to 60 ºC Size Approx 143 162 5 25 mm W D H including the projecting parts Weight Approx 400 g Design and specifications are subject to change without notice Handycam and are registered trademarks of Sony Corporation DVDirect and DVDirect logo are trademarks of Sony Corporation Other system and product names used h...

Страница 17: ......

Страница 18: ... un technicien qualifié peut effectuer l entretien Cet appareil fait partie des produits CLASS 1 LASER L étiquette CLASS 1 LASER se trouve sur le dessous à l extérieur de l appareil CLASS 1 LASER PRODUCT LASER KLASSE 1 PRODUKT Cette étiquette se trouve sur le boîtier de protection du laser à l intérieur du coffret Ce symbole est destiné à avertir l utilisateur de la présence dans le boîtier du pro...

Страница 19: ...prise consultez un électricien pour remplacer la prise obsolète 10 Protégez le cordon d alimentation afin d éviter qu il soit piétiné ou pincé en particulier au niveau des fiches des prises multiples et du point de sortie de l appareil 11 Utilisez uniquement des options accessoires spécifiés par le fabricant 12 Utilisez l appareil uniquement avec le chariot le socle le trépied le support ou la tab...

Страница 20: ... expressément approuvée dans ce manuel peut annuler votre droit d utilisation de cet équipement Traitement des appareils électriques et électroniques en fin de vie Applicable dans les pays de l Union Européenne et aux autres pays européens disposant de systèmes de collecte sélective Ce symbole apposé sur le produit ou sur son emballage indique que ce produit ne doit pas être traité avec les déchet...

Страница 21: ...rable disponible pour l enregistrement de vidéos 12 Temps nécessaire à l enregistrement 12 À propos de la compatibilité des disques HD haute définition 14 Dépannage 15 Précautions 16 Caractéristiques techniques 17 Reportez vous également au mode d emploi de votre Handycam Cet appareil ne peut être utilisé qu en le raccordant à un Handycam Pour de plus amples informations sur le fonctionnement repo...

Страница 22: ...des zones très bruyantes Il risquerait de ne pas fonctionner correctement Avant de raccorder le câble USB de l appareil au Handycam veillez à insérer la fiche du connecteur dans le bon sens Si vous forcez pour insérer le connecteur vous risquez d endommager la borne et de provoquer un mauvais fonctionnement de l appareil ou du Handycam Enregistrement Les programmes de télévision les films les cass...

Страница 23: ...ou un caméscope incompatible d une marque autre que Sony Vous ne pouvez pas utiliser cet appareil pour la copie ou la lecture d un disque en le raccordant à un ordinateur ou l utiliser comme lecteur de disque externe Disques pris en charge Les disques de 12 cm inscriptibles suivants neufs ou inutilisés sont compatibles avec cet appareil Type de disque Logo Vitesse d écriture DVD R Jusqu à 16 DVD R...

Страница 24: ...Retrait du câble USB Retirez le connecteur du câble USB de la rainure latérale de l appareil Si cette opération pose problème appuyez sur la pointe du connecteur afin qu il dépasse de l appareil puis retirez le Rangement du câble USB Rangez le câble USB dans la rainure latérale de l appareil Eléments et commandes ...

Страница 25: ...ique à l aide d un adaptateur secteur Vous n avez pas besoin de raccorder l appareil à une prise électrique Insertion d un disque L appareil ne peut ouvrir son tiroir à disque que s il est raccordé à un Handycam Appuyez sur le bouton éjection pour ouvrir le tiroir à disque Le tiroir à disque ne s ouvre qu à moitié Ouvrez le complètement à la main Posez le disque sur le tiroir à disque face d enreg...

Страница 26: ...on DISC BURN Les dernières vidéos qui ont été enregistrées par le Handycam et qui n ont pas encore été copiées sont enregistrées sur le disque Si le contenu vidéo est supérieur à un disque unique répétez les étapes 3 et 4 Vous ne pouvez pas ajouter de vidéo à un disque déjà enregistré par cet appareil Utilisation à partir d un Handycam L utilisation à partir d un Handycam vous permet de bénéficier...

Страница 27: ...ndycam 2 Raccordez l appareil au port USB du Handycam Port USB Type Mini AB Vous ne pouvez pas utiliser de câble d extension USB 3 Insérez le disque enregistré à l aide de cet appareil Pour plus de détails voir Insertion d un disque page 9 4 Appuyez sur le bouton lecture La lecture commence depuis le début du disque Utilisation à partir d un Handycam Vous pouvez également lire des vidéos en utilis...

Страница 28: ...té d image peut dépendre de la durée d enregistrement Les modes ENREG disponibles varient selon les modèles de Handycam Temps nécessaire à l enregistrement Lors de l enregistrement d une vidéo la durée requise pour l enregistrement dépend du modèle de Handycam du réglage du mode ENREG utilisé pour enregistrer la vidéo et du nombre de scènes que la vidéo contient Généralement le temps nécessaire à ...

Страница 29: ...ode ENREG à un débit binaire supérieur à 18 Mbits s comme en mode HD FX Handycam haute définition par exemple au format AVCHD Si la durée d une scène excède la capacité du disque l enregistrement n est pas possible Dans ce cas divisez la scène à l aide de la fonction de modification du Handycam ...

Страница 30: ...sitifs compatibles Disque HD haute définition contenant des vidéos haute définition Non Dispositif DVD Oui Appareil compatible avec le format AVCHD Oui Ordinateur Disque SD définition standard contenant des vidéos en définition standard Oui Dispositif DVD Oui Appareil compatible avec le format AVCHD Oui Ordinateur Installez d abord l application compatible AVCHD sur votre ordinateur Même dans un e...

Страница 31: ...enregistré ou formaté par un autre appareil Vérifiez que la face d enregistrement du disque est exempte de poussières de saletés ou de traces de doigts Vérifiez que le disque est installé dans le tiroir à disque avec sa face d enregistrement vers le bas Des vibrations de l appareil risqueraient de provoquer un dysfonctionnement du Handycam Ne posez pas le Handycam sur l appareil Impossible de lire...

Страница 32: ...ansport Veuillez replacer l appareil dans son emballage d origine lorsque vous l expédiez Si l appareil doit être transporté pensez à vérifier qu il ne contient pas de disque Précautions Condensation N exposez pas l appareil à des changements soudains de température N utilisez pas l appareil immédiatement après l avoir déplacé d un endroit frais vers un endroit chaud ou après avoir subitement augm...

Страница 33: ...Consommation 7 W max Température de fonctionnement 5 ºC à 35 ºC Température de stockage 20 ºC à 60 ºC Taille Environ 143 162 5 25 mm L P H à l exclusion des parties saillantes Poids Environ 400 g La conception et les caractéristiques techniques sont sujettes à modification sans préavis Handycam et sont des marques déposées de Sony Corporation DVDirect et le logo DVDirect sont des marques commercia...

Страница 34: ...schen Geräten anzuwenden in den Ländern der Europäischen Union und anderen europäischen Ländern mit einem separaten Sammelsystem für diese Geräte Das Symbol auf dem Produkt oder seiner Verpackung weist darauf hin dass dieses Produkt nicht als normaler Haushaltsabfall zu behandeln ist sondern an einer Annahmestelle für das Recycling von elektrischen und elektronischen Geräten abgegeben werden muss ...

Страница 35: ...Inhalt Sicherheitsbestimmungen 2 Bitte zuerst lesen 4 Lieferumfang 4 Hinweise zum Gebrauch 4 Wichtigste Merkmale und Funktionen 5 Kompatible Geräte 5 Unterstützte Discs 5 Teile und Bedienelemente 6 Einlegen einer Disc 7 Aufnahme 8 Wiedergabe 9 Videolänge und Aufnahmezeit 10 Verfügbarer Discspeicher Aufnahmezeit für die Aufnahme von Videos 10 Für die Aufnahme erforderliche Zeit 10 Hinweise zur Komp...

Страница 36: ...ät nicht in sehr lauter Umgebung Andernfalls können am Gerät Fehlfunktionen auftreten Wenn Sie das USB Kabel des Geräts an die Handycam anschließen achten Sie darauf den Stecker richtig herum in den Anschluss zu stecken Wenn Sie den Stecker mit Gewalt falsch herum in den Anschluss stecken können am Gerät oder an der Handycam Fehlfunktionen auftreten Hinweise zum Aufnehmen Fernsehsendungen Filme Vi...

Страница 37: ...cam oder einer Videokamera von einem anderen Hersteller als Sony kann dieses Gerät nicht verwendet werden Sie können mit diesem Gerät keine Discs kopieren oder abspielen indem Sie es an einen Computer anschließen auch als externes Disc Laufwerk kann dieses Gerät nicht verwendet werden Unterstützte Discs Die folgenden neuen oder unbenutzten beschreibbaren 12 cm Discs sind mit diesem Gerät kompatibe...

Страница 38: ...er des USB Kabels aus der seitlichen Vertiefung am Gerät heraus Wenn sich der Stecker nicht problemlos herausziehen lässt drücken Sie auf die Spitze des Steckers so dass der Stecker aus dem Gerät herausschaut und ziehen Sie ihn dann heraus Verstauen des USB Kabels Verstauen Sie das USB Kabel in der seitlichen Vertiefung am Gerät Teile und Bedienelemente ...

Страница 39: ...l mit einer Netzsteckdose Das Gerät selbst braucht nicht an eine Netzsteckdose angeschlossen zu werden Einlegen einer Disc Die Disc Lade öffnet sich nur wenn das Gerät an eine Handycam angeschlossen ist Drücken Sie die Taste Auswerfen um die Disc Lade zu öffnen Die Disc Lade wird nur zur Hälfte ausgefahren Ziehen Sie sie von Hand ganz auf Legen Sie die Disc mit der Aufnahmeseite nach unten in die ...

Страница 40: ...Drücken Sie die Taste DISC BURN Neu mit der Handycam aufgezeichnete und noch nicht kopierte Videos werden auf der Disc aufgezeichnet Wenn das Video für eine einzige Disc zu lang ist bespielen Sie wie in Schritt 3 und 4 erläutert weitere Discs Auf eine Disc auf die Sie mit diesem Gerät bereits ein Video aufgezeichnet haben können Sie keine weiteren Videos aufzeichnen Bedienung über Handycam Wenn Si...

Страница 41: ...am angeschlossen haben 2 Verbinden Sie das Gerät mit dem USB Anschluss der Handycam USB Anschluss Typ Mini AB Verwenden Sie kein USB Verlängerungskabel 3 Legen Sie eine Disc ein die mit diesem Gerät bespielt wurde Erläuterungen dazu finden Sie unter Einlegen einer Disc Seite 7 4 Drücken Sie die Taste Wiedergabe Die Wiedergabe beginnt am Anfang der Disc Bedienung über Handycam Sie können Videos auc...

Страница 42: ...ngen Die verfügbaren REC Modi variieren bei den verschiedenen Handycam Modellen Für die Aufnahme erforderliche Zeit Wenn Sie Videos aufzeichnen hängt die Länge der für die Aufnahme erforderlichen Zeit vom Modell der Handycam von der für die Videoaufnahme verwendeten REC Moduseinstellung und von der Anzahl der Szenen ab die das Video enthält Normalerweise ist mehr Zeit erforderlich um Videos auf ei...

Страница 43: ...on über 18 MBit s aufgezeichnet wurde wie zum Beispiel im HD FX Modus z B High Definition Handycam im AVCHD Format aufnehmen Wenn die Zeit einer Szene die Kapazität der Disc übersteigt ist die Aufnahme nicht möglich Teilen Sie in diesem Fall die Szene mit der Bearbeitungsfunktion der Handycam ...

Страница 44: ...Gerät wiedergegeben werden Typ des erstellten Mediums und kompatible Geräte HD Medium High Definition mit High Definition Videos Nein DVD Gerät Ja Mit AVCHD Format kompatibles Gerät Ja Computer SD Medium Standard Definition mit Standard Definition Videos Ja DVD Gerät Ja Mit AVCHD Format kompatibles Gerät Ja Computer Installieren Sie auf dem Computer zunächst eine AVCHD kompatible Anwendung Auch we...

Страница 45: ...ts etwas aufgezeichnet oder die mit einem anderen Gerät formatiert wurde kann nicht verwendet werden Vergewissern Sie sich dass die Aufnahmeseite der Disc frei von Staub Verunreinigungen oder Fingerabdrücken ist Vergewissern Sie sich dass die Disc mit der Aufnahmeseite nach unten in der Disc Lade liegt Erschütterungen des Geräts können zu Fehlfunktionen an der Handycam führen Stellen Sie die Handy...

Страница 46: ...ht längere Zeit mit Gummi oder Vinylmaterialien in Berührung kommt Transport Wenn Sie das Gerät transportieren möchten verpacken Sie es bitte im Originalkarton Wenn Sie das Gerät transportieren möchten nehmen Sie vorher gegebenenfalls die Disc heraus Sicherheitsmaßnahmen Feuchtigkeitskondensation Schützen Sie das Gerät vor starken Temperaturschwankungen Verwenden Sie das Gerät nicht unmittelbar na...

Страница 47: ...llgemeines Leistungsaufnahme 7 W max Betriebstemperatur 5 ºC bis 35 ºC Lagertemperatur 20 ºC bis 60 ºC Abmessungen ca 143 162 5 25 mm B T H einschließlich vorstehender Teile Gewicht ca 400 g Änderungen die dem technischen Fortschritt dienen bleiben vorbehalten Handycam und sind eingetragene Markenzeichen der Sony Corporation DVDirect und das DVDirect Logo sind Markenzeichen der Sony Corporation An...

Страница 48: ... altri paesi europei con sistema di raccolta differenziata Questo simbolo sul prodotto o sulla confezione indica che il prodotto non deve essere considerato come un normale rifiuto domestico ma deve invece essere consegnato ad un punto di raccolta appropriato per il riciclo di apparecchi elettrici ed elettronici Assicurandovi che questo prodotto sia smaltito correttamente voi contribuirete a preve...

Страница 49: ...rmazioni da leggere prima dell uso 4 Contenuto della confezione 4 Note sull utilizzo 4 Caratteristiche principali 5 Dispositivi compatibili 5 Dischi supportati 5 Componenti e comandi 6 Inserimento di un disco 7 Registrazione 8 Riproduzione 9 Lunghezza dei video e tempi di registrazione 10 Capacità disco tempo di registrazione disponibile per la registrazione dei video 10 Tempo necessario alla regi...

Страница 50: ...ienti molto rumorosi L apparecchio potrebbe non funzionare correttamente Quando si collega il cavo USB dell apparecchio alla Handycam fare attenzione a inserire il connettore nel verso corretto Se si cerca di inserirlo a forza si potrebbe danneggiare il terminale con conseguente rischio di malfunzionamento dell apparecchio o della Handycam Informazioni sulla registrazione I programmi televisivi i ...

Страница 51: ...ibile o con videocamere di produttori diversi da Sony Questo apparecchio non può essere utilizzato per copiare o riprodurre un disco tramite collegamento a un computer inoltre non può essere utilizzato come hard disk esterno Dischi supportati Questo apparecchio può essere utilizzato con i seguenti dischi scrivibili da 12 cm nuovi o non utilizzati Tipo di disco Logo Velocità di scrittura DVD R Fino...

Страница 52: ...nnettore del cavo USB per estrarlo dalla scanalatura laterale dell apparecchio Se l operazione risulta difficoltosa spingere la punta del connettore in modo che quest ultimo fuoriesca dall apparecchio quindi estrarlo Quando il cavo USB non è in uso Quando il cavo USB non è in uso riporlo nell apposita scanalatura laterale dell apparecchio Componenti e comandi ...

Страница 53: ...e CA Non è necessario collegare l apparecchio a una presa di corrente Inserimento di un disco Il vassoio porta disco dell apparecchio può essere aperto solo quando l apparecchio è collegato a una Handycam Premere il tasto espulsione per aprire il vassoio porta disco Il vassoio porta disco si apre solo a metà Aprirlo completamente con una mano Collocare il disco sul vassoio porta disco con il lato ...

Страница 54: ... Premere il tasto DISC BURN Sul disco verranno registrati i video nuovi registrati dalla Handycam e non ancora copiati Se un video è troppo lungo per essere contenuto in un solo disco ripetere le operazioni descritte ai punti 3 e 4 Questo apparecchio non consente di aggiungere altri video a un disco già registrato Comando dell apparecchio tramite la Handycam Comandando l apparecchio tramite la Han...

Страница 55: ...legare l apparecchio alla porta USB della Handycam Porta USB tipo Mini AB Non è possibile utilizzare un cavo di prolunga USB 3 Inserire il disco registrato con questo apparecchio Per informazioni dettagliate vedere Inserimento di un disco pagina 7 4 Premere il tasto riproduzione Il disco viene riprodotto dall inizio Comando dell apparecchio tramite la Handycam I video possono essere anche riprodot...

Страница 56: ...otrebbe dipendere dal tempo di registrazione Le modalità REC disponibili variano in base ai modelli di Handycam Tempo necessario alla registrazione In fase di registrazione di un video la durata del tempo necessario alla registrazione dipende dal modello di Handycam dall impostazione della modalità REC utilizzata per riprendere il video e dal numero di scene contenute nel video stesso In genere il...

Страница 57: ...C a una velocità in bit superiore a 18 Mbps come in modalità HD FX ad esempio High Definition Handycam in formato AVCHD Se la durata di una scena supera le dimensioni del disco la registrazione non è possibile In questo caso dividere la scena mediante la funzione di modifica della Handycam ...

Страница 58: ...e Tipo di disco creato e dispositivi compatibili Disco HD High Definition contenente video High Definition No Dispositivo DVD Sì Dispositivo compatibile con il formato AVCHD Sì Computer Disco SD Standard Definition contenente video Standard Definition Sì Dispositivo DVD Sì Dispositivo compatibile con il formato AVCHD Sì Computer Installare preventivamente l applicazione compatibile con il formato ...

Страница 59: ...la superficie di registrazione del disco non sia impolverata o sporca e che non siano presenti ditate Verificare che il disco sia stato inserito nel vassoio porta disco con la superficie di registrazione rivolta verso il basso Le vibrazioni dell apparecchio possono provocare anomalie di funzionamento della Handycam Non appoggiare la Handycam sull apparecchio Non è possibile riprodurre un disco È p...

Страница 60: ... mani sporche di tali sostanze Evitare di lasciare la scocca a contatto con oggetti in gomma o vinilici per periodi prolungati Trasporto Durante la spedizione e il trasporto si consiglia di riporre l apparecchio nella confezione originale Se l apparecchio deve essere spedito rimuovere preventivamente l eventuale disco presente al suo interno Precauzioni Condensa Non esporre l apparecchio a sbalzi ...

Страница 61: ... commercio o registrati in altro modo Informazioni generali Consumo di energia 7 W max Temperature di utilizzo da 5 ºC a 35 ºC Temperature di immagazzinamento da 20 ºC a 60 ºC Dimensioni ca 143 162 5 25 mm L P H incluse le parti sporgenti Peso ca 400 g Design e caratteristiche tecniche soggetti a modifiche senza preavviso Handycam e sono marchi registrati di Sony Corporation DVDirect e il logo DVD...

Страница 62: ...emas de recogida selectiva de residuos Este símbolo en el equipo o el embalaje indica que el presente producto no puede ser tratado como residuos domésticos normales sino que debe entregarse en el correspondiente punto de recogida de equipos eléctricos y electrónicos Al asegurarse de que este producto se desecha correctamente Ud ayuda a prevenir las consecuencias negativas para el medio ambiente y...

Страница 63: ...mación importante 4 Componentes suministrados 4 Notas sobre la utilización 4 Características principales 5 Dispositivo compatible 5 Discos admitidos 5 Componentes y controles 6 Introducción de un disco 7 Grabación 8 Reproducción 9 Tamaños de vídeo y tiempo de grabación 10 Espacio en disco tiempo de grabación disponible para grabar vídeos 10 Tiempo necesario para la grabación 10 Acerca de la compat...

Страница 64: ...n lugares especialmente ruidosos ya que podría no funcionar correctamente Al conectar el cable USB de la unidad a la Handycam procure introducir el conector correctamente No fuerce el conector al intentar insertarlo en el terminal ya que podría dañarlo y provocar problemas de funcionamiento en la unidad o la Handycam Sobre la grabación Es posible que determinados programas de televisión películas ...

Страница 65: ...r la unidad con una Handycam incompatible o con una videocámara que no sea de la marca Sony No puede utilizar la unidad para copiar o reproducir un disco conectándola a un ordenador ni como unidad de disco externa Discos admitidos Pueden utilizarse con la unidad los siguientes discos grabables de 12 cm nuevos o todavía sin usar Tipo de disco Logotipo Velocidad de grabación DVD R Hasta 16 DVD R Has...

Страница 66: ...USB Tire del conector del cable USB situado en la ranura lateral de la unidad Si tiene problemas para hacerlo presione ligeramente el extremo del conector hasta que el conector sobresalga de la unidad y seguidamente extráigalo Almacenamiento del cable USB Introduzca el cable USB en la ranura lateral de la unidad Componentes y controles ...

Страница 67: ...ediante un adaptador de CA No es necesario conectar la unidad a ninguna toma de corriente Introducción de un disco La bandeja de la unidad solo puede abrirse si se conecta a una Handycam Pulse el botón expulsar para abrir la bandeja del disco La bandeja del disco solo se abre hasta la mitad Para abrirla del todo deberá hacerlo manualmente Coloque el disco en la bandeja con la cara de grabación hac...

Страница 68: ... de un disco página 7 4 Pulse el botón DISC BURN Los vídeos grabados con la Handycam y todavía sin copiar se graban en el disco Si el tamaño del vídeo supera los límites de un disco repita los pasos 3 y 4 Recuerde que no podrá añadir vídeos a un disco grabado con esta unidad Operaciones desde una Handycam Si utiliza la unidad desde una Handycam dispondrá de prácticas funciones de grabación Por eje...

Страница 69: ...am 2 Conecte la unidad al puerto USB de la Handycam Puerto USB Tipo Mini AB No utilice nunca un cable alargador USB 3 Introduzca el disco grabado con la unidad Para obtener más información consulte Introducción de un disco página 7 4 Pulse el botón reproducción La reproducción empieza desde el principio del disco Operaciones desde una Handycam También puede reproducir vídeos desde la Handycam Para...

Страница 70: ...ario para la grabación Al grabar vídeos la cantidad de tiempo necesario para la grabación depende del modelo de Handycam el ajuste del modo REC que se utilizó para tomar el vídeo y el número de escenas que contiene el vídeo En general se necesitará más tiempo para grabar vídeos en un disco si el vídeo se ha grabado en un ajuste de calidad de imagen más elevado velocidad de bits Se tarda más tiempo...

Страница 71: ...VCHD consolas Playstation 3 u otros dispositivos compatibles Tipo de disco creado y dispositivos compatibles Disco HD alta definición con vídeos de alta definición No Dispositivo de DVD Sí Dispositivo compatible con el formato AVCHD Sí Ordenador Disco SD definición estándar con vídeos de definición estándar Sí Dispositivo de DVD Sí Dispositivo compatible con el formato AVCHD Sí Ordenador Instale p...

Страница 72: ...den utilizarse discos ya grabados o formateados por otro dispositivo Compruebe que la superficie de grabación del disco no presenta suciedad polvo ni huellas dactilares Asegúrese de que el disco está colocado en la bandeja con la cara de grabación hacia abajo Si la unidad experimenta vibraciones la Handycam podría dejar de funcionar correctamente No coloque la Handycam encima de la unidad Un disco...

Страница 73: ...asiado tiempo en contacto con objetos de caucho o vinilo Transporte Para transportar la unidad vuelva a utilizar su paquete original Si debe enviar la unidad extraiga primero cualquier disco de su interior Precauciones Condensación No exponga la unidad a cambios de temperatura bruscos No utilice la unidad inmediatamente después de trasladarla de un sitio frío a uno cálido o después de un cambio br...

Страница 74: ...ales Consumo 7 W máx Temperatura de funcionamiento 5 ºC a 35 ºC Temperatura de almacenamiento 20 ºC a 60 ºC Tamaño Aprox 143 162 5 25 mm an al prf con los salientes Peso Aprox 400 g El diseño y las especificaciones están sujetos a cambios sin previo aviso Handycam y son marcas comerciales registradas de Sony Corporation DVDirect y el logotipo DVDirect son marcas comerciales registradas de Sony Cor...

Страница 75: ......

Страница 76: ...стройстве или его упаковке обозначает что данное устройство нельзя утилизировать вместе с прочими бытовыми отходами Eго следует сдать в соответствующий приемный пункт переработки электрического и электронного оборудования Heпpaвильнaя утилизация данного изделия может привести к потенциально негативному влиянию на окружающую среду и здоровье людей поэтому для предотвращения подобных последствий нео...

Страница 77: ...хники безопасности 2 Прочтите перед началом работы 4 Компоненты в комплекте поставки 4 Примечания по эксплуатации 4 Основные функции 5 Совместимые устройства 5 Поддерживаемые диски 5 Детали и регуляторы 6 Установка диска 7 Запись 8 Воспроизведение 9 Продолжительность видео и время записи 10 Место на диске время записи доступное для записи видео 10 Время необходимое для выполнения записи 10 Примеча...

Страница 78: ...е используйте это устройство в очень шумных местах В противном случае устройство может работать неправильно При подключении этого устройства к видеокамере Handycam с помощью кабеля USB убедитесь в правильности подсоединения штекерного разъема Вставка разъема в гнездо с усилием может привести к повреждению гнезда и неполадкам в работе устройства или видеокамеры Handycam Запись Телевизионные програм...

Страница 79: ...льзовать с неподдерживаемыми видеокамерами Handycam или видеокамерами других производителей не Sony Это устройство нельзя использовать для копирования или воспроизведения диска путем подключения к компьютеру его также нельзя использовать в качестве внешнего диска Поддерживаемые диски С этим устройством совместимы следующие новые или неиспользованные диски диаметром 12 см с возможностью записи Тип ...

Страница 80: ...Извлечение кабеля USB Извлеките разъем кабеля USB из паза на боковой части устройства Если при этом возникают затруднения нажмите на кончик разъема чтобы разъем вышел из устройства а затем извлеките его Хранение кабеля USB Кабель USB следует хранить в пазе на боковой части устройства Детали и регуляторы ...

Страница 81: ...е видеокамеру Handycam к электрической розетке с помощью адаптера переменного тока Устройство не нужно напрямую подключать к электрической розетке Установка диска Лоток для дисков можно открыть только когда устройство подключено к видеокамере Handycam Нажмите кнопку извлечение чтобы открыть лоток для дисков Лоток для дисков откроется наполовину Полностью откройте его вручную Поместите диск в лоток...

Страница 82: ...ск Подробнее см в разделе Установка диска стр 7 4 Нажмите кнопку DISC BURN Видеофрагменты вновь записанные с помощью видеокамеры Handycam и еще не скопированные будут записаны на диск Если видеофрагмент не умещается на один диск повторите шаги 3 и 4 Не удастся добавить видеофрагменты на диск который уже записан с помощью этого устройства Управление с видеокамеры Handycam При управлении с помощью в...

Страница 83: ...е будет работать при его подключении к видеокамере Handycam 2 Подключите устройство к порту USB видеокамеры Handycam Порт USB тип Mini AB Нельзя использовать удлинительный кабель USB 3 Вставьте диск записанный с помощью этого устройства Подробнее см в разделе Установка диска стр 7 4 Нажмите кнопку воспроизведение Начнется воспроизведение с начала диска Управление с видеокамеры Handycam Кроме того ...

Страница 84: ...и записи видео время необходимое для записи зависит от модели Handycam а также настройки режима ЗАПИСИ используемого для съемки видео и количества сцен Как правило для записи на диск видео снятого с настройкой более высокого качества изображения скорости передачи в битах требуется больше времени Процесс преобразования в видео стандартной четкости SD может занять больше времени чем фактическая прод...

Страница 85: ...елях устройствах записи Blu ray Disc Playstation3 или других совместимых устройствах Тип создаваемого диска и совместимые устройства Диск высокой четкости содержащий видео высокой четкости Нет Устройство DVD Да Устройство совместимое с форматом AVCHD Да Компьютер Диск стандартной четкости содержащий видео стандартной четкости Да Устройство DVD Да Устройство совместимое с форматом AVCHD Да Компьюте...

Страница 86: ...Не удастся использовать диск который был записан или отформатирован на другом устройстве Убедитесь что на записываемой стороне диска нет пыли загрязнений или отпечатков пальцев Убедитесь что диск размещен в лотке для дисков записываемой стороной вниз Вибрация устройства может привести к неисправности видеокамеры Handycam Не кладите видеокамеру Handycam на устройство Не удается воспроизвести диск М...

Страница 87: ... корпуса камеры с резиновыми или виниловыми предметами в течение долгого времени Транспортировка При транспортировки устройство следует укладывать в оригинальную упаковку Перед транспортировкой убедитесь что в устройстве нет диска Меры предосторожности Конденсация Не подвергайте устройство резким перепадам температур Не используйте устройство сразу же после его переноса из холодного места в теплое...

Страница 88: ...мая мощность 7 Вт макс Рабочая температура от 5 ºC до 35 ºC Температура хранения от 20 ºC до 60 ºC Размер прибл 143 162 5 25 мм Ш Г В включая выступающие части Вес прибл 400 г Конструкция и технические характеристики могут изменяться без предварительного уведомления Handycam и являются зарегистрированными товарными знаками Sony Corporation DVDirect и логотип DVDirect являются товарными знаками Son...

Страница 89: ......

Страница 90: ...iva de resíduos Este símbolo colocado no produto ou na sua embalagem indica que este não deve ser tratado como resíduo urbano indiferenciado Deve sim ser colocado num ponto de recolha destinado a resíduos de equipamentos eléctricos e electrónicos Assegurando se que este produto é correctamente depositado irá prevenir potenciais consequências negativas para o ambiente bem como para a saúde que de o...

Страница 91: ...vídeo da Sony Índice Normas de segurança 2 Leia isto primeiro 4 Itens fornecidos 4 Notas acerca da utilização 4 Funções principais 5 Dispositivo compatível 5 Discos suportados 5 Peças e controlos 6 Introduzir um disco 7 Gravação 8 Reprodução 9 Duração dos Vídeos e Tempo de Gravação 10 Espaço em disco tempo de gravação disponível para gravar vídeos 10 Tempo necessário para a gravação 10 Sobre a com...

Страница 92: ...de em áreas com muito ruído A unidade poderá não funcionar correctamente Quando ligar o cabo USB da unidade à Handycam certifique se de que introduz a ficha do conector de modo correcto Se empurrar a ficha com demasiada força no terminal poderá danificar o terminal o que poderá causar uma avaria da unidade ou da Handycam Gravação Programas de televisão filmes cassetes de vídeo e outros materiais p...

Страница 93: ...Handycam incompatível ou câmara de vídeo que não da Sony Não pode utilizar esta unidade para copiar ou reproduzir um disco ligando a a um computador nem poderá ser utilizada como uma unidade de disco externo Discos suportados Os seguintes discos graváveis de 12 cm novos ou não utilizados são compatíveis com esta unidade Tipo de disco Logótipo Velocidade de gravação DVD R Até 16 DVD R Até 16 Discos...

Страница 94: ...SB Retirar o cabo USB Puxe o conector do cabo USB da ranhura lateral da unidade Caso tenha dificuldade em fazê lo empurre a ponta do conector de forma a que o conector fique saliente em relação à unidade em seguida puxe o Guardar o cabo USB Guarde o cabo USB na ranhura lateral da unidade Peças e controlos ...

Страница 95: ...dycam a uma tomada de alimentação utilizando um transformador de CA Não necessita de ligar a unidade a uma tomada de alimentação Introduzir um disco A unidade apenas pode abrir o respectivo tabuleiro quando se encontra ligada a uma Handycam Prima o botão ejectar para abrir o tabuleiro O tabuleiro abre apenas até meio Abra o na totalidade manualmente Coloque o disco no tabuleiro com o lado de grava...

Страница 96: ... Prima o botão DISC BURN Os vídeos que foram recentemente gravados pela Handycam e que ainda não foram copiados são gravados no disco Se o conteúdo do vídeo exceder a capacidade de um disco repita os passos 3 e 4 Não consegue adicionar vídeos a um disco que já foi gravado nesta unidade Utilizar a partir de uma Handycam Estão disponíveis várias funções úteis de gravação através da utilização a part...

Страница 97: ...do for ligada à Handycam 2 Ligue a unidade à porta USB da Handycam Porta USB Tipo Mini AB Não pode utilizar um cabo de extensão USB 3 Introduza o disco gravado nesta unidade Para mais informações consulte Introduzir um disco página 7 4 Prima o botão reproduzir A reprodução começa no início do disco Utilizar a partir de uma Handycam Também pode reproduzir vídeos utilizando a própria Handycam Para m...

Страница 98: ...Ao gravar vídeos a duração do tempo necessário para a gravação depende do modelo da Handycam da definição do modo REC utilizada para gravar o vídeo e do número de cenas que o vídeo contém Geralmente é necessário mais tempo para gravar vídeos num disco se o vídeo tiver sido gravado com uma definição de qualidade de imagem velocidade de transmissão mais elevada Converter para vídeo SD Definição Norm...

Страница 99: ...ro dispositivo compatível Tipo de disco criado e dispositivos compatíveis Disco HD Alta Definição contendo vídeos de Alta Definição Não Dispositivo de DVD Sim Dispositivo compatível com o formato AVCHD Sim Computador Disco SD Definição Normal contendo vídeos de Definição Normal Sim Dispositivo de DVD Sim Dispositivo compatível com o formato AVCHD Sim Computador Instale previamente a aplicação comp...

Страница 100: ... disco que já foi gravado ou formatado noutro dispositivo não pode ser utilizado Certifique se de que o disco não tem pó sujidade ou impressões digitais no lado de gravação Certifique se de que o disco é colocado no tabuleiro com o lado de gravação virado para baixo A vibração da unidade pode causar uma avaria da Handycam Não coloque a Handycam na unidade Não consegue reproduzir um disco Apenas po...

Страница 101: ...de na sua caixa original quando realizar um transporte Se desejar transportar a unidade retire previamente os discos Precauções Condensação Não exponha a unidade a mudanças súbitas de temperatura Não utilize a unidade imediatamente a seguir a tê la deslocado de um local frio para um local quente ou caso tenha aumentado subitamente a temperatura ambiente visto que poderá se ter formado condensação ...

Страница 102: ...nsumo 7 W máx Temperatura de funcionamento 5 ºC a 35 ºC Temperatura de armazenamento 20 ºC a 60 ºC Dimensões Aprox 143 162 5 25 mm L P A incluindo partes salientes Peso Aprox 400 g Design e especificações sujeitos a alterações sem aviso prévio Handycam e são marcas comerciais registadas da Sony Corporation O logótipo DVDirect e DVDirect são marcas comerciais da Sony Corporation Outros nomes de sis...

Страница 103: ......

Страница 104: ...t gescheiden ophaalsystemen Het symbool op het product of op de verpakking wijst erop dat dit product niet als huishoudelijk afval mag worden behandeld Het moet echter naar een plaats worden gebracht waar elektrische en elektronische apparatuur wordt gerecycled Als u ervoor zorgt dat dit product op de correcte manier wordt verwijderd voorkomt u voor mens en milieu negatieve gevolgen die zich zoude...

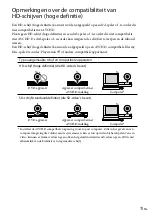
Страница 105: ...opgave Veiligheidsvoorschriften 2 Lees eerst dit 4 Geleverde items 4 Opmerkingen bij het gebruik 4 Belangrijkste kenmerken 5 Compatibiliteit met andere apparaten 5 Ondersteunde schijven 5 Onderdelen en bedieningsknoppen 6 Een schijf plaatsen 7 Branden 8 Afspelen 9 Lengte van de video en opnameduur 10 Beschikbare schijfruimte opnameduur voor het branden van video s 10 Benodigde opnametijd 10 Opmerk...

Страница 106: ...tast Gebruik het toestel niet in een erg luidruchtige omgeving De werking van het toestel kan erdoor worden aangetast Zorg ervoor dat u de USB kabel van het toestel correct aansluit op de Handycam Als u de verkeerde aansluitplug in het contact probeert te duwen kunt u dit beschadigen waardoor het toestel of de Handycam defect kan raken Opmerking bij het maken van opnames Televisieprogramma s films...

Страница 107: ...it toestel is niet bruikbaar met een incompatibele Handycam of met een videocamera die niet van Sony is Dit toestel is niet bruikbaar voor het kopiëren of afspelen van schijven vanaf een computer evenmin kan het als extern schijfstation worden gebruikt Ondersteunde schijven De volgende beschrijfbare 12 cm schijven nieuw of ongebruikt zijn compatibel met dit toestel Schijftype Logo Schrijfsnelheid ...

Страница 108: ...ken Trek de USB kabel bij de aansluitplug uit de sleuf op de zijkant van het toestel Indien dit niet dadelijk lukt duwt u eerst de lip van de plug opzij en uit de sleuf en vervolgens trekt u de kabel eruit De USB kabel opbergen Berg de USB kabel op in de sleuf op de zijkant van het toestel Onderdelen en bedieningsknoppen ...

Страница 109: ...apter op een stopcontact zijn aangesloten Het toestel zelf hoeft niet op een stopcontact te worden aangesloten Een schijf plaatsen De disklade kan alleen worden geopend wanneer het toestel op een Handycam is aangesloten Druk op de uitwerp knop om de disklade te openen De disklade schuift daardoor half open Trek de lade vervolgens helemaal uit met de hand Leg de schijf in de disklade met de opnamek...

Страница 110: ...e DISC BURN knop Het videomateriaal op de Handycam dat nog niet op schijf werd gekopieerd wordt vervolgens op de schijf gebrand Indien één schijf hierbij niet voldoende is herhaalt u stappen 3 en 4 Aan een schijf waarop met dit toestel al materiaal werd overgebracht kunt u geen opnames meer toevoegen Bediening vanaf een Handycam Wanneer u het toestel vanaf een Handycam bedient beschikt u over nog ...

Страница 111: ...niet werken wanneer het op de Handycam wordt aangesloten 2 Sluit het toestel aan op de USB poort van de Handycam USB poort mini AB U mag geen USB verlengkabel gebruiken 3 Plaats de disk die u met dit toestel hebt gebrand Zie Een schijf plaatsen pagina 7 voor meer informatie 4 Druk op de afspelen knop De disk wordt vanaf het begin afgespeeld Bediening vanaf een Handycam U kunt de video s ook afspel...

Страница 112: ...et Handycam model de REC modus waarmee de video is opgenomen en het aantal scènes dat de video bevat Algemeen geldt dat er meer tijd nodig is voor het opnemen van video s op een schijf als de video s werden opgenomen met een hogere beeldkwaliteit bitsnelheid Het omlaag converteren naar SD video standaarddefinitie neemt meer tijd in beslag dan de video duurt HD video hoge definitie of SD video stan...

Страница 113: ...kte schijf en compatibele apparaten HD schijf hoge definitie die HD video s bevat Nee DVD apparaat Ja Apparaat compatibel met AVCHD indeling Ja Computer SD schijf standaarddefinitie die SD video s bevat Ja DVD apparaat Ja Apparaat compatibel met AVCHD indeling Ja Computer Installeer de AVCHD compatibele toepassing vooraf op uw computer Zelfs in het geval van een computeromgeving die voldoet aan de...

Страница 114: ...hijf waarop reeds werd gebrand of die werd geformatteerd door een ander apparaat kan met dit toestel niet worden gebruikt Controleer of op de opnamekant van de schijf geen stof vuil of vingerafdrukken zitten Controleer of de schijf met de opnamekant naar beneden in de disklade is geplaatst Trillingen van het toestel kunnen de werking van de Handycam aantasten Plaats de Handycam nooit op het toeste...

Страница 115: ... laten liggen Vervoer Verpak voor het vervoer het toestel opnieuw in de oorspronkelijke verpakking Tijdens het vervoer mag zich geen schijf in het toestel bevinden Voorzorgsmaatregelen Condensatie Stel het toestel niet bloot aan plotse temperatuurschommelingen Gebruik het toestel niet onmiddellijk nadat het uit een koude naar een warme locatie werd overgebracht of nadat de kamertemperatuur op kort...

Страница 116: ...everbruik 7 W max Bedrijfstemperatuur 5 ºC tot 35 ºC Opslagtemperatuur 20 ºC tot 60 ºC Afmetingen Circa 143 162 5 25 mm B D H uitstekende delen inbegrepen Gewicht Circa 400 g Ontwerp en technische kenmerken kunnen zonder voorafgaande kennisgeving worden gewijzigd Handycam en zijn geregistreerde handelsmerken van Sony Corporation DVDirect en het DVDirect logo zijn handelsmerken van Sony Corporation...

Страница 117: ......

Страница 118: ......

Страница 119: ......

Страница 120: ...Sony Corporation Printed in China P N 7825000084B ...

Отзывы: