background image

10

EN

Recording Operations

3-856-761-11(2)

Set REC MODE to select the recording mode.
The following table shows the selectable recording
modes and corresponding REC MODE position and
sampling frequency for various input signals.

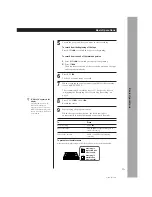
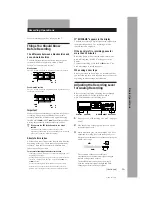
If the level exceeds 0 dB

The segments under “OVER” light up, and “0.0 dB”
flashes in the display.  If these segments light steadily,
sound distortion may occur.  To avoid this, keep the
recording level between –12 dB and 0 dB.

To reset  the margin indication

Press MARGIN RESET.  The margin indication changes
to “- - dB”.

4

Stop playing the program source.

5

To start recording, press PAUSE 

P

 or PLAY 

(

,

then start playing the program source.

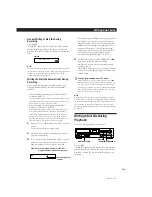
Locating the End of the
Recorded Portion (End Search)

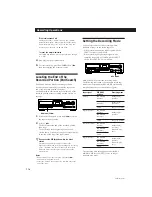
End Search detects a blank section longer than 9
seconds, then automatically rewinds the tape to the
end of the recorded portion, then stops.
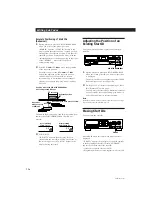
Use End Search to start recording from the end of the
recorded portion without creating a blank section on
the tape.

Setting the Recording Mode

You can select either of  two recording modes—
standard or long—in the following cases.
• When recording an analog input signal with the

INPUT switch set to ANALOG

• When recording a digital input signal with a

sampling frequency of 32 kHz with the INPUT
switch set to OPTICAL or COAXIAL.

REC MODE

MARGIN

OPEN/CLOSE

RESET

RESET

MODE

REW

PREVIOUS

FF

NEXT

AMS

TIMER

START ID

PHONES

SBM

INPUT

REC MODE

REC

REC MUTE

PAUSE

PLAY

STOP

PHONE LEVEL

REC LEVEL

RENUMBER

REHEARSAL

AUTO

WRITE

ERASE

g

§

5

4

6

0

3

7

2

8

1

9

10

10

0

ON

48 kHz

44.1kHz

LONG

ANALOG

OPTICAL

COAXIAL

STANDARD

OFF

REC

OFF

POWER

PLAY

=

p

P

R

r

(

+

0

)

L

R

STANDARD
(48 kHz)

REC MODE
position

Input signal

STANDARD
(48 kHz)

STANDARD
(44.1 kHz)

Analog

Digital (32 kHz)

LONG

Long play (32 kHz)

Standard play
(44.1 kHz)

Standard play
(48 kHz)

Recording mode

Long play (32 kHz)

Digital (44.1 kHz)

STANDARD
(48 kHz)

STANDARD
(44.1 kHz)

LONG

Standard play
(44.1 kHz)
(Standard play
only)

Digital (48 kHz)

STANDARD
(44.1 kHz)

Standard play
(32 kHz)

LONG

STANDARD
(44.1 kHz)

STANDARD
(48 kHz)

Standard play
(48 kHz)
(Standard play
only)

LONG

REW 

0

 / FF 

)

MARGIN

OPEN/CLOSE

RESET

RESET

MODE

REW

PREVIOUS

FF

NEXT

AMS

TIMER

START ID

PHONES

SBM

INPUT

REC MODE

REC

REC MUTE

PAUSE

PLAY

STOP

PHONE LEVEL

REC LEVEL

RENUMBER

REHEARSAL

AUTO

WRITE

ERASE

g

§

5

4

6

0

3

7

2

8

1

9

10

10

0

ON

48 kHz

44.1kHz

LONG

ANALOG

OPTICAL

COAXIAL

STANDARD

OFF

REC

OFF

POWER

PLAY

=

p

P

R

r

(

+

0

)

L

R

1

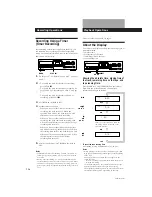
With the deck stopped, press REW 

0

 to rewind

the tape to the beginning .

2

Press FF 

)

.

The deck locates the end of the recorded portion,
then stops.
The deck stops at the beginning of any blank
section that is 9 seconds or longer, or fast-forwards
to the end of the tape if the tape is blank.

z

If you press the REC 

r

 button while in a blank

section

The deck automatically rewinds the tape to the
beginning of the blank section and changes to recording
pause.  “BLANK” and “WAIT” appear in the display
while the deck is searching for the beginning of the
blank section.

Notes

• End Search does not operate if you press the FF 

)

button while in a blank section.

• If the tape is blank, the deck merely  fast-forwards to the

end of the tape.

The recording time in long-play mode (the REC
MODE switch set to LONG) is twice as long as
standard-play mode.

Содержание DTC-A6

Страница 1: ...DTC A6 1996 by Sony Corporation 3 856 761 11 2 3 856 761 11 2 Digital Audio Tape Deck GB EN F D Operating Instructions Mode d emploi Bedienungsanleitung ...

Страница 2: ...3 856 761 11 2 Sony Corporation Printed in Japan ...

Страница 3: ...l only For the customers in the United States This symbol is intended to alert the user to the presence of uninsulated dangerous voltage within the product s enclosure that may be of sufficient magnitude to constitute a risk of electric shock to persons This symbol is intended to alert the user to the presence of important operating and maintenance servicing instructions in the literature accompan...

Страница 4: ...ing 11 Recording Using a Timer Timer Recording 12 Playback Operations About the Display 12 Locating a Track AMS Direct Access 13 Playing Tracks Repeatedly Repeat Play 13 Playback Using a Timer Timer Playing 14 Writing Sub Codes About Sub Codes 14 Writing Start IDs During Recording 14 Writing Start IDs During Playback 15 Adjusting the Position of an Existing Start ID 16 Erasing Start IDs 16 Renumbe...

Страница 5: ... REW PREVIOUS FF NEXT AMS TIMER START ID PHONES SBM INPUT REC MODE REC REC MUTE PAUSE PLAY STOP PHONE LEVEL REC LEVEL RENUMBER REHEARSAL AUTO WRITE ERASE g 5 4 6 0 3 7 2 8 1 9 10 10 0 ON 48 kHz 44 1kHz LONG ANALOG OPTICAL COAXIAL STANDARD OFF REC OFF POWER PLAY p P R r 0 L R Insert the cassette beyond the silver bar Close the cassette holder by pressing OPEN CLOSE 4 Set INPUT to the corresponding ...

Страница 6: ...efer to Adjusting the Recording Level for Analog Recording on page 9 8 Press PAUSE P or PLAY Recording starts 9 Start playing the program source When the tape reaches the end the deck rewinds it automatically to its beginning and stops Auto Rewind To Press Stop recording Pause recording PAUSE P Press the button again to resume recording STOP p Take out the cassette OPEN CLOSE after stopping record...

Страница 7: ...OPEN CLOSE and insert a cassette See page 5 for hookup information b b Window side up OPEN CLOSE Close the cassette holder by pressing OPEN CLOSE Insert the cassette beyond the silver bar 4 Press PLAY The deck starts playing Adjust the volume on the amplifier To Stop playing Go to the preceding track Press STOP p PREVIOUS Fast forward or rewind FF or REW 0 when the deck is stopped FF or REW 0 duri...

Страница 8: ...n Important Make sure no blank sections are created while you are recording The existence of blank sections within recorded material will make search operations using the PREVIOUS NEXT buttons impossible or destroy the continuity of the absolute time codes z If you press the REC r button while in a blank section The deck automatically rewinds the tape to the beginning of the blank section and chan...

Страница 9: ...0 10 0 ON 48 kHz 44 1kHz LONG ANALOG OPTICAL COAXIAL STANDARD OFF REC OFF POWER PLAY p P R r 0 L R STANDARD 48 kHz REC MODE position Input signal STANDARD 48 kHz STANDARD 44 1 kHz Analog Digital 32 kHz LONG Long play 32 kHz Standard play 44 1 kHz Standard play 48 kHz Recording mode Long play 32 kHz Digital 44 1 kHz STANDARD 48 kHz STANDARD 44 1 kHz LONG Standard play 44 1 kHz Standard play only Di...

Страница 10: ...ONE LEVEL REC LEVEL RENUMBER REHEARSAL AUTO WRITE ERASE g 5 4 6 0 3 7 2 8 1 9 10 10 0 ON 48 kHz 44 1kHz LONG ANALOG OPTICAL COAXIAL STANDARD OFF REC OFF POWER PLAY p P R r 0 L R 1 Press REC MUTE R where you want to insert a space while the deck is recording or in recording pause The deck creates a sound muted section as REC flashes in the display After the sound muted section is completed REC ligh...

Страница 11: ... Set the timer as required When you have set the time for the start of recording the deck turns off When the specified time arrives the deck turns on and after about 10 seconds starts recording When you have set the time for the end of recording the deck continues recording then when the specified time arrives the deck stops recording and turns off When you have set the time for both the start and...

Страница 12: ...atically deemphasizing it with attenuation proportional to the degree of emphasis Locating a Track AMS Direct Access You can locate the tracks in a number of ways but only after you have recorded start IDs on the tape see pages 14 to 16 To use Direct Access program numbers must be recorded on the tape see pages 14 and 17 The beginning of the next or succeeding tracks AMS NEXT as many times as you ...

Страница 13: ... use AMS see page 13 or Direct Access see page 13 Since sub codes are written on the tape separately from the audio signal they have no effect on the audio signal Start IDs Start IDs indicate the start of a track and therefore allow you to locate the position of a track precisely The start IDs are 9 seconds in length 18 seconds in long play mode to enable easy detection during fast forwarding or r...

Страница 14: ...am number PGM NO AUTO REC 6 If the last program number on the tape appears in the display you don t have to specify the next program number If you are recording from the beginning of a blank tape program number 1 appears in the display If you forget program numbering at this time you can add them later see Renumbering the Program Numbers Automatically Renumbering on page 17 4 To start recording pr...

Страница 15: ...ion from its original position Note Start IDs written within 10 seconds from the end of the tape may be difficult or impossible to move Erasing Start IDs You can erase any start ID START ID REHEARSAL MARGIN OPEN CLOSE RESET RESET MODE REW PREVIOUS FF NEXT AMS TIMER START ID PHONES SBM INPUT REC MODE REC REC MUTE PAUSE PLAY STOP PHONE LEVEL REC LEVEL RENUMBER REHEARSAL AUTO WRITE ERASE g 5 4 6 0 3 ...

Страница 16: ...ds from the end of the tape Additional Information Precautions On safety Do not disassemble the cabinet as this may result in an electric shock Refer servicing to qualified personnel only Should any solid object or liquid fall into the cabinet unplug the AC power cord before operating the unit any further On power sources Before operating the unit check that its operating voltage is identical with...

Страница 17: ... This appears when the WRITE button is pressed Regarding tapes of over 120 minutes Do not use thin tape cassettes with a playing time of over 120 minutes to record important material since such cassettes are subject to the following problems Improper threading of the tape after repeated AMS rewinding fast forwarding or cueing operations Incorrect writing and erasing of start IDs Sound distortion F...

Страница 18: ...z not during the recording of a digital input signal or an analog input signal with a sampling frequency of 32 kHz or during playback Troubleshooting If you ve experienced any of the following difficulties while using the deck use this section as a guide to remedy the problem Should any problem persist consult your nearest Sony dealer The cassette holder does not close Check that the cassette is i...

Страница 19: ...inches Weight Approx 100 g 3 5 oz incl batteries Supplied accessories See page 4 Design and specifications are subject to change without notice SBM Super Bit Mapping Function During analog recording the SBM function lowers noise within the frequency band to which to the human ear is most receptive to noise thereby sharply expanding the auditory dynamic range of the recorded signal High precision p...

Страница 20: ... 20 kHz hearing sensitivity however shows greater sensitivity to the range between 3 kHz and 4 kHz and lower sensitivity to frequencies above and below this range This principle applies also to quantizing noise as well By reducing quantizing noise in this particular range signals can be recorded to produce more expansive sound than is possible by a uniform reduction of noise over the entire audibl...

Страница 21: ...AT or MD recorded via digital to digital connection Playing DAT deck or MD deck v Recording DAT deck or MD deck DAT deck or MD deck Optical cable or coaxial digital connecting cable Line analog input jack Digital input jack Line analog output jack Digital output jack 3 You can record a DAT or MD recorded via the DAT or MD deck s analog input jack onto another DAT or MD via the DAT or MD deck s dig...

Страница 22: ...tem 21 Setting the recording mode 10 Sound muted section 9 11 Start ID Accurate positioning of start IDs 16 Adjusting the position of an existing start ID 16 Erasing start IDs 16 Manual writing of start IDs during recording 14 Writing start IDs during playback 15 Writing the start IDs automatically during recording 15 Sub Codes 14 T U V W X Y Z Tape running time 12 Timer Playing 14 Timer Recording...

Страница 23: ...vertisseur N A à impulsion alimenté vers l avant et équipé d un filtre numérique nouvellement conçu réduit le bruit de quantification dans la plage auditoire ce qui permet d accroître l amplitude du son Fonction SBM Super Bit Mapping Système de protection contre les copies multiples voir page 21 Trois fréquences d échantillonnage 48 kHz 44 1 kHz 32 kHz Enregistrement et lecture en mode longue duré...

Страница 24: ... avec une minuterie enregistrement programmé 12 Lecture Utilisation de l affichage 12 Localisation d une plage AMS accès direct 13 Répétition de plages lecture répétée 13 Lecture avec une minuterie lecture programmée 14 Inscription de sous codes Utilisation des sous codes 14 Inscription de codes ID de départ pendant l enregistrement 14 Inscription de codes ID de départ pendant la lecture 15 Change...

Страница 25: ...indiqué ci dessous et fixez les avec les vis enlevées à l étape 1 3 Si nécessaire fixez la baguette décorative avec les vis autotaradeuses 3 8 La baguette décorative recouvre l espace sous la platine Vis autotaradeuse 3 8 4 Insérez la platine dans le rack et fixez la avec les rondelles décoratives et les vis M5 12 fournies Rondelle décorative z Quand remplacer les piles Le piles durent environ six...

Страница 26: ...l audionumérique Platine DAT ç Ç COAXIAL IN OUT OUT IN COAXIAL DIGITAL OUT IN COAXIAL DIGITAL Appareil audionumérique Platine DAT Remarque Si PROHIBIT apparaît sur l affichage l enregistrement est impossible via les prises numériques Dans ce cas réglez le sélecteur INPUT sur ANALOG et enregistrez la source de programme via les prises ANALOG LINE IN Branchement du cordon d alimentation secteur Racc...

Страница 27: ... NEXT AMS TIMER START ID PHONES SBM INPUT REC MODE REC REC MUTE PAUSE PLAY STOP PHONE LEVEL REC LEVEL RENUMBER REHEARSAL AUTO WRITE ERASE g 5 4 6 0 3 7 2 8 1 9 10 10 0 ON 48 kHz 44 1kHz LONG ANALOG OPTICAL COAXIAL STANDARD OFF REC OFF POWER PLAY p P R r 0 L R 4 Réglez le sélecteur INPUT en fonction de la prise d entrée utilisée Pour enregistrer via Réglez INPUT sur ANALOG LINE IN ANALOG DIGITAL OP...

Страница 28: ...ur l enregistrement analogique à la page 9 8 Appuyez sur PAUSE P ou PLAY L enregistrement commence 9 Démarrez la lecture sur la source de programme Quand la bande est finie elle est automatiquement rebobinée jusqu au début et la platine s arrête rebobinage automatique z Si UNLOCK apparaît sur l affichage L appareil de source n est pas raccordé correctement à la platine ou bien il n est pas sous te...

Страница 29: ...cassette Appuyez sur Pour 4 Appuyez sur PLAY La lecture commence sur la platine Réglez le volume sur l amplificateur Arrêter la lecture Revenir à la plage précédente Avancer rapidement ou rebobiner la bande REW ou FF 0 quand la platine est à l arrêt Avancer rapidement ou rebobiner la bande en écoutant le son REW ou FF 0 pendant la lecture Quand vous relâchez la touche la lecture se poursuit normal...

Страница 30: ...s pendant la lecture Le début des plages précédentes AMS PREVIOUS autant de fois que nécessaire pendant la lecture Par exemple pour localiser l avant dernière plage appuyez trois fois En désignant le numéro de programme de la plage accès direct Z 1 Entrez le numéro de programme de la plage à l aide des touches numériques 2 Appuyez sur AMS Automatic Music Sensor Détecteur automatique de musique z S...

Страница 31: ...atteinte la platine se met sous tension puis la lecture commence au bout de 10 secondes environ Quand vous réglez l heure de fin de la lecture la platine poursuit la lecture Quand l heure désignée est atteinte la platine arrête la lecture et se met hors tension Quand vous réglez l heure de début et l heure de fin la platine se met hors tension Quand l heure de début de la lecture est atteinte la p...

Страница 32: ...de départ et les numéros de programme ne sont pas inscrits au début des plages qui durent moins de 18 secondes 1 Effectuez les étapes 1 à 7 de Enregistrement sur une cassette DAT aux pages 6 et 7 La platine entre en pause d enregistrement 2 Appuyez plusieurs fois sur START ID AUTO jusqu à ce que AUTO apparaisse sur l affichage 3 Si vous commencez à enregistrer à la fin de l enregistrement précéden...

Страница 33: ...F POWER PLAY p P R r 0 L R Appuyez sur ERASE quand le code ID de départ à effacer est affiché ERASE apparaît sur l affichage tandis que la platine rebobine la bande jusqu au début du code ID de départ puis ID ERASE apparaît pendant que la platine efface le code ID de départ Il faut 9 secondes pour effacer un code ID de départ Les numéros de programme sont effacés en même temps que les codes ID de ...

Страница 34: ...ère La cassette audionumérique est conçue pour ne pas laisser entrer la poussière Ne pas ouvrir le boîtier et exposer la bande L orifice à l arrière de la cassette est une fente de détection Ne pas la recouvrir Renumérotation automatique des numéros de programme Avec cette fonction la platine recherche tous les codes ID de départ depuis le début de la bande et attribue un nouveau numéro à chaque c...

Страница 35: ...he WRITE est pressée Messages sur l affichage Les différents messages qui apparaissent sur l affichage sont expliqués dans le tableau suivant Message A propos des cassettes de 120 minutes N utilisez pas de cassettes à durée de lecture de plus de 120 minutes pour enregistrer des matériaux importants parce qu elles sont sujettes aux problèmes suivants Bobinage incorrect de la bande après des opérati...

Страница 36: ...quence d échantillonnage de 48 kHz ou 44 1 kHz et pas lors de l enregistrement d un signal d entrée numérique ou d un signal d entrée analogique avec une fréquence d échantillonnage de 32 kHz ni pendant la lecture Guide de dépannage Si vous rencontrez des difficultés lors de l utilisation de la platine consultez ce guide de dépannage pour essayer de remédier au problème Si le problème persiste con...

Страница 37: ... signal de 16 bits les 4 bits d informations qui étaient ignorés jusqu à présent Spécifications Système Cassette Cassette audionumérique Tête d enregistrement Tête rotative Temps d enregistrement Standard 120 minutes avec DT 120 Longue durée 240 minutes Vitesse de bande Standard 8 15 mm s Longue durée 4 075 mm s Rotation du tambour Standard 2 000 rpm Longue durée 1 000 rpm Pas de plage 13 6 µm 20 ...

Страница 38: ...e de fréquences la plus sensible et réintégrer l erreur de quantification qui est normalement perdue au signal d entrée en réinsérant les informations binaires des extrémités supérieure et inférieure voir Fig A Fig A Entrée d informations 24 bits Sortie SBM 16 bits Filtre conformateur de bruit La fonction SBM agit uniquement pendant l enregistrement Cependant vous pouvez profiter du son amélioré p...

Страница 39: ... ou MD v Platine DAT ou platine MD Platine DAT ou platine MD Prise de sortie numérique Câble optique ou câble de raccordement numérique coaxial Prise d entrée numérique v Cassette DAT ou MD de première génération enregistrés via une connexion numérique à numérique v Platine DAT ou platine MD Enregistrement Cassette DAT ou MD enregistrés via une connexion analogique à numérique Enregistrement Lectu...

Страница 40: ...d enregistrement 11 Sous codes 14 Système de protection contre les copies multiples 21 T U V W X Y Z Taquet de protection d enregistrement 7 Temps absolu 12 Temps de lecture écoulé 12 Temps de lecture de la plage 12 Temps de lecture restant sur la cassette 12 Nomenclature Touches CLEAR annulation 13 COUNTER MODE mode du compteur 12 COUNTER RESET réinitialisation du compteur 12 ERASE effacement de ...

Страница 41: ...r Sie das Deck in Betrieb nehmen lesen Sie diese Anleitung bitte sorgfältig durch und bewahren Sie sie zum späteren Nachschlagen gut auf Das DTC A6 zeichnet sich durch die folgenden Merkmale aus High Density Linearkonverter Der eingebaute A D Impulskonverter arbeitet praktisch verzerrungsfrei und stellt einen unverfälschten Klang sicher Der D A Impulskonverter mit einem neu entwickelten Digitalfil...

Страница 42: ...Anzeigen im Display 12 Titelsuche AMS Direktsuche 13 Wiederholspielbetrieb Repeat Funktion 13 Timergesteuerte Wiedergabe 14 Setzen von Subcodes Die verschiedenen Subcodes 14 Setzen von Startcodes während der Aufnahme 14 Setzen von Startcodes während der Wiedergabe 15 Feinkorrektur der Position eines existierenden Startcodes 16 Löschen von Startcodes 16 Automatische Neunumerierung der Programmnumme...

Страница 43: ...alter M3 10 Schraube 3 Falls erforderlich bringen Sie die Zierblende mit den 3 8 Schneidschrauben an Die Zierblende verdeckt die Lücke unter dem Deck 4 Setzen Sie das Deck in das Gestell ein und schrauben Sie es mit den mitgelieferten M5 12 Schrauben mit untergelegten Zierscheiben fest 3 8 Schneidschraube M3 10 Schraube z Zur Lebensdauer der Batterien Bei normalem Betrieb halten die Batterien etwa...

Страница 44: ...ecks an p Anschluß des Decks an ein digitales Audiogerät Zum Überspielen von einem digitalen Audiogerät Digitalverstärker DAT Deck CD Spieler MD Deck oder Satellitentuner schließen Sie den Digitalausgang an den Digitaleingang DIGITAL OPTICAL IN oder DIGITAL COAXIAL IN dieses Decks an Zum Überspielen von diesem Deck auf ein anderes DAT Deck oder ein MD Deck schließen die den Digitalausgang DIGITAL ...

Страница 45: ... p P R r 0 L R Zum Anschließen siehe Seite 5 Grundlegender Betrieb 1 Schalten Sie den Verstärker ein und geben Sie die aufzunehmende Signalquelle wieder 2 Drücken Sie POWER 3 Drücken Sie OPEN CLOSE und legen Sie die Cassette ein b b Mit dem Fenster nach oben 4 Stellen Sie INPUT entsprechend der verwendeten Eingangsbuchse ein Die Cassette bis hinter den Silberstreifen einschieben Den Cassettenhalte...

Страница 46: ...nstellen des Aufnahmepegels bei einem analogen Eingangssignal auf Seite 9 8 Drücken Sie PAUSE P oder PLAY Die Aufnahme beginnt 9 Starten Sie die Wiedergabe der Signalquelle Wenn das Band am Ende angelangt ist wird es automatisch zum Anfang zurückgespult und stoppt automatische Rückspulfunktion Drücken Sie Stoppen der Aufnahme STOP p Aufnahme möglich Vertiefung geschlossen Aufnahme gesperrt Vertief...

Страница 47: ...dem Fenster nach oben Den Cassettenhalter durch Drücken von OPEN CLOSE schließen Die Cassette bis hinter den Silberstreifen einschieben 4 Drücken Sie PLAY Das Deck beginnt mit der Wiedergabe Stellen Sie dann am Verstärker die Lautstärke ein Zum Drücken Sie Stoppen der Wiedergabe STOP p Aufsuchen des nächsten Titels NEXT Aufsuchen des vorausgegangenen Titels PREVIOUS Vor oder Zurückspulen FF oder R...

Страница 48: ...and keinen durchgehenden Absolutzeitcode aufweist z Wenn die REC r Taste an einer unbespielten Stelle gedrückt wird Das Deck spult automatisch zum Anfang der unbespielten Stelle zurück und schaltet dort auf Aufnahme Pause außer bei timergesteuerter Aufnahme Absolutzeitcode Der Absolutzeitcode gibt die verstrichene Bandlaufzeit an und wird automatisch aufgezeichnet Wenn dieser Code einmal aufgezeic...

Страница 49: ... Standardplay 44 1 kHz Nur Standard play LONG Digital 48 kHz STANDARD 48 kHz Standardplay 48 kHz Nur Standard play STANDARD 44 1 kHz LONG Der Longplay Modus REC MODE Schalter steht auf LONG ermöglicht die doppelte Aufnahmezeit Verwendung der Ende Suchfunktion Die Ende Suchfunktion spricht auf Leerstellen von mehr als 9 Sekunden an sie veranlaßt ein Rückspulen zum Ende des Aufzeichnungsteils und an...

Страница 50: ...e Wenn die Taste länger als 4 Sekunden gedrückt gehalten wird beginnt REC schneller zu blinken und im Display erscheint die Länge der bereits erzeugten Stummstelle Beim Loslassen der REC MUTE R Taste erscheint P weiterhin im Display das Deck befindet sich dann im Aufnahme Pausenbetrieb 2 Drücken Sie PAUSE P oder PLAY um die Aufnahme fortzusetzen Hinweis Es wird empfohlen am Bandanfang eine Stummst...

Страница 51: ...t beim nächsten Einschalten des Decks automatisch die Aufnahme ein Bei timergesteuertem Aufnahmebetrieb d h wenn der TIMER Schalter auf REC steht arbeitet die Rückspulautomatik siehe Seite 7 nicht d h am Ende der Aufnahme wird das Band nicht automatisch zurückgespult Dadurch wird verhindert daß die bereits vorhandene Aufnahme überschrieben wird Zum grundlegenden Wiedergabebetrieb siehe Seite 8 Anz...

Страница 52: ...z Um nach dem Rückspulen automatisch mit der Wiedergabe zu beginnen Drücken Sie PLAY bei gedrückt gehaltener REW 0 Taste Wiederholspielbetrieb Repeat Funktion Z Es kann unter Wiederholen aller Titel und Wiederholen eines einzelnen Titels gewählt werden PREVIOUS NEXT PLAY MARGIN OPEN CLOSE RESET RESET MODE REW PREVIOUS FF NEXT AMS TIMER START ID PHONES SBM INPUT REC MODE REC REC MUTE PAUSE PLAY STO...

Страница 53: ...ergestellt etwa zehn Sekunden später beginnt dann die Wiedergabe Wenn nur die Wiedergabe Endzeit programmiert wurde setzt das Deck die Wiedergabe fort bis die Endzeit erreicht ist Danach stoppt die Wiedergabe und das Deck schaltet sich aus Wenn sowohl die Start als auch die Endzeit programmiert wurden stellt der Timer bei Erreichen der Startzeit die Stromversorgung her und etwa zehn Sekunden späte...

Страница 54: ...ige ID WRITE erscheint dann einige Sekunden lang im Display und der Startcode wird an der betreffenden Stelle auf das Band aufgezeichnet Während des Aufzeichnungsvorgangs blinkt START ID im Display Manuelles Setzen von Startcodes während der Aufnahme Drücken Sie WRITE Die Anzeige ID WRITE erscheint dann einige Sekunden lang im Display und der Startcode wird an der betreffenden Stelle auf das Band ...

Страница 55: ...LOG OPTICAL COAXIAL STANDARD OFF REC OFF POWER PLAY p P R r 0 L R Drücken Sie ERASE wenn der zu löschende Startcode angezeigt wird Während das Deck nun zum Anfang des Startcodes zurückspult erscheint die Anzeige ERASE Während des anschließenden Löschvorgangs erscheint die Anzeige ID ERASE Das Löschen eines Startcodes dauert 9 Sekunden Zusammen mit dem Startcode wird auch die zugehörige Programmnum...

Страница 56: ...erlassen Sie Wartungsarbeiten nur einem Fachmann Sollte ein fester Gegenstand oder Flüssigkeit in das Gehäuse gelangen trennen Sie das Netzkabel ab bevor Sie das Gerät weiterverwenden Zur Stromversorgung Vergewissern Sie sich vor der Inbetriebnahme des Geräts daß die Betriebsspannung mit der örtlichen Netzspannung übereinstimmt Die Betriebsspannung steht auf dem Typenschild an der Geräterückseite ...

Страница 57: ...fzeichnungsfunktion ist aktiviert Hinweise zu Cassetten mit mehr als 120 Minuten Länge Das Band solcher Cassetten ist besonders dünn Vermeiden Sie die Verwendung solcher Cassetten zur Aufnahme wichtiger Daten weil folgende Probleme auftreten können Inkorrekte Bandfädelung bei wiederholtem AMS Betrieb Vor und Zurückspulen und Schnittbetrieb Inkorrektes Setzen und Löschen von Startcodes Tonverzerrun...

Страница 58: ...int nur beim Aufnehmen eines Analogsignals mit einer Abtastfrequenz von 48 kHz oder 44 1 kHz nicht jedoch beim Aufnehmen eines Digitalsignals oder eines Analogsignals mit einer Abtastfrequenz von 32 kHz und auch nicht bei der Wiedergabe Störungsüberprüfungen Bei Problemen mit dem Deck gehen Sie die folgende Liste durch Wenn das Problem nicht behoben werden kann wenden Sie sich bitte an den nächste...

Страница 59: ...wicht ca 100 g einschl Batterien Mitgeliefertes Zubehör Siehe Seite 4 Änderungen die dem technischen Fortschritt dienen bleiben vorbehalten Super Bit Mapping Funktion SBM Die SBM Funktion reduziert beim Aufnehmen von analogen Eingangssignalen die Rauschanteile in dem Frequenzband für das das menschliche Ohr am sensibelsten ist und erweitert dadurch den Dynamikumfang Hochpräziser A D Impulskonverte...

Страница 60: ...die höchste Empfindlichkeit liegt jedoch zwischen 3 kHz und 4 kHz Das Quantisierungsrauschen wird nun in dem Bereich in dem das menschliche Ohr am sensibelsten ist auch am stärksten reduziert Dadurch ergibt sich eine wesentlich höhere Gesamt Rauschverminderung Noise Shaping Filter Das SBM System arbeitet mit einem Noise Shaping Filter siehe Abb B dessen Frequenzgang der Empfindlichkeitscharakteris...

Страница 61: ...oger Line Eingang DAT Deck oder MD Deck Digitalausgang DAT Deck oder MD Deck Audiokabel DAT Deck oder MD Deck DAT Deck oder MD Deck Digitalausgang Wiedergabe Wiedergabe Wiedergabe Satellitentuner DAT Deck oder MD Deck Digitaleingang Aufnahme DAT Band oder MD Erste über Digitalanschluß erstellte Kopiergeneration Optokabel oder digitales Koaxialkabel Optokabel oder digitales Koaxialkabel DAT Band od...

Страница 62: ...von Startcodes 16 Feinkorrektur der Position eines existierenden Startcodes 16 Löschen von Startcodes 16 Manuelles Setzen von Startcodes während der Aufnahme 15 Setzen von Startcodes während der Wiedergabe 15 Stummstellen 9 11 Subcodes 14 T Timergesteuerte Aufnahme 12 Timergesteuerte Wiedergabe 14 Titelspielzeit 12 U V Unbespielte Bandstelle 9 W X Y Z Wiedergabe 8 Wiederholspielbetrieb 13 aller Ti...

Отзывы: