background image

38 

GB

Digital Photo Printer -DPP-FP30_GB_UC2/CED/CEK/AU_

  2-190-186-12(1)

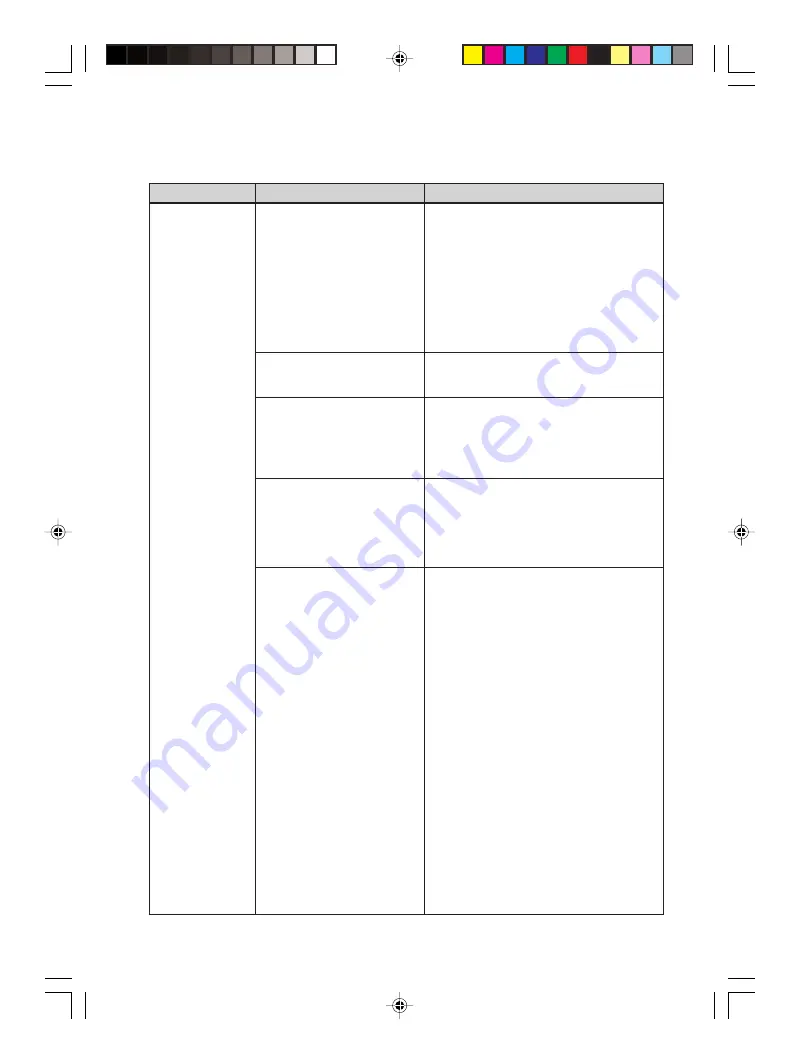
Printed results

Symptom

The printed
pictures are
inferior in
quality.

Check

• Did you print preview

image data?

• Did you allow dust to get

on the print cartridge?

• Did you allow dust or

finger prints to get on the
printed surface?

• Did you use used print

paper?

• Did you use an AdobeRGB-

compliant digital camera,
not compatible with the
DCF 2.0, to shoot an image
in the AdobeRGB mode?

Cause/Solutions

When a digital camera saves an image,  a

preview image may be saved along with
the primary images.  The printed quality
of the preview images will not be as
good as the primary images.  Note that if
you delete the preview images, the data
for the primary images may be
damaged.

c

Wipe the plastic part of the print
cartridge and remove dust.

c

Do not touch the printing surface (the
shiny-side with no imprint). Fingerprints
on the printing surface may result in
imperfect printing.

c

Do not print on used print paper.
Printing an image twice on the same
paper will not make the printed image
thicker. Doing so could result in
damages to the printer.

c

An AdobeRGB image file that supports
the DCF 2.0 will undergo color
corrections, but an AdobeRGB image file
that does not support the DCF 2.0 will be
printed in vague colors without color
corrections.

What is an AdobeRGB?

An AdobeRGB is a color space that the
Adobe System Incorporated employs
and uses as the default setting for image
processing software including the Adobe
Photoshop.  The AdobeRGB, an optional
color space extended with the DCF 2.0,
determines the color ranges widely used
in printing industry.

For whether or not a digital camera
supports the AdobeRGB, see the
operating instructions of the digital
camera.

01GBPFP3007TRB-UC/CED.p65

10/22/04, 4:06 PM

38

Содержание DPP-FP30 Fall 2005

Страница 1: ...camera PictBridge mode Printing from a PC PC mode Troubleshooting Additional information 2 190 186 12 1 2004 Sony Corporation Operating Instructions Before operating this printer please read this manual thoroughly and retain it for future reference Digital Photo Printer DPP FP30 01GBFP3001COV UC CED p65 10 22 04 4 06 PM 1 ...

Страница 2: ...on the user is encouraged to try to correct the interference by one or more of the following measures Reorient or relocate the receiving antenna Increase the separation between the equipment and receiver Connect the equipment into an outlet on a circuit different from that to which the receiver is connected Consult the dealer or an experienced radio TV technician for help The shielded interface ca...

Страница 3: ...ied by the JEITA Japan Electronics and Information Technology Industries Association All other companies and product names mentioned herein may be the trademarks or registered trademarks of their respective companies Furthermore and are not mentioned in each case in this manual Notice for users Program 2004 Sony Corporation Documentation 2004 Sony Corporation All rights reserved This manual or the...

Страница 4: ...ge camera PictBridge mode Printing images from the digital camera 13 Printing from a PC PC mode Installing the software 15 System requirements 15 Installing the printer driver 16 Uninstalling the printer driver 20 Installing the PictureGear Studio 22 Uninstalling the PictureGear Studio 24 Printing photos from the PictureGear Studio 25 Printing from other application software 32 Troubleshooting If ...

Страница 5: ... printer to print images using the PC Depending on the operation mode you choose follow the operation flow below PictBridge mode PC mode Get the printer ready for printing Prepare the printing pack not supplied page 8 Load the print cartridge page 9 Insert the print paper page 10 Install the supplied software on the PC page 15 Connect to an AC outlet Connect to a camera page 13 Use the camera to p...

Страница 6: ...plied printer driver uses the Exif data of an image and the printer s color processing to adjust and reproduce an image with supreme picture quality Red eye reduction and other adjustments PC mode only page 29 You can adjust an image to reduce the red eye phenomenon that may occur when the subject was shot with flash Adjustments of brightness hue and other elements of picture quality are also poss...

Страница 7: ...rint an image 1 Checking the contents of the package Make sure that the following accessories are supplied with your printer Paper tray 1 CD ROM 1 Sony DPP FP30 Printer Driver Software for Windows XP Professional Windows XP Home Edition Windows 2000 Professional Windows Millennium Edition Windows 98 Second Edition PictureGear Studio V 2 0 AC power adaptor 1 AC power cord 1 Color printing pack 1 Op...

Страница 8: ...s and paper of different types printing may not be possible The side without the imprinting is the printing surface Inferior print quality may result if the printing surface is contaminated with dust or fingerprints Be careful to avoid touching the printing surface Do not bend the paper or tear it off at the perforations before printing Do not print on used sheets of print paper or attempt to rewi...

Страница 9: ...idge contained in the same box with the print paper Do not touch the ink ribbon or place the print cartridge in a dusty location Fingerprints or dust on the ink ribbon may result in imperfect printing 3 Loading the print cartridge 1 Pull and open the cartridge compartment lid 2 Insert the print cartridge to the back in the arrow direction until it clicks into place Arrow 3 Close the cartridge comp...

Страница 10: ...k ribbon in the direction of the arrow to remove the slack Do not remove the print cartridge while printing Notes on storing the print cartridge Avoid placing the print cartridge in a location subject to high temperatures high humidity excessive dust or direct sunlight When you are going to store a partially used cartridge store it in its original bag 4 Inserting the print paper 1 Open the eject p...

Страница 11: ...n an arrow imprint to the paper feeding direction Insert the protective sheet together with paper You can set up to 20 sheets of print paper Release the lock To attach the tray adaptor to the tray Put the projections of the tray adaptor into the lock holes of the front of the tray 1 and then slide down the adaptor until its back lock clicks into place 2 x To use 3 5 x 5 inch size print paper Keep ...

Страница 12: ...aper When adding print paper to a partially full tray make sure that the total number of sheets does not exceed 20 for the print paper Do not print on the used print paper Printing an image twice on the same paper will not make the printed image thicker Use the print paper for this printer only Do not use the print paper ejected without printed Notes on storing the print paper Avoid storing the pa...

Страница 13: ...adaptor supplied AC power cord supplied Notes Connect the AC power adaptor to an easily accessible wall outlet close by If some trouble occurs while using the adaptor immediately shut off the power by disconnecting the plug from the wall outlet When you have finished using the AC power adaptor disconnect it from the DC IN jack of the printer and the wall outlet The set is not disconnected from the...

Страница 14: ...urning off the power and resume printing On the PICTBRIDGE indicator The PICTBRIDGE indicator shows the connection status between the printer and the digital camera as follows When the indication lights The connection between the printer and the PictBridge compliant digital camera is established When the indication blinks The device that does not support the PictBridge feature is connected Or the ...

Страница 15: ...t for private or domestic use All other companies and product names mentioned herein may be the trademarks or registered trademarks of their respective companies Furthermore and are not mentioned in each case in this manual Installing the software System requirements To use the supplied printer driver and PictureGear Studio your PC must meet the following system requirements OS Microsoft Windows X...

Страница 16: ...o system standby hibernate mode We cannot guarantee operations with all personal computers even though they may meet or exceed the system requirements Installing the printer driver 1 Make sure that the printer is disconnected from the computer Note If you connect the printer to your PC in this stage either of the following dialog boxes are displayed When using Windows 98SE Me Add New Hardware Wiza...

Страница 17: ... the Setup exe of the CD ROM 4 Click Installing Printer Driver The Sony DPP FP30 InstallShieldWizard dialog box appears 5 Click Next The license agreement dialog box is displayed 6 Check I accept the terms of the license agreement and click Next If you check I do not accept the terms of the license agreement you cannot proceed to the next step The Ready to install the program dialog box is display...

Страница 18: ...ord 9 Turn on the printer The STANDBY indicator lights in green To turn off the printer Keep pressing STANDBY for longer than one second until the STANDBY indicator turns to red 10Connect the USB connectors of the printer and your computer Use a commercially available USB connecting cable To the wall outlet AC power cord supplied Notes Connect the AC power adaptor to an easily accessible wall outl...

Страница 19: ...e printer setup will start automatically When the printer setup is complete the InstallShield Wizard Complete dialog box is displayed Windows PC To USB connector To USB connector B TYPE 12Click Finish The installation of the printer driver is complete When you are prompted to restart your computer restart the computer 13 To finish installation click Complete and remove the CD ROM from your compute...

Страница 20: ...tion Before you use the printer read the Readme file the Readme folder of the CD ROMcEnglish foldercReadme txt Checking the installation Open the Printers and Faxes Windows XP Home Edition XP Professional only or Printers from the Control Panel When the Sony DPP FP30 is displayed in the Printers and Faxes or Printers window the printer driver has been successfully installed Uninstalling the printe...

Страница 21: ...d for confirming uninstallation is displayed 6 Click Yes The dialog box used for restarting the computer is displayed 7 Check Yes I want to restart my computer now and click OK After the computer is restarted the relevant files will be deleted and uninstallation is complete To check uninstallation Select Printers and Faxes Windows XP Home Edition XP Professional only or Printers from the Control P...

Страница 22: ...onal unless otherwise specified The installation procedures and the dialog boxes shown differ depending on the operation system 2 Insert the supplied CD ROM into the CD ROM drive of your computer The setup starts automatically and the installation window is displayed Notes In case the installation window is not automatically displayed double click the Setup exe of the CD ROM Depending on the PC sy...

Страница 23: ...ects insertion of a device or medium storing photos when the PictureGear Studio is installed in an operating system other than the Windows XP To change the settings done during installation follow the procedures below 1 After you install the PictureGear Studio software click Start Programs PictureGear Studio Tools and then Media Watcher The PictureGear Studio Media Watcher is started 2 Click the P...

Страница 24: ...other than Sony In PrintStudio you cannot create or print Label In PrintStudio you cannot create or print a Sticker name card or card In PrintStudio you cannot print part of Postcard designs To delete the above limitations and upgrade the software to the version supplied with VAIO computer or CLIE handheld execute the Setup exe in the pgs add folder Uninstalling the PictureGear Studio When the sof...

Страница 25: ...udio PictureGear Studio allows you to carry out a series of procedures for handling a still image capturing managing processing and outputting You can use the software to print an image from your PC in the post card or 3 5 x 5 inch size print paper Note In some regions 3 5 x 5 inch size print paper is not sold 1 Select Start from the Windows desktop and then PictureGear Studio from the Programs Th...

Страница 26: ...e print quantity will not be reflected 6 Click Sony and then select the DPP F series paper size of the paper you use DPP F series 4 x 6 Postcard size SVM F40P F80P DPP F series 3 5 x 5 SVM F40L Notes In some regions 3 5 x 5 inch size print paper SVM F40L DPP F series is not sold If you select paper other than the DPP F series paper you cannot obtain proper printing results When you use the supplie...

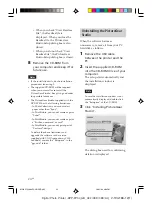
Страница 27: ...e printed without adjustments Properties Specifies orientation picture quality and other details When you click Properties the document properties dialog box for the selected printer is displayed 8 In the Paper Output tab specify the paper size Items Functions Paper size From the drop down list box select the paper size you actually use for printing Post card 3 5x5 inch Note In some regions 3 5 x ...

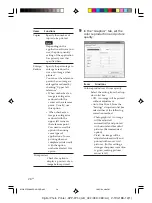
Страница 28: ...o use this option when using some types of applications In case printing does not complete satisfactorily with the option unchecked select this option Print preview Check this option to display a preview of an image before printed 9 In the Graphics tab set the color reproduction and picture quality Items Functions Color reproduction Picture quality Select the setting from the drop down list box Of...

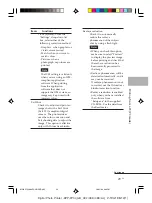
Страница 29: ...xif 2 21 compliant digital camera The printer driver uses the color conversion and Exif shooting data to adjust the image This option is effective only with PictureGear Studio Red eye reduction Check it to automatically reduce the red eye phenomenon of the subject shot by using a flash light Notes When you check this option make sure to select Preview to display the preview image before printing a...

Страница 30: ...ght The lower you set the level the darker the picture becomes as if red purple is added B Adjusts the blue and yellow elements The higher you set the level the more bluish the picture becomes as if it receives blue light The lower you set the level the darker the picture becomes as if yellow is added Sharp sharpness The higher you set the sharpness level the more distinct the outlines become 10Cl...

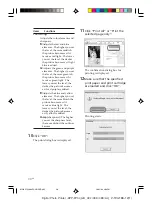
Страница 31: ...to be fully ejected after printing ends Make sure to spare enough space behind the printer during printing If print paper runs out during continuous printing or if you print with no print paper in the paper tray the printer s ERROR indicator lights Feed the print paper without turning off the power and resume printing Continued To stop printing 1 Double click on the printer icon on the taskbar and...

Страница 32: ...ect Full page photo print or a similar option Set a larger value in the Enlarge Reduce text box in the Paper Output tab of the Sony DPP FP30 Properties dialog box If borders remain on the right and bottom sides of a printed image even after you set a larger value check Upper left reference In either case make sure to display and check the preview image before printing Orientation setting Depending...

Страница 33: ...ptom The PICTBRIDGE indicator of the printer does not light Cause Solutions c Connect the cable correctly c Press STANDBY to turn on the STANDBY indicator in green c See the homepage for the digital camera you are using c If a USB mouse or other non PictBridge compliant device is connected remove it and connect a PictBridge compliant device c Disconnect the digital camera and the printer and then ...

Страница 34: ...puter and then the CD ROM icon in the open window Follow the procedures in the operating instructions to install the driver c The USB driver may not be installed properly Follow the operating instructions to install the USB driver again Symptom An error is displayed with the digital camera and you cannot make printing You cannot make a DPOF printing You cannot make a date printing Check Are you us...

Страница 35: ...For details on the error contents see the operating instructions of your PC c If there is an anti virus program or other program running on the system exit it and then start installing the driver c To install the driver in Windows XP 2000 Professional log onto Windows using an Administrator user account c Check if the ERROR indicator of the printer lights or flashes If it does do the following pro...

Страница 36: ... an application set an image to be printed fully in the print range even if it is printed over the range Set a larger value in the Enlarge Reduce text box in the Paper Output tab of the Sony DPP FP30 Properties dialog box page 28 If borders remain on the right and bottom sides of a printed image even after you set a larger value check Upper left reference c The Exif Print setting in the Color repr...

Страница 37: ...rtridge loaded page 8 Did you place print paper exceeding the limit in the paper tray page 10 Did you set the tray adaptor according to the print paper size you use page 10 Did you riffle the print paper thoroughly Did you bend or fold the print paper before printing c If print paper runs out during continuous printing or if you print with no print paper in the paper tray the printer s ERROR indic...

Страница 38: ...d remove dust c Do not touch the printing surface the shiny side with no imprint Fingerprints on the printing surface may result in imperfect printing c Do not print on used print paper Printing an image twice on the same paper will not make the printed image thicker Doing so could result in damages to the printer c An AdobeRGB image file that supports the DCF 2 0 will undergo color corrections bu...

Страница 39: ...c Because of differences in the phosphor method or profiles of a monitor or LCD display please regard the image being displayed on the screen as just a reference c Depending on the type of digital camera used the aspect ratio of the recorded image differs so the image may not be printed covering the entire printable area c Depending on the type of digital camera used the image may be stretched ver...

Страница 40: ... 10 c Keep the paper tray inserted and turn off the STANDBY button and then turn it on After the initial motion stops try to remove the cartridge If this does not solve the problem contact Sony service facilities or your Sony dealer c Paper is jammed See If paper jams page 41 and remove jammed paper from the printer If jammed paper cannot be removed contact the Sony service facilities c Remove the...

Страница 41: ...g slot of the printer and remove the jammed paper if any Note If you cannot remove the jammed paper contact your Sony dealer or service facilities To turn off the printer Keep pressing STANDBY for longer than one second until the STANDBY indicator turns to red Customer support home page The latest support information is available at the following homepage addresses For the customers in the U S A h...

Страница 42: ...ning and servicing the printer On installation Avoid placing the printer in a location subject to vibration high humidity excessive dust direct sunlight extremely high or low temperatures Do not use electrical equipment near the printer The printer will not work properly in electromagnetic fields Do not place heavy objects on the printer Leave enough room around the printer so that the ventilation...

Страница 43: ...ive packaging If you no longer have the original box and packing parts use similar packing material so that the printer will not be damaged while being transported On cleaning Clean the cabinet panel and controls with a soft dry cloth or a soft cloth lightly moistened with a mild detergent solution Do not use any type of solvent such as alcohol or benzine which may damage the finish On restriction...

Страница 44: ... page 8 Power requirements DC IN jack DC 24V On standby mode less than 1W Operating temperature 5 C to 35 C 41 F to 95 F Dimensions Approx 175 x 60 5 x 137 mm 7 x 2 1 2 x 5 1 2 inches w h d excluding protruding parts 400 mm 15 3 4 inches of depth when the paper tray is installed Mass Approx 950g 2 lb 2 oz excluding the 100 g 4 oz paper tray Supplied accessories See Checking the contents of the pac...

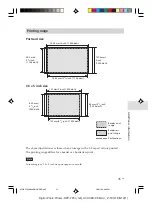
Страница 45: ...nt Note In some regions 3 5 x 5 inch size print paper is not sold Printing range Postcard size 3 5 x 5 inch size 152 4 mm 6 inch 1 800 dots 95 5 mm 3 7 8 inch 1 128 dots 101 6 mm 4 inch 1 200 dots 146 3 mm 5 7 8 inch 1 728 dots 127 mm 5 inch 1 500 dots 83 9 mm 3 3 8 inch 990 dots 89 mm 3 5 8 inch 1 050 dots 122 mm 4 7 8 inch 1 450 dots Border print range Borderless print range Perforations 01GBPFP...

Страница 46: ...21 Exif Print Exif Exchangeable image file format for digital cameras Print is a global standard for digital photo printing A digital camera supporting Exif Print stores the data relevant to the conditions of shooting as each shot is taken The printer utilises the Exif Print data stored in each image file to ensure the printed result matches the original shot as closely as possible 1 1 When the Au...

Страница 47: ...ter is powered on Flashes in green Printing is in process 4 PICTBRIDGE indicator page 14 Lights The printer is being connected to a PictBridge compliant digital camera Flashes A device that does not support the PictBridge feature is connected Or the image to be printed is damaged 5 ERROR indicator pages 9 35 37 41 Lights The paper tray is not inserted No print paper is in the paper tray Paper rema...

Страница 48: ...connect the AC power adaptor and the wall outlet with the supplied AC power cord qs PICTBRIDGE connector page 14 Connect the PictBridge compliant digital camera Paper tray 1 Tray adaptor page 11 Use the adaptor only when you feed 3 5 x 5 inch size paper into the paper tray Note In some regions 3 5 x 5 inch size print paper is not sold 2 Paper eject tray page 10 3 Paper tray lid page 10 01GBPFP3008...

Страница 49: ...r Studio 22 Printer driver 16 System requirements 15 M Moisture condensation 43 O Operation flows 5 Operation modes 5 Orientation 27 Overview 5 P Paper jams 41 Paper size 8 27 Paper tray 10 48 PC mode 5 19 PictBridge 5 13 46 PICTBRIDGE indicator 14 Picture quality 28 30 Post card size 8 Preview 31 Print cartridge 8 9 Print paper 8 10 Print Setting 30 Printing From a PictBridge compliant digital ca...

Страница 50: ...01GBPFP3008ADD UC CED p65 10 22 04 4 06 PM 50 ...

Страница 51: ...01GBPFP3008ADD UC CED p65 10 22 04 4 06 PM 51 ...

Страница 52: ...Sony Corporation Printed in China 01GBPFP3008ADD UC CED p65 10 22 04 4 06 PM 52 ...

Отзывы: